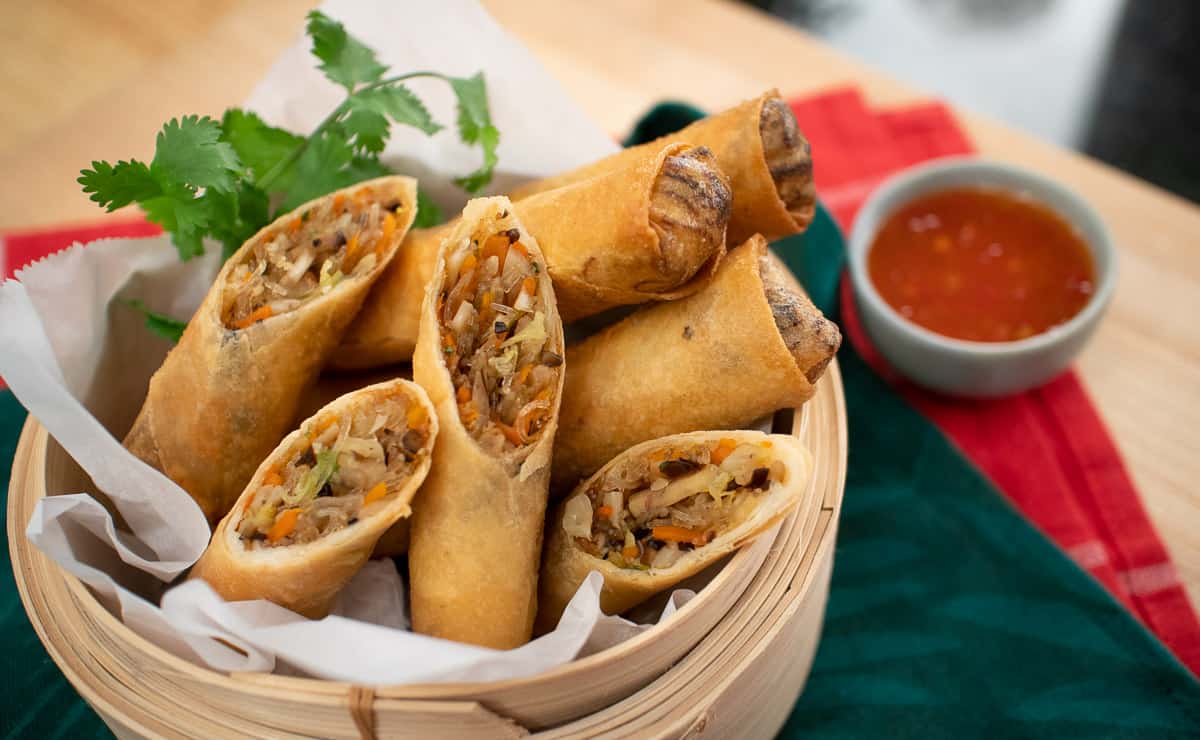
Ultimate Crispy Veggie Spring Rolls
These vegan spring rolls are made special with the addition of taro. They're so flavourful no sauce is required, but to take it to the next level serve with Thai sweet chili sauce!
Ingredients
- 0.5 oz (about 4 medium pc) dried shiitake mushrooms, rehydrated , see note
- 0.25 oz dried black fungus mushrooms, rehydrated, see note
- 1.4 oz dry glass noodles (1 small pack)
- 2 tablespoon neutral oil
- 4 cloves garlic, minced
- ½-1 teaspoon ground white or black pepper, see note
- 5.3 oz (2 cups) finely julienned taro root
- 5.3 oz (1¾ cups) finely julienned cabbage
- 4.3 oz (1 cup) packed julienned carrots
- 2 tablespoon soy sauce
- 1 tablespoon sugar
- ¼ teaspoon table salt
- 8-10 cilantro stems, finely chopped
- 2 green onions, chopped
- 12-14 pieces large 8-inch spring roll wrappers or 24 pieces 6-inch ones.
- 1 tablespoon all-purpose flour or 1 egg for sealing the wrapper
- Vegetable oil for frying
- Sweet Chili Sauce, for dipping, store bought or homemade
Notes:
- You can soak the shiitake and black fungus together in hot off-the-boil water for about 15 minutes. If you have at least 2 hours you can soak them in room temp water. Wash mushrooms before soaking.
- If you’re serving kids 1 teaspoon of pepper might be a bit much so I'd use only ½ tsp.
Instructions
- Remove mushrooms from the soaking water squeezing out excess water from the shiitake mushrooms (and do not throw away the soaking water).
- Soak glass noodles in the mushroom water, adding more tap water as needed to submerge the noodles. Soak for 7-10 minutes until softened.
- While the noodles soak, remove the stems from the shiitake mushrooms and finely chop the caps. Finely dice the black fungus; if you find any hard parts (that's the root end) cut around them and discard. Place the mushrooms in a large bowl together with the taro, cabbage and carrots.
- Once noodles are done, drain the water but do not throw it away (yes, we're STILL going to use this!). Don't toss the noodles so that the strands remain in alignment for easy cutting. Use scissors to cut the noodles into 2-inch pieces.
- In a wok or a large non-stick saute pan, add the oil, garlic, pepper and saute for about 2 minutes over medium heat or until the garlic starts to turn golden.
- Turn the heat up to medium high and add the mushrooms, taro, cabbage, carrot and 1 tablespoon of the soy sauce; cook for 3-4 minutes until the taro is done. You can tell that the taro is getting close to done when some of the pieces start to break; you can then taste to see if they're cooked through.
- Add the glass noodles, cilantro stems, the remaining soy sauce, sugar, and about ¼ cup of the mushroom soaking water. Toss until the noodles are fully cooked, adding a splash more of the mushroom water if needed.
- Toss in the green onions and remove from heat. Taste the filling and add the salt if it needs it. (I find it usually does need the extra salt, but it’s always good to taste first).
- Transfer the filling into a large, shallow bowl and spread it out so it can cool quickly.
- While the filling is cooling, peel the wrappers apart so it will be easier when you wrap. (Spring roll wrappers tend to stick together a bit right out of the package.)
- For the spring roll wrapper glue, you can use a beaten egg, or for a vegan glue, mix the all-purpose flour with an equal amount of water so you have a thick but spreadable paste.
- To wrap, follow the instructions in the video. Use a little more than ¼ cup of filling per roll if using a large (8-inch) wrapper. At this point you can freeze the spring rolls and fry them directly from frozen.
- Heat 2-3 inches of oil in a wok or a pot to 350 F. Add the spring rolls, a few at a time so as to not crowd the pot. Fry on medium heat for about 5-6 minutes until golden brown and crispy. You can tell that the surface are crispy when the bubbles are only coming out of the ends, not the surface (more on this in the video). If they are frozen they may take 7-8 minutes.
- You can also bake them: Brush them generously with oil all over and bake (better if you have a rack) at 425°F (convection if you have it) for about 25 minutes or until they’re golden and crispy. If you don’t have a rack, flip them over half way through so they brown evenly. If after 25 minutes you still want them to be more brown, you can put them under the broiler for a minute or so per side; watch them carefully! (They will be lighter in colour than the deep fried ones but will still be crispy.)
- For air-frying: I have not done this personally, but other sources say to brush them with oil and air fry them for 7-8 minutes at 350°F.
Tried this recipe? Share a pic!Tag @hotthaikitchen on Instagram and Twitter!