Jump to video!
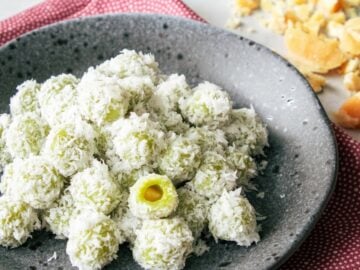
There are no better gifts than ones that are handmade with love and care, and this recipe is just the perfect one to make for friends and family! I made these date truffles (some people call them bliss balls) a couple of years ago and gave them to all my friends for Christmas, and everyone loved them. They also last a long time, so you can make them well in advance.
Save this recipe!
These date balls are made with only dried fruits and nuts, with no added sugar, fat or flour, so if you don't want to indulge in too many Christmas cookies, tame your sweet tooth with these instead! Customize these with your choice of nuts, fruits, spices, flavourings, etc. You can make them more chocolatey by adding more cocoa powder along with a bit of extra hot water (cocoa powder dries up the balls). Enjoy!
Watch The Full Video Tutorial!

Date Truffles (a.k.a. Bliss Balls) DIY Gift
- Yield: Makes about 24-26 1-inch balls
Ingredients
Save this recipe!
- 300 g pitted dates (see note)
- ¾ cup your favourite mix nuts or seeds, roasted and chopped so the pieces are no larger than ¼-inch
- ⅓ cup your favourite mix of dried fruits, chopped into ¼-inch pieces (choose ones that are tart such as dried cherries)
- 3 Tbsp cocoa powder
- 1 tsp cinnamon (optional)
- ¼ tsp nutmeg (optional)
- Other flavourings/spices of your choice (optional)
- A pinch salt
- Coating: Finely shredded coconut, finely chopped nuts, cocoa powder, or even sprinkles!
Note: I prefer medjool dates which tend to be softer and more moist, making them easier to process, but other dates would work just as well. I usually buy whole dates and remove the pits myself (it's easy to do), I just find that these ones tend to be better quality than ones already pitted.
Instructions
Remove pits from dates, if any, then process them in a food processor just until they gather into a ball. If your food processor is small, process half at a time so as to not wear out the motor. If you find that the dates are too dry and they're not coming together into a ball, add a splash of very hot water (1 tablespoon at a time) and let it soak into the dates for a minute to soften them. (What I have done in the past when I use dryer dates is soak them in hot water first for just a couple of minutes to soften them. If you do this, the dates can become too moist and will be hard to shape, and you will have to add more cocoa powder to absorb the moisture, which is not necessarily a bad thing!)
In a large mixing bowl, combine all your nuts and dried fruit. Sift the cocoa powder and spices into the mixing bowl, add salt, and then stir everything together, making sure all the dried fruit pieces are well separated.
Add dates, and with CLEAN hands, knead everything together until there are no more dry cocoa. You can add more hot water if the mix seems too dry, or add more cocoa powder if the mix seems too wet. Once mixed, taste the mixture and at this point feel free to add more fruit, nuts, spices, salt or cocoa powder. If you want to add more cocoa powder for a more chocolatey taste, you may need to add more water as well because cocoa absorbs moisture.
Using a disher or a spoon, portion out the dates into desired size. Wet your palms with water then roll the dates into round balls. Toss the balls into your coating of choice and press the coating onto the balls slightly. You can now serve or pack them into a package!
Storage: These will keep at room temperature for a several days in an airtight container, and they are better served at room temp, but I recommend putting them in the fridge for longer term storage.


Allan Cobb says
These are so easy and tasty. I kicked it up a notch be adding a splash of cognac to some and a splash of rum to some.
Betchie joy yunson says
Thanks for sharing the recipes.