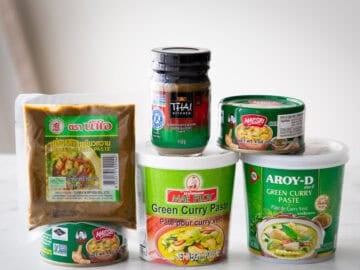
If you've been buying ready-made tamarind paste (a.k.a "tamarind concentrate") for cooking, let me tell you why I stopped using them and what I do now. Growing up in Thailand we always made our own tamarind paste for cooking, but when I arrived in Canada I was delighted by the convenient jars from the store!
But after years of using it, I don't know if the products became worse or my standards became higher, but I eventually I became more and more dissatisfied with the quality of premade pastes.
They started to taste bland and diluted to me. And while this isn't the case with all brands, all the time, it was inconsistent enough, even within the same brand, to warrant another solution. Time to go back to my roots and make my own.
What is tamarind?
Simply put, tamarind is a fruit. Its sticky brown flesh ranges from being very sweet to very sour, depending on the variety. The sweet ones are for eating fresh, and the sour ones are for turning into a paste for cooking.
Note: The tamarind liquid that is used for Thai cooking is sometimes referred to as "tamarind water," and some brands of premade ones are labeled "tamarind concentrate." I used to call it "tamarind juice," but I have switched to "tamarind paste" to avoid confusion with tamarind beverages. This is all very confusing, I know!
For everything you need to know about tamarind, check out my Ultimate Guide to Tamarind video. I also show you what tamarind looks like in its original pod!
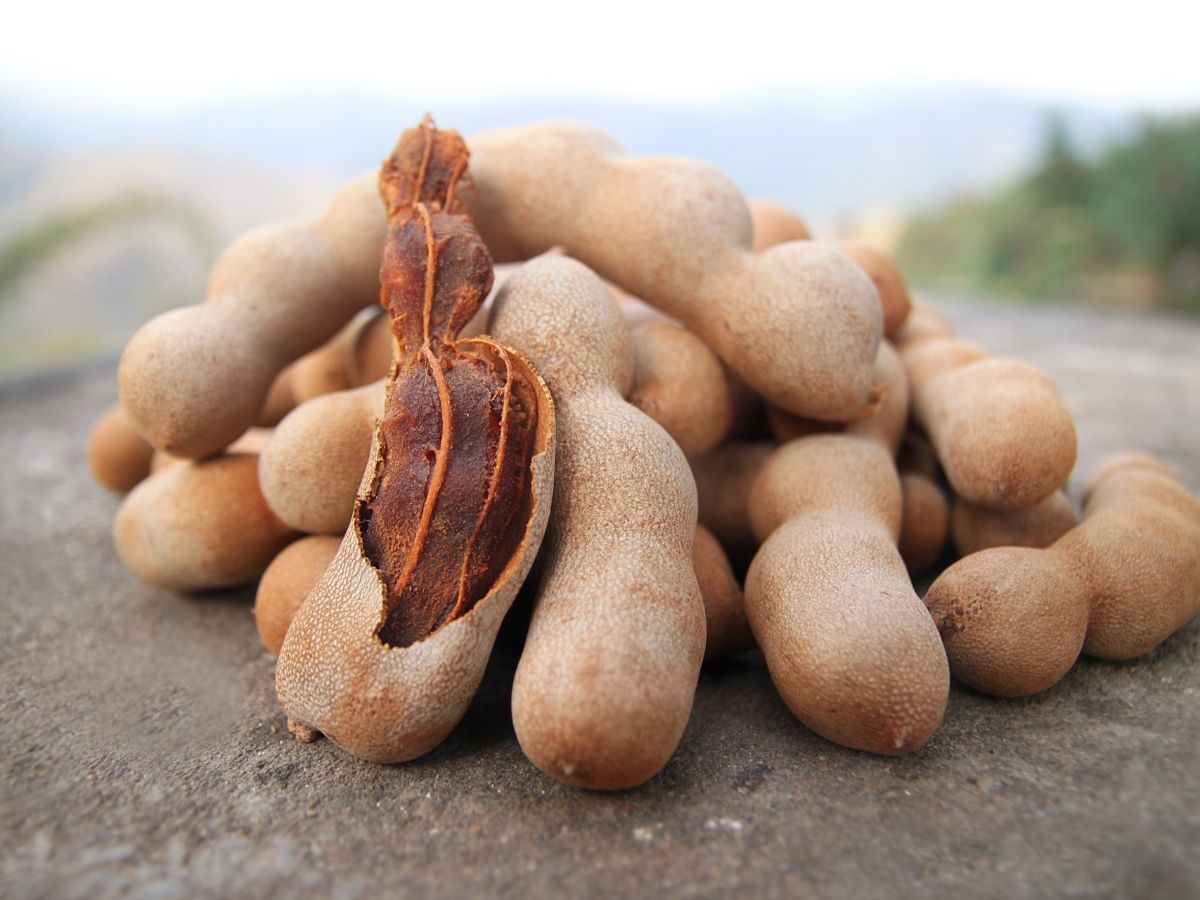
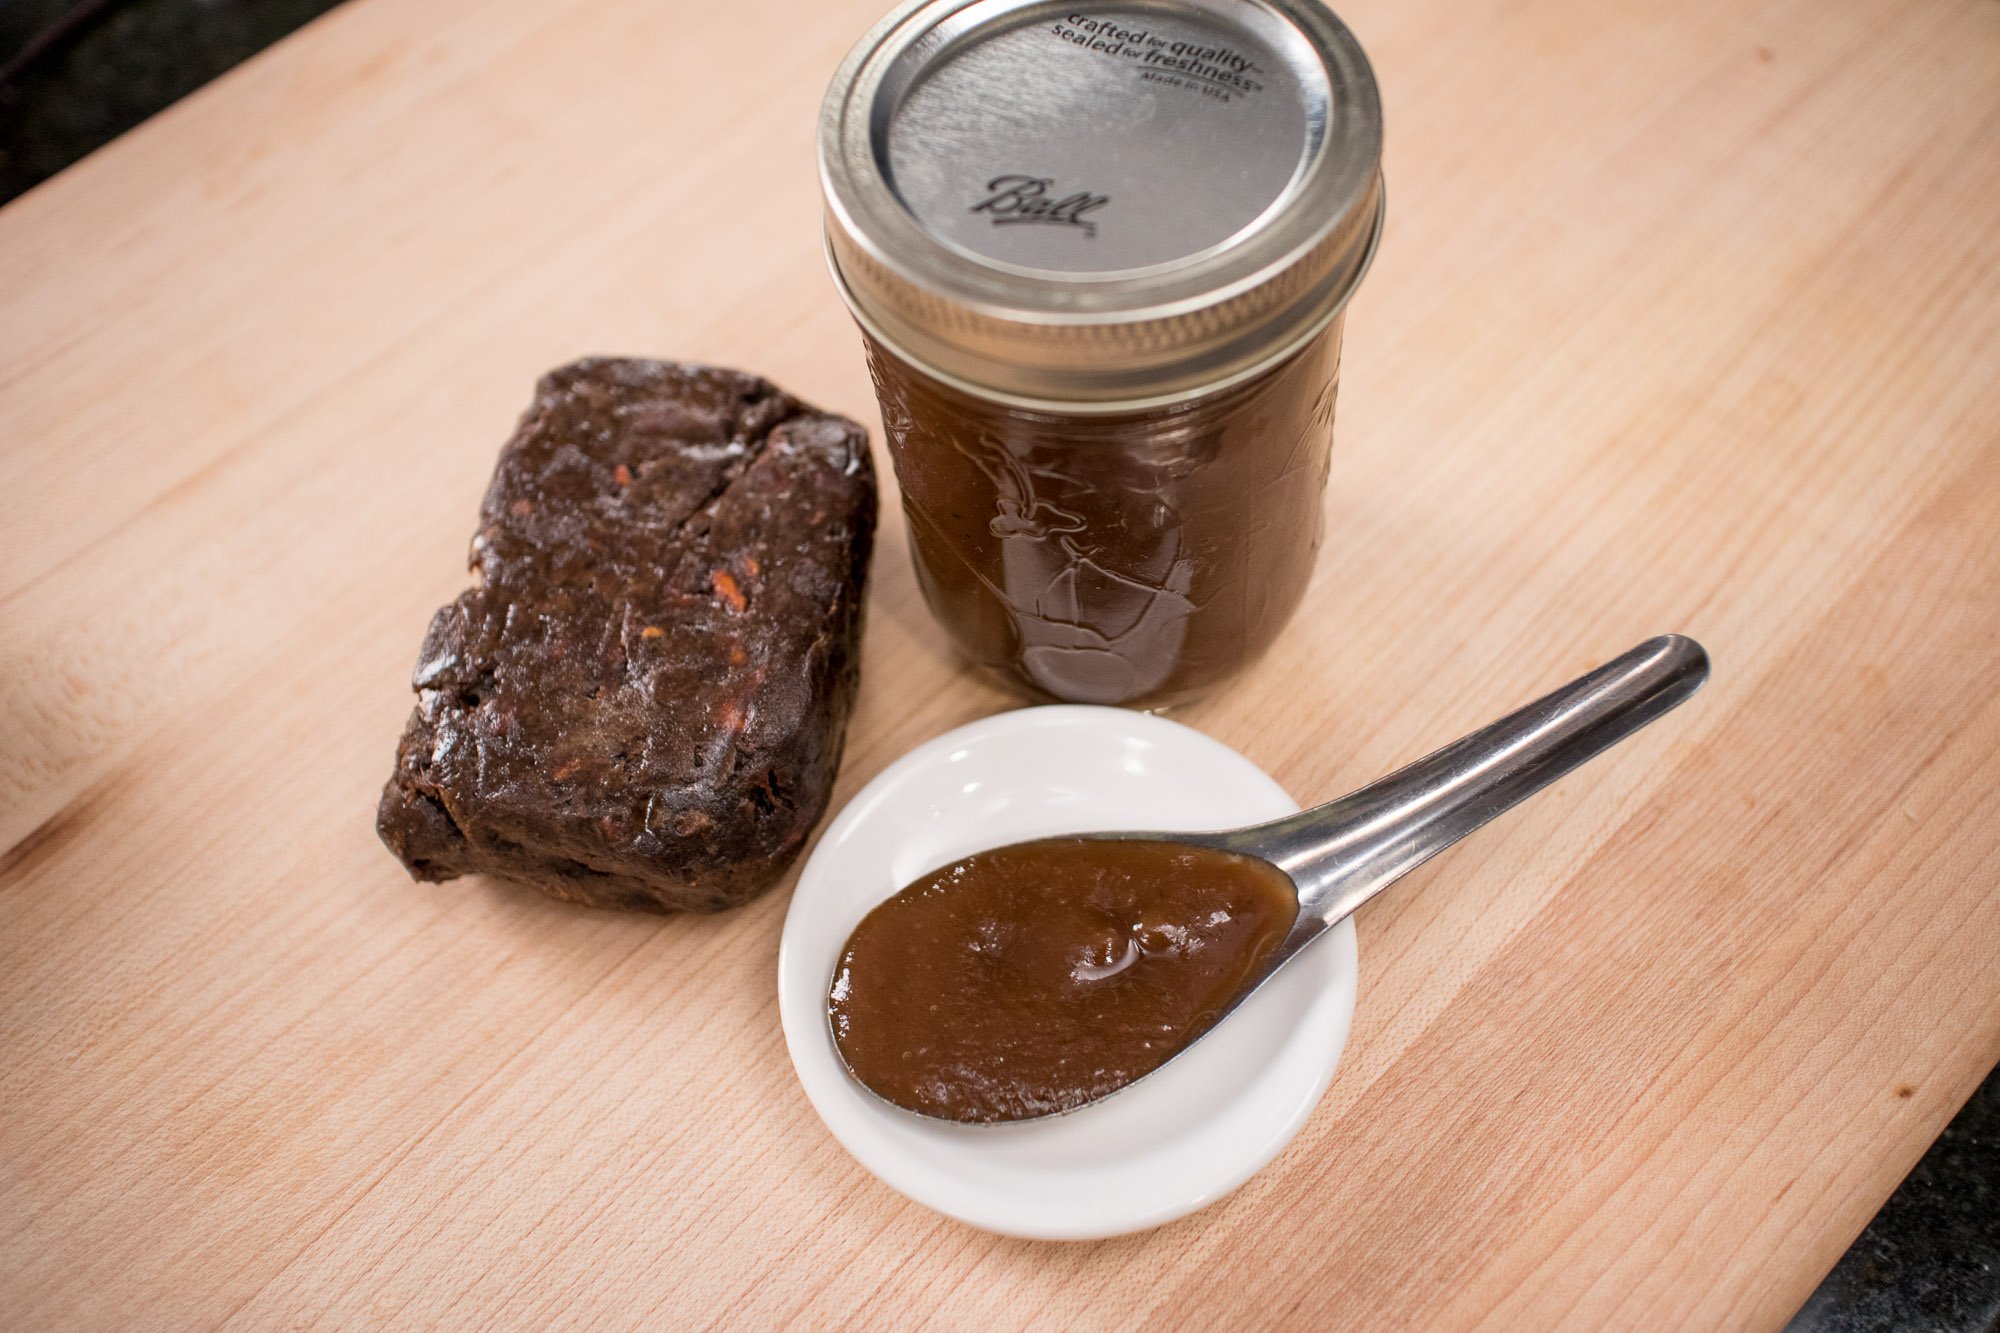
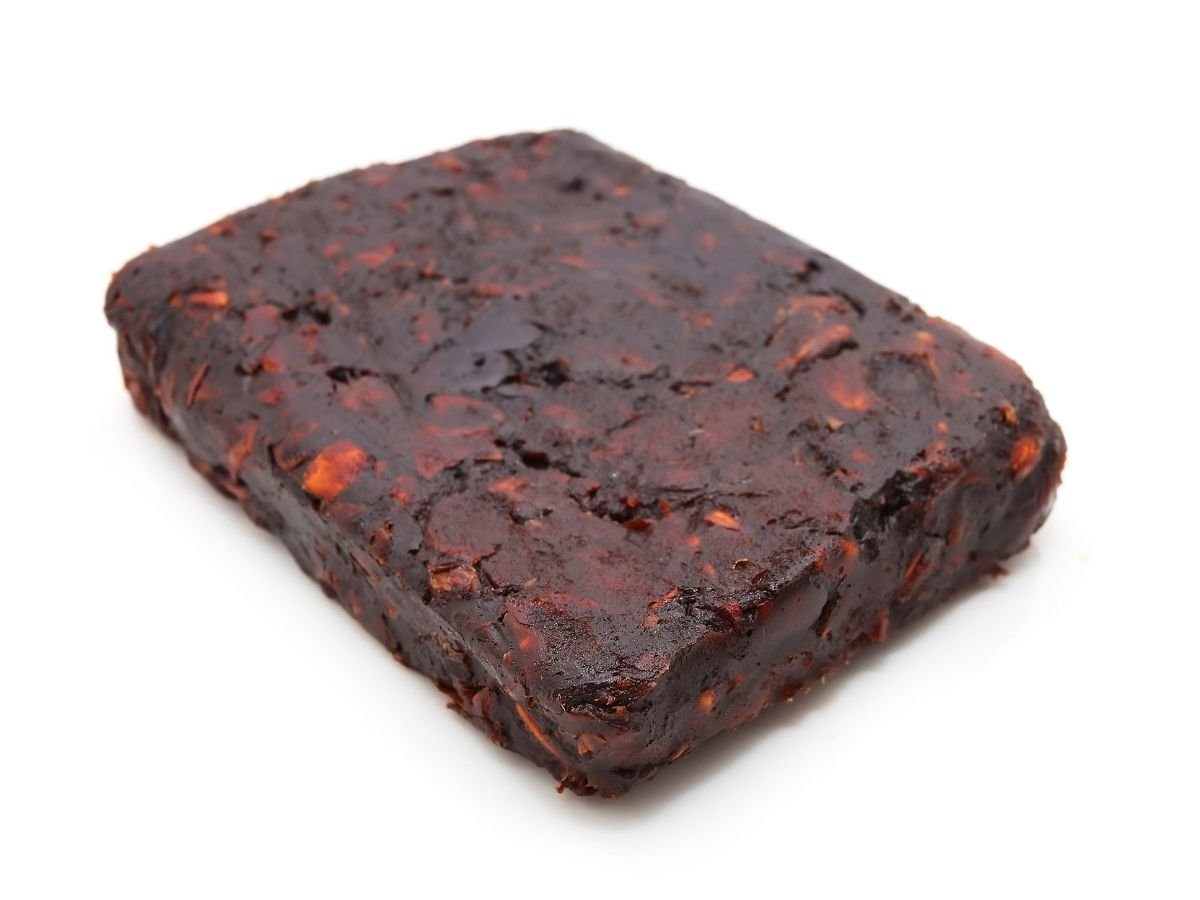
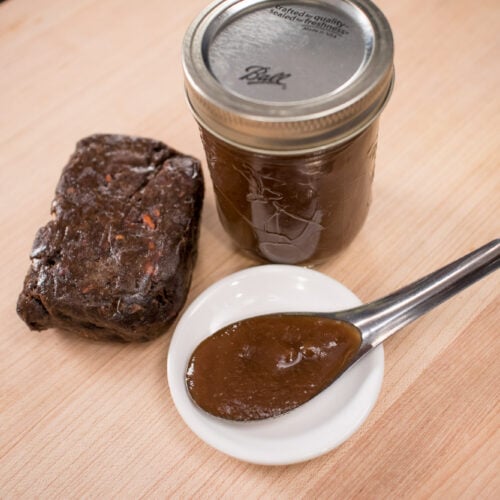
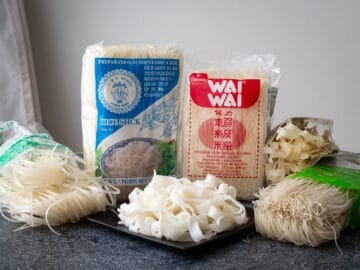
If you find tamarind fruit pods at the store, those are the sweet ones for eating as snacks. Cooking tamarind comes in a brown block, which is simply compacted tamarind fruit pulp, without seeds, but still with some of their fibers (though sometimes a rogue seed or two make it in). These blocks of tamarind are what you'll need to make tamarind paste at home.
How to Make Tamarind Paste
Here's an overview of the process, but be sure to read the recipe card and watch the video tutorial because this is one of those things that's much better understood once you see it in action. I also include more tips I didn't include here in the video!
- Pull apart tamarind pulp into small chunks and place into a heatproof bowl.
- Cover the tamarind pulp with hot off-the-boil water and let it sit until the water is cool enough to handle, at least 20 minutes.
- Use your hand to squeeze and scrunch the tamarind pulp so that the flesh is released from the fibers and mixes into the water.
- Strain the tamarind paste and rinse the remaining fibers with a little more water to remove more tamarind.
- You can use this right away, or for storage, cook the tamarind paste in a pot until it bubbles, and let it bubble for about 5 minutes to ensure that it is thoroughly heated. Stir it constantly to avoid splattering!
- Transfer the tamarind paste into small jars and once cool, store in the fridge.
Storing Leftovers
The tamarind paste you make is ready to use right away, but for the rest, you will want to cook it before storing to maximize its shelf life. When cooking tamarind, because it's thick, it'll bubble and looks like it's boiling before the entire mixture has reached boiling temperature. So it's important to let it bubble for about 5 minutes to allow it to thoroughly heat through.
If you cook the paste and store it in a mason jar as per my instructions, it will last up to 6 months, unopened in the fridge. Once it's opened, it has lasted me at least 2 months, but always use clean utensils to scoop from the jar.
Because of this, I recommend you putting it in small jars, no larger than 1 cup per jar, to maximize its shelf life. You can also can the tamarind, like you would with jam, to make it shelf-stable, though I have not personally done this.
Learn more about other Thai ingredients
Check out my Thai Ingredient Playlist on YouTube where I have informational videos about the most important ingredients in Thai cuisine.
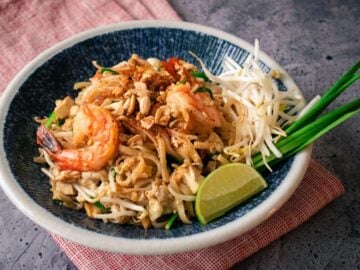
Recipes with Tamarind
Now that you've got delicious homemade tamarind paste, try using it in these recipes!

Homemade Tamarind Paste
Ingredients
- ½ lb seedless tamarind pulp (see note)
- 2 cups hot water
Notes
FULL VIDEO TUTORIAL
All my recipes come with step-by-step video tutorials with extra tips not mentioned in the blog post, so make sure you watch the video to ensure success. If you enjoy them, consider subscribing to the YouTube Channel to not miss an episode. Thank you!
Subscribe to my YouTube ChannelInstructions
- Use your hands to pull apart the tamarind block into small chunks and place it in a large, heat-proof mixing bowl. Pour the hot water over the tamarind and let it sit until it’s cool enough for you to handle, about 20 minutes, though you can let it sit for as long as you need at this point—the longer it sits, the easier the next step will be.½ lb seedless tamarind pulp (see note), 2 cups hot water
- Use clean hands, preferably gloved, to squeeze and scrunch the pulp to loosen it from the fibers. You should end up with something that has a consistency of a smoothie. A little thinner than smoothie is fine, but too thick will make it hard to strain, so if it looks super thick add a little water.
- Once you can feel that most of the pulp has been released from the fibers, strain the tamarind mixture, into a pot through a sieve, preferably not fine-mesh as the paste will be thick and it'll hard to push through. Push as much of the liquid through as possible, and scrape the bottom of the sieve occasionally.Tip: If at any point in the process you're having a hard time because the liquid is too thick, do not be afraid to add more water. Some brands of tamarind pulp are more "pulpy" than others and require more water to loosen.
- Gradually pour about ½ cup of room temperature water over the remaining fibers in the sieve while using your hand to mix it around. This will rinse off any last little bit of tamarind still stuck in the fibers.
- You can use this right away for cooking, but for storage, cook the tamarind paste over medium high-heat until it boils, stirring constantly, as it is quite thick and can bubble and jump at you if you don’t stir. Allow it to bubble for 4-5 minutes to ensure that it is thoroughly heated through before turning off the heat.
- Transfer the hot tamarind paste to clean, small mason jars, no larger than 1 cup capacity. I like using the smaller ones so each jar will not be open for as long. Close the lids while still hot and and allow it to cool at room temperature before moving them to the fridge for storage. As it cools the lids will be sucked in and it will seal very well, like jam, but since this was not properly canned, you still need to store them in the fridge. You can also freeze them in ice cube trays and store the cubes in freezer bags.


John Yeates says
Hi Pai, it's ages since I've used this recipe but I can't get the ready made stuff in the UK at the moment. Unfortunately like 99% of the people in the world we use the metric system and the conversion in the ingredients of 2 cups of hot water to 240 ml is 100% out. So after a couple of hours struggle I managed to produce about one and a third of a cup of tamarind 'pulp' instead of 2 cups. This really is tamarind concentrate xxx
Pailin Chongchitnant says
Oh thanks for pointing out the conversion error! It's fixed now, so sorry about that!
Andy says
Wow, glad I found your website! I just made my first batch of Tamarind Paste from Pulp. Mine was a little runny. To much water? Is there a way to thicken it up a little? Thanks
Pailin Chongchitnant says
If it's runny it's because you used more water, but there's no need to worry about the consistency. Tamarind is used for acidity and it doesn't matter if it's thick or loose, it won't affect the final result. In traditional Thai kitchens we tend to make it on the runnier side anyway because it is easier to make with more water than less.
kelly says
I bought the block for the same reasons as you. My local grocery stores only carried paste with really crappy ingredients added to it and I wanted it more of a natural paste. Hence, I found your site. Thanks for showing me how to make it.
Chef Giovanni says
Awesome just found your channel
Diane Brunjes says
I just found you, and am now a devoted follower! Just made your Massaman chicken with your semi-homemade curry and wow! And now this. Very grateful.
LauraLee says
Very helpful information and “recipe”. I have been using the thick, black tamarind paste from India and didn’t know there was a difference. I found the block of paste at one of our Asian markets, and followed your instructions. MUCH more tart, lighter colored, and thinner than what is from India. Going to make my first pad Thai using this tonight, and including the glass noodles (my husband is on the keto diet), and head-on shrimp. Can’t wait to finally taste how this should. BTW, if you want to process this for long-term, I recommend using the times for jam; 5 minutes at sea level and 1/4” headspace, or visit https://nchfp.uga.edu/publications/publications_usda.html.
You can also just turn your sealed jars over after ladling in the hot juice, and the heat will soften the seal on the lid, creating a vacuum. This ISN’T the same as “canning” or the hot cooking method in the jar, but it does help prevent air from getting into an unopened jar, letting your tamarind juice last longer.
JIWA says
Hi I have been making tamarind paste from that same block for about 10 years. I was curious about your method, after coming across your Pahd Thai recipe. I do a couple of thins differently. 1) I cut the brick into 4 pieces. Wrap 3 of thum in plastic and freeze. Keeps beautifully. I only make up what I need. 2) I use Luke warm water to cover the pieces I want in a small bowl, soak for awhile to soften. Using a fork I work the pulp off the fibers and pits. I strain the cleaned pulp through a stainless sieve. Then put remaining fiber in another small bowl or glass, cover with water, soak some more and then work off remaining pulp, adding to the first. I may repeat if there seems to be more pulp. What remains is a l9vely brown loose paste, depending how much water was used. I try to keep to a minimum. 3) I then put this in a small jar, glass or plastic with lid. NO NEED TO COOK. This paste also freezes well. Ice cube trays are great for that. COOKING changes the flavor, I find. But I use a lot of tamarind for various Thai, Indian and Mexican dishes, so this is a staple in my kitchen. Just wanted folks to know that cooking is not necessary and that it freezes beautifully, either in brick form or after made into usable paste. ENJOY!!
Pailin Chongchitnant says
Thanks for your input! The cooking is definitely not necessary, but it will make the paste last longer if you don't want to freeze it (I don't freeze mine because I use it regularly). But if using in a salad where it will not be cooked in the final dish, it's an extra food safety step in case of contamination during the processing especially if you touch it with your hand at any point in the process.
Elaine says
Thank you for this. It was good to see someone else make this. Just FYI. I put the paste in ice cube trays and freeze them. Then I use them from the freezer as needed.
Also, my husband loves your gai yang sauce. He says it is better than Thailand (Chiang Mai) place we use to go to once a week during the winters. We loved that place (Gai Yang Wichian) but have not been back since covid started.
Ruj says
Your metric converter isn’t working you said 0.5 lbs / 2 cups water. This is 227g / 500ml water but the converter says 227g /240ml which is only 1 cup of water.
suzi says
I tried 1 cup of hot water, 2 cups are needed for a good consistency. Then a bit more water to Rinse the leftover pulp. Directions as written were perfect! Thank you!
Cary says
I am glad she explained the difference between the tamarind block and pods sold in stores. I was using the sweet ones for pad Thai and it didn't taste right. I hope anyone who succeeded in water bath canning their paste can share how it is done.
Alan J says
Looks good. I bought a block of tamarind by accident and when I realized it wasn't blending well in my recipe, that it was not in fact paste. Which brought me to your website.
Just a quick question. Can I use a food mill with a fine grinding disc to strain the boiled tamarind instead of using the sieve? My guess is yes.
Pailin Chongchitnant says
I don't see why not, so give it a try!
Angela says
I don't think so, this would grind up the seeds and fibres too.
Alan J says
I would do maybe a first pass with a coarse grinding disc in the food mill, and then the sieve. Fibre and seeds still intact after first pass, but easily separated in the sieve. I'm lazy!
Helena says
Very helpful, thank you 🙏
Don says
Regarding storage, is there any reason why the jarred tamarind paste couldn’t be frozen? I would think freezing would extend its shelf life indefinitely.
And, how does refrigerated tamarind exhibit spoilage? Does it mold, or does it just start to taste different than when fresh?
Pailin Chongchitnant says
You can absolutely freeze with no problem! However, if you want to freeze, I recommend freezing in ice cubes because you're going to need maybe a few tablespoons at a time, and having to thaw a whole jar just for that wouldn't be as convenient. I don't usually do it because I tend to use it fast enough to not need it, but i know this is not true for others, in which case freezing is the best.
When tamarind spoils it will get green fuzzy mold around the edges.
Briana says
So helpful!! Thank you for this. I’ve been trying to figure out how to work with the block for years! Not a lot of clarification about tamarind out there.
Shih says
Hello. What brand of tamarind slab is good and where can I buy it? I’m having trouble finding it
Pailin Chongchitnant says
All the brands I've tried have all been fine so whatever you can find. Look for it in stores that sell other Thai ingredients.
Ed says
Can I put the jar in the fridge right after it’s been boil or do I wait for the paste to cool down?
Junaidi Aminuddin says
No harm for the tamarind paste, but not good for your fridge. Always good practice to let anything cool down before putting in fridge.
Therry says
How long can I store the other half of the block? Should/Can I freeze it?
Yvonne Roberts says
Love your Pad Thai recipe. Thank you for emphasizing that we should boil the paste once we soak the block of Tamarin and squish it through a strainer. You should add this part to the recipe on how to make Pad Thai . Your recipe is the best. I make it all the time and everyone loves it. When making the paste, a trick I use is that I put my clean jar in the oven to warm them. I put the lids in a pot of boiling water. When I put the paste in the jars and put on the lids (fingertip tight) the lids seal. This may help to preserve the paste longer and in a safer manner.
Oscar Pinlac says
The only trick that might possibly work is getting one of those coffee strainers with plunger, where you can probably squeeze out the thick slurry. But you still have to clean that equipment afterwards, an added dish to wash.
Patty says
Hi Pailin, how long would you process in a hot water bath (as for jam) for longer shelf life? Or would pressure canning be better?
Pailin Chongchitnant says
Hot water bath or pressure canning would be fine, as to how long I'm not entirely sure but I think it would be the same as if you were to make jam.
Tony says
Is there a particular brand of a tamarind block you used in the video?
Jim says
Cooked in a stainless steel pot that had some hard water stains and it ate them away. Washed the pot after and it was spotless. Possible side benefit of boiling paste is as a stainless steel cleaner. 😉
However if that acidic probably better to use enameled cast iron or non stick so there is no chance of reacting with the pot.
Adam The HTK Minion says
Hi Jim! ... and lol re using it as a cleaner 🙂 Re acidic ingredients though and reacting with the pot itself you might be thinking of aluminum? Stainless steel is non-reactive, so doesn't matter what you put in it. ASSUMING of course that it's clean - maybe a big assumption 🙂 Cheers! Adam
Oscar Pinlac says
Good idea, but stainless steel is better. The calcium deposit is just more obvious on the stainless pot due to the mirror effect of the metal. Otherwise, there's probably calcium stain on the enameled cast iron that is not quite obvious?
Jennifer Spencer says
In Bali, I learned they use tamarind paste as a silver cleaner. It's why the jewelry for sale there is such a white, shiny silver. The story of your cleaner pot makes sense in that light.
Sana says
Hello very good good site and recipes!! How long does it last if you do this? I have a Block of tamarind and on the bag it says it lasts until august. If i do this and put it in a mason jar, Will it last longer?
Kind regards
Sanae
Pailin Chongchitnant says
If you make a paste, boil it, and it should last in the jar for a few months. But the block of tamarind will last longer, it usually outlasts the expiration date if kept in the fridge.
Petru says
I followed the recipe with half the bar and 2 cups of water but it ended up allot more watery and not like a paste. Should I boil it more to try and reduce it? Thank you.
Pailin Chongchitnant says
BLocks come in different sizes, is it possible you used a smaller bar? What I used it a 1lb block so ½ lb of tamarind for 2 cups. Also, it could mean that you didn't squish out enough flesh. You can certainly reduce it by boiling.
Liana says
This was great! Thank you so much for making this helpful video and making it so easy to follow! I will doing this tomorrow.
jane says
Instructions are excellent and the whole process is easier than it sounds. The one thing I did differently was to fill the jar right to the very top with boiling water and put the lid on and let it stand for five minutes before putting the paste in jar...not sterilized but better than just "clean" for refrigerator shelf life.
Meredith Sanders says
I’m so looking forward to trying this recipe! Is there a simple trick to removing the tamarind from the seeds?