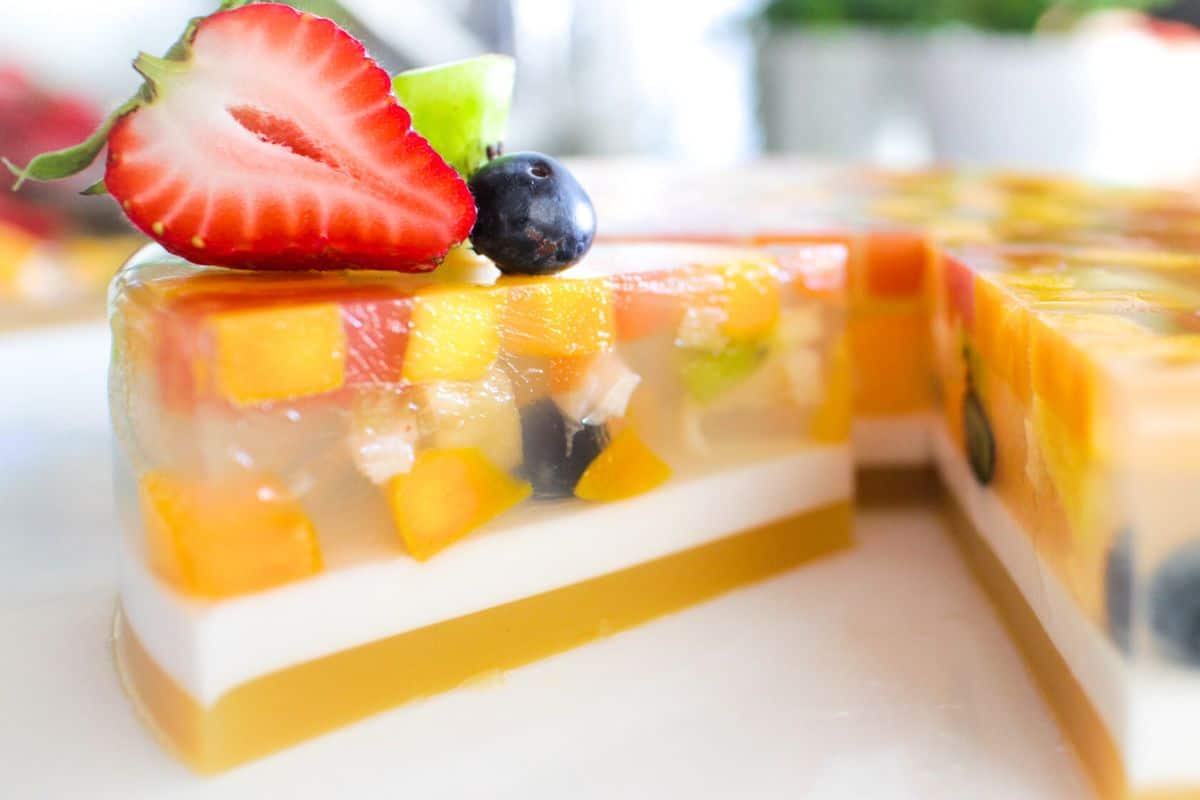
With over 4 million views on YouTube, this is one of my most popular recipes of all time. I call it a "fruit cake" but it's a completely different kind! This delicious and refreshing beauty is an absolute showstopper, and nothing says "summer treats" more than this gorgeous tropical fruit-embedded jelly. You can be creative with the fruit combination and the colour palette as well.
Watch The Video Tutorial
If you've never made an agar agar recipe before, I highly recommend watching the video below so you understand how it works and behaves.
Also, before you cook, watch this "Recipe Footnote" video as it addresses common problems people have with agar agar jelly, some of which might actually ruin the recipe if you're not aware of them.
Jump to:
What is agar agar?
Agar agar jelly, or woon in Thai, is a powder made from seaweed that sets liquid into a jelly. The concept is similar to gelatin - which is why it's sometimes called "plant-based gelatin" - but the texture is very different. It's firmer and less bouncy, but delicious and can create beautiful distinct layers with ease.
IMPORTANT: Only buy 100% PURE agar agar powder. Some brands have sugar and/or flavouring added, and it's not always easy to tell, so you must check the ingredient list. Those versions (unlike the ones below) are instant mixes much like Jell-O powder, so you cannot use them in this recipe.
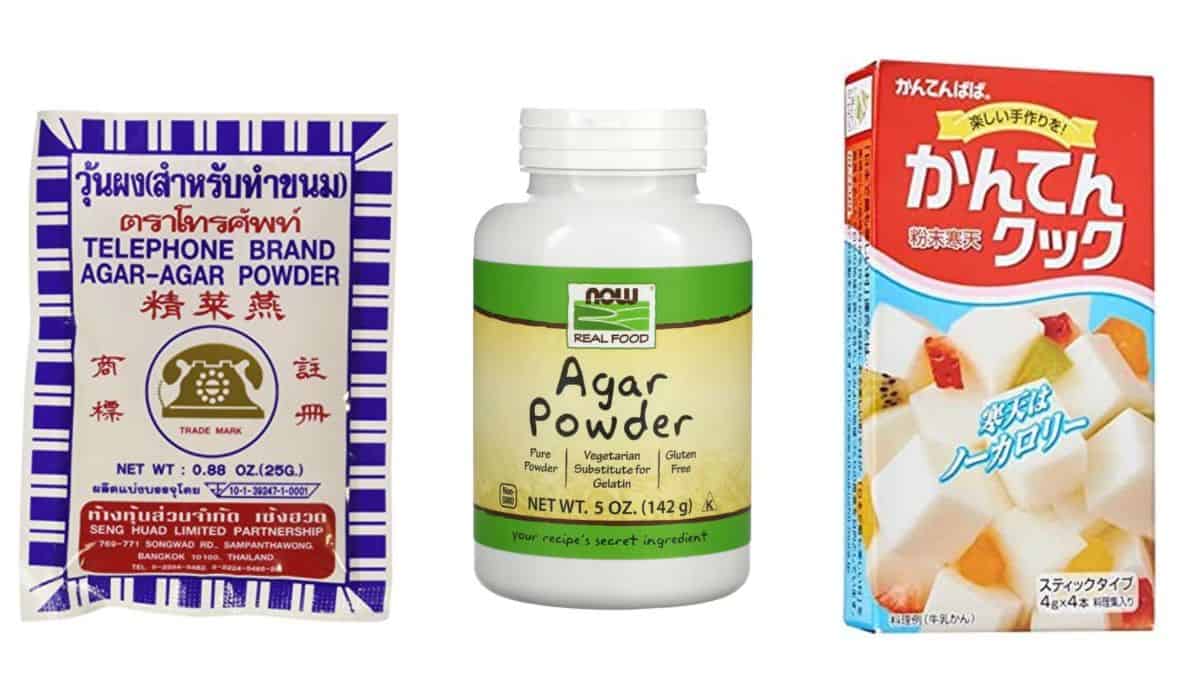
Agar agar also comes in non-powder forms: flakes, strings, and a few others. I highly recommend using powder because it is the easiest one to work with. Agar flakes would be my second choice, but they measure differently, so you will have to weigh them to get the right amount. If using bigger pieces of agar agar, such as strips, weigh it out, and them blitz in a coffee grinder before using so that it dissolves quickly.
Here are some online options for agar agar powder, but you can also find it at Asian supermarkets (especially ones with Thai and Vietnamese products), Japanese grocery stores (called kanten in Japanese), and health food stores. Locate an Asian store near you with this map!
Ingredients
For this agar agar recipe, the following are the ingredients that I used, but keep in mind that you can change up the juice and the fruit to create your own unique jelly fruit cake. You can also keep it simple and make only 1 or 2 layers instead of 3. For the amounts and full instructions, see the recipe card below.
Fruit Layer
- Water
- Juice from canned lychee (keep the fruit for the cake itself)
- Sugar
- Agar agar powder. See above for more info for the right product to buy. Here are some options online.
- Small fruit pieces of your choice - I used mango, pineapple, red papaya, lychee, kiwi and blueberries.
Coconut Layer
- Coconut milk. Coconut cream would also be okay for this recipe, as would evaporated milk.
- Water
- Agar agar powder. Make sure it's 100% pure agar agar powder.
- Sugar
- Salt
- Pandan leaf, optional
Juice Layer
- Juice of your choice - I used mango juice which is quite thick; if your juice isn’t thick, you can substitute the water with more juice. Pomegranate juice would be great for a purple version.
- Water
- Agar agar powder. Make sure it's 100% pure agar agar powder.
- Sugar, this is added to adjust the sweetness of the juice and may not be needed if it's sweet enough for your taste.
Save this recipe!
How to Make Agar Agar Jelly Fruit Cake
*Before you start, make sure you have all your fruit cut and ready to go as you will need to work quickly once you pour the liquid into the mold.
Make the fruit layer:
- In a small pot add cold water, lychee juice, and agar agar powder, and whisk until there are no more big lumps. Once mixed, turn on the heat and bring to a full boil, stirring constantly.
- Once boiling, let it boil for a minute or so, or until agar agar powder is completely dissolved. To check, scoop some liquid into a spoon, pour it off, then closely inspect the spoon to see if there are any specks of agar agar stuck to the spoon. If not, you're good to move on.
- Add sugar and stir until dissolved, then remove from heat and immediately pour about ¼-inch of the agar agar into your mold. Working quickly, place fruit pieces in the mold, making sure you evenly distribute all the different colours. Once you've added all the fruit, pour the rest of the liquid gently over them.
- Let this layer sit for several minutes, or until the top is firm enough to pour on the second layer.
While you wait for the fruit layer to set, make the coconut layer:
- In a small pot, combine coconut milk, water, and agar agar powder, and stir to dissolve the powder.
- Add the pandan leaf, (if using), then turn on the heat to medium high and bring to a boil, stirring constantly.
- Once boiling, let it boil for a minute or so, or just until the agar agar is completely dissolved (do the same check as above).
- Add sugar and a pinch of salt and stir to dissolve. Remove the pandan leaf.
- Your bottom layer should be firm enough by this point, but check by gently touching it and see if the top is set and dry; it is okay if it is still soft in the centre. If it is ready, GENTLY pour the hot coconut layer on top of it. If the bottom layer is still quite soft, pour the coconut layer onto the back of a spoon and let it drizzle gently onto the bottom layer.
While you wait for the coconut layer to set, make the bottom juice layer:
- Combine all ingredients in a small pot and stir to mix the powder. Turn the heat on to medium and bring to a boil, stirring constantly, just until the powder has completely dissolved. DO NOT OVER COOK THIS MIXTURE, SEE NOTE BELOW.
- Make sure the coconut layer has set enough, and pour the hot juice layer over it.
- Refrigerate for a couple of hours until cold.
- If you want to unmold the whole thing in one piece, it can be a bit of a challenge, but see the video for my technique OR check out my Coffee and Cream Agar Jelly for a new technique I came up with!
Important note about using fruit juice: When working with acidic liquids such as fruit juices, DO NOT simmer the liquid any longer than necessary. Simmering agar agar in an acidic liquid for a long time will break it down and it will not set. Simmer it just long enough to dissolve the powder and use it immediately. Trust me, I learned the hard way!
Unmolding Agar Agar Jelly Cake
In the video tutorial, you'll see that it was a bit of a struggle to unmold the cake in one piece. Many people have asked why I don't just place the mold in a hot water bath to dissolve the exterior slightly and then flip it out.
Trust me...if that worked, I would've done it! But agar agar isn't gelatin, and it doesn't work like that. Once set, agar agar will not melt unless you boil it. This is why it's a great treat for a hot summer day - it'll sit out on your picnic table without melting!
How to unmold agar agar jelly: Unlike gelatin, agar agar doesn't stick to the mold, so if you create an air gap and nudge it out, the whole thing will plop out cleanly. If making small pieces, we usually just use a toothpick or skewer to nudge it out.
For a bigger piece, like this cake, it's a bit trickier because you need more air gap, so here are a few tips for easily removing the cake:
- Use a flexible mold such as silicone or thin plastic: this is your best option, and you can see how easy it is to remove in this recipe's video. If you have a silicone mold, you can flex the mold and it'll just plop out. You can also get molds that come in fun shapes which kids always love.
- If using a hard mold, use toothpicks or skewers to create an air gap to help the jelly release. Watch the video tutorial to see how I did this; it'll be much easier to understand to see it in action.
- If using a hard mold, oil the mold first. Rub a very thin layer of oil on the mold using a paper towel, and it should help the jelly come out after you create the air gap.
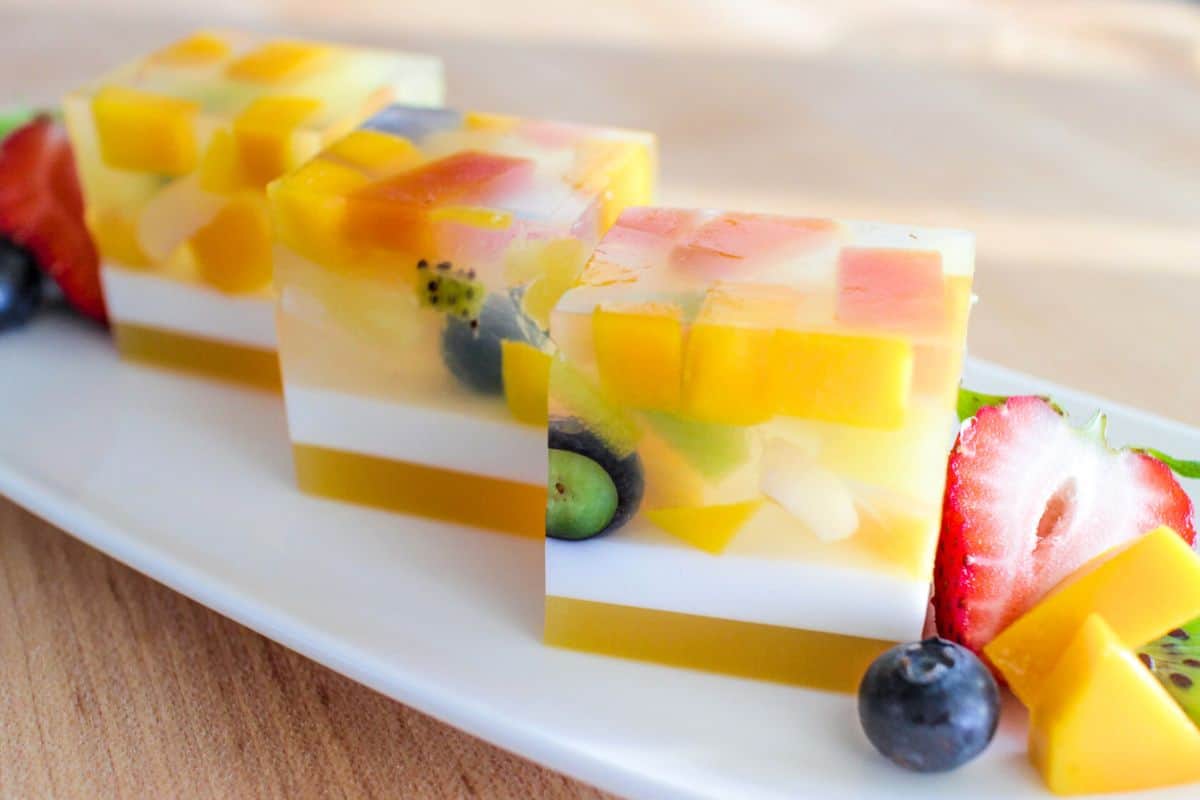
- Or forget unmolding...you can cut and serve them in pretty little cubes, like in this picture below. Make it in a square or rectangular dish, then cut and serve. **If you're going to do this, remember to reverse the order in which you make the layers since you will not need to flip the jelly upside down!
Important Note on Unmolding: Do not unmold or cut agar jelly until close to serving time. When agar jelly is uncontained, water will slowly seep out because it's an unstable gel. A small amount of water loss will not affect how it tastes, and if it has to sit for a couple of hours unmolded that's fine, but you want to avoid it when possible. If you want to give it away to people, I recommend making it in glass or clear heat-proof plastic containers that you're willing to part with.
FAQ
Yes. Make the jelly and refrigerated for up to 3 days ahead, but DO NOT unmold or cut the jelly until close to serving time. When agar jelly is uncontained, water will slowly seep out because it's an unstable gel. A small amount of water loss will not affect how it tastes, so if it has to sit for a couple of hours unmolded, that's totally fine. But you want to avoid it when possible; so it's best to cut or unmold as close to serving time as possible.
Not one that will behave in this same way, so you cannot substitute another setting agent, like gelatin, and follow these instructions and ratios. If you want to use gelatin instead, I recommend following a gelatin recipe and use the flavour combination from this recipe as a guide.
To ensure that the layers stick together, the bottom layer shouldn't be too cold, and the top layer needs to be steaming hot when you pour. The heat from the second layer will melt the top of the bottom layer every so slightly so they can fuse together. If the bottom is too cold, it will cool the liquid layer down instantly and they won't stick.
A YouTube viewer also suggested that you can scratch the top surface of the bottom layer slightly to create little crevices that allows the two layers to adhere together better. They didn't specify what to scratch it with (I'm thinking tip of a paring knife) or how many scratches you need to make (I'm thinking over the entire surface), but it sounds sensible. I have not personally tried this, so if you try it out let me know how it goes!
You can substitute anything! As long as you keep the ratio of liquid to agar agar powder the same, you can make this out of whatever liquid you like.
This is normal. When agar jelly is uncontained, water will slowly seep out because it's an unstable gel. A small amount of water loss will not affect the taste or texture, so if it has to sit for a couple of hours unmolded that's fine. But the best practice is to cut or unmold it close to serving time.
If you want to give it away to people, I recommend making it in a container you're willing to part with and give it to them in the mold.
Yep! The recipe can be scaled up or down proportionally without any changes to the method. You can also make it in lots of little molds instead of one big one.
Agar Jelly Fruit Cake Recipe
- Prep Time: 20 min
- Chilling Time: 3 hours
- Cook Time: 40 min
- Total Time: 4 hours
- Yield: Makes one 7-inch round cake
Description
A refreshing treat with fresh fruit, coconut milk, and your favorite fruit juice. It's a healthy, vegan treat that kids and adults alike will love! Can be made in advance, perfect for a summer party!
Ingredients
Save this recipe!
Fruit Layer
- 1 ⅓ cups water
- ⅔ cup juice from canned lychee (and keep the fruit for the cake itself)
- ¼ cup sugar
- 1¾ tsp agar agar powder (buy it online)
- ~2 cups small fruit pieces of your choice (I used mango, pineapple, red papaya, lychee, kiwi and blueberries)
Coconut Layer
- ¾ cup coconut milk
- ¼ cup water
- ¾ tsp + ⅛ tsp agar agar powder
- 3 Tbsp sugar
- A pinch of salt
- ~4 inches pandan leaf, optional
Bottom Juice Layer
- ¾ cup juice of your choice (I used mango juice to match the colour and flavour of my fruit pieces. If your juice isn’t thick like mine, you can use 1 cup of juice and no water)
- ¼ cup water
- ¾ tsp + ⅛ tsp agar agar powder
- Sugar to adjust flavour if needed
Instructions
Before you start, make sure you have all your fruit cut and ready to go. If it's your first time, please watch this "Recipe Footnote" video which addresses common issues people have with this recipe.
Make the fruit layer:
- In a small pot add COLD water, lychee juice, agar agar powder, and whisk until there are no more lumps. Once mixed, turn on the heat and bring to a full boil, stirring constantly.
- Once boiling, let it boil for a minute or so, or until agar agar powder is completely dissolved. To check, scoop some liquid into a spoon, pour it off, then closely inspect the spoon to see if there are any specks of agar agar stuck to the spoon or not. If not, you're good to move on.
- Add sugar and stir until dissolved, then remove from heat and immediately pour about ¼-inch of the agar agar into your mold. Working quickly, place fruit pieces in the mold, making sure you evenly distribute all the different colours. Once you've added all the fruit, pour the rest of the liquid gently over them.
- Let this layer sit for several minutes or until the top is firm enough to pour on the second layer.
While you wait for the fruit layer to set, make the coconut layer:
- In a small pot, combined coconut milk, water, agar agar powder, and stir to dissolve the powder.
- Add the pandan leaf, if using, then turn on the heat to medium high and bring to a boil, stirring constantly.
- Once boiling, let it boil for a minute or so, or just until the agar agar is completely dissolved (do the same check as above).
- Add sugar and a pinch of salt and stir to dissolve. Remove the pandan leaf.
- Your bottom layer should be firm enough by this point, but check by gently touching it and see if the top is set and dry; it is okay if it is still soft in the centre. If it is ready, GENTLY pour the hot coconut layer on top of it. If the bottom layer is still quite soft, pour the coconut layer onto the back of a spoon and let it drizzle gently onto the bottom layer.
While you wait for the coconut layer to set, make the bottom juice layer:
- Combine all ingredients in a small pot and stir to mix the powder. Turn the heat on to medium and bring to a boil, stirring constantly, just until the powder has completely dissolved. DO NOT OVER COOK THIS MIXTURE, SEE NOTE BELOW.
- Make sure the coconut layer has set enough, and pour the hot juice layer over it.
- Refrigerate for a couple of hours until cold.
- If you want to unmold the whole thing in one piece, it can be a bit of a challenge, but see the video for my technique OR check out my Coffee and Cream Agar Jelly for a new technique I came up with!
Important Note on Unmolding: Do not unmold or cut agar jelly until close to serving time. When agar jelly is uncontained, water will slowly seep out because it's an unstable gel. A small amount of water loss will not affect how it tastes, and if it has to sit for a couple of hours unmolded that's fine, but you want to avoid it when possible. If you want to give it away to people, I recommend making it in glass or clear heat-proof plastic containers that you're willing to part with.
Notes
When working with acidic liquids such as fruit juices, DO NOT simmer the liquid any longer than necessary. Simmering agar agar in an acidic liquid for a long time will break it down and it will not set. Simmer it just long enough to dissolve the powder and use it immediately. Trust me, I learned the hard way!



Emma Kershaw says
Hi is there any reason why you wouldn’t line the mould with clingfilm to ease the remoulding? I am planning on doing this for a tasting event and I cannot risk it collapsing at the last minute!
Thanks
Paddie says
I have made this twice with different fruit juices and fruits. It is a lovely recipe and very easy to follow, helpful video. Thank you so much! I hope to make it a few more times this summer.
Lisa says
Made this for a birthday and everyone loved it! Unfortunately, I could only find the agar agar powder that’s mixed with sugar, but I adjusted the measurements and it worked out. Followed your instructions for unmolding, and it was easy. Gonna make this again and again.
Khun Jeff says
Can unflavored gelatin be substituted for the agar?
noon says
how long does it take to set / make?
Pailin Chongchitnant says
thin layers would only take about 15 minutes to set. The final fruit layer would take about 20-30, plus chilling time.
Audrey says
Can I use frozen fruits for this recipe? Thinking of frozen mango, lychee, blueberries and strawberries.
Avery Nelson says
I loved this recipe!🤩 I really appreciate your tips as well!
Blue C says
Love your videos on agar agar! Thank you for sharing it 🙂 Question I want to ask is if you know tips on how best to keep the agar agar cake from "sweating' too much at the bottom esp after unmolding it? Thank you
LPC says
Thank you 🙂 Please disregard my latest question as I overlooked your previous answer re this same query. My bad! Stay well and blessed 🙂
LPC says
Hi! Do you prevent the agar agar from "sweating" or prevent water from settling at the bottom ? Thank you
Pailin Chongchitnant says
Keep it in the container as long as you can, only unmold closer to serving time. You can't prevent it, but if you use a higher ratio of agar it will "weep" less, but then you'll also have a firmer jelly.
lars says
Hi, how much servings does this have?
Adam from HTK says
Hi Lars! Depends on people's appetites, but the serving size indicated above is "Yield: Makes one 7-inch round cake". Cheers! Adam
Rubab says
Hi have you tried frozen fruit instead of fresh fruit? Any difference?
Adam The HTK Minion says
Hi Rubab! I asked and she said "I haven't tried that, but if you're going to use frozen I would go straight from frozen so they don't mush and discolour the jelly." Cheers! Adam
Divya says
The dessert looks amazingly yummy and the recipe feels to be very promising.
Thank you for posting such wonderful recipes. Wish you all the best in your life.
I would like to make agar agar jelly cake for the first time for my son’s Bday. So please give me some tips.
Can I set the jelly cake in Stainless Steel vessel and take it out after setting?
Do I need to refrigerate agar agar jelly cakes?
If I take it out of the fridge, will it stay outdoors for 5-6 hours?
Adam The HTK Intern says
Hi Divya! Yes it's probably best to refrigerate agar-agar as long as you can before serving as, though it won't melt, it will leach water faster when warm. And re the form, that should work if you can figure out a way to get them out again 🙂 ... Someone suggested heating the form itself with warm water, but we haven't tried that ourselves. Someone else suggested oiling the form, but not sure about that one ... Cheers! Adam
Sherlyn says
My mould is a 9" with hole in the middle. Do I do 2x the recipe or 1.5x?
Thanks
Pailin Chongchitnant says
Hi Sherlyn, without knowing the exact volume of your mold we can't advise on that. I'd just do your best to estimate by sight and then err on the side of making extra and put any leftovers in small cups.
Donna says
Food 52 has information on how to increase/decrease volume according to original recipe and your pan size. https://food52.com/blog/13239-how-to-make-your-baking-recipe-fit-your-pan-size?
srsltid=AfmBOoozQk5QAJsV38Onbd3Advvdmp6k0vexsMk1tLbIsoEEXf64fJdN
Charlotte says
hi how long in advance can you make this? i am worried about the cut fruit not looking perfect anymore but would like to make it in advance! (last year i left it until the last minute)
Sharon Dercksen says
Stunning looking cake, tastes great. Lasts well in the fridge, can be made 3/4 days ahead. Measure the agar agar exactly, I was a little heavy handed so it was a bit firm but still very nice.
Scarlet says
Hi,
How long will the cake last? I'd like to make it in advance for Christmas. Thank you.
Stephen Chan says
My partner loves jelly, so I've made it a couple of times as his birthday cake, so refreshing!
Eva says
Hi, can I replace the jelly powder with konnyaku powder?
Pailin Chongchitnant says
I don't have experience with konnyaku powder, but the texture are very different.
Evelyn Eyan says
Hi Pailin, your afar afar is so colourful n mouth watering. But unfortunately am not able to try,cos I have the strands agar agar not powder. Do you have the recipe in strands Agar agar? Thanks for your time
Pailin Chongchitnant says
Hi Evelyn, I don't have this recipe with the amount for strands. But if you watch this video I provide a info the ratio of agar thread to liquid that you will need. At around min 2:20