After several requests, it's time to go back to the basics and talk about how to cook the perfect rice without a rice cooker. There are some tips and tricks to know, but once you know them, you'll cook perfect rice every time and in a snap!
If you want something a little more interesting than plain rice, also try this easy coconut rice recipe!
WATCH THE VIDEO TUTORIAL FOR PERFECT RICE
Want to save this recipe?
FAQ About Cooking Rice on the Stovetop
The process for cooking rice should not change BUT the amount of water required will. Short grain, long grain, medium grain all require different amounts of rice. Also, this process does not apply to glutinous (sticky) rice. See this post for different ways to cook sticky rice.
For Thai food, always use jasmine rice from Thailand (also known as "hom mali" rice). When you open a bag of jasmine rice, it should have a wonderful jasmine aroma. To learn more about jasmine rice and how to tell if it's genuine jasmine rice, watch this Jasmine Rice 101 video.
No matter what you do, don't use instant rice or rice from a box or parboiled rice!
Different types, or even different brands of the same type, of rice will take different amounts of water. For jasmine rice, the ratio can range from 1 part rice to 1¼ - 1 ½ parts water. This is a ratio by volume. So for example, if you use 1 cup of rice, you will use between 1¼ cups to 1½ cups of water, and for 2 cups of rice, you will use 2½ - 3 cups of water.
If you're not sure how much to use, start on the low end because you can always add more water at the end and keep it cooking longer if it turns out to be too dry, but there is no way to fix too-wet rice.
If using Japanese short grain rice, you will need to use the ratio of 1 part rice to 1 part water.
For fried rice, I use 1 part rice to 1 part water because you will rehydrate the rice later with the sauce, and there will be moisture from meat and veggies.
Also, make sure you rinse the rice extra well, until the water runs almost clear, to ensure the rice grains will not clump up together as much.
The rice will expand 3 times its volume when cooked, so choose a pot that is big enough for that, plus a little extra room to be safe. But don't go too big or you will risk losing a lot of rice to the bottom of the pot should it get stuck, which sometimes happens.
Use a heavy bottom pot with a tight fitting lid. Heavy bottomed pot will ensure a more even heat distribution, which will result in less chances of burning and hot spots. A tight fitting lid is important in keeping most of the moisture in the pot. A clear glass lid is a bonus so you can see the progress without having to open the pot. If you don't have a lid, you can cover it tightly with foil.
Watch The Full Video Tutorial!
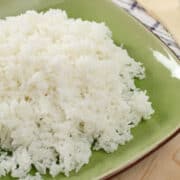
How to Cook Jasmine Rice without a Rice Cooker
- Prep Time: 3 mins
- Cook Time: 20 mins
- Total Time: 23 minutes
Ingredients
- 1 part Thai jasmine rice (See this video for more about jasmine rice)
- 1 ¼ part water (this depends on your rice and also your preference, feel free to adjust)
Want to save this recipe?
Instructions
- Put the rice in the pot and cover with plenty of cold or room temp water. Swish the rice around with your hands until the water is very cloudy. Pour off most of the water. Repeat, but this time, pour off as much water as you can. If you have a sturdy sieve, you can place the bottom of the sieve over the pot so you can pour the water out easily without losing your rice to the sink. If making fried rice, rinse the rice 4-5 times until the water runs clear.
- Add a measured amount of room temp water to the rice (see tips above for how much water). If you have a clear pot lid, put the lid on now and bring to a simmer over medium heat. If your pot lid isn't clear, leave the lid off for now so you can see when it reaches a simmer. If you're in a hurry, you can put it on high heat so it will simmer faster, but keep an eye on it cuz it can boil over if you're not paying attention!
- Once it comes to a simmer, turn the heat down to maintain a very gentle simmer. Let the rice cook, undisturbed, for 15-20 minutes or until it is done. Keeping the heat low will prevent your rice from burning on the bottom in case you let it go for too long.
- How do you know when it's done? Once the rice looks done (it's still, no bubbling, it's fluffy), check that the bottom of the pot is dry by inserting a rubber spatula along the side of the pot so you can see if the bottom of the pot is dry. Once it's dry, taste the rice to see if it's good. If the bottom of the pot is dry, but the rice is still crunchy, it means you need to add more water. Sprinkle a little water evenly over the rice, cover, and let it cook for another 5-10 minutes.
NOTE: If the rice tastes done, but the grains feel wet, it just needs to sit on the lowest heat for another 5-7 minutes to allow all the moisture lingering in between the rice grains to be fully absorbed. (Note: This is the reason why, when using a rice cooker, you always want to let the rice sit for a bit after the rice cooker has turned off. The bottom of the pot may be dry, but there is still moisture hanging out between rice grains.)
T says
Hi Pailin,
I have been seeing your videos for years but only just recently dared to make Thai food at home. I’m newbie to Thai cooking. And have dared to only try Thai green curry. Which everyone loved.
I want to learn two things from you:
1. Is this Royal Umbrella Thai Hom Mali Rice (red color packaging) on this website below good for this recipe(link below)?
https://greenvalley.pk/product/royal-umbrella-thai-jasmine-rice-1-kg/
Basically I am looking for Thai jasmine rice variety that is good for Thai steamed rice recipe. There are near to none options of imported items where I live, and of any imported item is available is available is very expensive. So just want to double check from your before purchasing.
Can you share the range of rice dishes I can make from this kind of Thai rice?
2. And what about this rice (link below) what is the range of rice dishes that can be made from this rice variety?
https://greenvalley.pk/product/better-thai-glutinous-rice-2kg/
Ernie C says
Love your website and videos!
I realize that substituting brown rice for jasmine would change the taste and texture of a Thai dish. Is there any way to compensate for this so I could use brown rice for the health benefits?
Barbara says
Hallo Pai😊..is there a way to measure the water without cups?..especially for small amount of rice…100gr for instance ..100gr rice to 125 gr/ml water right?..but How would I do without scale or cups..
Thanks..
Pailin Chongchitnant says
You just need the ratio to be correct. It doesn't have to be a measuring cup, it can be a coffee cup, a soup bowl, whatever container. Just keep the same ratio. Hope that makes sense!
Felicity says
Hi Pai, what rice to water ratio do you use for the rice cooker? I have been eating the Costco brand of Thai jasmine rice and I just can't seem to get the texture right.