Thai people may eat jasmine rice as our main staple, but we also eat sticky rice regularly. And for some dishes, sticky rice is a necessary accompaniment! But cooking sticky rice isn't nearly as straightforward as cooking regular rice, and it's much less forgiving. But worry not, with this detailed article and video tutorial, you'll be able to make sticky rice like a Thai!
I've put together 7 different ways to cook sticky rice (yes, there are that many!) so no matter your situation, no matter what tools you have, one of these methods will work for you!
I highly suggest watching the video tutorial below, especially if you're not experienced, as it is much easier to understand these methods by seeing them. Note: The water ratio for the microwave method has changed slightly from what's shown in the video, so please see written instructions below for that!
Video: 7 Ways to Make Sticky Rice
Jump to:
- Video: 7 Ways to Make Sticky Rice
- But first, what is sticky rice?
- Why Cooking Sticky Rice is (a bit) Tricky
- The 7 Ways to Cook Sticky Rice
- Methods 1-4: Soak-and-Steam Sticky Rice
- 1. Bamboo Cone Steamer
- 2. Steamer Rack
- 3. Metal Sieve
- 4. The Hot Soak
- Hack: If Serving Sticky Rice at Room Temp...
- Methods 5-7: No-Soak Sticky Rice
- 5. Steam The Bowl
- 6. Rice Cooker (maybe)
- 7. Microwave
- How to Store and Reheat Sticky Rice
- Recipes Using Sticky Rice
- 7 Ways to Make Thai Sticky Rice
But first, what is sticky rice?
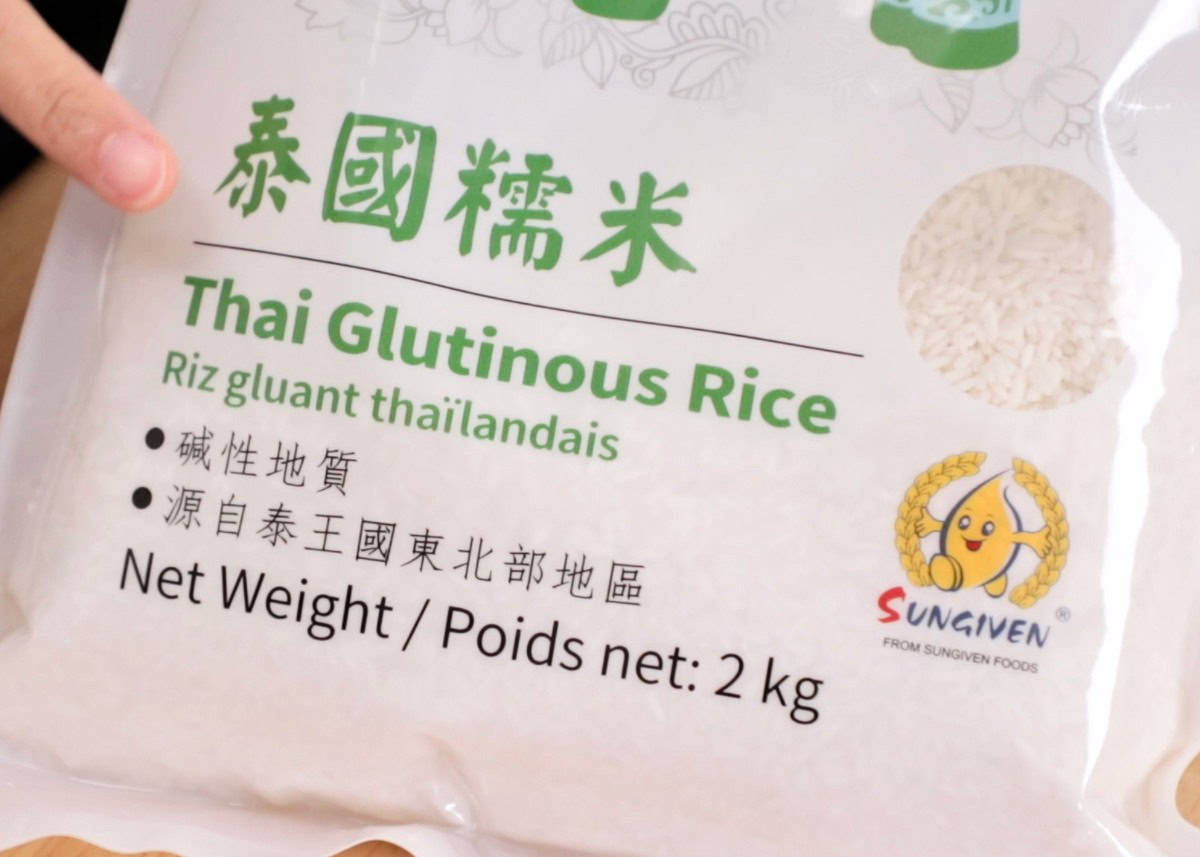
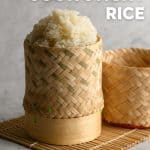
Before you cook, let's make sure you buy the right rice to begin with! Sticky rice, also called sweet rice or glutinous rice, is much chewier and denser than your average white rice. It's an ultra satisfying texture, and we love to pair it with meats such as our grilled steak or BBQ chicken, and use it in desserts such as the famous mango sticky rice.
In Thailand, we use long grain sticky rice which we call khao niew. At the store, it can be labeled as "sweet rice" or "glutinous rice," but to make sure it's the right one, check that it is a product of Thailand. Short grain sticky rice is also available, but it is used in China and Japan, not in Southeast Asia. In this article, I'm discussing how to cook long grain sticky rice, and while in theory you can apply the same methods to short grain sticky rice, I have not personally tried them.
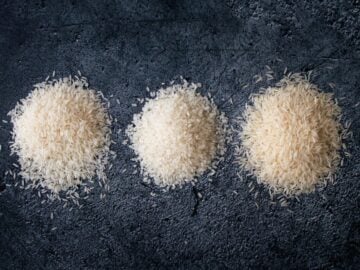
Note that sticky rice is NOT sushi rice. Yes, sushi rice is sticky, and some people confuse the two, but they are very different. When shopping, you should look for grains that are opaque, bright white, and not translucent.
Why Cooking Sticky Rice is (a bit) Tricky
Why are there so many ways to cook sticky rice, and why are none of them just...throwing rice into a pot of water like you do with any other kind of rice? Well, it's because Thai sticky rice is a little bit...sensitive.
Trust me, if you could cook it like regular rice the whole nation of Thailand wouldn't do it any other way. Sticky rice can't absorb much water, which is why it's so dense and chewy, and it is not forgiving at all if you add even a bit too much. So, cooking it in an amount of water that you just eyeballed will not yield good results.
So the wise people of the past discovered that if you soak the rice in water for at least 3 hours until it is completely saturated, and then steam it OUT of water, there is no chance that it can overcook. Brilliant, right?
But not all of us have the time or the equipment to do it traditionally, so here's my roundup of all the ways that I know of that you can cook sticky rice, along with the pros and cons of each method.
The 7 Ways to Cook Sticky Rice
The 7 methods can be divided into 2 categories: soak and steam, and no soak. And under the soak-and-steam methods, you can either do a cold soak or a hot soak. Usually, the results are better using the soak-and-steam methods for the reasons I described above, but if you're short on time, the no soak methods will do in a pinch, but some precision is required.
But first, you need to wash the rice.
Doesn't matter which method you're using, you need to wash the rice! This gets rid of excess loose starch leftover from the milling process, and it will prevent your rice from becoming gummy.
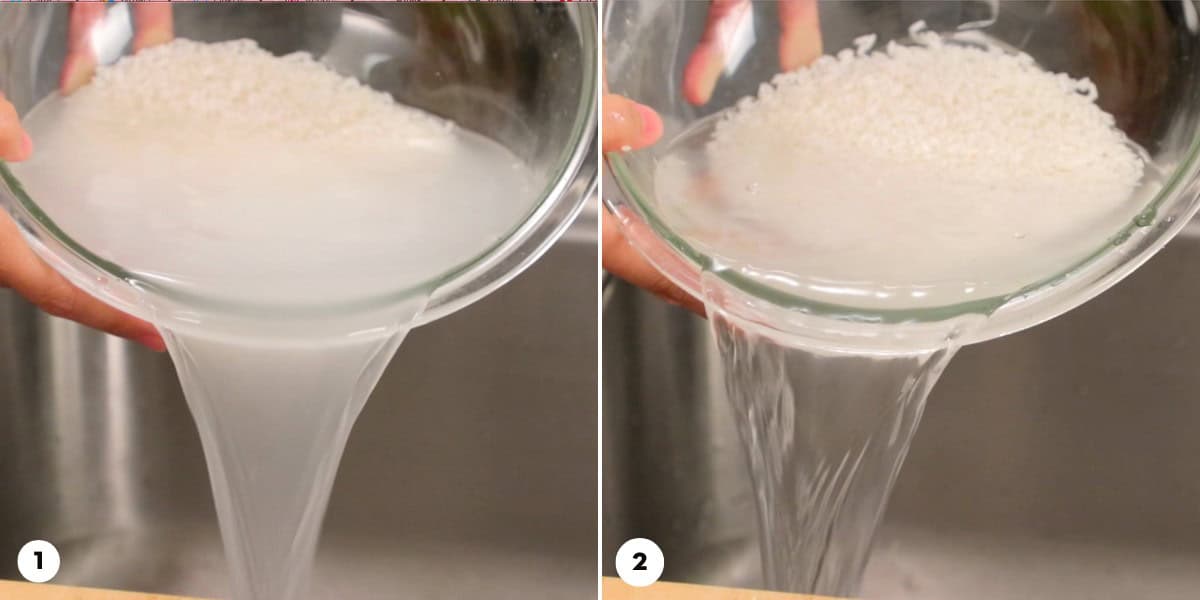
- Swish the rice around vigorously in room temperature water, then pour off most of the cloudy water.
- Repeat the washing a few more times until the water runs mostly clear.
Methods 1-4: Soak-and-Steam Sticky Rice
These first 4 methods all require 2 major steps: soaking the rice, and then steaming the rice. But each method requires different equipment, so there should be something for everyone here!
Pro Tip: Of all the soak and steam methods, the hot soak (4th method) has become my personal favourite as it is the fastest and yields great results. I show how to do it here, but for more detailed on why I love this method, and some of its cons, read my post on the hot-soak sticky rice method.
1. Bamboo Cone Steamer
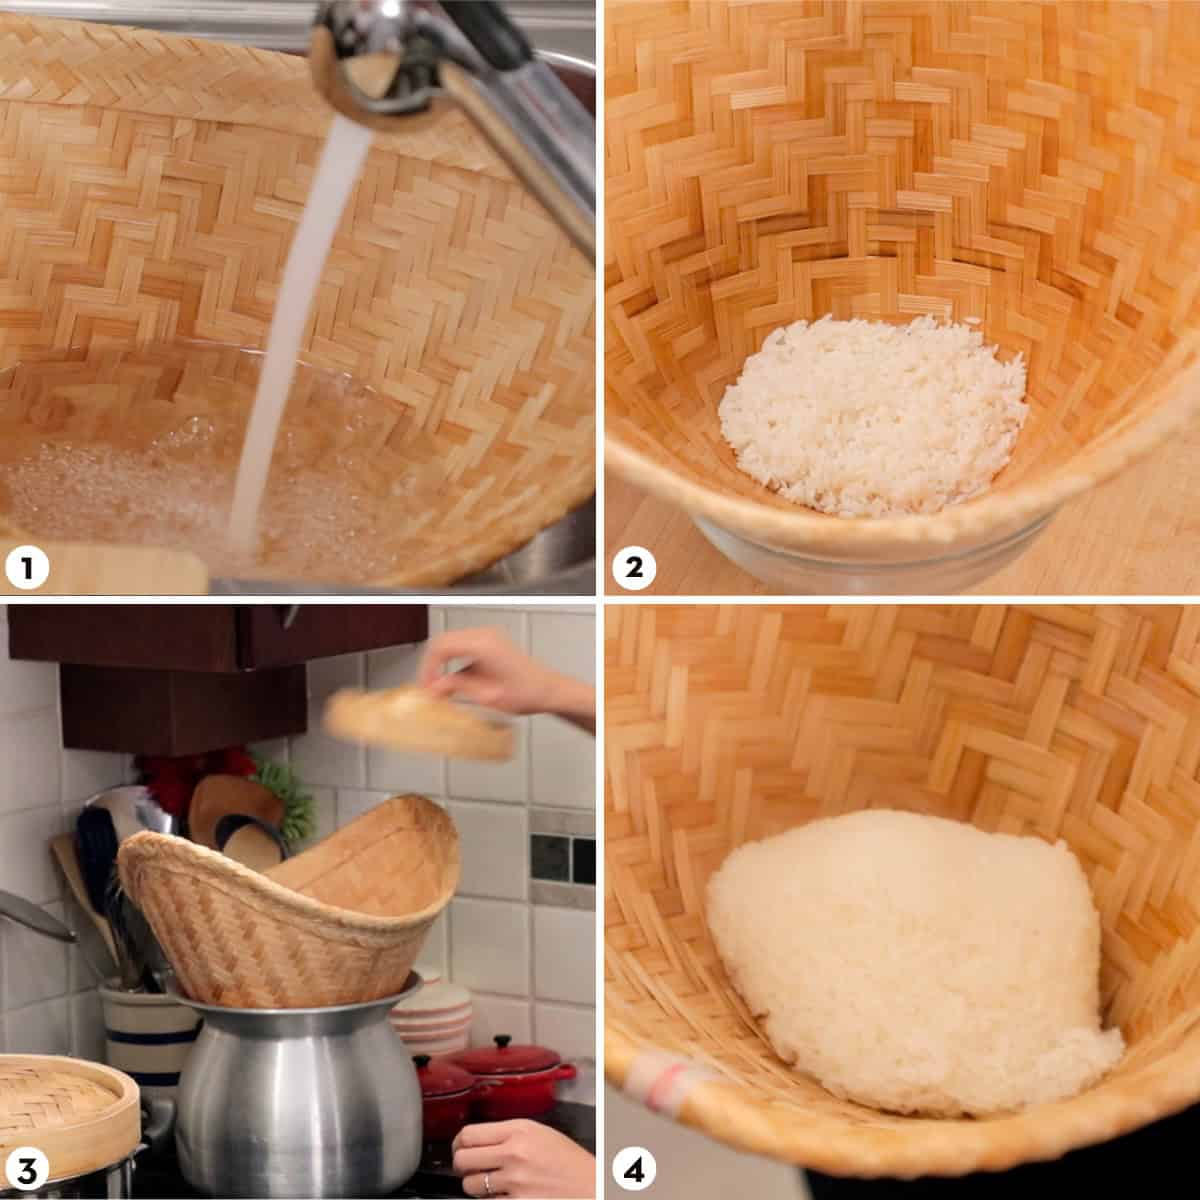
This is THE traditional method. If you go to a rural village in northeastern Thailand, this is how they make sticky rice! It is absolutely fail proof, and yields perfect rice every time. It also works with a small or large amount of rice.
The tool we're using here is a bamboo cone steamer set called huad. It's comprised of 2 parts, the bottom pot for water, and the cone-shaped bamboo steamer that sits on top.
- After washing the rice (see above), soak the rice in plenty of room temperature water for a minimum of 3 hours, preferably 4 and up to 12 hours, and then drain well.
- Fill the pot with no more than 2 inches of water and bring to a boil over high heat, meanwhile soak the bamboo steamer in water otherwise the rice will stick to a dry steamer.
- Place the drained rice inside the steamer. Handle soaked rice carefully as they are brittle.
- Once the water is boiling, place the steamer on top of the pot and cover with any lid that will fit (any old pot lid is fine). Steam for 15 minutes.
- After 15 minutes, flip the rice ball so the top is facing down by tossing the steamer (see the video tutorial for how to do this). Then continue to steam for another 10 minutes.
2. Steamer Rack
If you have a basic steamer rack that sits above a pot, such as a dim sum bamboo steamer, this method will work for you. This method is also popular with Thai people and yields great results.
- After washing the rice (see above), soak the rice in plenty of room temperature water for a minimum of 3 hours, preferably 4 and up to 12 hours, and then drain well.
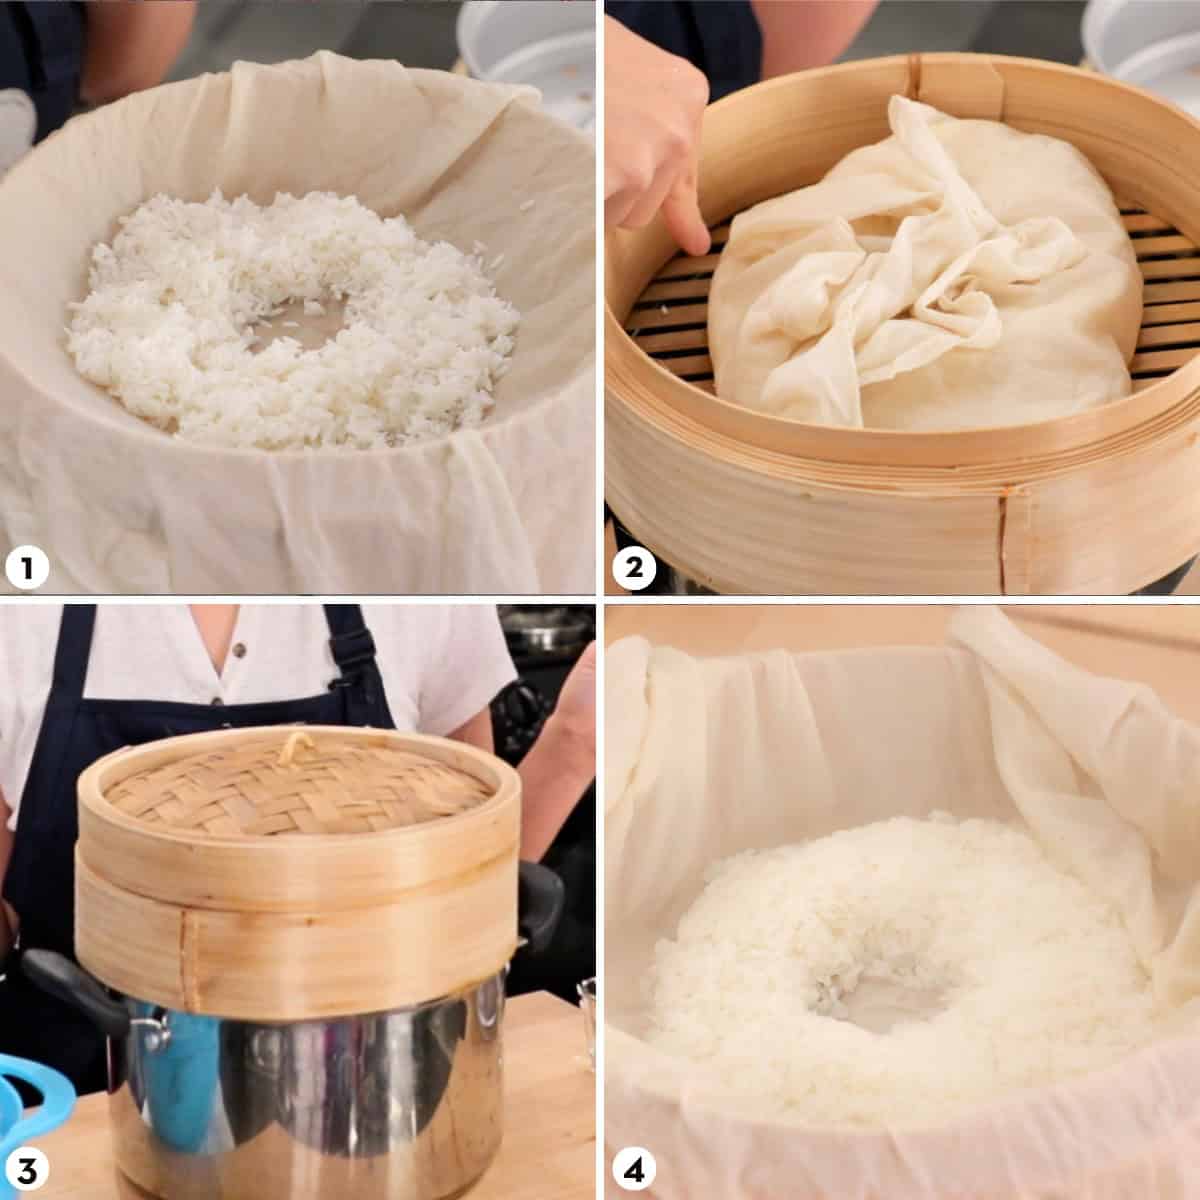
- Wet a muslin or thin tea towel and squeeze out as much water from it as possible. You want it damp, not wet. Line your steamer rack with the muslin.
- Place the soaked rice in the steamer and clear a hole in the middle. This eliminates any "thick part" and the rice will cook faster.
- Fold the edges of the muslin up to cover the rice, making sure there is space around the rice for the steam to come up.
- Cover and steam over boiling water for 20-30 minutes until cooked through (longer time if making a large batch).
3. Metal Sieve
I learned this method from my cousin who lived in Alabama where she didn't have access to much Asian cooking supplies. It's such a useful method because it doesn't require any special equipment, and the result is nearly as good as a bamboo steamer!
You do need to have a METAL sieve that has a similar diameter to a pot so you can set it on top of the pot. Make sure there's enough space at the bottom so the water will not touch the bottom of the rice.
- After washing the rice (see above), soak the rice in plenty of room temperature water for a minimum of 3 hours, preferably 4 and up to 12 hours, and then drain well.
- Place the sieve on top of the pot, then fill it with 1-2 inches of water, making sure there is at least 1 inch of space between the water and the bottom of the sieve. Remove the sieve and bring the water to a boil.
- Place the soaked rice into the sieve but do not fill it completely or you will block the steam! You need some space at the top so steam can come up and surround the rice. Use your finger to clear a hole or an indentation in the middle of the rice to eliminate the "thick part" so the rice will cook faster.
- Once the water is boiling, place the sieve over the pot and cover with a lid. Steam for 20-30 minutes until cooked through (longer time if making a large batch).
Tip: You can use this set up to steam vegetables or anything else as well!
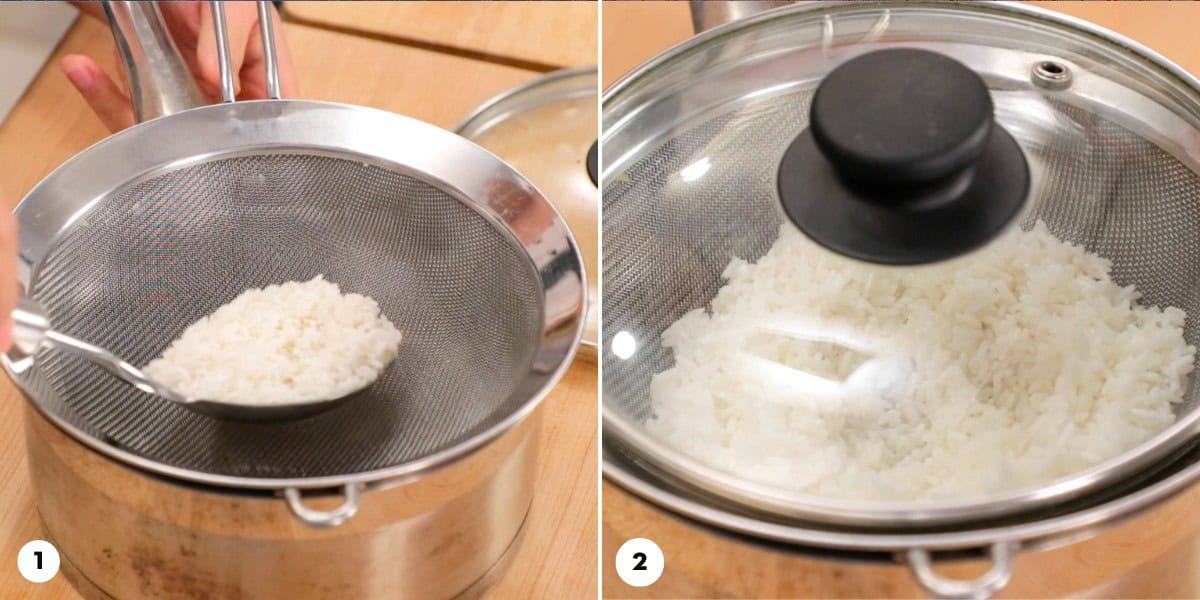
4. The Hot Soak
This is officially my favourite method because it's fast, and it yields a great result. The rice made using the hot soak method will be slightly softer than the cold soak BUT this is actually an asset because the extra moisture will keep it soft after it's cooled down to room temp, unlike cold soak sticky rice which quickly turns dry and hard once it's cooled down.
There are some minor cons to this method, most importantly you do need to be precise with soaking time, and adjustments may be needed if making a large batch. I write more about this method in detail in this post: hot soak sticky rice.
- After washing the rice, place it into a heatproof bowl. Cover it with hot-off-the-boil water so the water comes up ½-1 inch above the rice. Give the rice a stir to break up any lumps and let it soak for 20 minutes and NO MORE.
- Meanwhile, get your steamer setup ready. You can use any of the steaming set up from methods 1-3 above: the cone steamer, regular steamer rack, or the sieve.
- Drain the rice, and rinse it with cold tap water to remove excess starch that has come out during the soaking.
- Now the rice is ready to be steamed using any of the methods above.
Save this recipe!
Hack: If Serving Sticky Rice at Room Temp...
Sticky rice made using the cold soak method needs to be served warm as it quickly turns dry once cooled to room temp. So if you know that your sticky rice won't remain hot for serving (a potluck or a picnic?) here are a few options:
- Use the hot soak method (method 4 above).
- If you've already soaked the rice in cold water, but decide last minute you want to have it extra soft, drain and do a quick 10-minute hot water soak before steaming.
- Do the cold soak and let the rice steam normally, but halfway through drizzle some cold water over the rice, you want just enough water to make sure all the grains are coated. This extra water will cling onto the partially cooked rice grains and gets steamed into the rice. Note: I don't like to do this if the rice is wrapped in cloth because the cloth becomes soggy from the extra water and the bottom of the rice gets mushy.
Methods 5-7: No-Soak Sticky Rice
I'm going to be frank here, no-soak methods are shortcuts for when you need sticky rice but didn't plan ahead. They are not the ideal ways to cook sticky rice because the resulting rice texture is generally not as good (except for method #6, maybe) and because you have to be very precise with the amount of water. But, it's still better than NO sticky rice, so I'll take it :).
*As with all other methods, you will need to wash the rice as mentioned above.
5. Steam The Bowl
With this method, you put the rice and the water together in a bowl, then steam the bowl in any kind of steamer set up you have. This allows the rice to cook gently, and with no risk of burning the bottom so you do not have to be precise with timing.
- Drain the washed rice very well, making sure there is absolutely no water left. Place it into a heatproof bowl.
- Add water at a ratio of 1 part rice to ⅔ parts water. So for every 1 cup of rice, add ⅔ cups of water OR for 1 ½ cups of rice add 1 cup of water. Measure this, do not eyeball. Stir to break up any clusters of rice.
- Cover the bowl with a plate or foil to prevent condensation from dripping into the rice, and steam the bowl over rapidly boiling water for about 30 minutes. You will need more time if making a larger amount.
- Remove the rice from the steamer, check that all water has been absorbed, if not, put it back and steam longer.
Tips: If you find that the rice came out too soft, add less water next time. Different brands of rice may require slightly different amount of water.
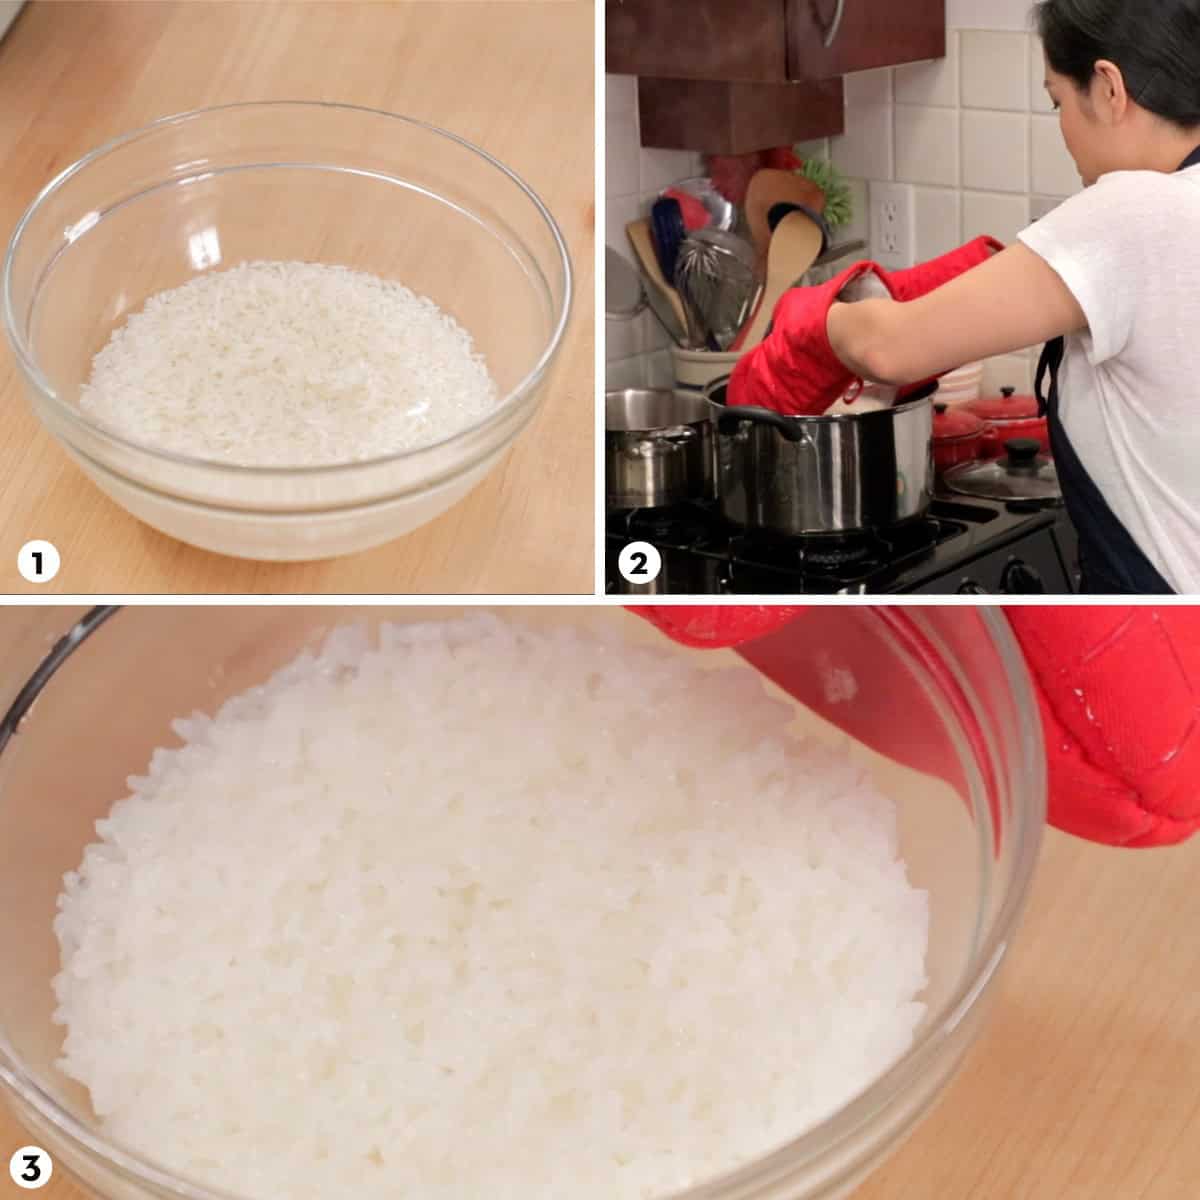
6. Rice Cooker (maybe)
This method is a "maybe" because it doesn't work with all rice cookers, but when it works, it is awesome, and the result can be almost as good as rice cooked the traditional way. What you need your rice cooker to do is cook the sticky rice gently and slowly. So if your rice cooker normally boils the heck out of your rice, it'll likely not work for sticky rice.
If you've got a multi-function rice cooker, such as the Zojirushi, with a "sweet" rice function. That is the function made specifically for sticky rice. Congratulations!
I've also had success with a cheap, simple 1-button rice cooker that is super weak, so it cooks rice slowly and gently, which is perfect for sticky rice! If you have a "brown rice" function, it may be worth a try as brown rice function tends to cook more slowly too.
- Wash the rice as per usual and drain very well. Place the rice into the rice cooker pot.
- Add water at a ratio of 1 part rice to ⅔ parts water. So for every 1 cup of rice, add ⅔ cups of water OR for 1½ cups of rice add 1 cup of water. Measure this, do not eyeball. Stir to break up any clusters of rice. (If you're using the measuring cup that comes with the rice cooker, you can try using the line for "sweet rice" in the pot which follows roughly the same ratio, and adjust as needed next time.)
- Cook the rice using the "sweet" mode and let the rice cooker do its thing!
NOTE: I have found that for the Zojirushi rice cooker, this function does not work as well with larger amounts of sticky rice (3+ cups). The result was a little more uneven than when I made 1-2 cups of rice, but it was still okay.
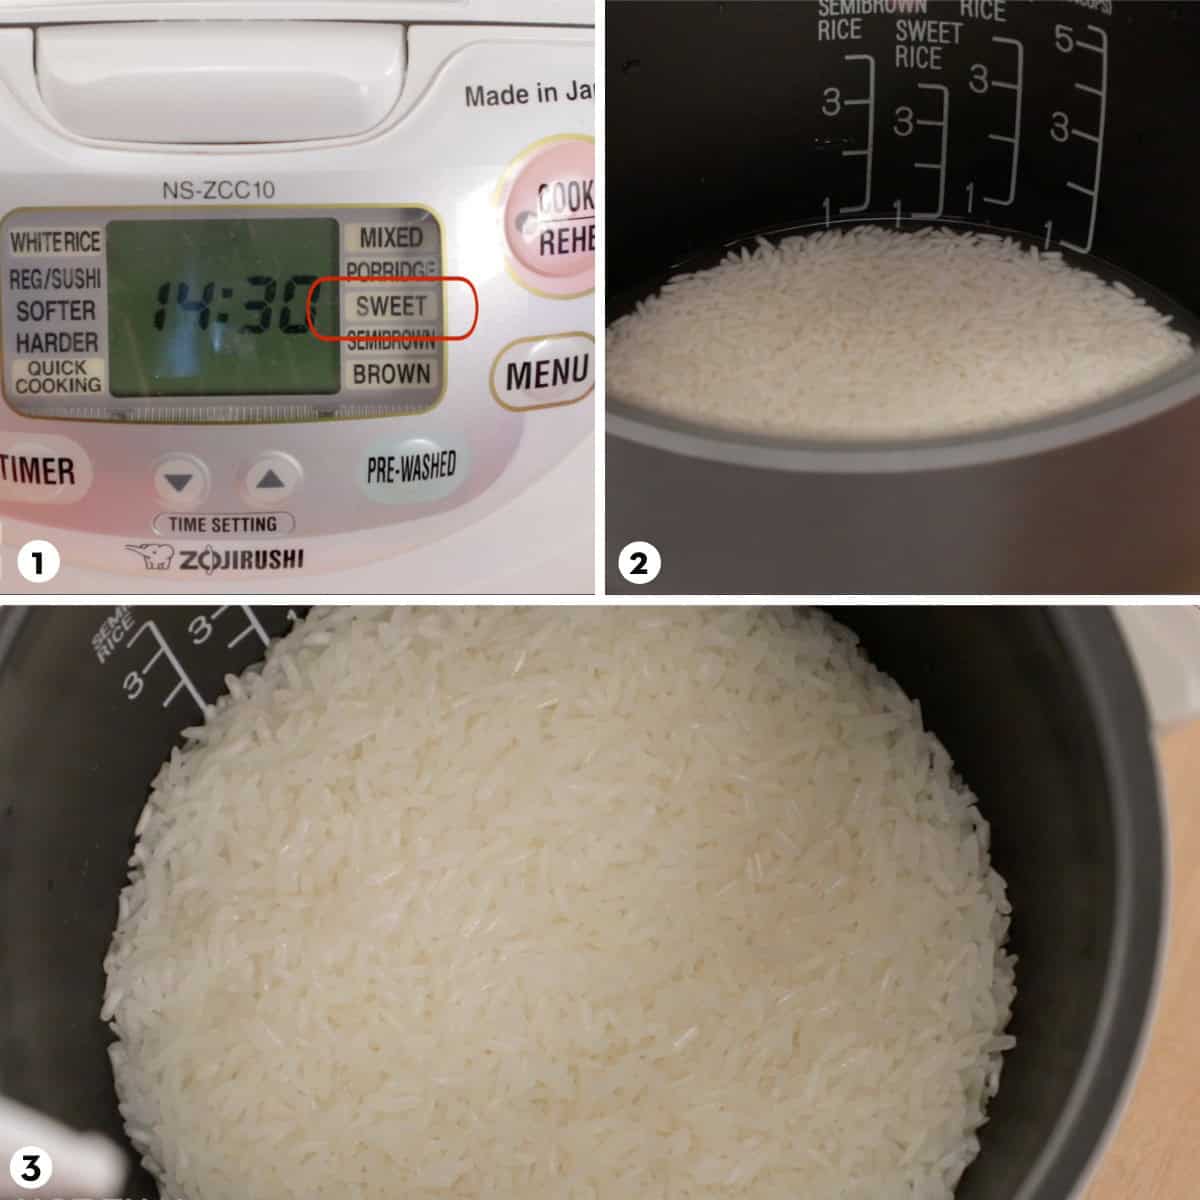
7. Microwave
Yes you CAN do it in the microwave, though it wouldn't be my go-to if I have other options available to me. It is the most finicky and the least hands-off of all the methods. But when you're in a dorm room and desperate for sticky rice, it'll do the trick!
After a few practice batches and fine-tuning to match your microwave and the amount of rice you typically cook, the result can be surprisingly decent.
IMPORTANT: As every microwave is different, treat the instructions below as a guideline. Also, the more rice you make, the longer it will take to cook. The timing below is based on 1 cup (240 ml) of sticky rice. You may need to adjust the timing, but the idea is that you want to microwave it in bursts, gradually decreasing in duration, and stir it in between for even cooking.
- Place the washed and drained rice into a heatproof bowl.
- Pour hot off-the-boil water over the rice so it comes up about ½ inch over the rice. Give it a stir to break up any lumps and soak for 15 minutes.
- Drain off the soaking water and rinse off excess starch with cold tap water. Drain the rice very, very well, then place it into a round glass or ceramic bowl.
- Add cold water to the rice at the ratio of 1 part rice to ½ parts water, the water should come up approximately to the level of the rice.
- Cover the bowl with a glass or ceramic plate and microwave on full power for 3 minutes. Take it out (carefully), stir the rice by flipping the bottom up to the top and the edges into the middle to evenly distribute the heating.
- Cover and microwave again for another 2 minutes, then repeat the stirring. Then microwave for another 2 minutes and, at this point, all the water should be absorbed and the rice is should be mostly cooked with perhaps some grains still slightly undercooked (uncooked sticky rice will be opaque white in the middle). Give it a final stir then cover and rest for at least 5 minutes, and it should all be cooked through and ready to serve.*If after resting the rice is still undercooked, stir in 1-2 tablespoon (15-30 ml) water and microwave again for another minute or so and repeat the resting process.
*The instructions here are slightly different from one in the video as I have made some adjustments.
How to Store and Reheat Sticky Rice
Short term storage in the fridge: Cooked sticky rice will last in the fridge for 1-2 days, but beyond that the texture will be compromised even when reheated. Be sure to store it in a tightly sealed container as it dries out quickly. For longer storage, freeze the rice.
How to Freeze Sticky Rice
Sticky rice can be frozen for about a month before it starts to dry out to the point where it doesn't reheat well. It won't spoil beyond that, you can still eat it, but it won't have as good of a texture.
Separate the rice into portions before freezing as it's impossible to separate the rice when frozen. Wrap each portion in plastic wrap or foil (foil will prevent freezer burn for longer), then consolidate them into a freezer bag, squeezing as much air out of the bag as possible.
How to Reheat Sticky Rice
To reheat with a microwave: Cover the sticky rice in moist paper towel and microwave until steaming hot. It needs to be fully reheated until piping hot or it will not regain its soft texture. If the rice is really dry, you may want to spray or drizzle a bit of water directly on the rice.
To reheat by steaming: Preheat the steamer so the water is boiling. Wrap the sticky rice in a clean damp muslin, damp tea towel, or damp paper towel, then steam until the rice is until piping hot all the way through.
Recipes Using Sticky Rice
Generally, we love to eat sticky rice with meats. Here are a few classic meat dishes that are often paired with sticky rice:
- BBQ Chicken or Thai Fried chicken
- BBQ pork skewers
- Northeastern Thai food such as laab or green papaya salad are always served with sticky rice.
- Or try it with northern Thai food, which is commonly eaten with sticky rice. You can dip it into the thick sauce of Hung Lay curry; or if you like carb-on-carb, it's fantastic with spicy curry glass noodle stir-fry.
We also feature sticky rice prominently in desserts:
- A popular classic that's a must-try during mango season: mango sticky rice
- For fellow durian lovers, durian sticky rice is absolutely divine.
- We eat sticky rice with ice cream! Any ice cream will work, but the classic pairing is this street-style coconut ice cream.
7 Ways to Make Thai Sticky Rice
Description
I've summarized all the sticky rice cooking methods here, but I recommend you first watch the video tutorial or read the blog post above for more detailed explanations and important tips!
Ingredients
Save this recipe!
- Thai glutinous rice, aka "Thai sweet rice". I recommend cooking around ⅓ - ½ cup uncooked sticky rice per person.
- Water, amount depending on method, see instructions below
Instructions
SOAK & STEAM METHODS:
Step 1: Wash your rice in room temp water for a few times until the water runs mostly clear. [Video 00:58] This is necessary regardless of which method you choose, otherwise you will end up with gummy rice!
Step 2: Soak your rice in plenty of room temp water for a minimum of 3 hours, preferably 4 (especially if your rice is old), and for up to 12 hours. [Video 01:45]
Step 3: Drain the rice and steam for 20-25 minutes (may take longer if making a lot), using any of the following implements (see video at the time indicated for details):
Bamboo Cone Steamer [Video 02:27].
- Bring about 2 inches of water to a boil in the pot, meanwhile soak the bamboo steamer in water.
- Place the drained rice into the bamboo steamer, cover with a lid, and steam for 15 minutes.
- Toss the steamer to flip the rice ball, then cover and steam for another 10 minutes until fully cooked.
Steamer Rack [Video 04:50]
- Bring water for steaming to a boil in a pot that has the same diameter as the steamer rack.
- Line the steamer rack with a damp muslin or tea towel, then place the rice in it, clearing a hole in the middle so the rice cooks faster.
- Fold the muslin over to cover the rice and steam for 25-30 minutes.
Metal Sieve [Video 06:39]
- Add water to a pot you're using to steam, making sure there is at least 1 inch of space between the water and the bottom of the sieve.
- Place the rice into the sieve and clear a hole in the middle. Don't completely fill the sieve as you need room for steam to come up.
- Cover with a lid and steam for 25-30 minutes.
Hot-Soak Sticky Rice [see this post for video tutorial]
Recommended if you are serving rice at room temp
- Soak the washed rice in hot-off-the-boil water for 20 minutes, make sure the water is covering the rice by ½-1 inch.
- Drain immediately then rinse with cold water.
- Steam as per usual using any of the implements from methods 1-3.
NO SOAK METHODS (cooking rice in water):
Step 1: Wash your rice. [Video 00:58]
Step 2: Drain your rice EXTREMELY WELL. You want to use a sieve, then shake and shake until water is no longer dripping from the rice. As I mentioned above, sticky rice overcooks very easily. So if we're going to cook sticky rice IN water it's important that you do not accidentally use too much water by not draining well enough.
Step 3: Cook the rice using any of the methods below
No Soak - Steam-the-Bowl [Video 10:56]
- Place the washed rice into a heat proof bowl and add the water using the ratio of 1 part rice to ⅔ parts water by volume. Cover with a plate and steam the bowl using whatever steamer set up you have for about 30 minutes.
No Soak - Rice Cooker [Video 12:32]
- Cook the rice the way you normally would in the rice cooker, but use the water ratio of 1 part rice to ⅔ parts water by volume.. This does not work for every kind of rice cooker, please see details on this in the blog post above.
No Soak - Microwave [Video 14:52, though I have modified this slightly from the method shown in the video]
Every microwave is different, you'll need to adjust the timing accordingly! More details on this in the blog post above.
- Place the washed and drained rice into a heatproof bowl.
- Pour hot off-the-boil water over the rice so it comes up about ½ inch over the rice. Give it a stir to break up any lumps and soak for 15 minutes.
- Drain the soaked rice and rinse off excess starch with cold tap water. Drain very, very well, then place the rice into a glass or ceramic, microwave-safe bowl.
- Add cold water to the rice at the ratio of 1 part rice to ½ parts water, the water should come up roughly to the level of the rice.
- Cover the bowl with a plate and microwave on full power for 3 minutes. Take it out, stir it, flipping the bottom up to the top, then microwave another 2 minutes. Stir again, then microwave for another 2 minutes, at this point, all the water should've been absorbed and the rice is should be mostly cooked with some grains still have some opacity in the middle. Give it a final stir then cover and rest for at least 5 minutes before serving. *If after all this the rice is still undercooked, add 1-2 tablespoon (15-30 ml) water, stir it in, and microwave again for another minute and repeat the resting process.



Horace Jacquin says
Cách bạn sắp xếp các luận điểm rất sáng tạo, giúp người đọc dễ dàng tiếp cận nội dung.
Pailin Chongchitnant says
You use the 1 to ⅔ ratio for any rice cooker, on any mode. The amount of water does not change regardless of what rice cooker you use. None of these methods apply to jasmine rice, only sticky rice, jasmine rice you just stick it in the rice cooker and use 1 part rice to 1 ⅓ - 1 ½ parts water, depending on the brand of rice.
Brooke Hoyer says
Did the video go missing? I can't find it in the article.
Bazil says
yes. link has disappeared.
The video is still on youtube though; just search there for "pailin's kitchen sticky rice"
Charles Pascual says
Terrific sticky rice - best I've made. Thank you for all the directions, tips, and the video. I used your "soak & steam" method, with a metal steamer basket and pre-soaked cheesecloth. It's foolproof - thank you. I served it with your Hat Yai style fried chicken and corn cucumber salad (tum tang kao poad).
MK says
Thank you so much for making the video and for your website. Wow, lots of great stuff here! I have been looking for the just-right way to make Thai sticky rice, and here are several. Awesome!
Jenny says
Hello, I have a steam oven. Can you make sticky rice in this, and if so,how? Thanks!
Pailin Chongchitnant says
I don't have experience with that, however, is there a steam-only option? If so, you can treat it like a stovetop steamer.
Beth says
Hi. Quick question: I have an instant pot and planning to cook 3 cups sweet rice. Which method should I follow? If I am steaming (instant pot), for how long do you think?
Adam from HTK says
Hi Adam here and she tells me "I don’t recommend instant pot for sticky rice. Use one of the 7 methods shown." So there you go 🙂 Cheers!
Karen says
Hi Pailin
I soak 1 cup of sticky rice for 4 hours then drain the water off.
I want to use a rice cooker - how much water do I add to cook?
Thank you. Love your YouTube videos.
Pailin Chongchitnant says
Hi Karen, if you soak sticky rice, you cannot cook it in a rice cooker (unless you have a steaming rack for your rice cooker). You have to steam it out of water because it's already saturated.
Lori says
Where may I find a lid for the bamboo steamer? Many thanks!!
Adam from HTK says
Hi Lori and Adam here - as she mentions at around 3:22 in the video people tend to use whatever is at hand, but in this case she's using the lid from your typical dimsum container. Cheers!
Matt says
I get away with a piece of aluminum foil or a pie tin, watch out, the steam is hot!
Mirte says
Hi Pailin, don’t you use salt in your rice?
BTW, I love your recipes!
Adam from HTK says
Hi Mirte, and nope salt isn't added to Thai (or most Asian) white rice. Cheers! Adam
Mai says
Hi Pai. I have the same rice maker in your video and wanted to ask, instead of water, can I use coconut water? Thank you for the amazing and easy-to-follow videos!
Pailin Chongchitnant says
Sure you can use any liquid, not sure how that would taste though... If you want to make coconut rice, check out my coconut rice recipe!
Amanda says
Hi Pai! LOVE your youtube channel! In your video you say don't use the mark in the zoji because it's for Japanese sticky rice- what type is Hakubai? What measurements would I use for that brand? Can't wait to try it. Your tips for the Thai jasmine rice were excellent.. I LOVE my zoji.. only got it because of your review!!
Pailin Chongchitnant says
If it's Hakubai sweet rice, you can use the sweet rice line in the zoji as that's japanese sticky rice. Thank you, glad you've enjoyed it!!
Dan says
Hi!
Love all of your recipes!
Do you have any additional tips for when cooking with black sticky rice and white sticky rice mixed together? Should I par cook the black rice at all?
Pailin Chongchitnant says
So, if you ask other Thai people, they'd say no, but they also will end up with black sticky rice that's harder than I like it. So I do cook the black sticky rice first, and this method is written in detail in my mango and sticky rice recipe in my cookbook BTW. In short, I soak the black rice separately, then boil it until it's cooked but not burst open, then I steam it with the white rice. You will not overcook the black rice this way.
Dan says
Ohhhh of course! I have the book - knew I had read this somewhere!
Thank you. Will give the pre cooking of the black rice a go 🙂
Laura says
Where is the link for the vídeo? I can’t find it anywhere on the page 🙁
Thien says
Hi Laura, I think the video doesn't show when you have an ad blocker. Here is the link
https://www.youtube.com/watch?v=YcTo0ZM8Iqg
Adam The HTK Intern says
Yep 🙂 Cheers! Adam
Bethany says
Love my Zoji! Have you found there is an upper limit to the amount of sticky rice you can cook in a rice cooker? Is it only good for small quantities?
Pailin Chongchitnant says
Yes, when I cooked a larger amount recently,it wasn't as good. I don't remember exactly how it was different, but I think this might be able to be mitigated by some fiddling with water amounts and perhaps a brief soaking time.
Adam The HTK Intern says
What Thien said 🙂 Cheers! Adam
Adam The HTK Intern says
Hi! Sorry I just saw this - it's under "SHOW MORE" at he tope of the post. Cheers! Adam
will says
Great Video ... comprehensive understanding of sticky rice... I had no idea about bamboo lids ... money in the bank ... Thanks, Pai
Cyntha says
So helpful! I’ve cooked sticky rice for years in a bamboo steamer but I will cook it even better now, thanks to all your tips. I had no idea that I should soak the basket first and then I could simply flip the rice. Wow! I finally figured out to use cloth on my own, after cleaning out way to many baskets. I will try what you mentioned. Thank-you!
Tom says
Perfect
Pen says
Question when you say 1 parts rice to 2/3 water... do you mean use the white cup that comes with the Rice cooker or do you mean 1 cup (traditional measuring cup)?
Heather says
Pai, thank you so much for your recipes (your Pad Thai is perfect), experience and knowledge! I travelled to Thailand in the 90's and remember sticky rice fondly. I'm a trained Chef as well but have never made it! I've been on a real culinary tour of S.E. Asia since the fall and with COVID keeping me at home. (Bubble of 1). It took me 4 times before I got this right.lol. I kept missing a step or followed another recipe and the rice was dry and hard each time. I've been making Dim Sum to put in my freezer and wanted to make Lo Mai Gai with 2 failed attempts at that too. I just did your soak, steep, donut hole, bamboo steamer method and remembered to moisten the cloth and leave space around the rice this time. Success! Tomorrow I'll try it without steeping to see if I can have success with that. Thank you! Now I can make Lo Mai Gai to add to my Dim Sum inventory!
Nicole says
I am a huge fan of sticky rice. Had it all my life. For many many years I have used Nishiki sticky rice. Considered top brand and cost a bit more money. Is Thai sweet sticky rice that much different? I want to buy a bag of Thai sticky rice but wanted to know if there was a big difference.
Rena says
Can I use jasmine rice?
Adam from HTK says
Hi Rena! If you mean can you make sticky rice with Jasmine rice then no you have to use some form of "glutinous rice" ... https://en.wikipedia.org/wiki/Glutinous_rice Cheers!
Rena says
What brand of glutinous rice do you recommend?
Pailin Chongchitnant says
Hi Rena, I am not attached to a particular brand. I found that as long as it's a product of Thailand, they're all fine.
John D'Cunha says
As always beautifully explained..Thanks Pailin
Beau says
I love sticky rice, but I've failed to make it on my own for years. I thought it was due to not having the right equipment, but it was more about technique. Now I'm so excited to make stick rice again and again!
Eric DeWitt says
This made making sticky rice so easy and perfect every time. Thanks Pailin!