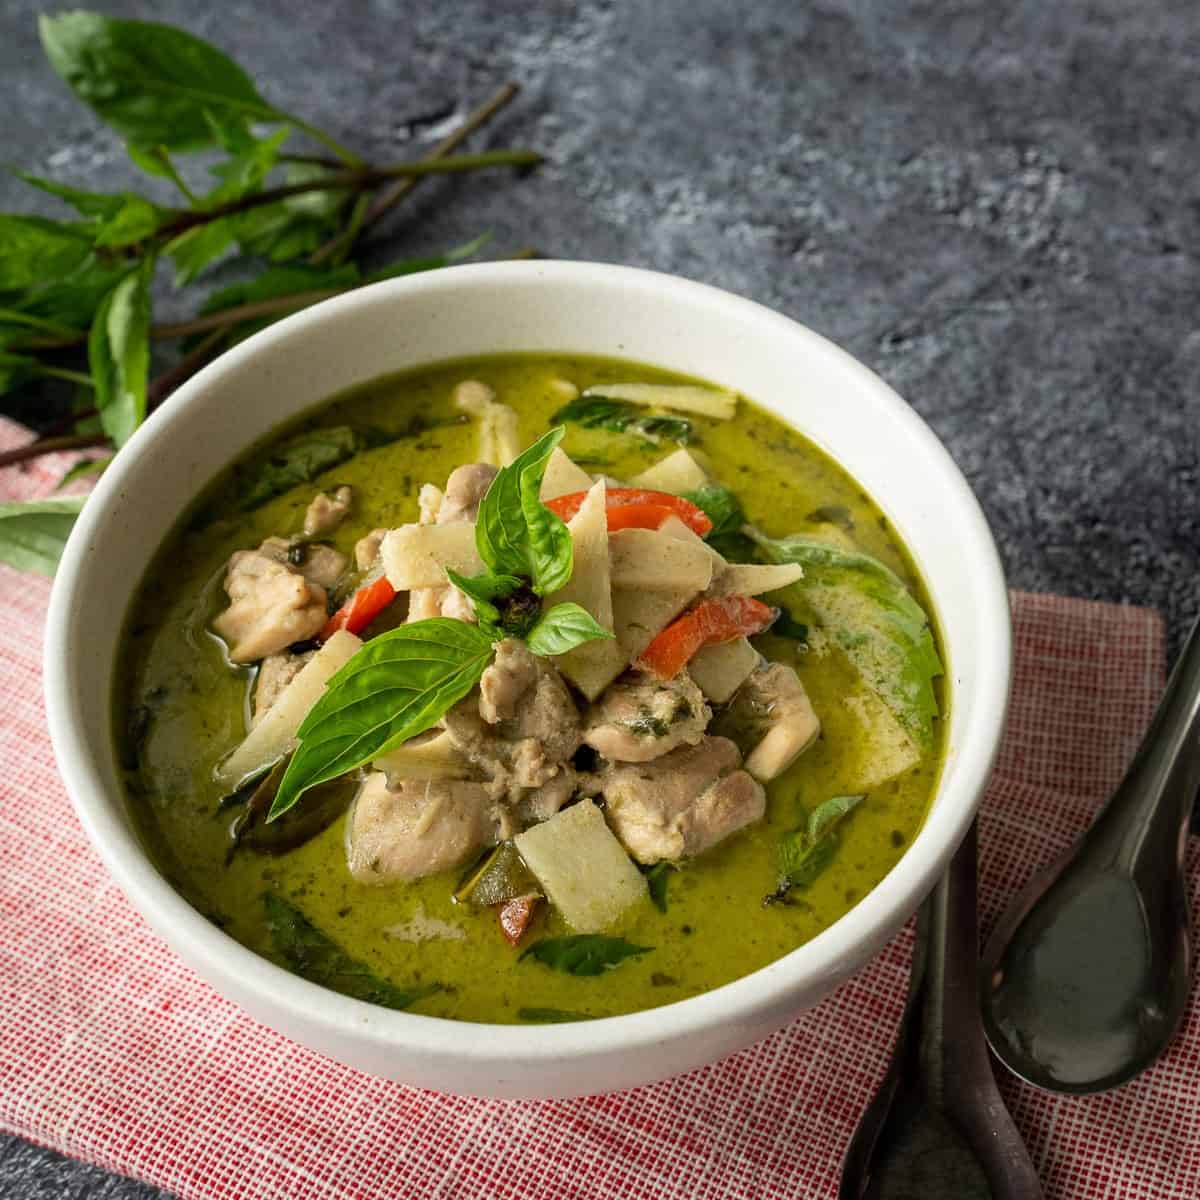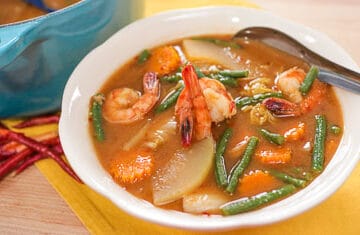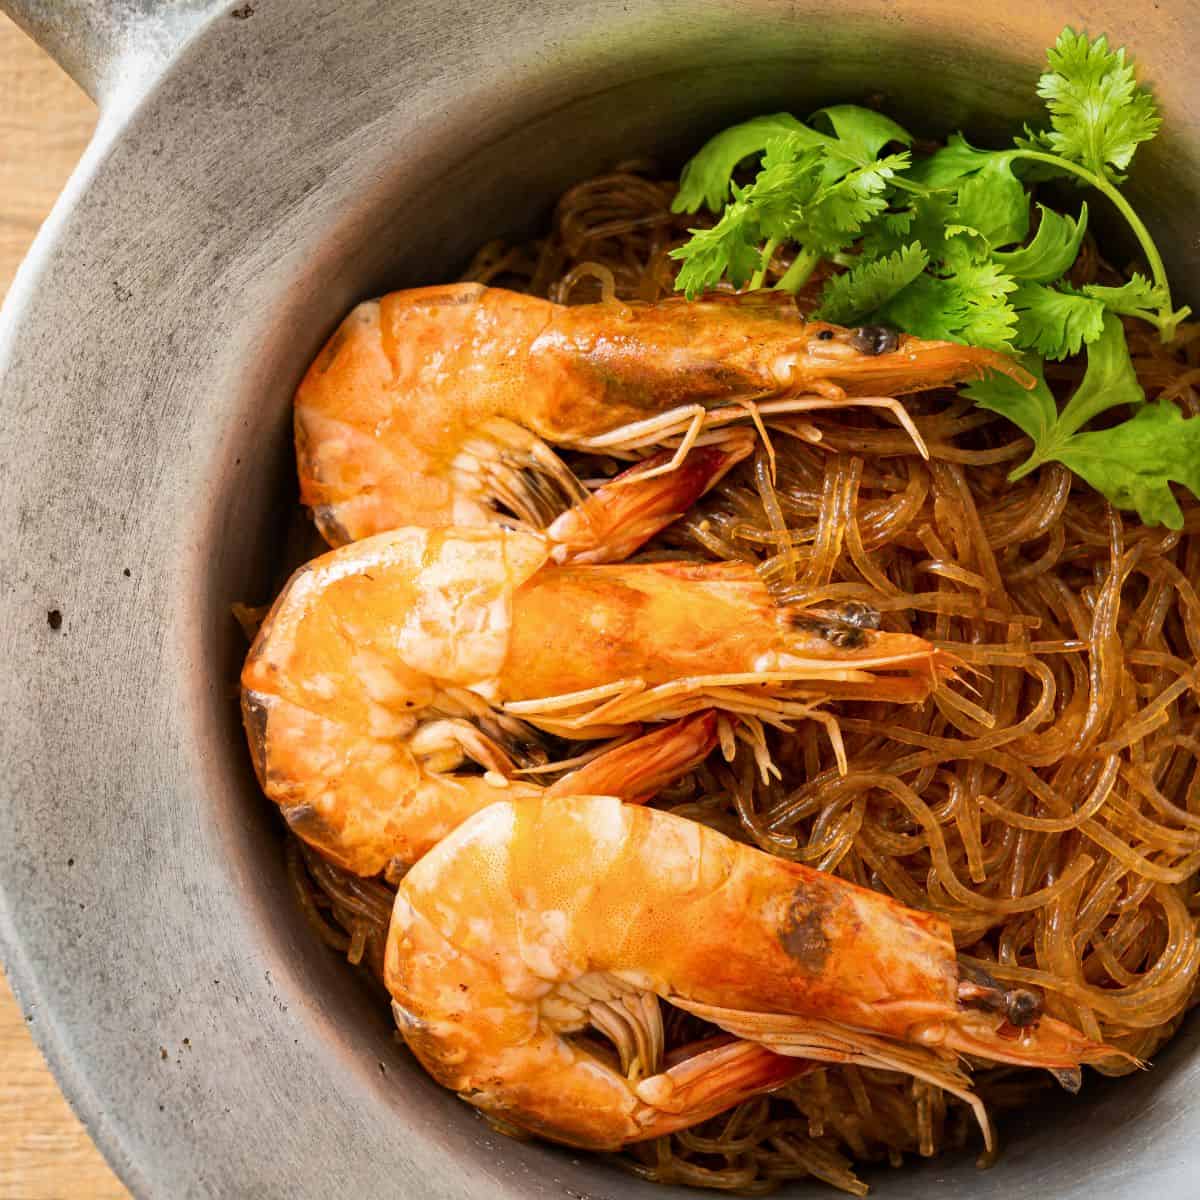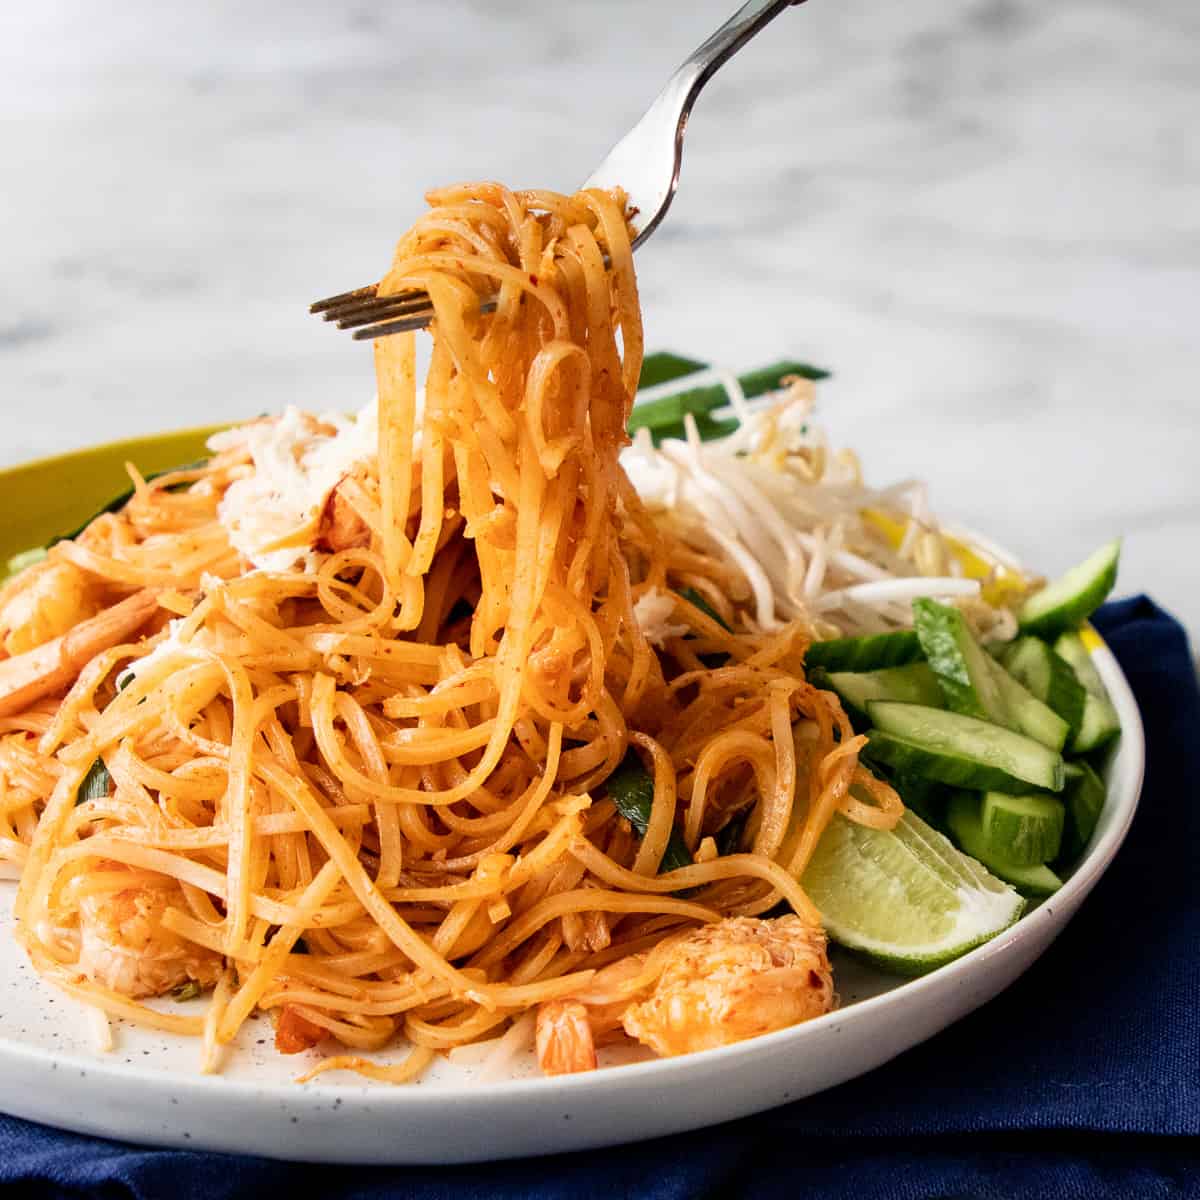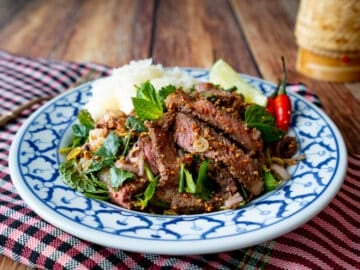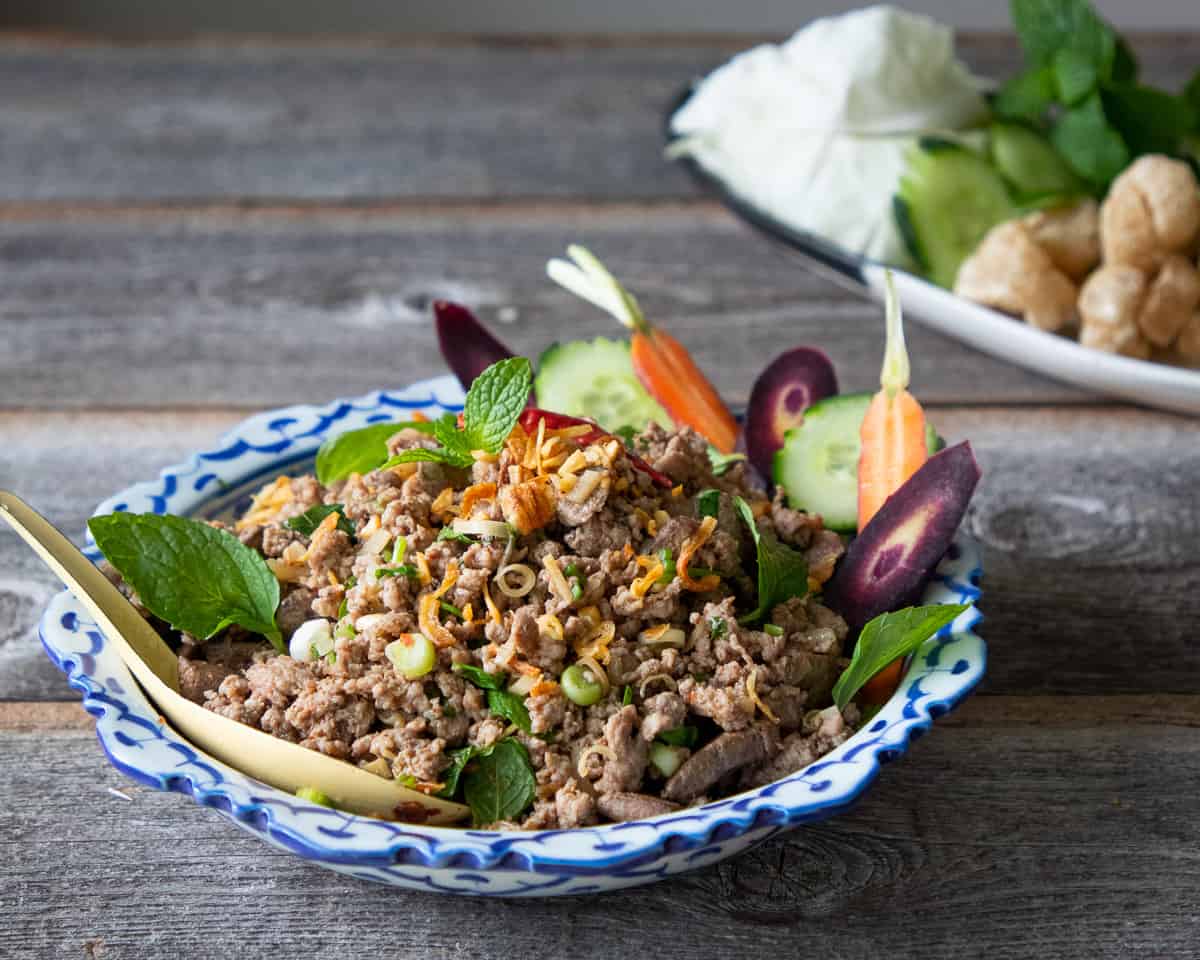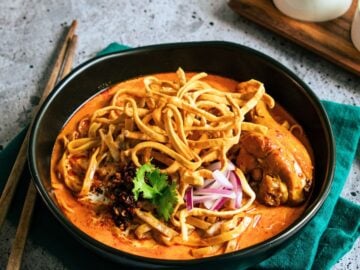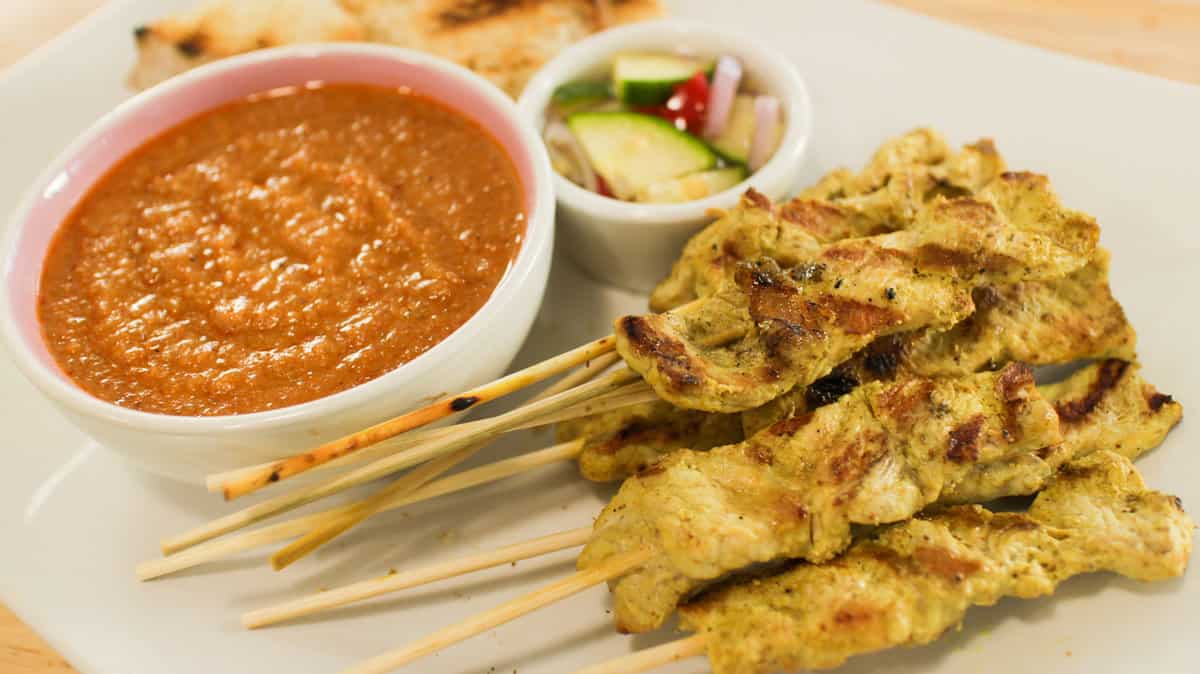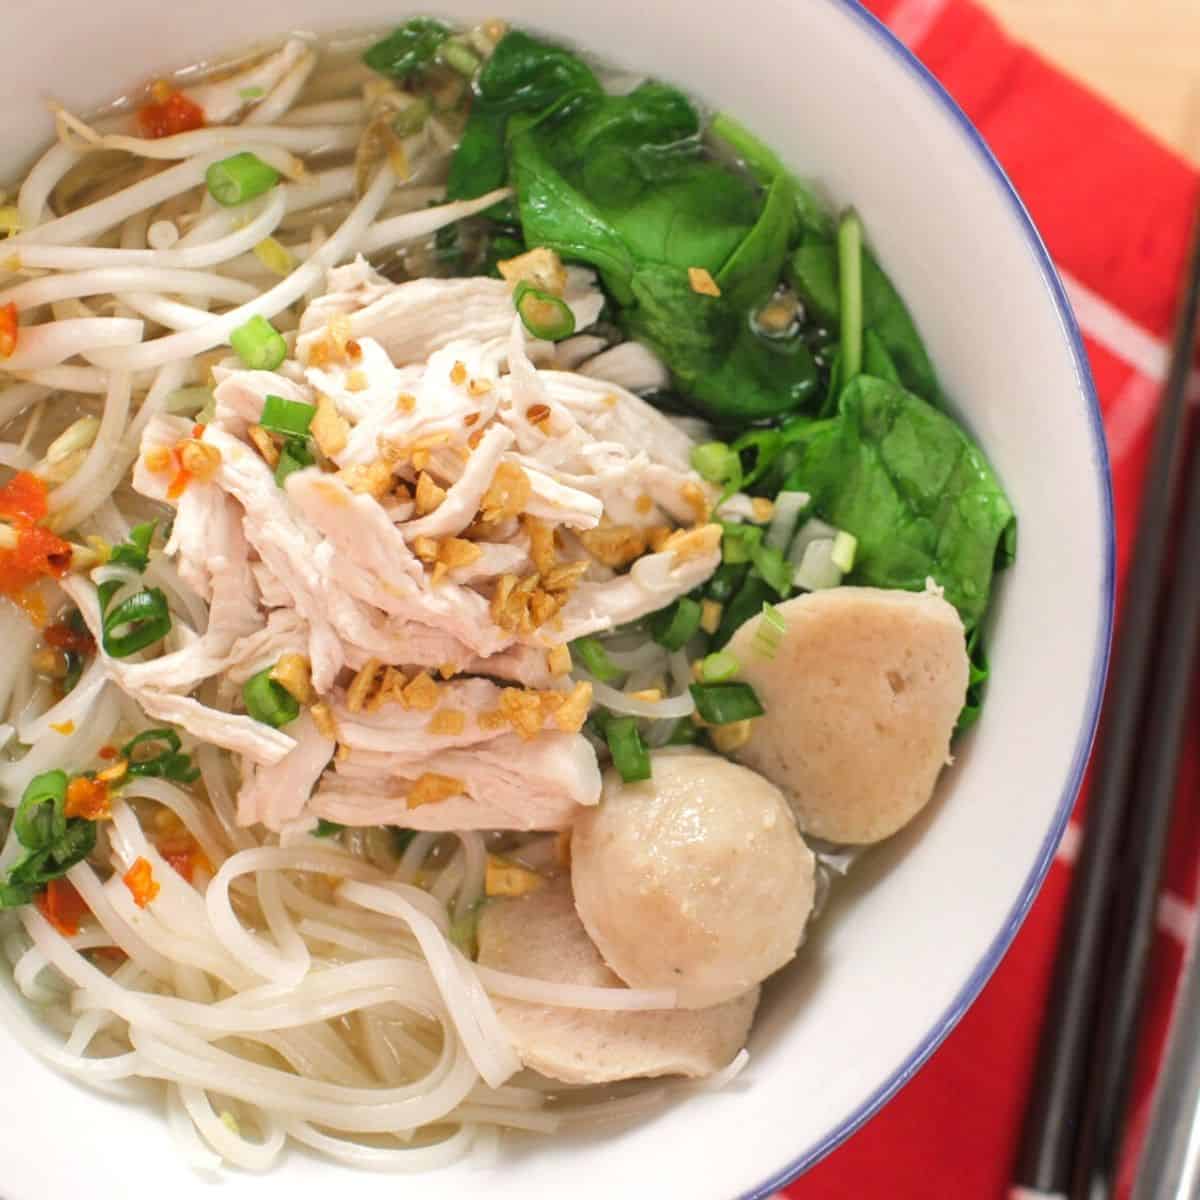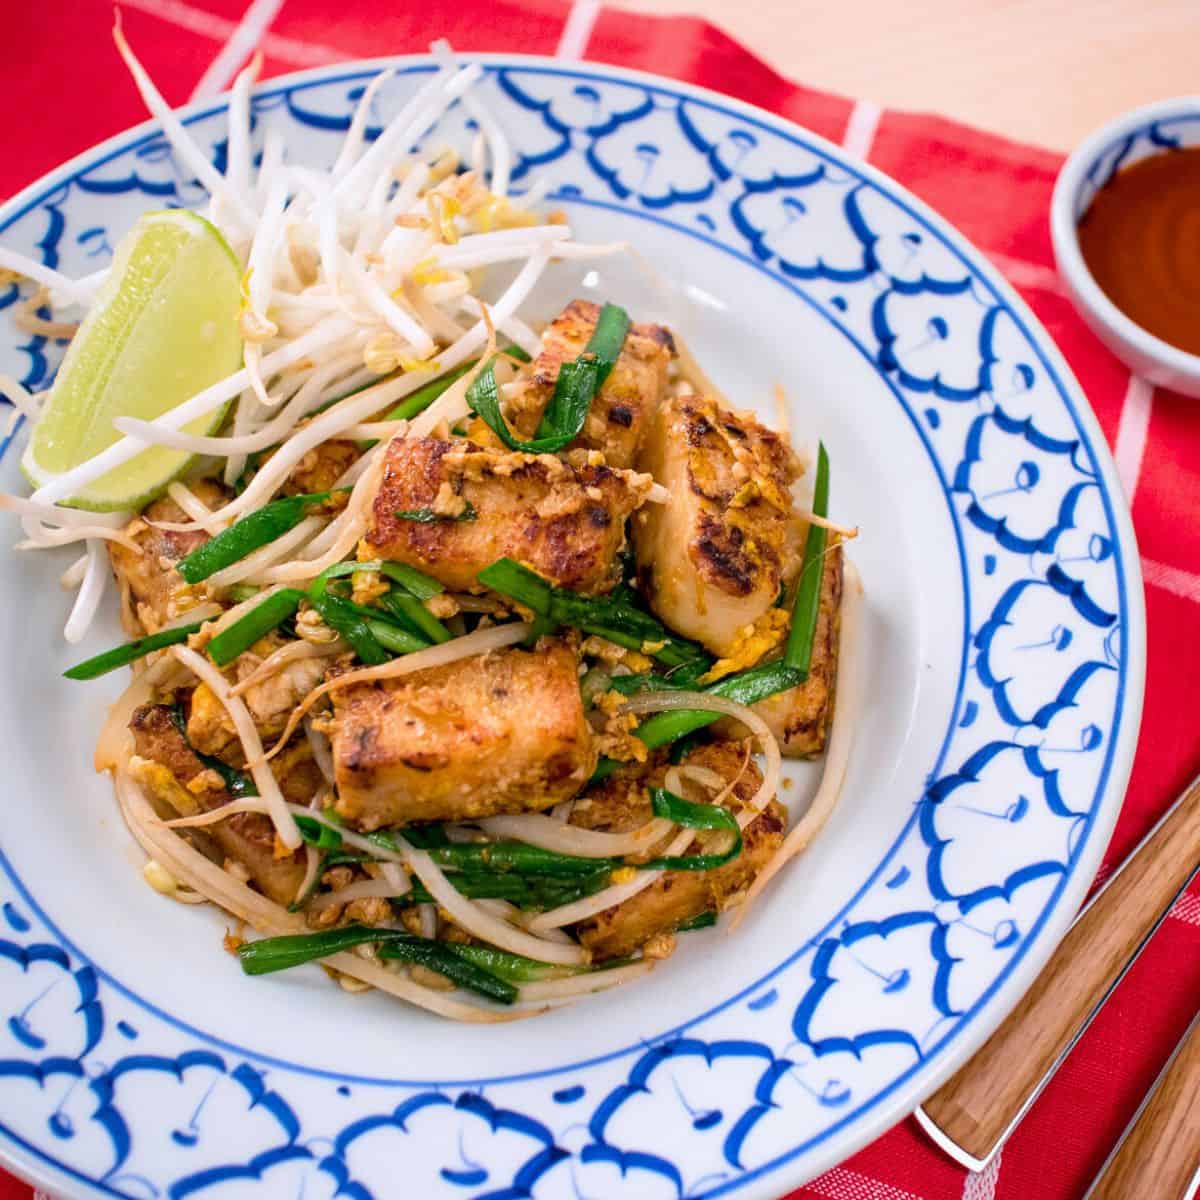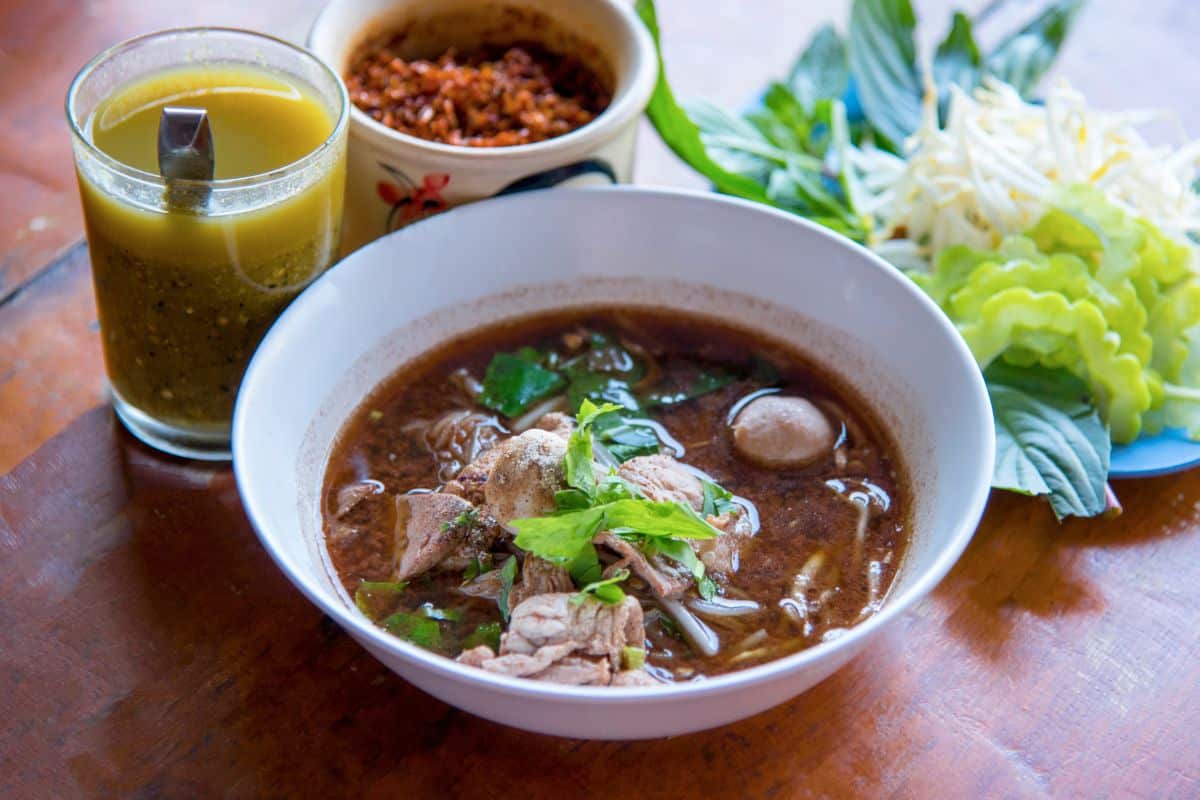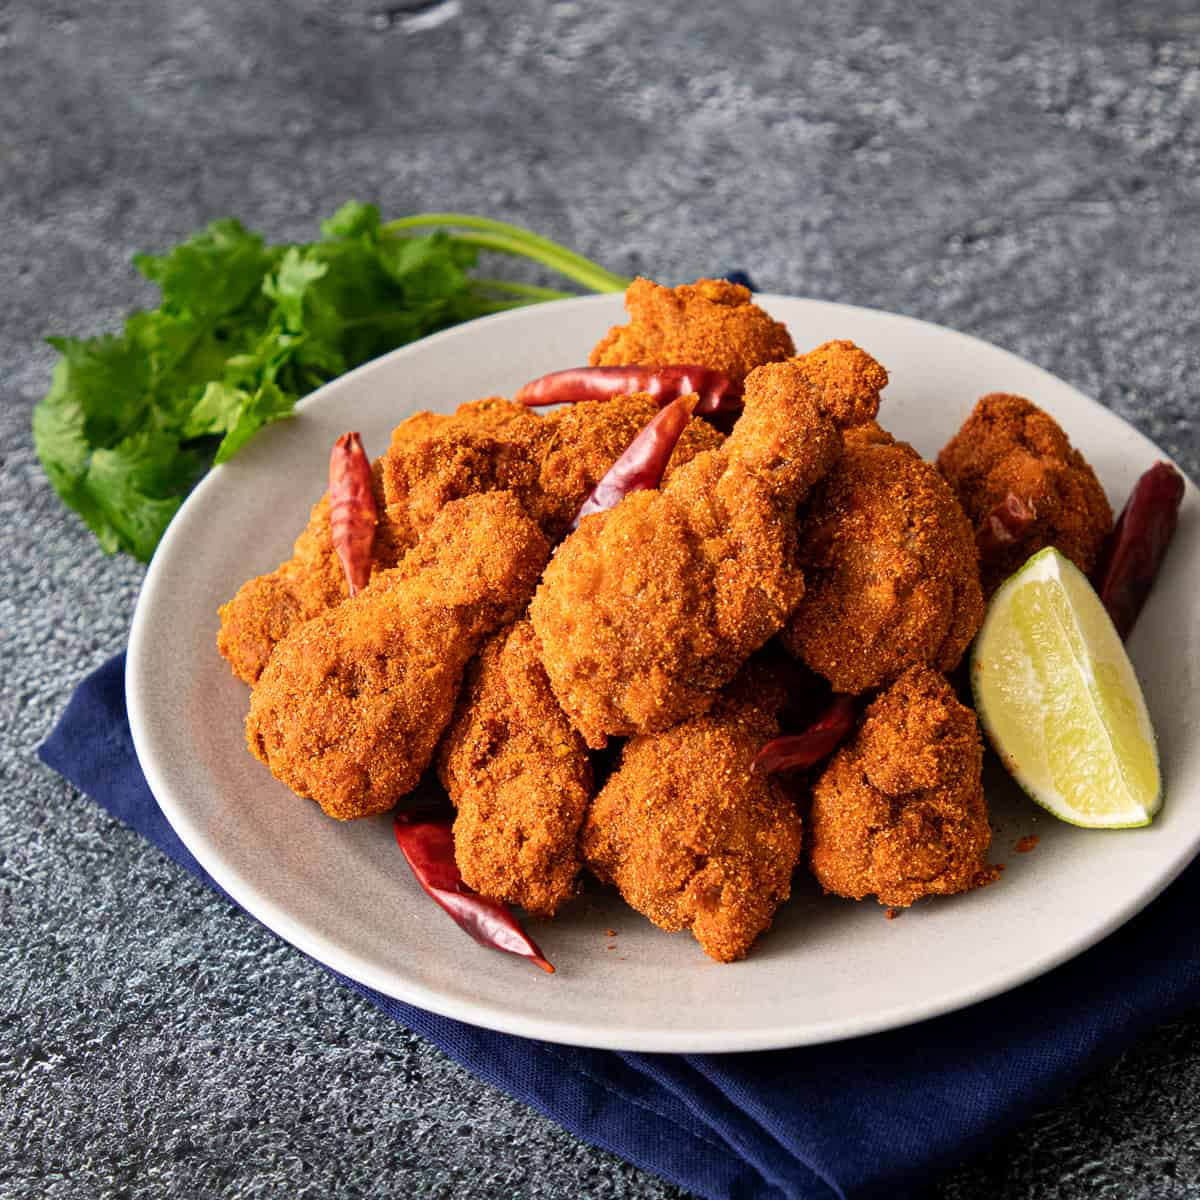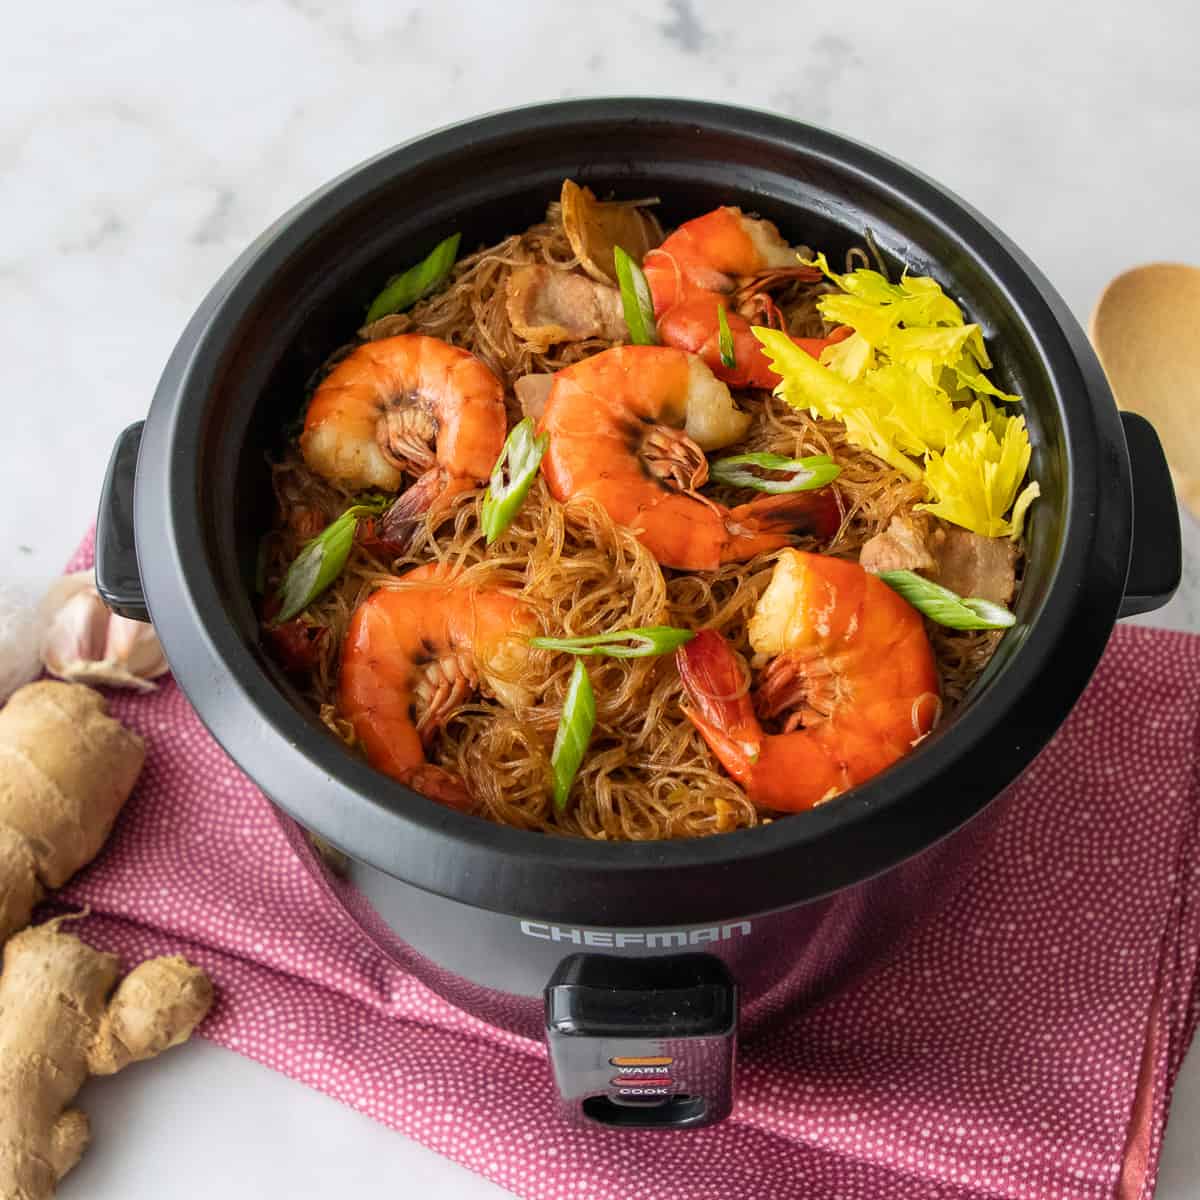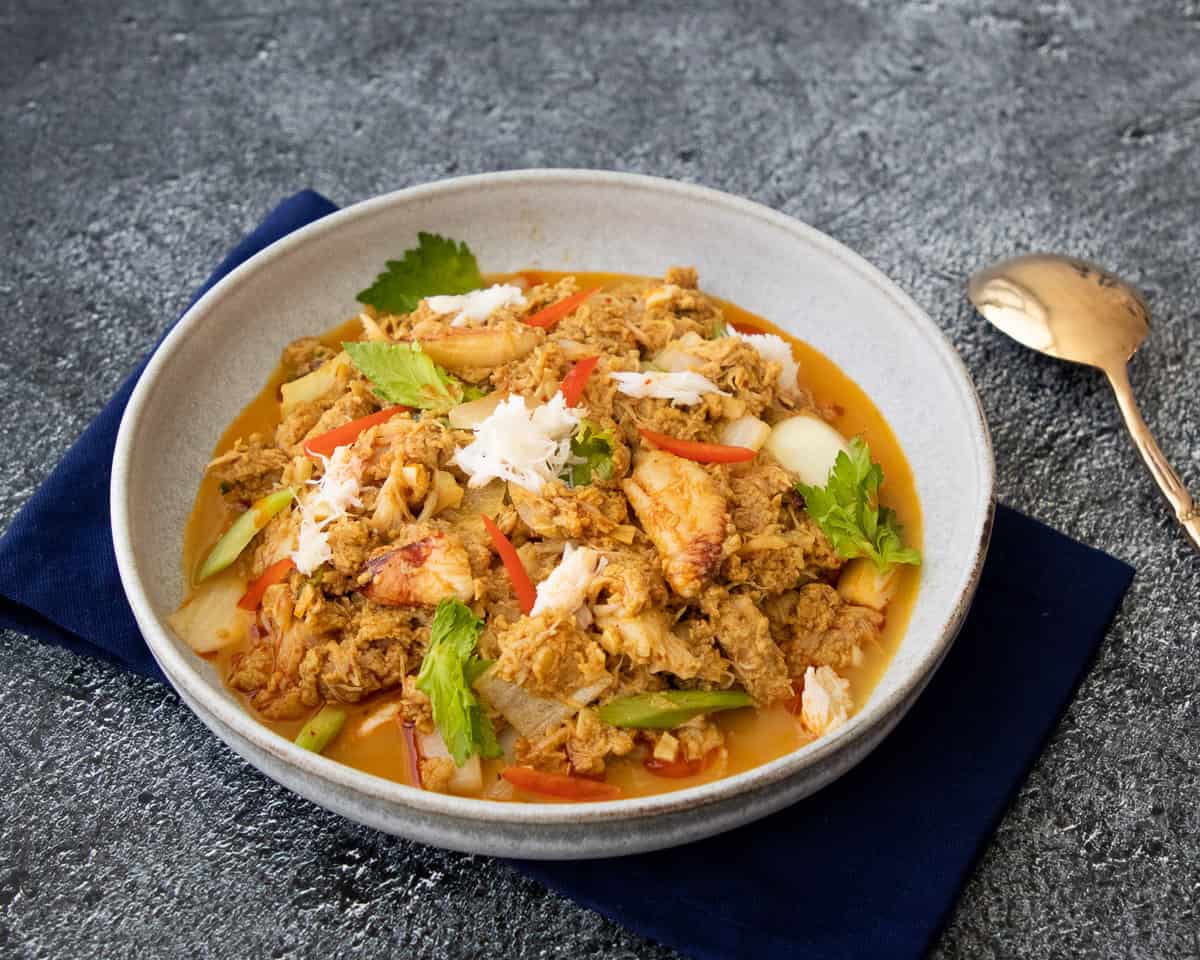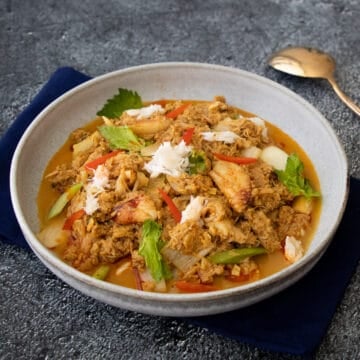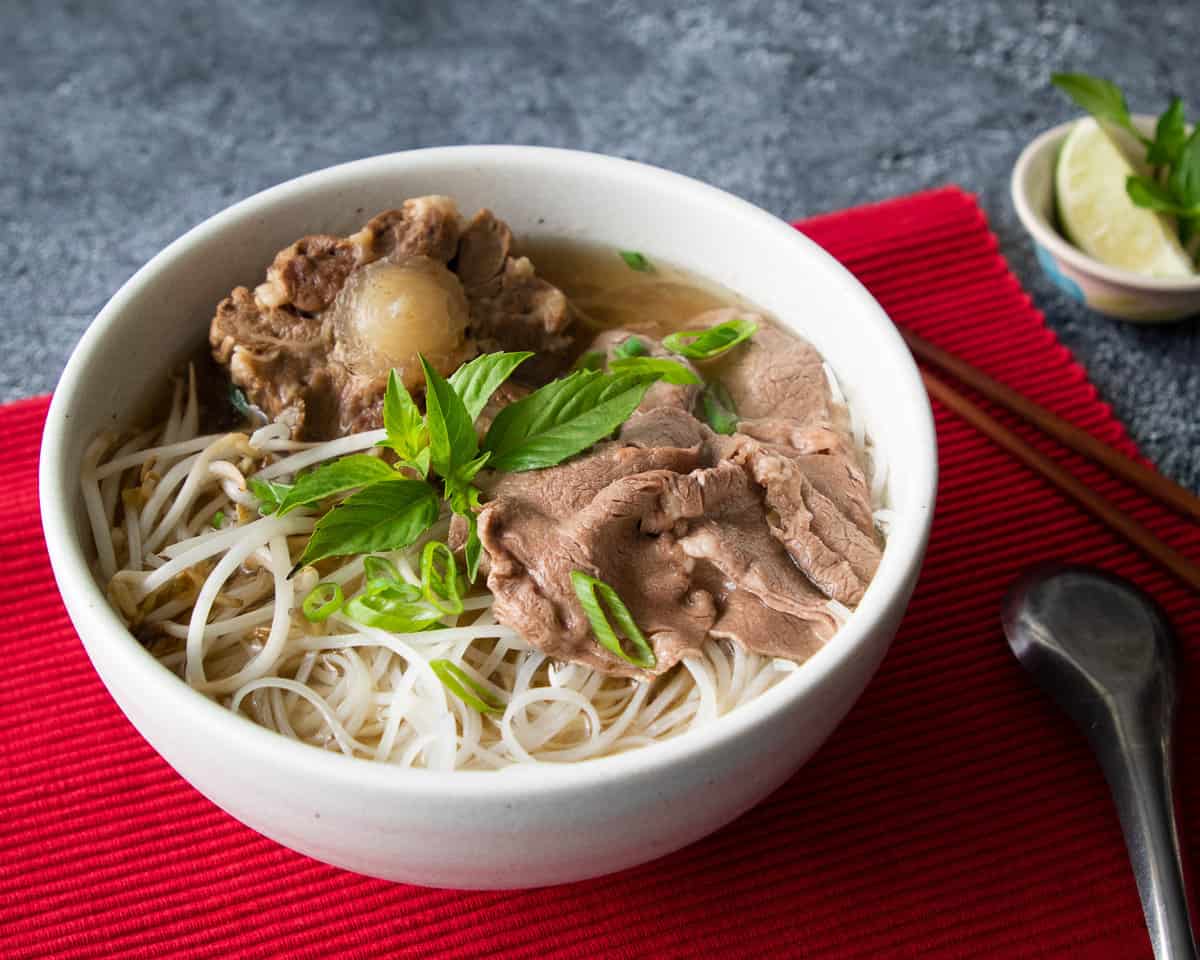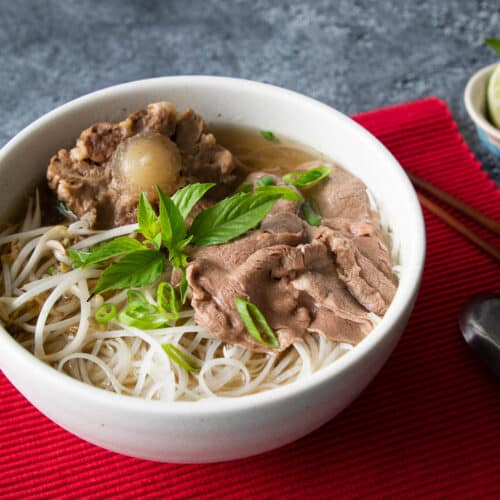
One of the most iconic dishes in Thailand is boat noodles or guay tiew ruea. Thai people LOVE boat noodles, and every time I have it, I am amazed by how much flavour can be packed into such a small bowl. This recipe will give you boat noodles that taste just like what you get in Thailand, I promise!
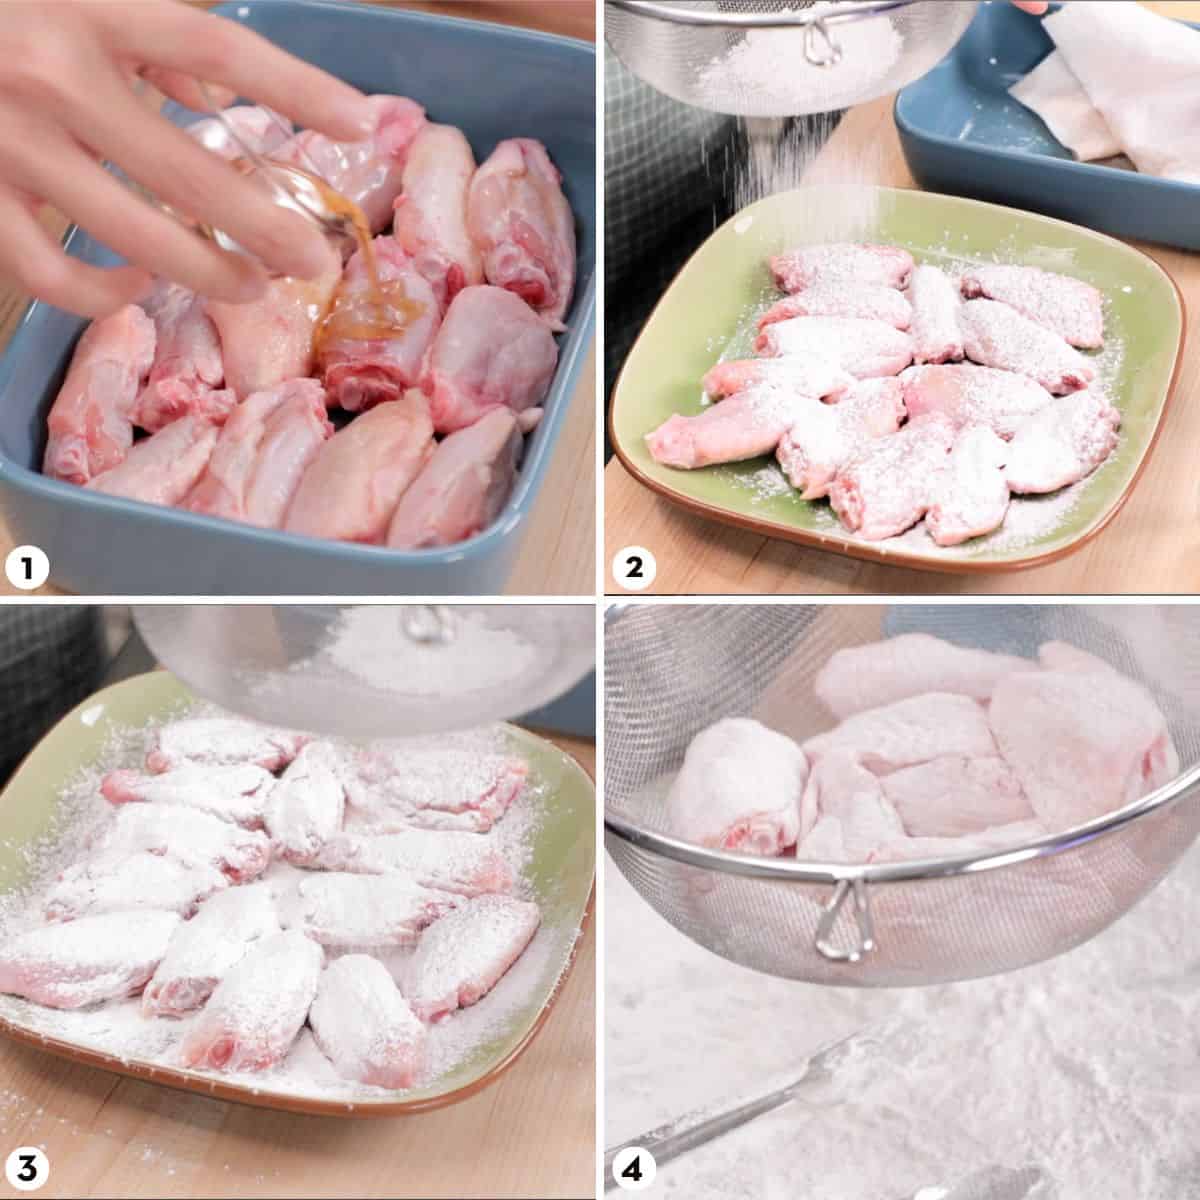
It’s a complex dish with a lot of ingredients (that’s why it’s so good) but it is not that hard to make. The broth takes a bit of time, but it is SO worth it, and this can be made in advance. In fact, once the broth is made, the rest is quick and weeknight friendly!
What is boat noodles?
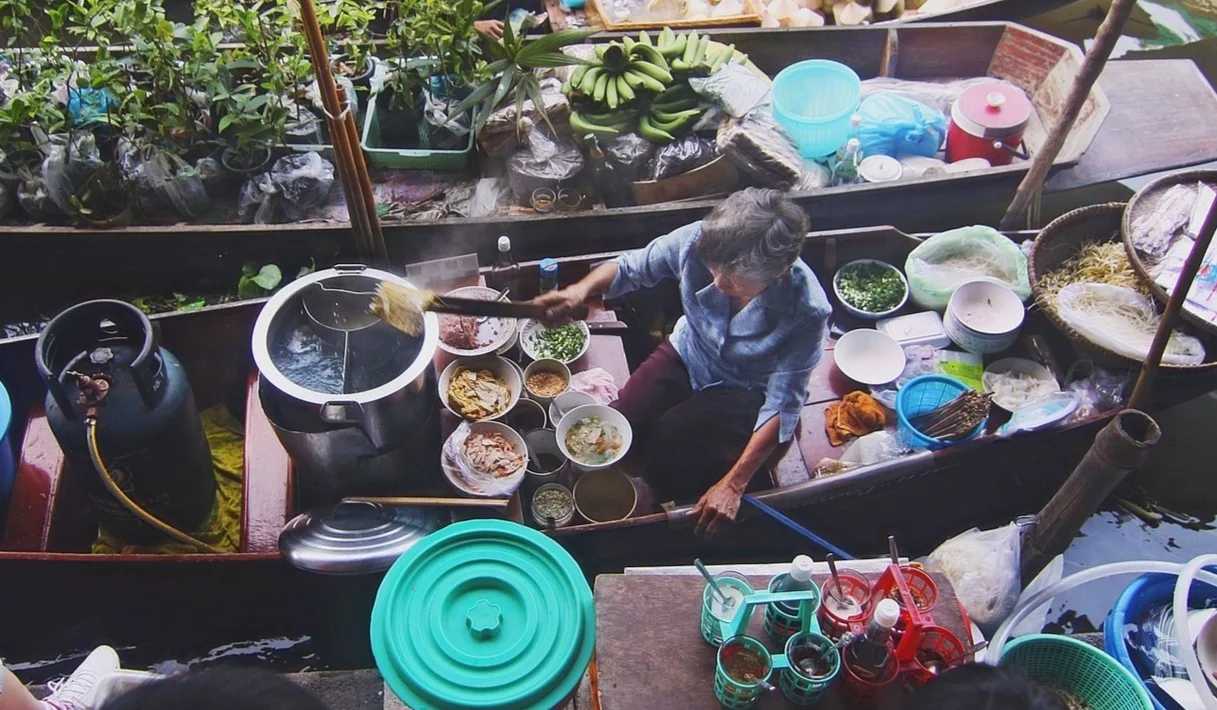
"Boat noodles" is a direct translation from the Thai name, guay tiew ruea. It's so named because originally they were actually sold from boats along Bangkok's canals; though nowadays most vendors have moved on land, and you can find them all over the country.
This is why boat noodles in Thailand come in little bowls - it wasn't practical to pass around large bowls of hot soup on a wobbly boat. So it's not uncommon for someone to eat 3-5 boat noodle bowls in one meal!
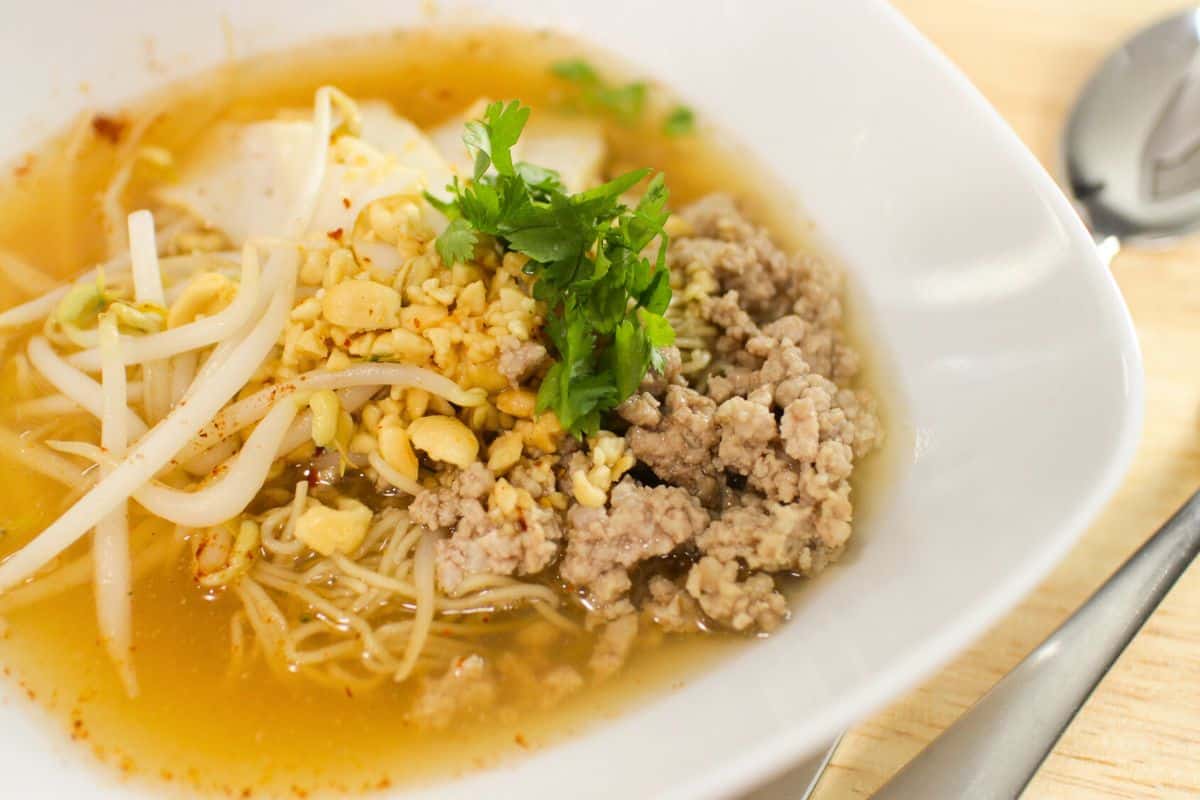
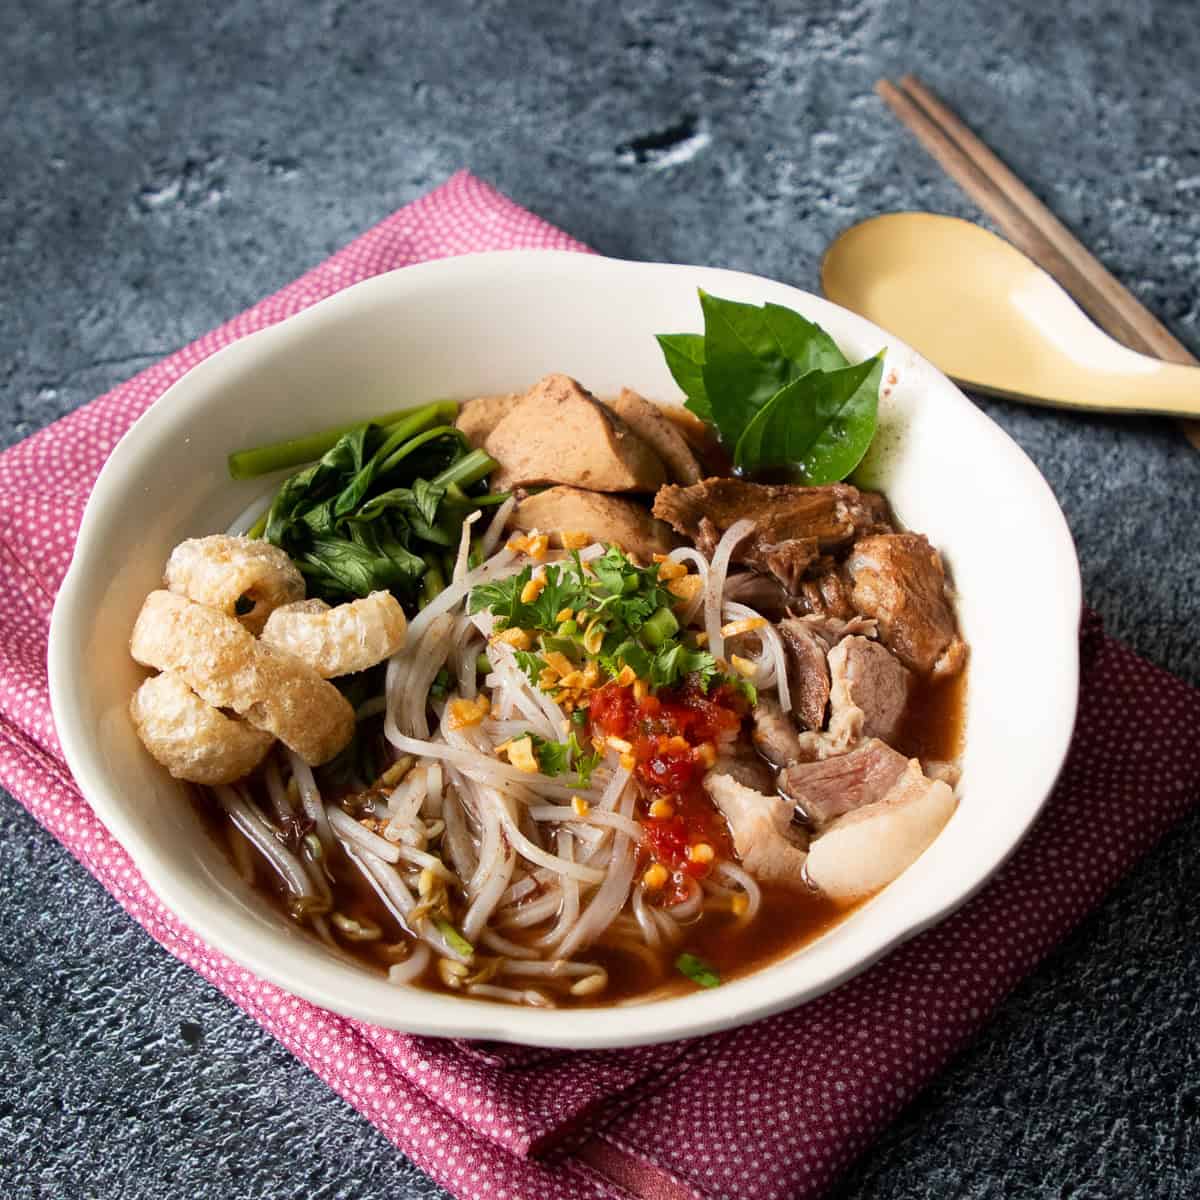
The heart of boat noodles is the uniquely aromatic and rich broth. The broth is dark thanks to the various soy sauces, and it has a lot of herbs and spices infused into it. The most unique part about boat noodles is that it is extra rich due to the added blood! (Before you get squeamish, it doesn't taste like blood at all, but it's optional.)
What is guay tiew ruea nam tok?
You'll often hear boat noodles referred to as guay tiew nam tok. "Nam tok" means waterfall, and it refers specifically to boat noodles with the blood added. Nam tok tends to be the default (unless you're at a touristy place), so when you're ordering boat noodles in Thailand, if you don't want the blood you'll have to say mai tok (no waterfall).
But why does "waterfall" mean blood? While it is not proven, the most popular story seems to be this: Back in the day vendors would have the raw sliced meats sitting on ice on top of a woven bamboo tray, and over time, the meat juices and ice would melt and "fall" through the tray into a receptacle below. Vendors would then use meat dripping to add back into the bowl. Nowadays fresh blood is used instead of these drippings.
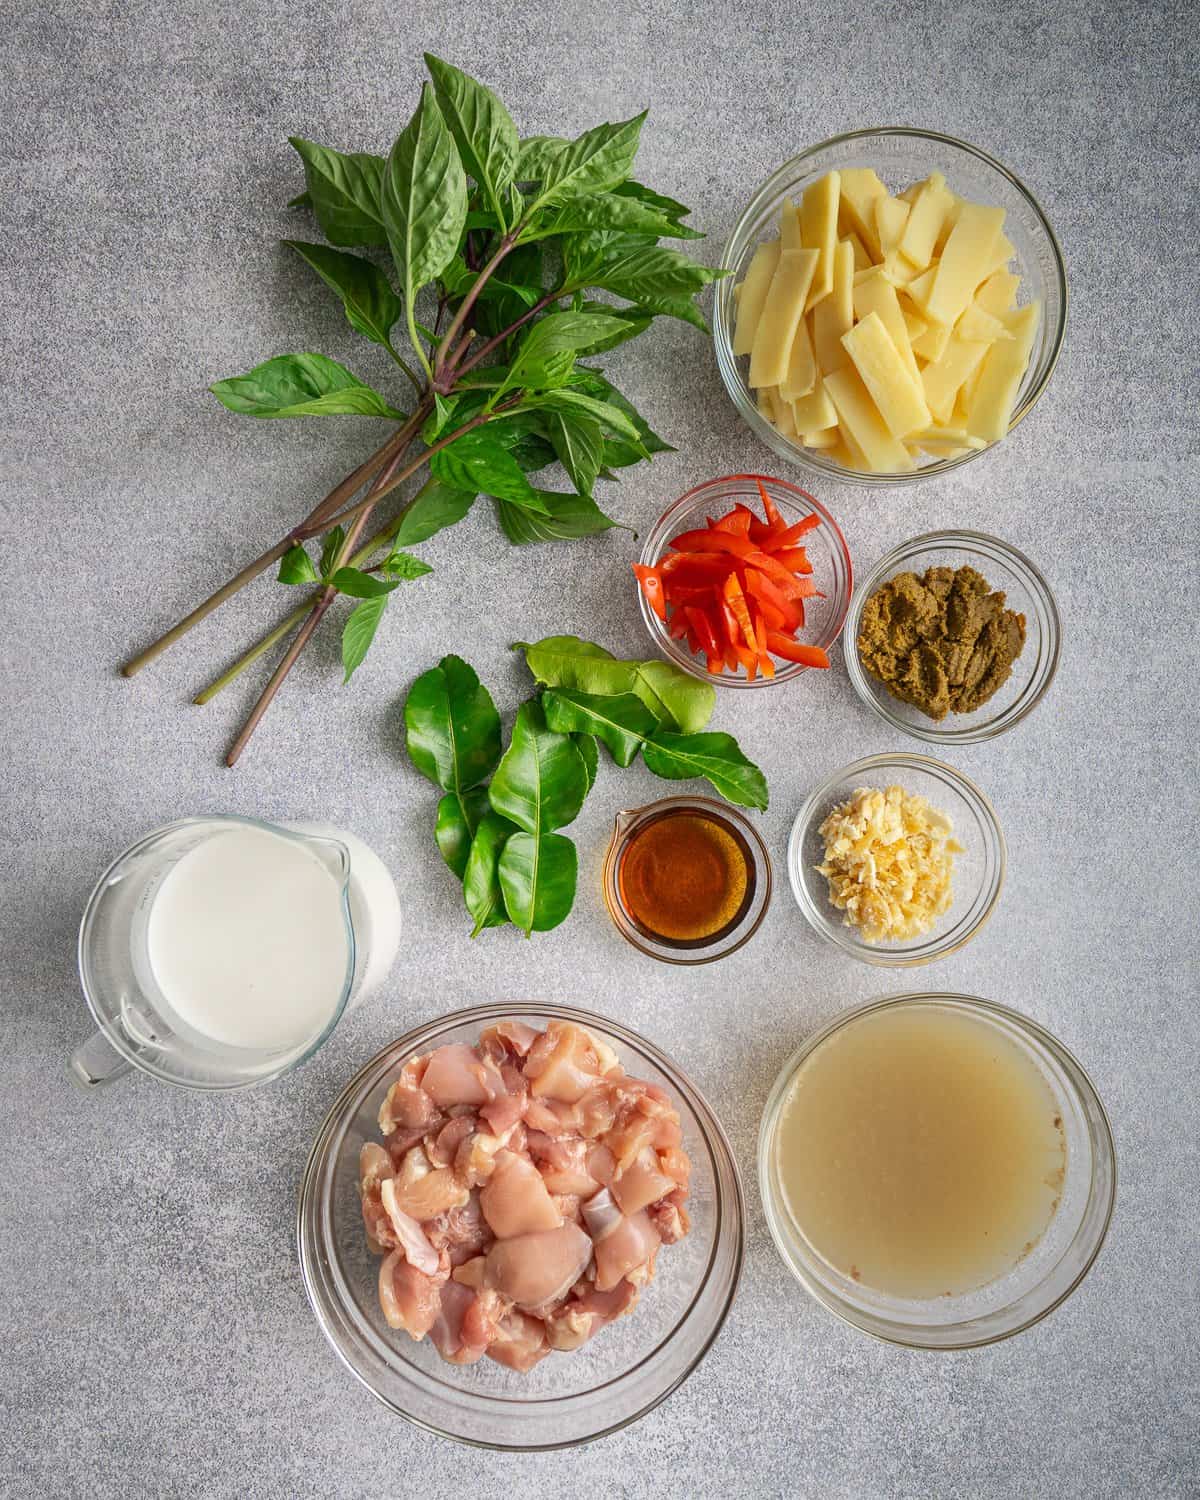
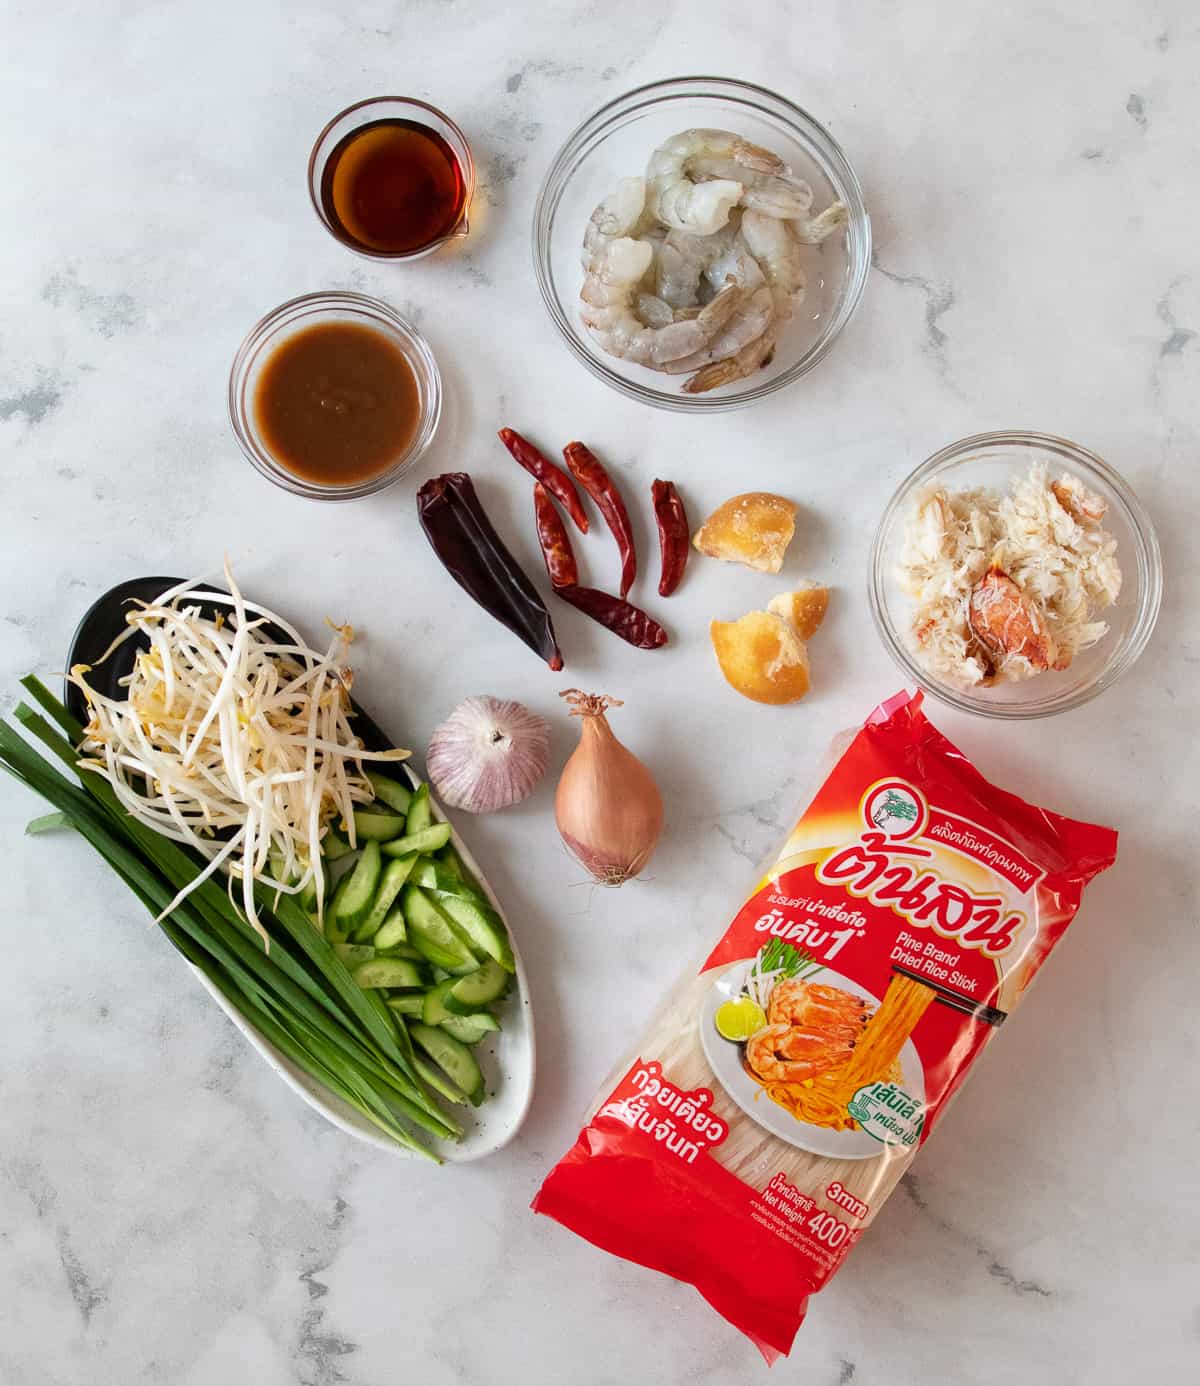
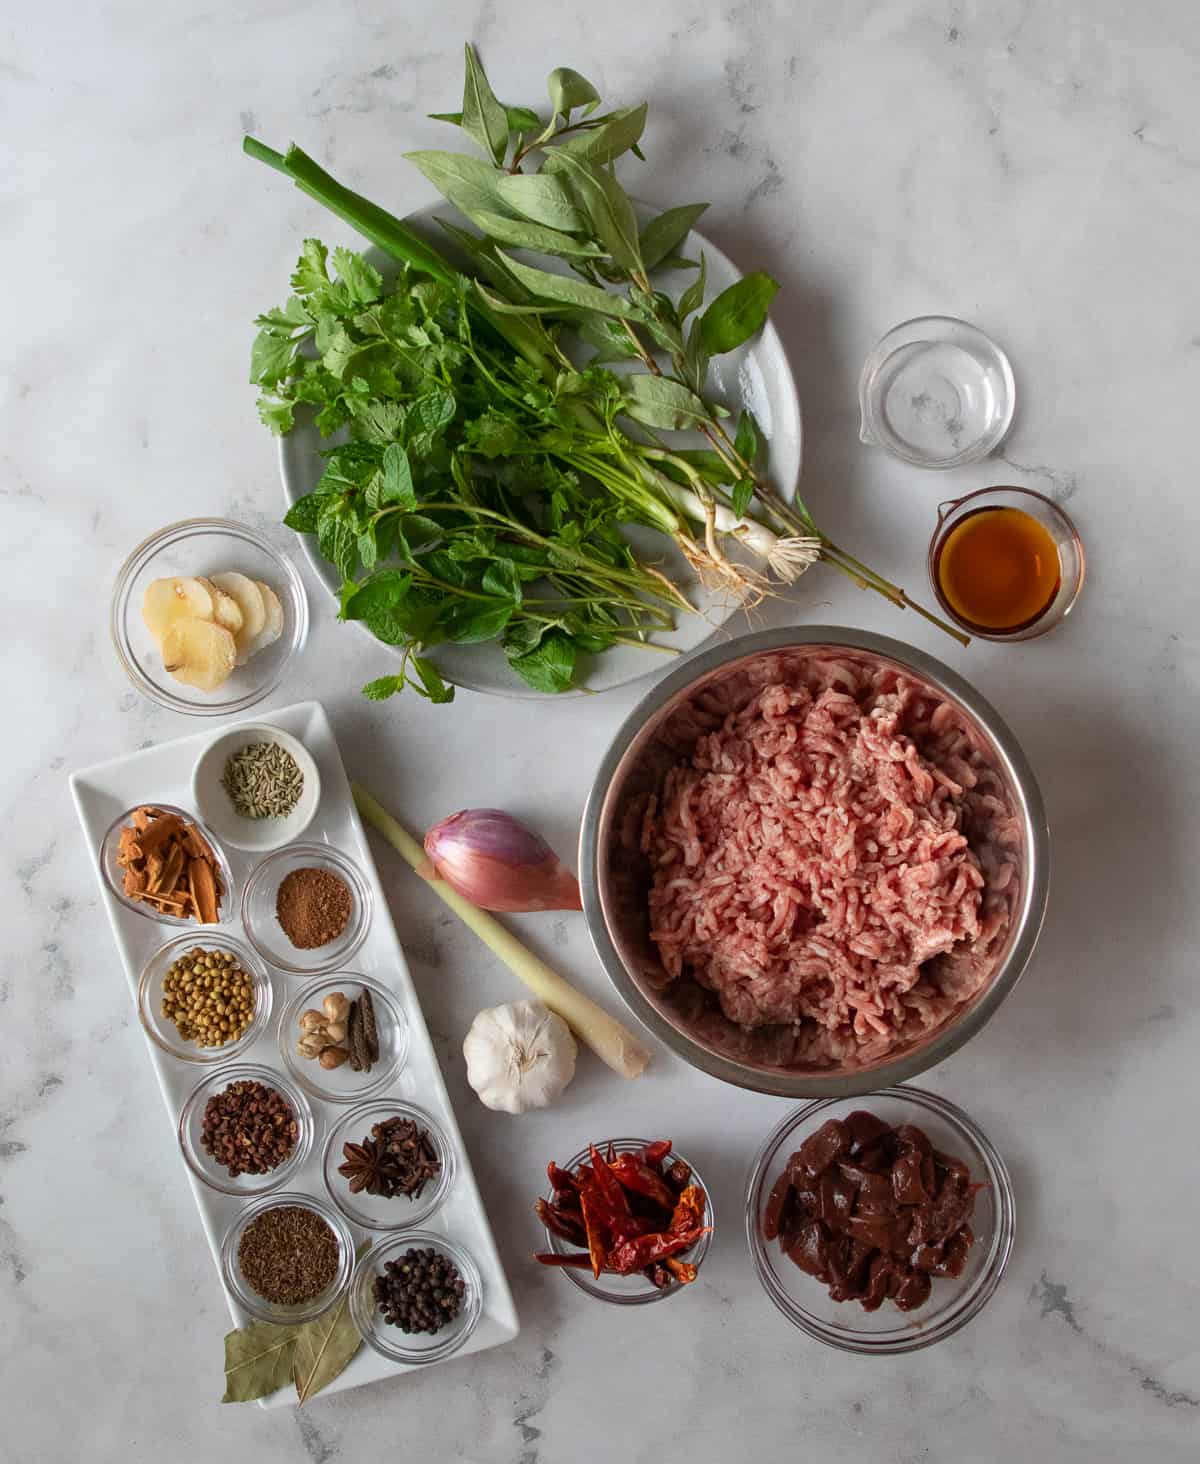
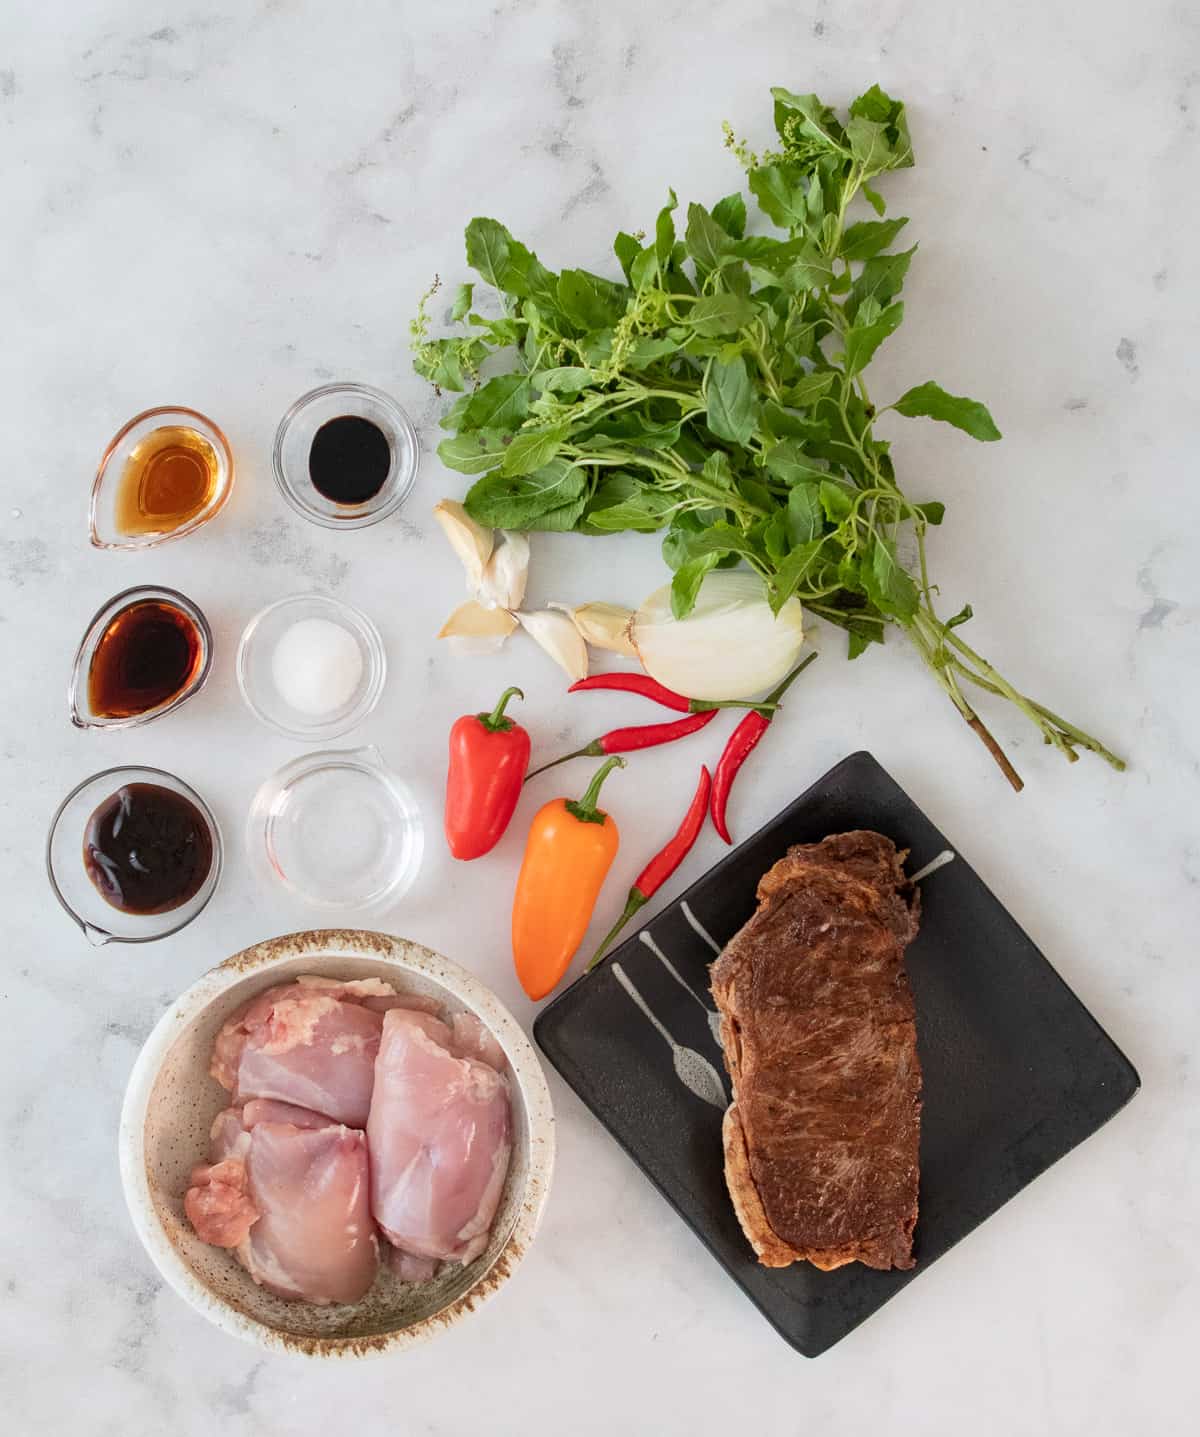
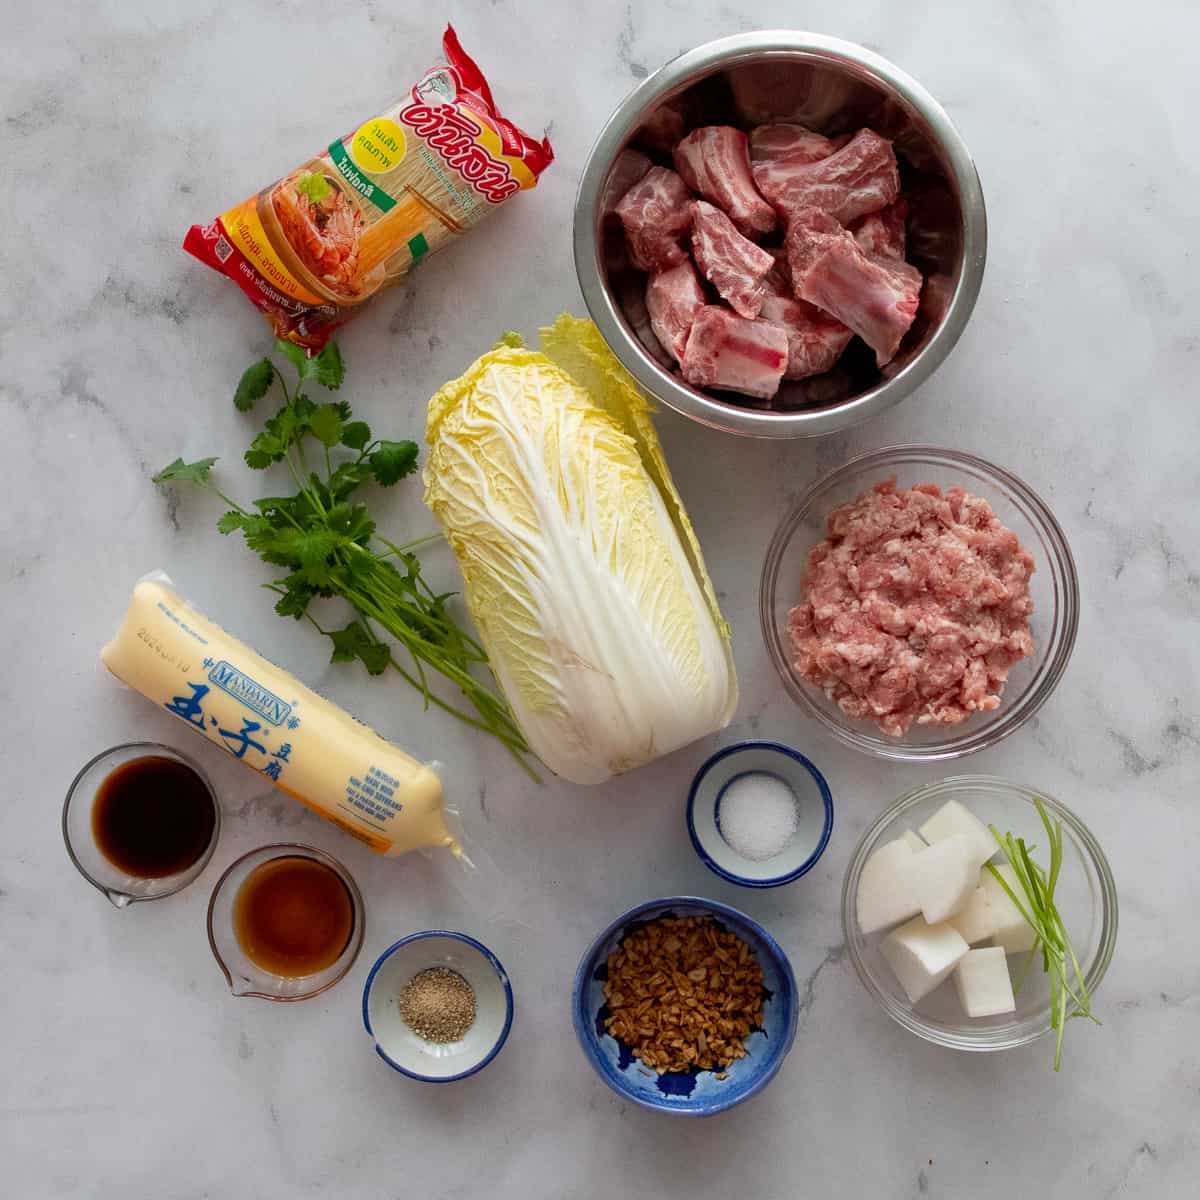
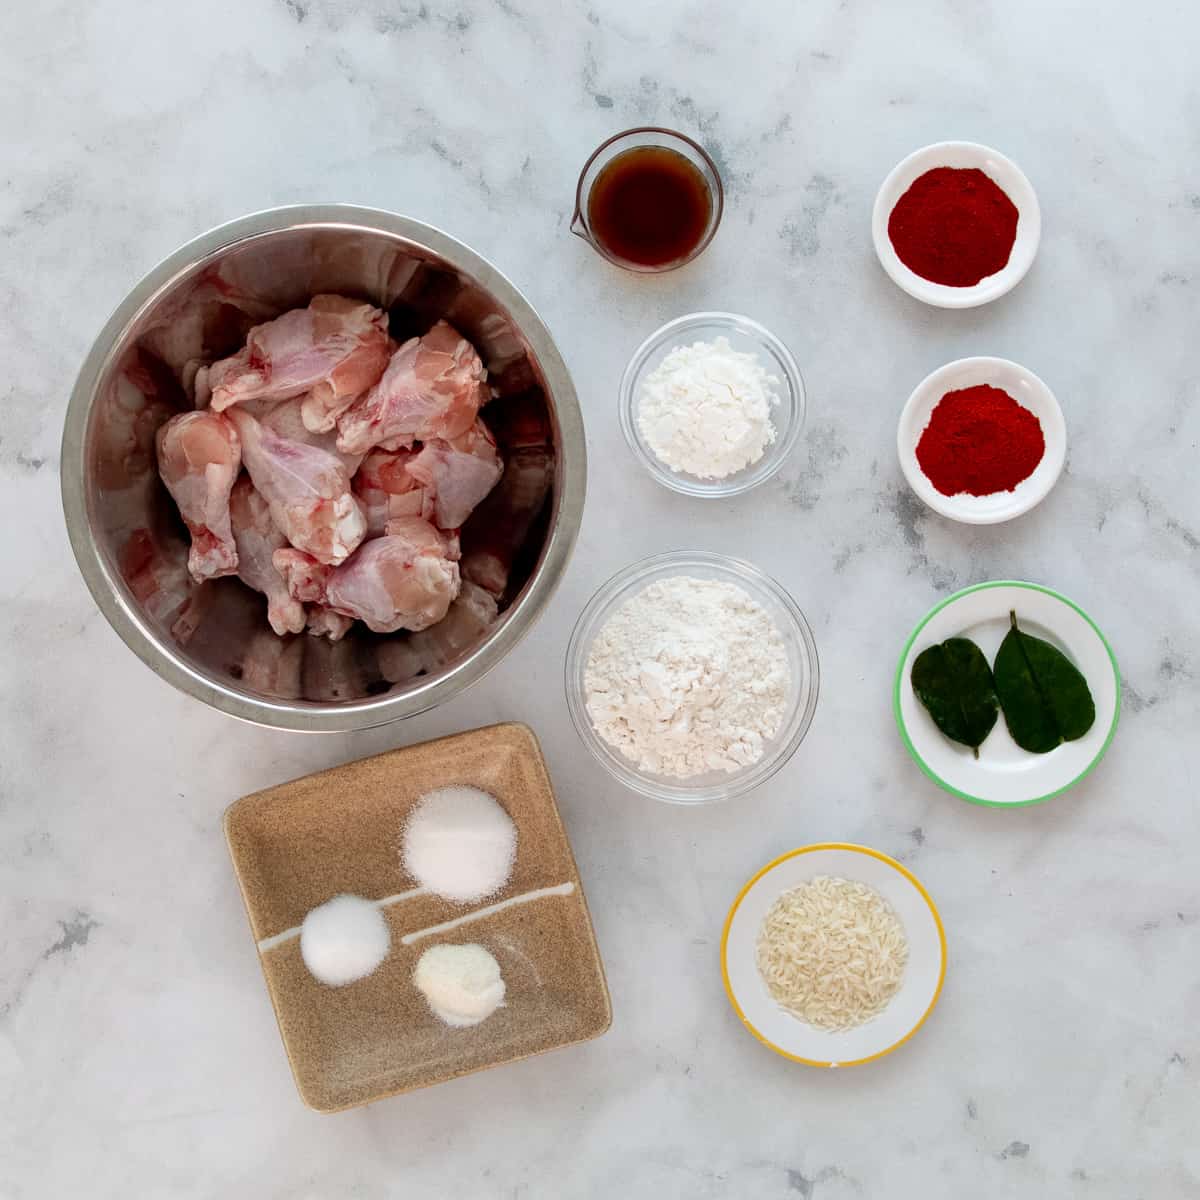
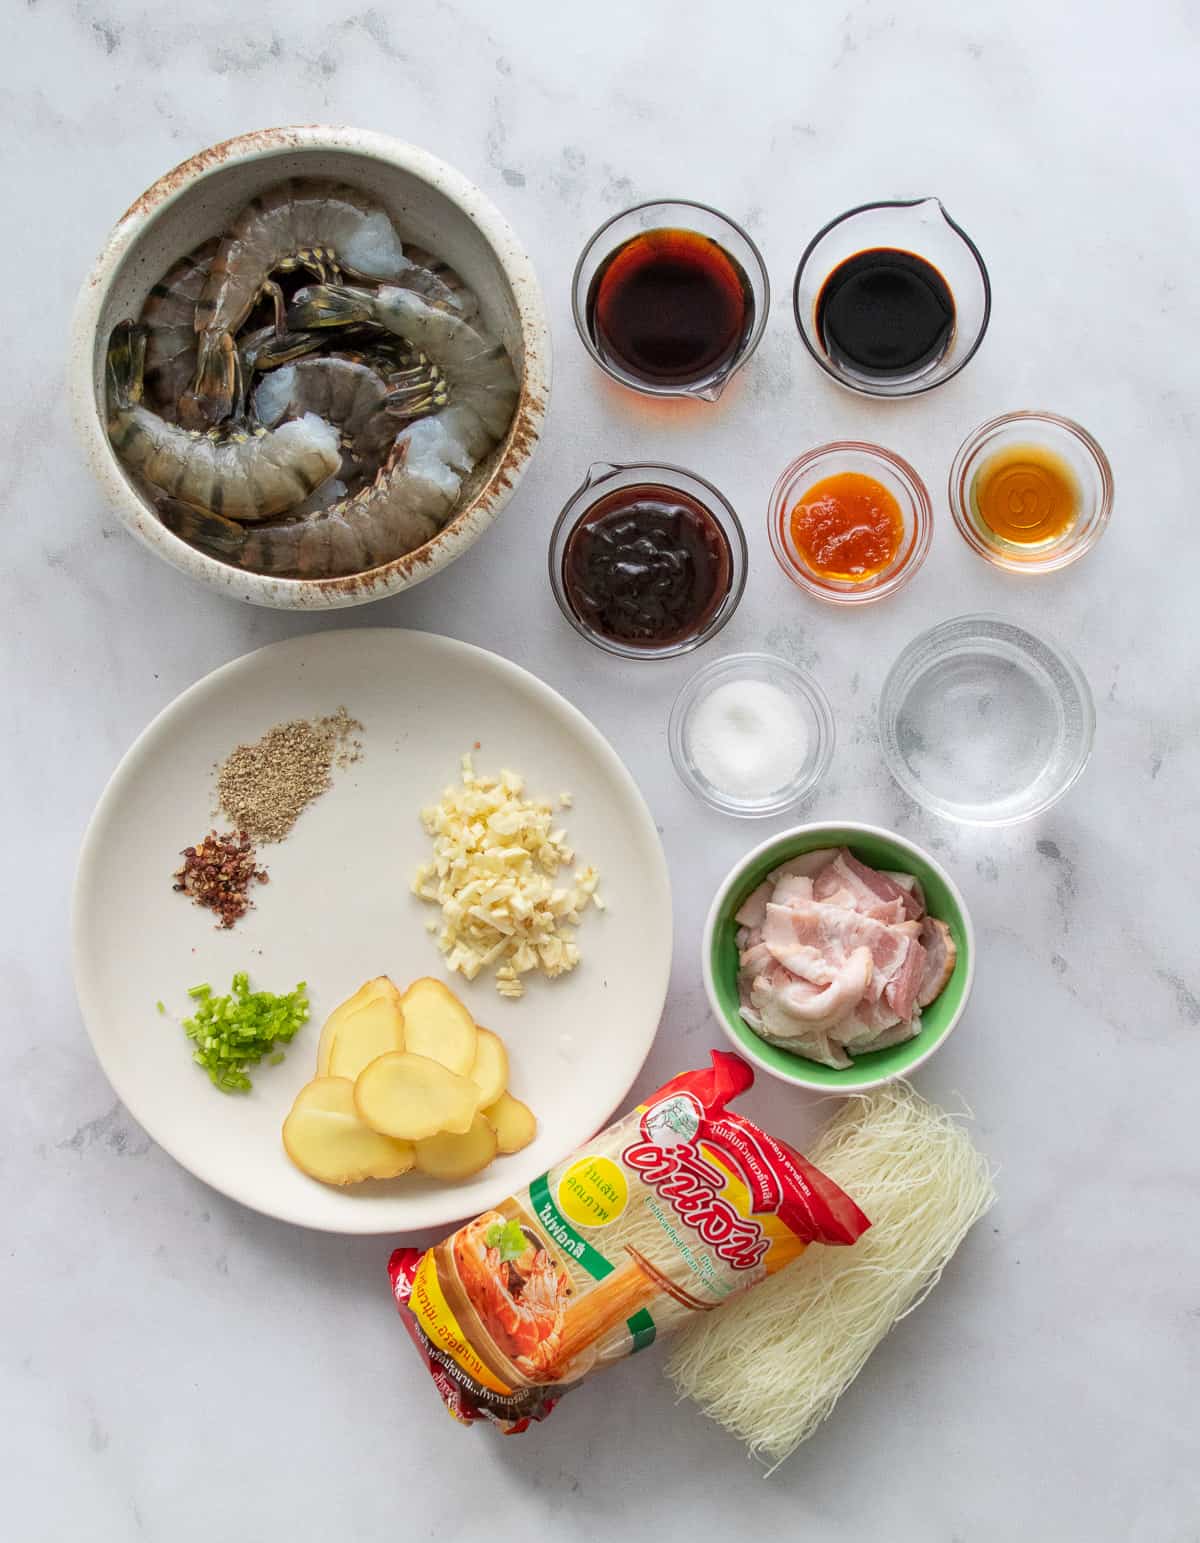
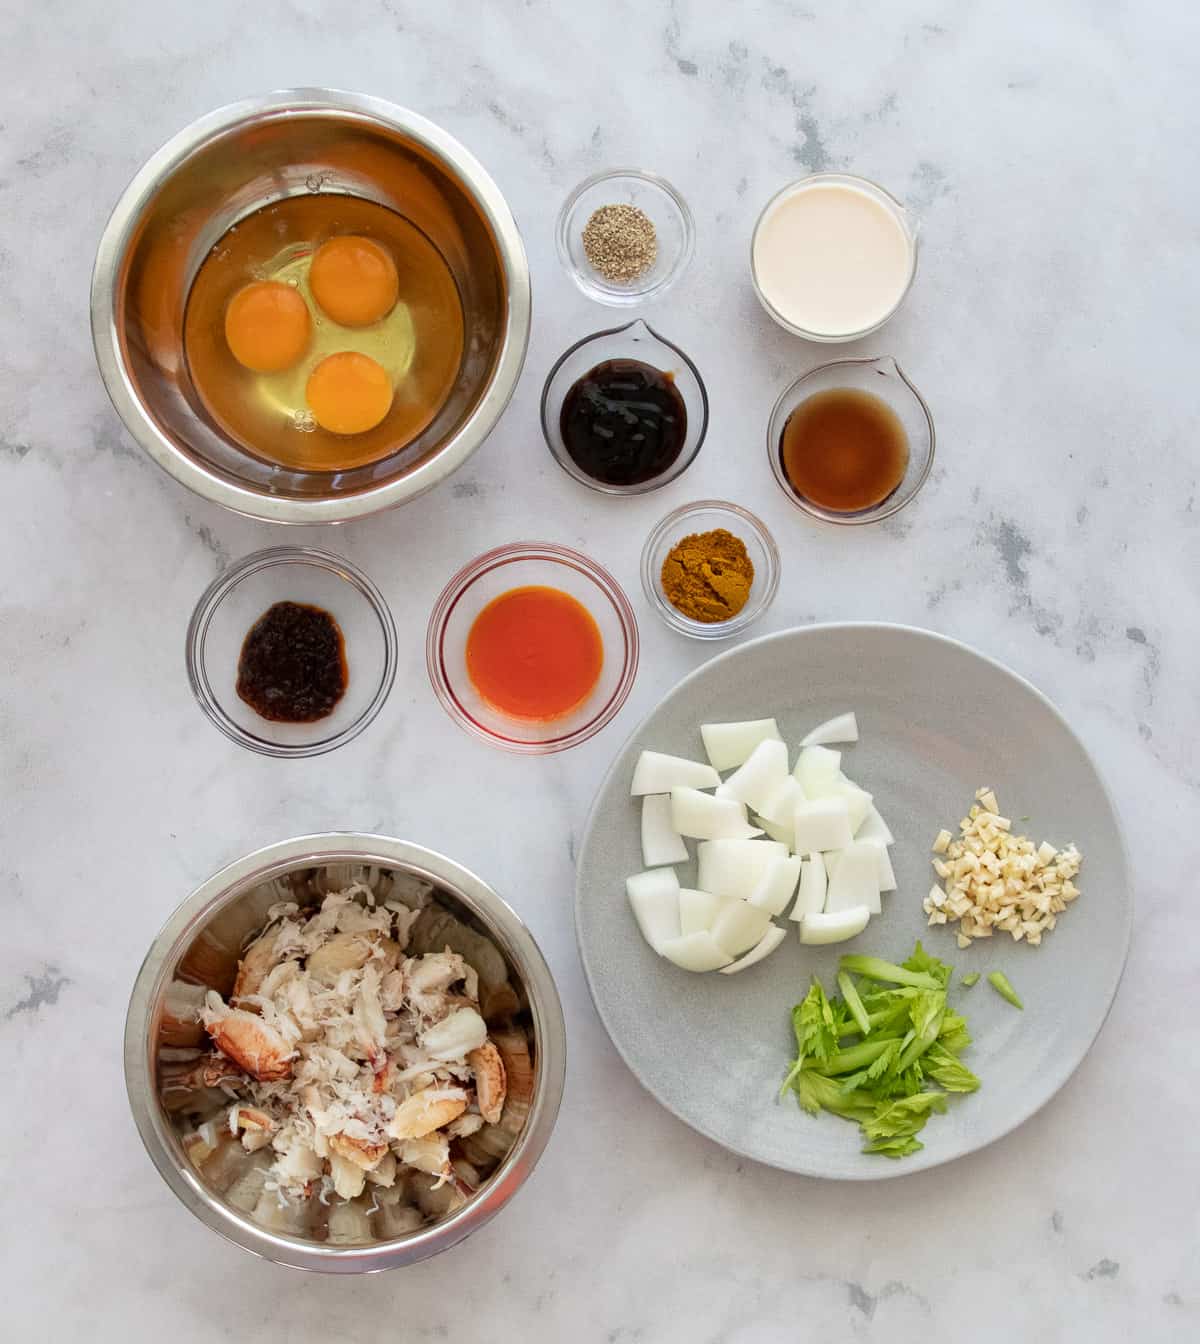
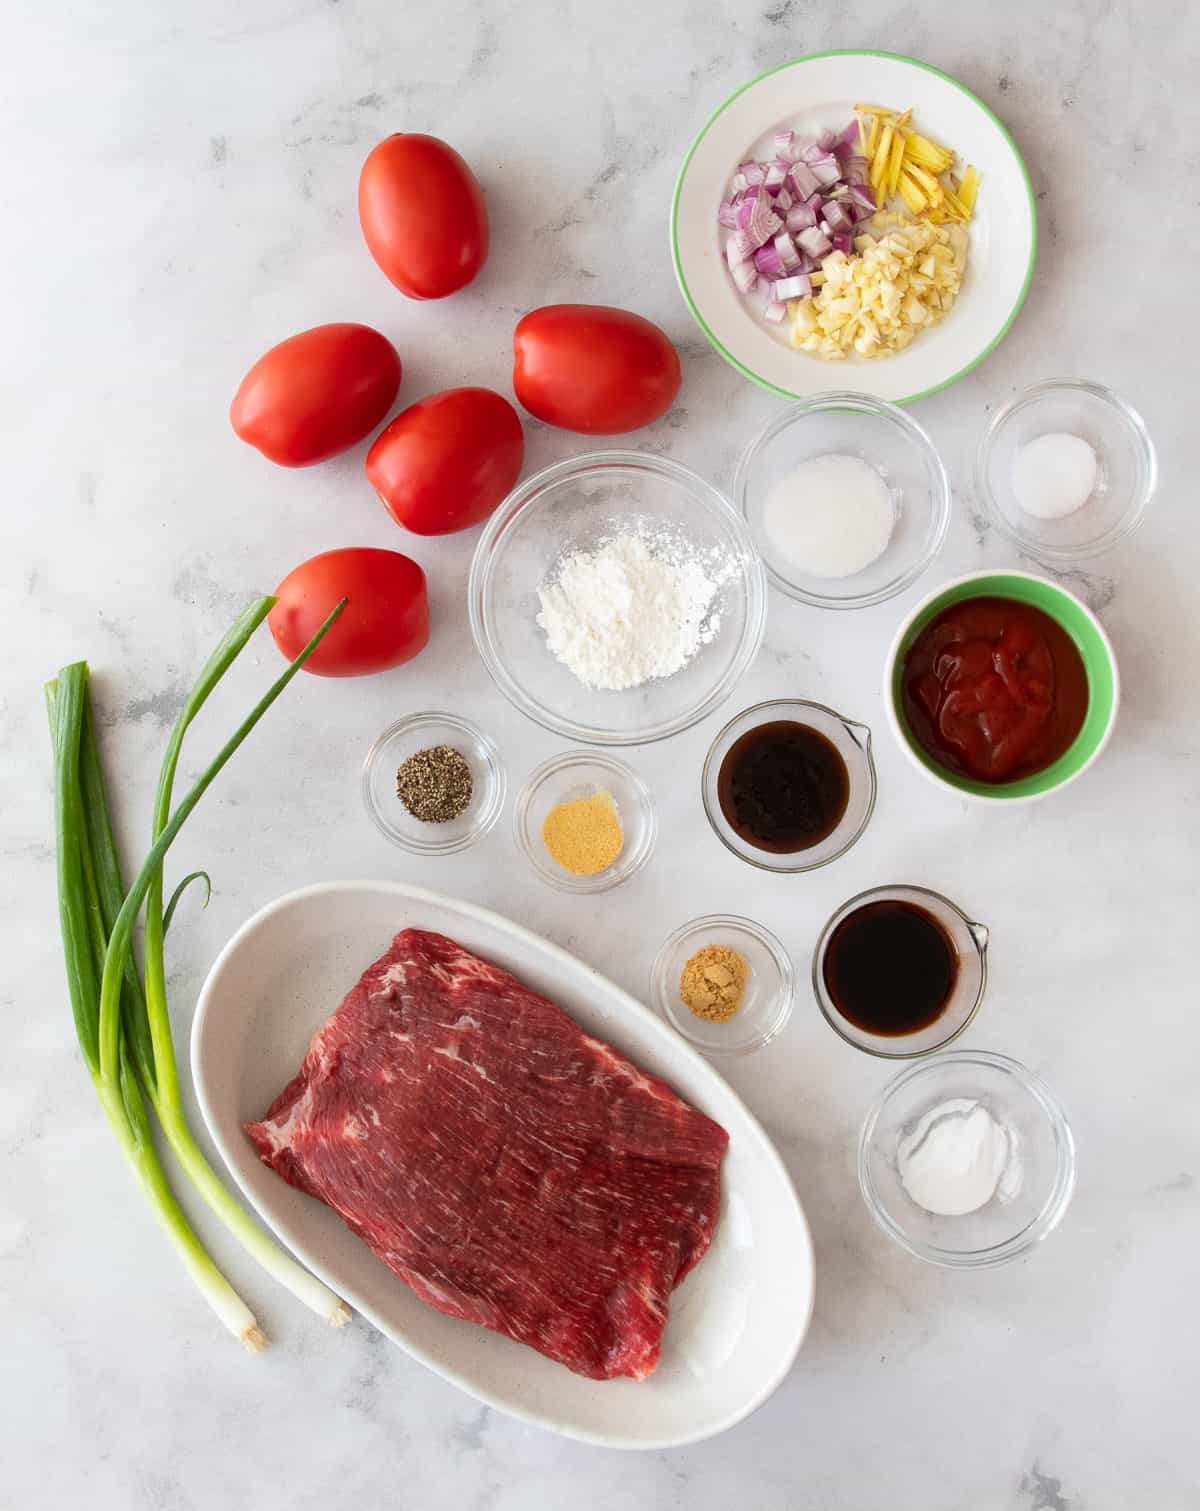
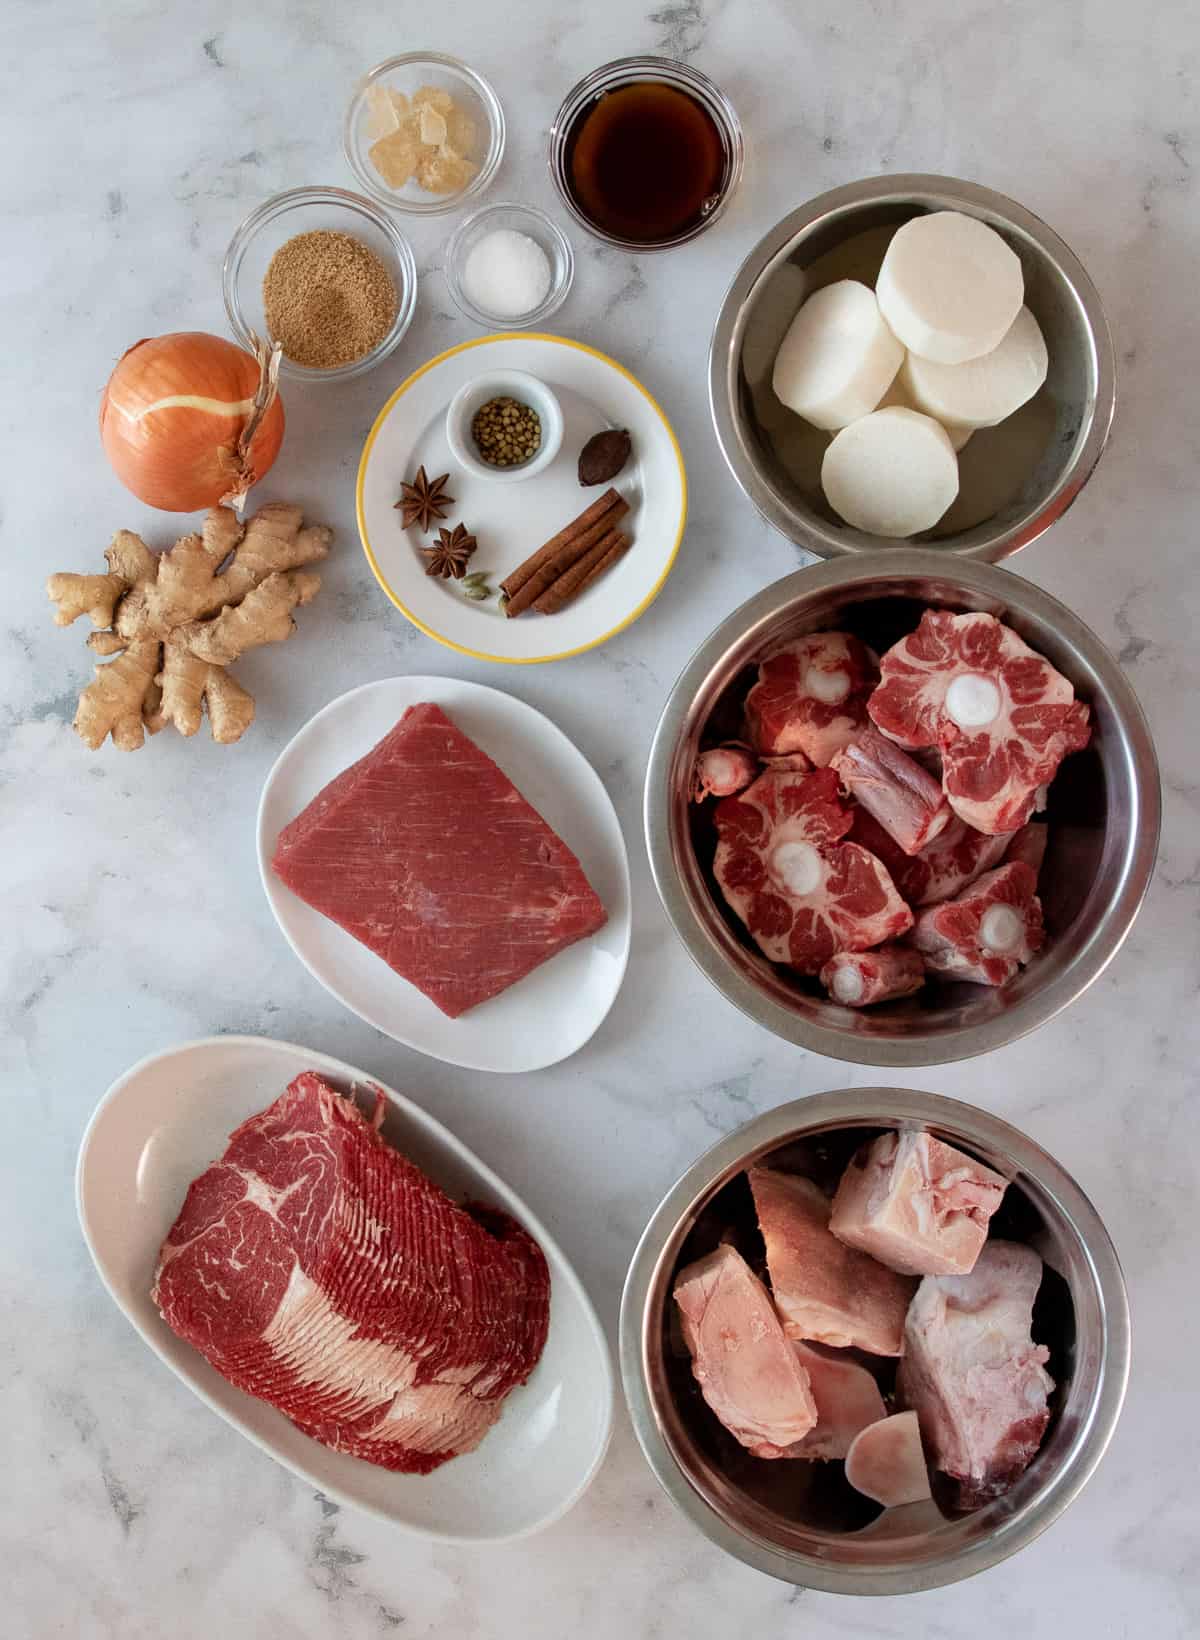
Ingredients and Notes
Boat noodles have A LOT of ingredients, but don't let the length of the list deter you. You probably have many of these in your kitchen already, and gathering them is really the hardest part, the rest is super easy!
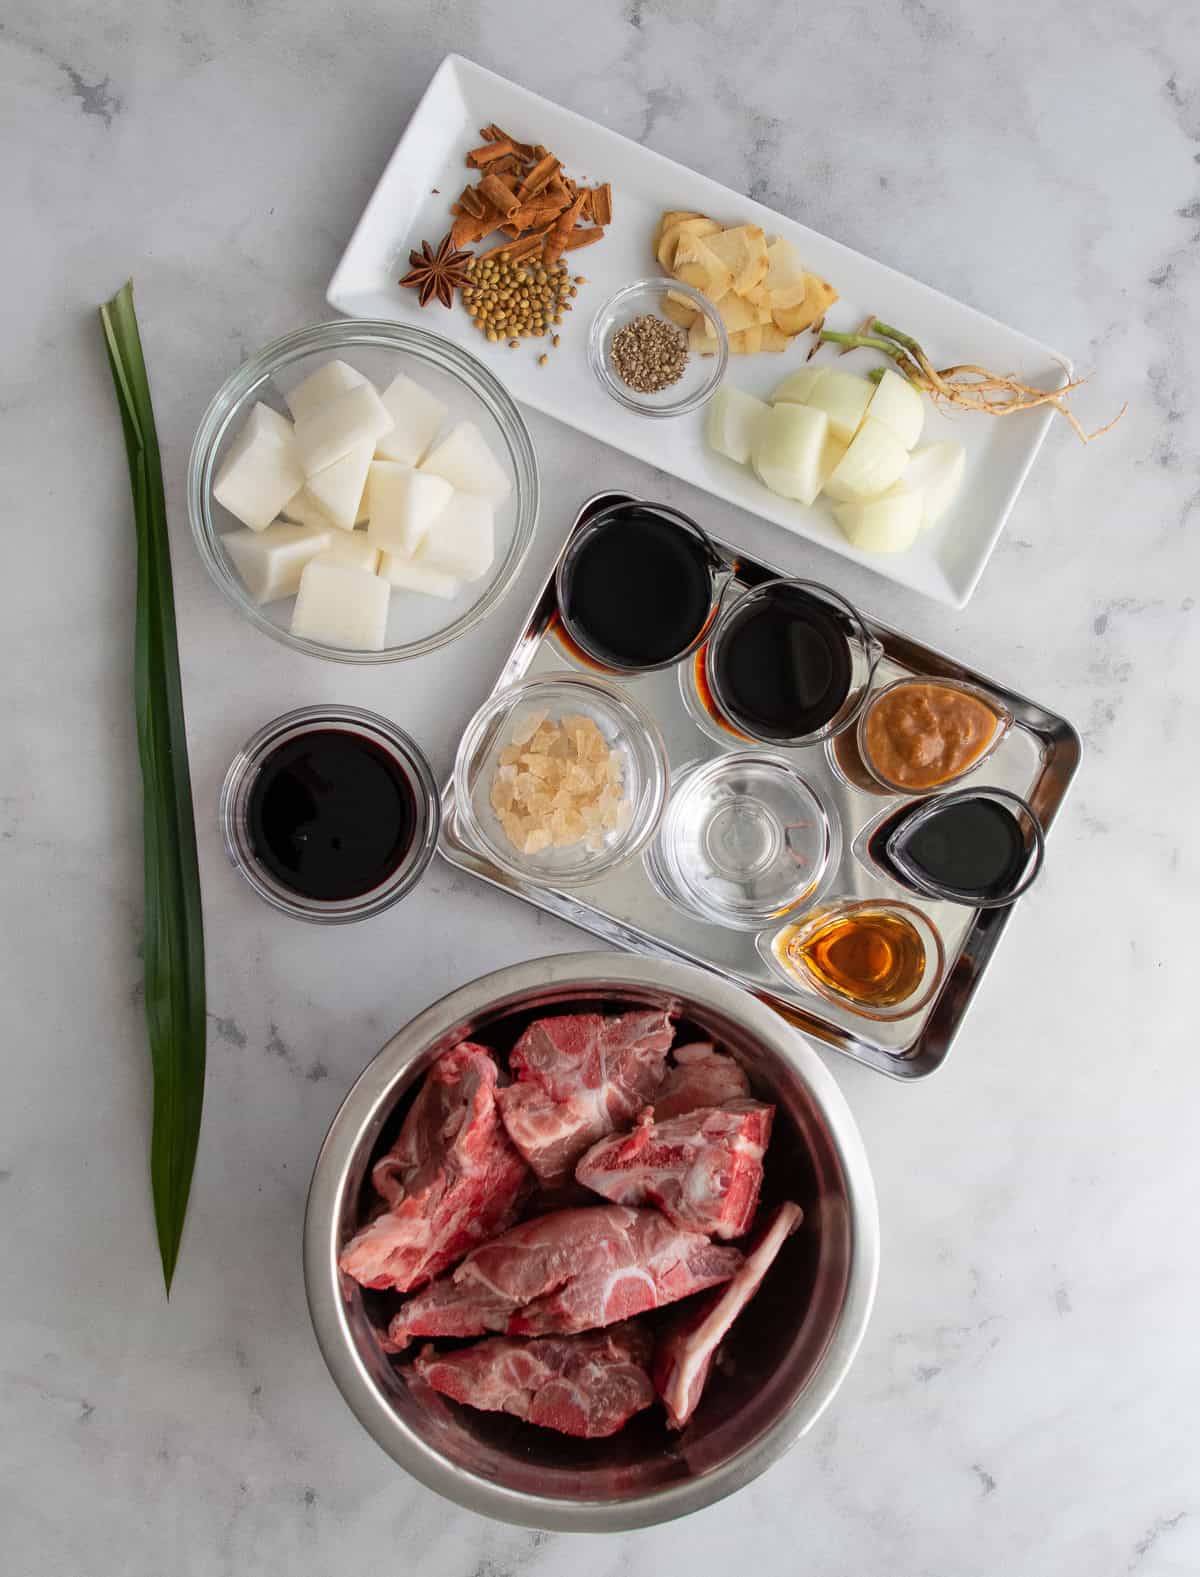
Broth Ingredients
- Pork neck bones, are my favourite bones to use for the broth because they have a lot of meat on them which will become tender and delicious when we're done. But you can also use pork back bones, beef bones or veal bones.
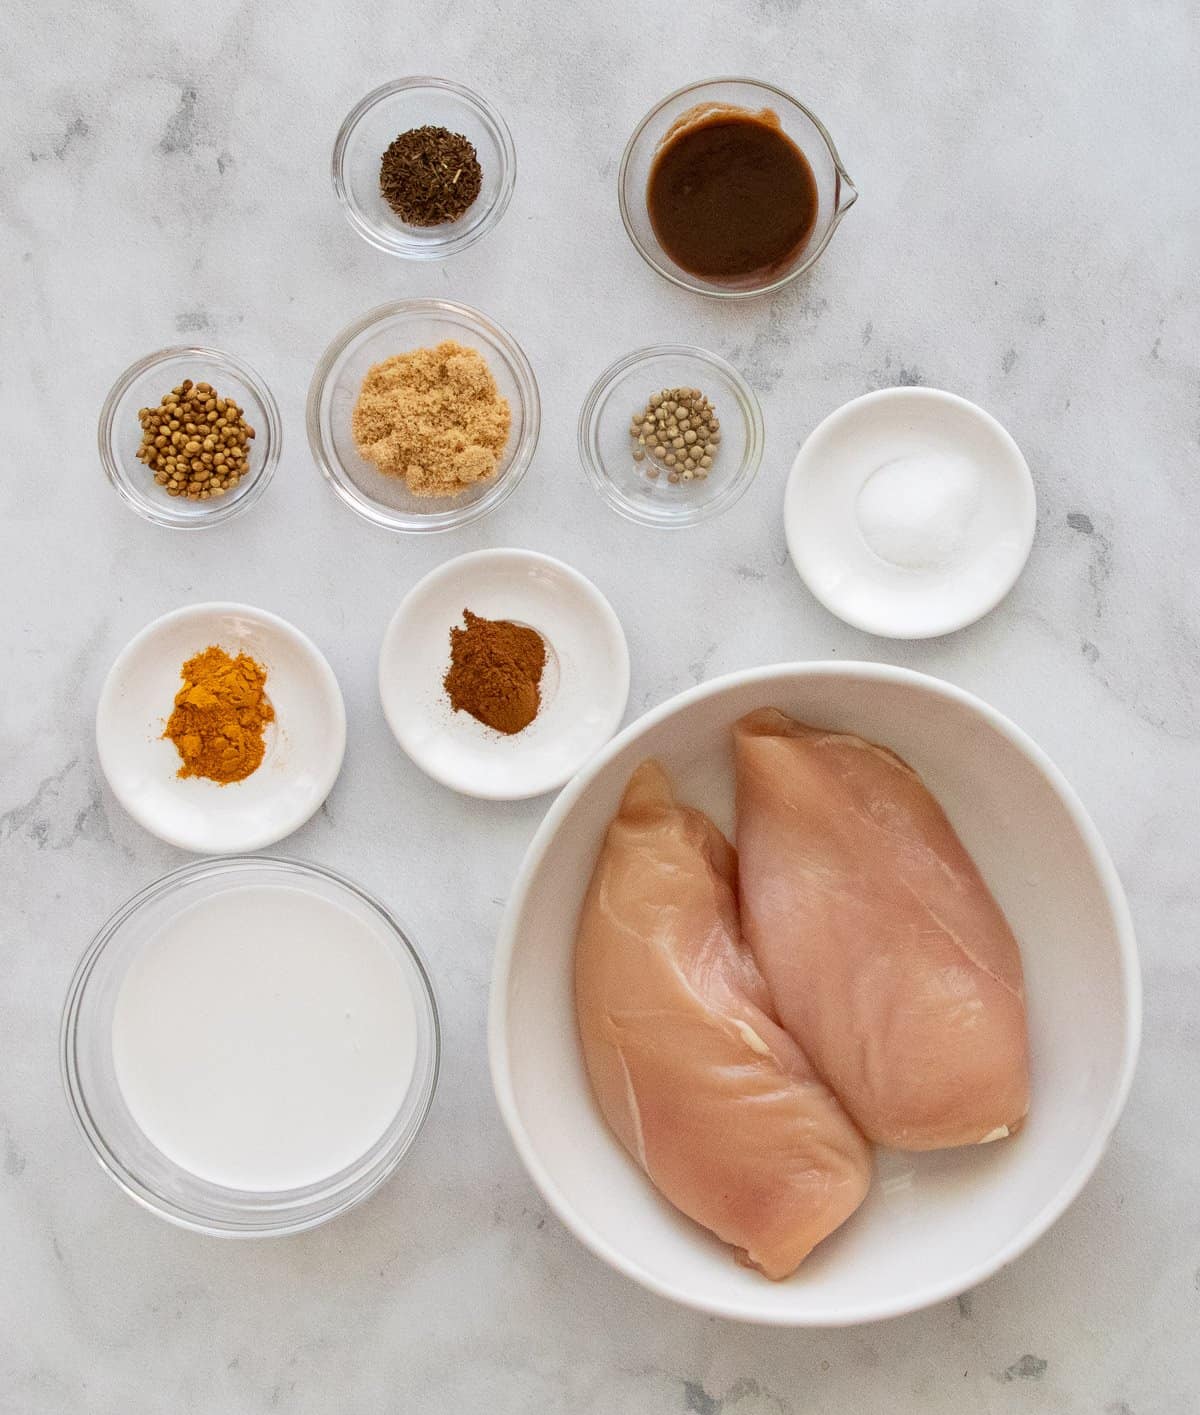
- Cinnamon stick, crush it just until broken into smaller pieces so it'll be easier to toast
- Star anise
- Coriander seeds
- Galangal, sliced into thin rounds. If you don't have it, it's fine to omit or use dried galangal.
- Cilantro roots or cilantro stems. Smash them gently just to bruise and release the flavour.
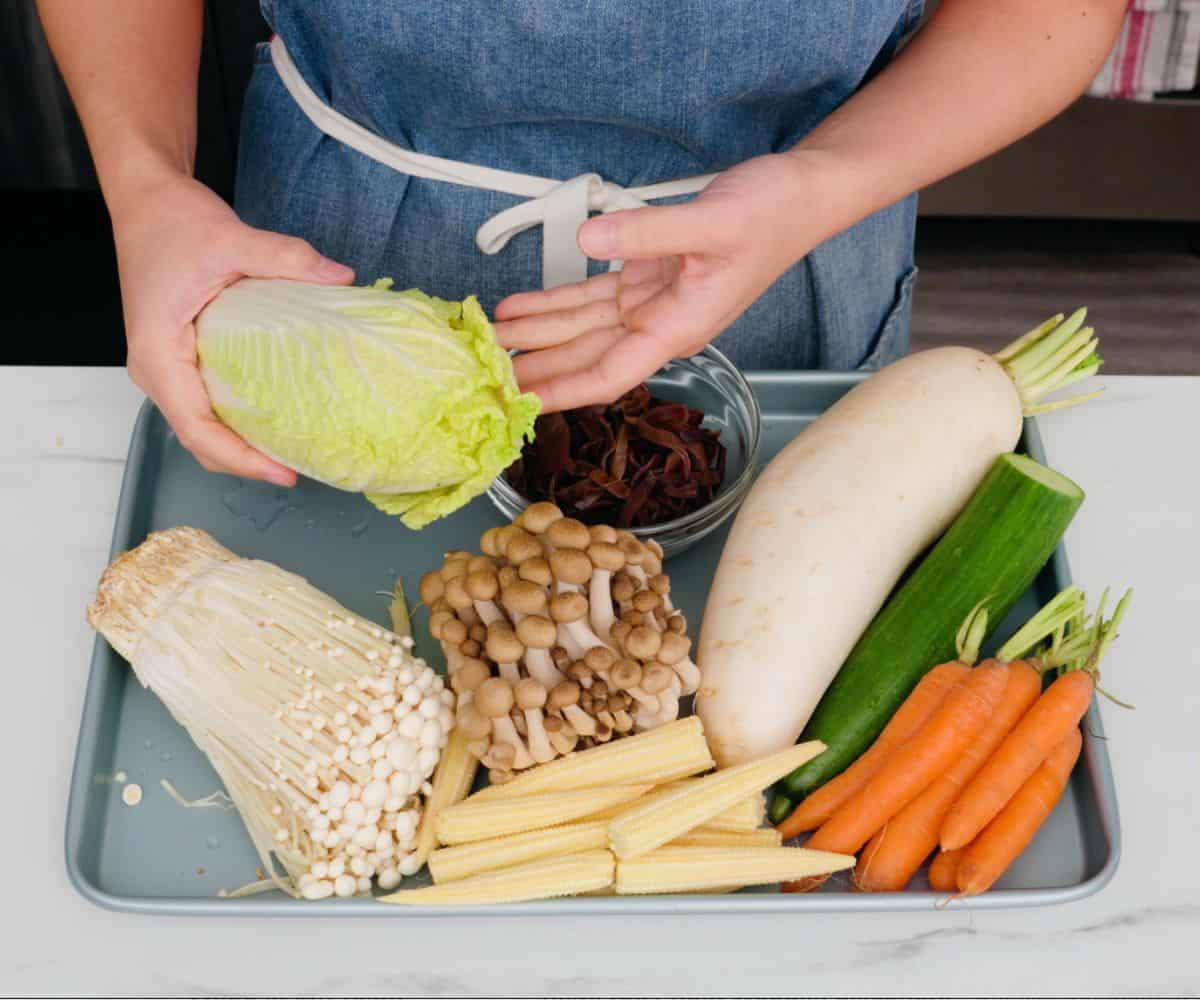
- Daikon, peeled and cut into big chunks. This helps sweeten the broth and make it extra delish. WIthout it, you can add more onion instead. Once done, the daikon will also be super delicious, so don't throw them away! Serve it with the noodles or save it for another meal.
- Onion, cut into big chunks
- Garlic, crushed until broken to help release the flavour
- White pepper, ground. Black pepper is fine too.
- Pandan leaf, optional. Pandan leaves are used mostly in desserts, but it's commonly added to boat noodles. You won't taste the pandan in the finished product, and it is fine to omit.
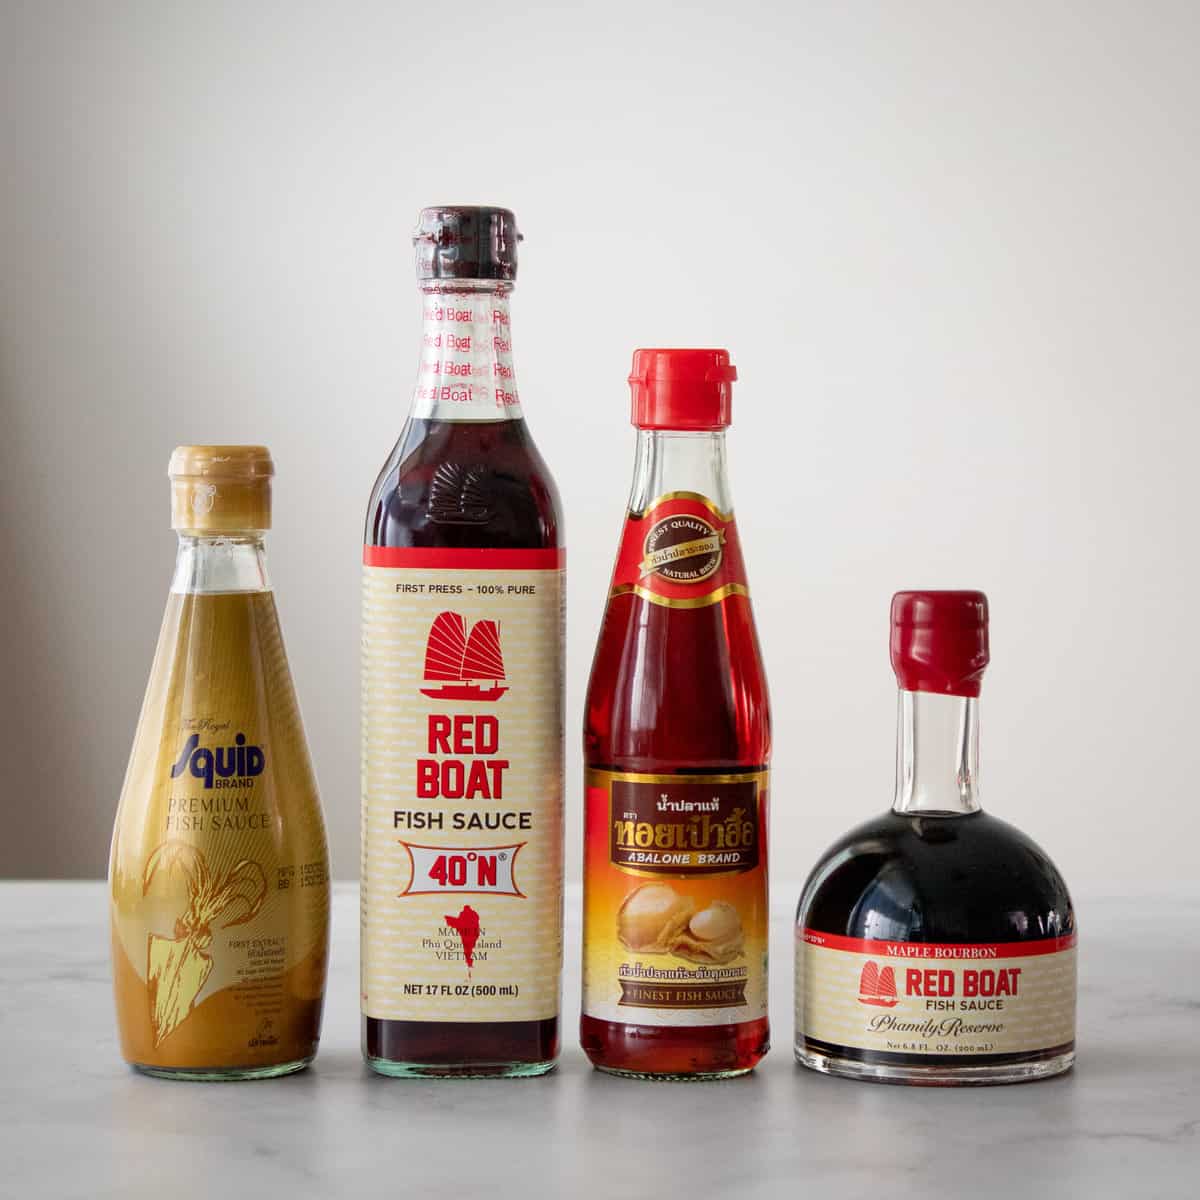
- Soy sauce. I use Thai soy sauce but other kinds are fine. See more about soy sauces here.
- Golden Mountain Sauce. Golden Mountain is a brand of "Thai seasoning sauce" that is the most popular so the brand has become genericized. It's a type of soy sauce with a different flavour. Healthy Boy Brand also makes a seasoning sauce (green cap), and Maggi Seasoning or Bragg's Liquid Aminos taste very similar and can be used instead. You can also simply use more of the soy sauce.
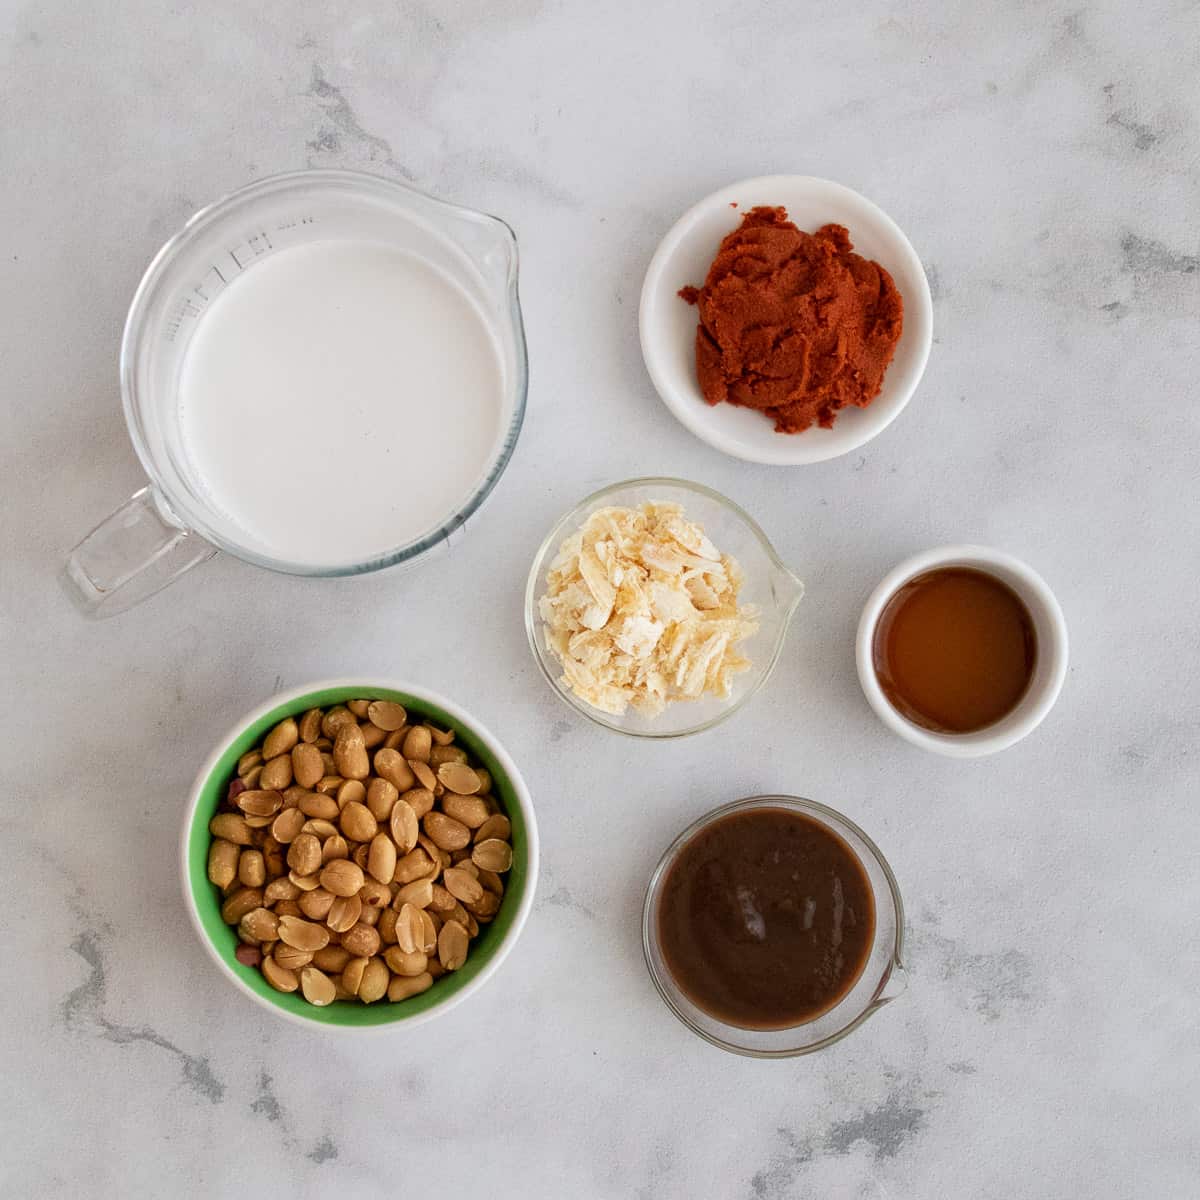
- Taojiew, this is Thai fermented soybean paste; basically the Thai version of miso paste. You can sub miso or doenjang instead. If your taojiew looks particularly chunky, mash it with a fork so it distributes better.
- Thai black soy sauce or dark soy sauce. If using Chinese dark soy sauce it tends to be a bit salty, so I'd hold back on the regular soy sauce and then add more as needed.
- Fish sauce
- White vinegar
- Rock sugar or granulated sugar. Rock sugar is traditional, but it'll make no difference whatsoever if you use granulated, so use it only if you already have it!
- Liquid beef or pork blood. You can find blood at some Asian grocery stores, usually frozen. Do not buy cooked blood, which is solid, or fresh blood without the anticoagulant added.
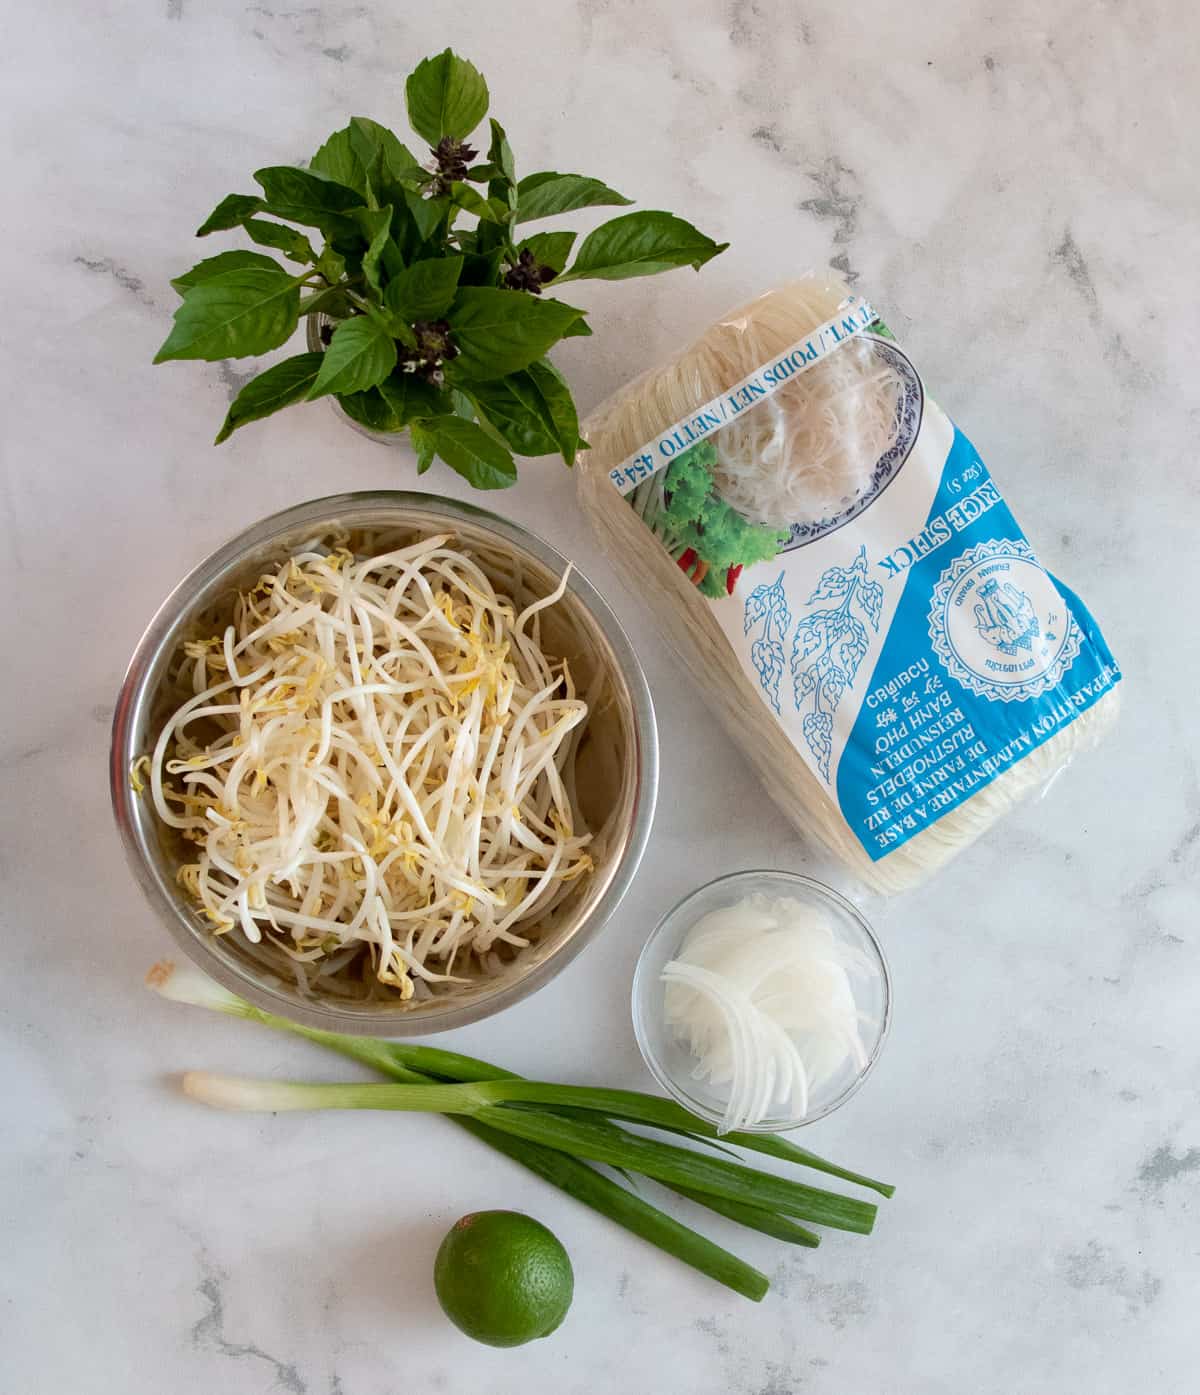
Noodle Bowl Ingredients

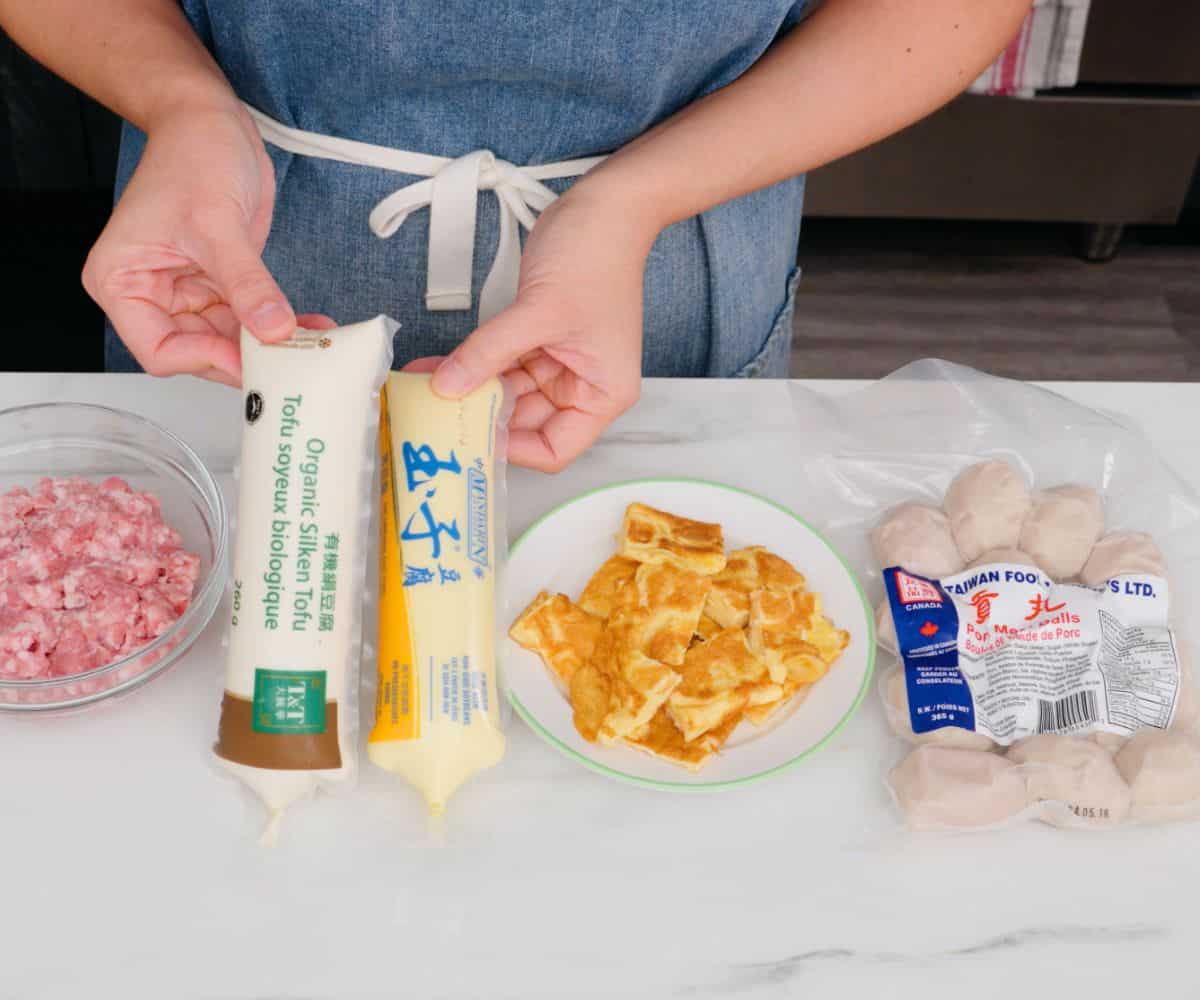
- Pork shoulder, (not pictured) for making marinated sliced pork. If you already have the meatballs and meat from the pork neck bones, you can skip this to simplify a bit.
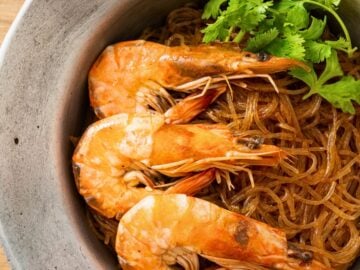
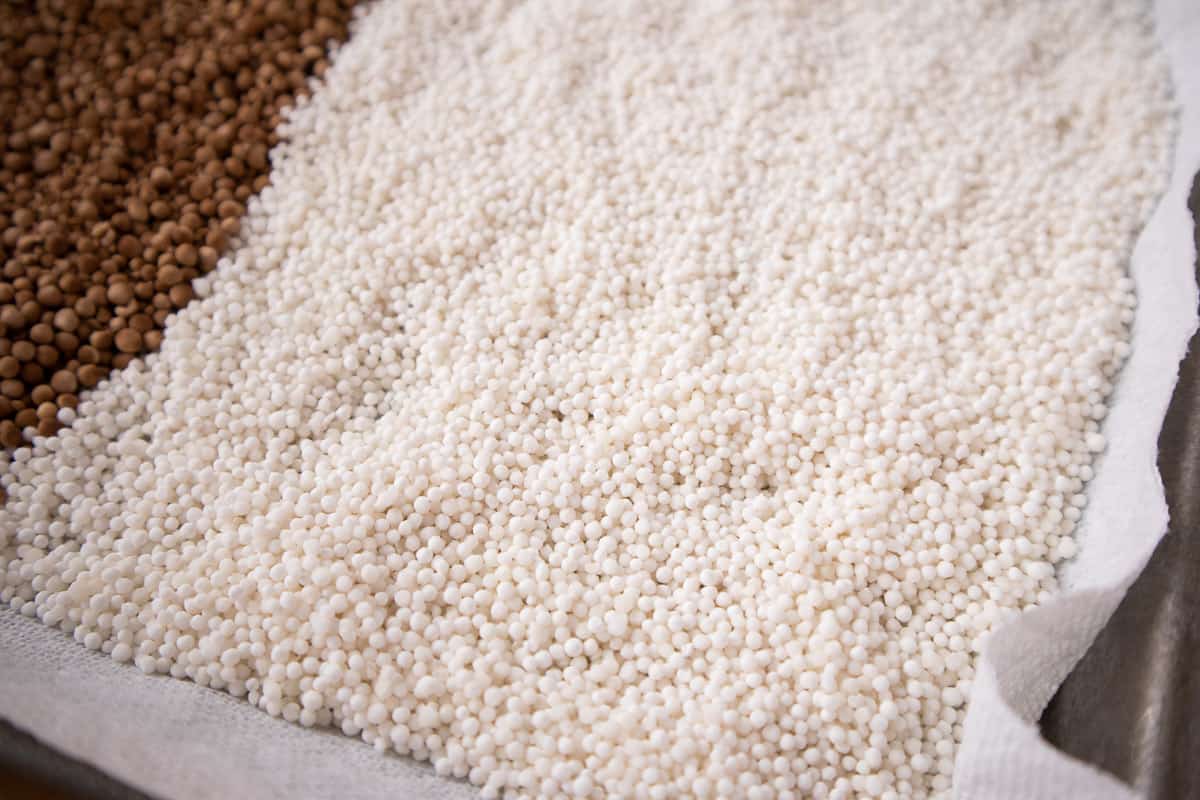
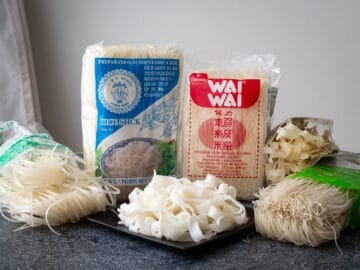
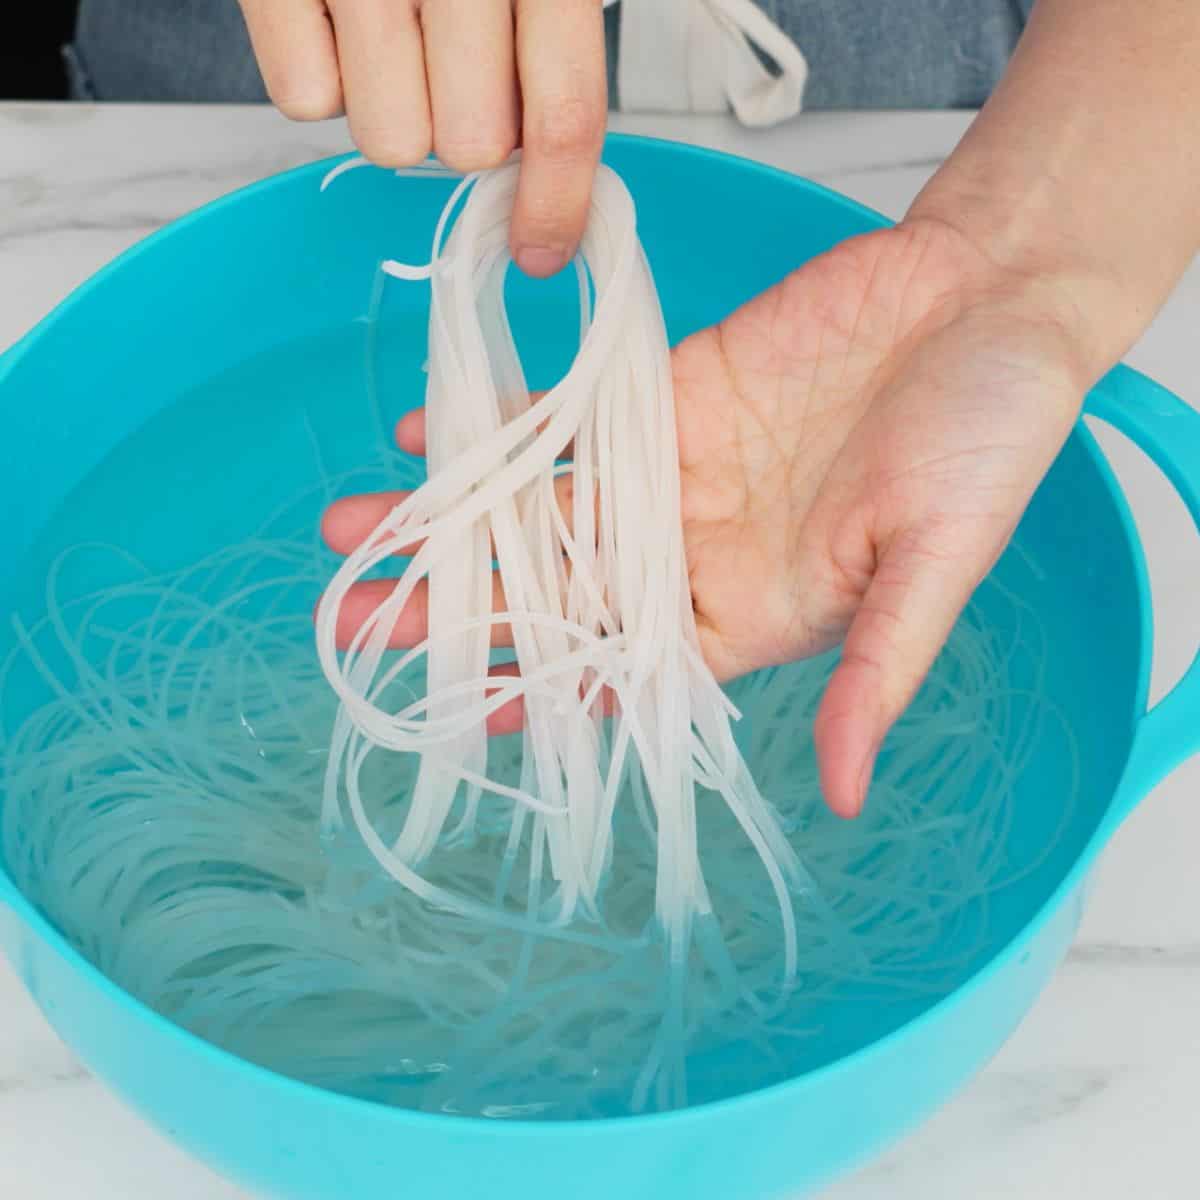
- Dry rice noodles, (picture below) size small, or another noodle of your choice. This is my favorite noodle for boat noodles, but in Thailand you'll be offered many noodle options, so you can choose one of those that I talk about in the noodle options section below.
- Asian style pork or beef meatballs. You can buy these at many Asian grocery stores, refrigerated or frozen. If you are in a DIY mood you can also make them from scratch using my Asian meatballs recipe.
- Water spinach or spinach, cut into 2-inch pieces. Water spinach (aka morning glory) is the classic greens added to boat noodles. Regular spinach or another kind of greens work just fine.
- Bean sprouts
- Cilantro and/or green onions, chopped
- Thai basil or holy basil (optional)
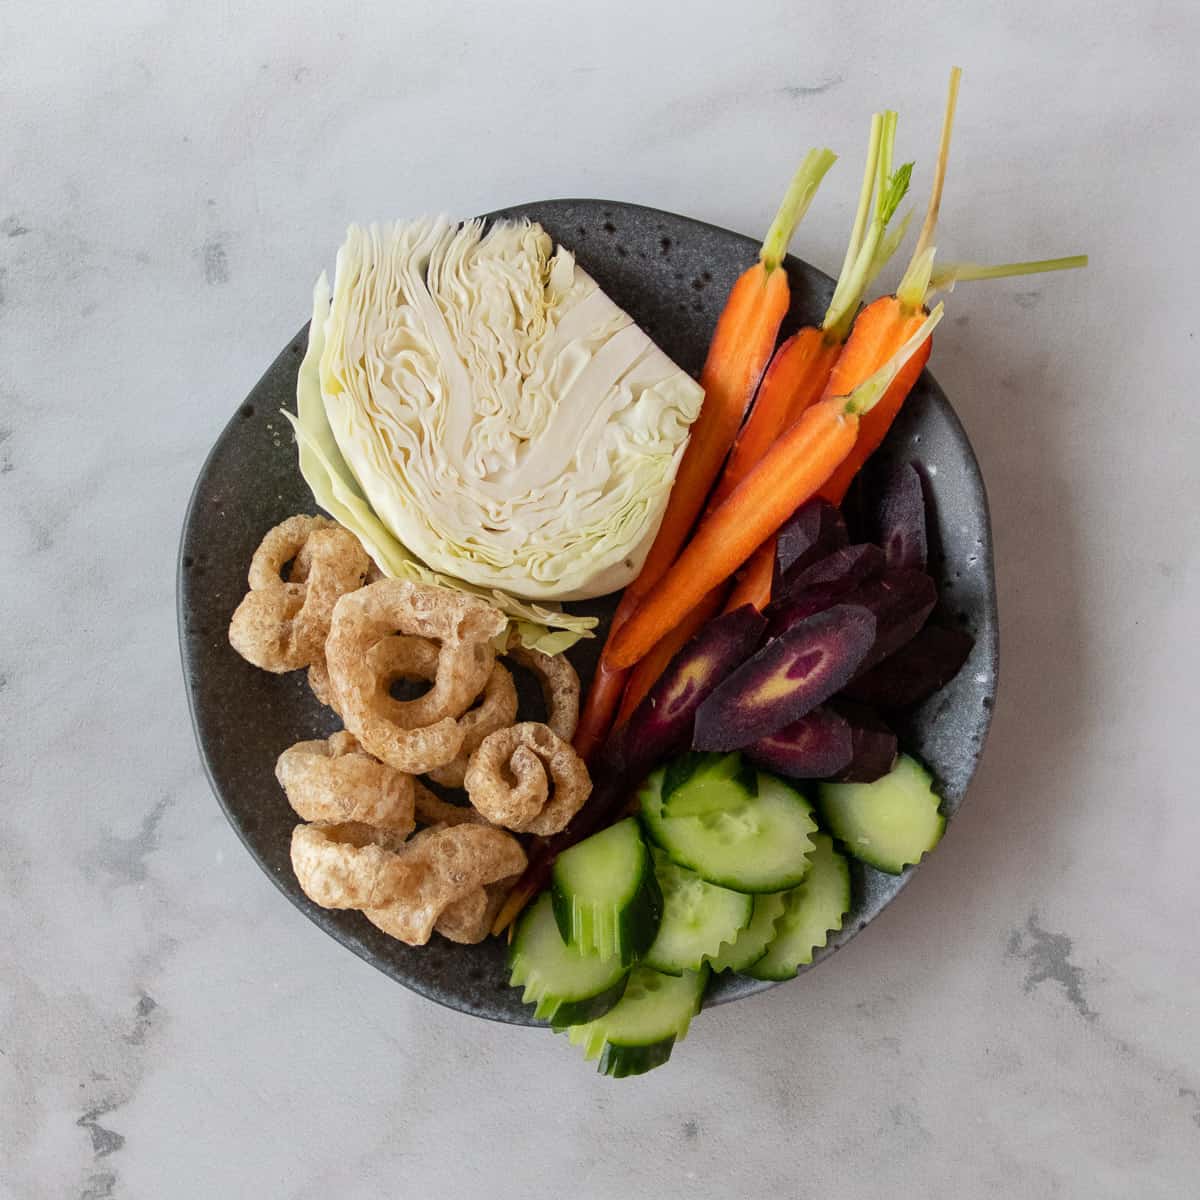
Optional Condiments
In Thailand you'll find these condiments on the table at boat noodle restaurants and you can add as much of them as you like, (though you'll have to pay for the pork rind if you add it!); except the fried garlic that is, which the vendor will add to your bowl for you.
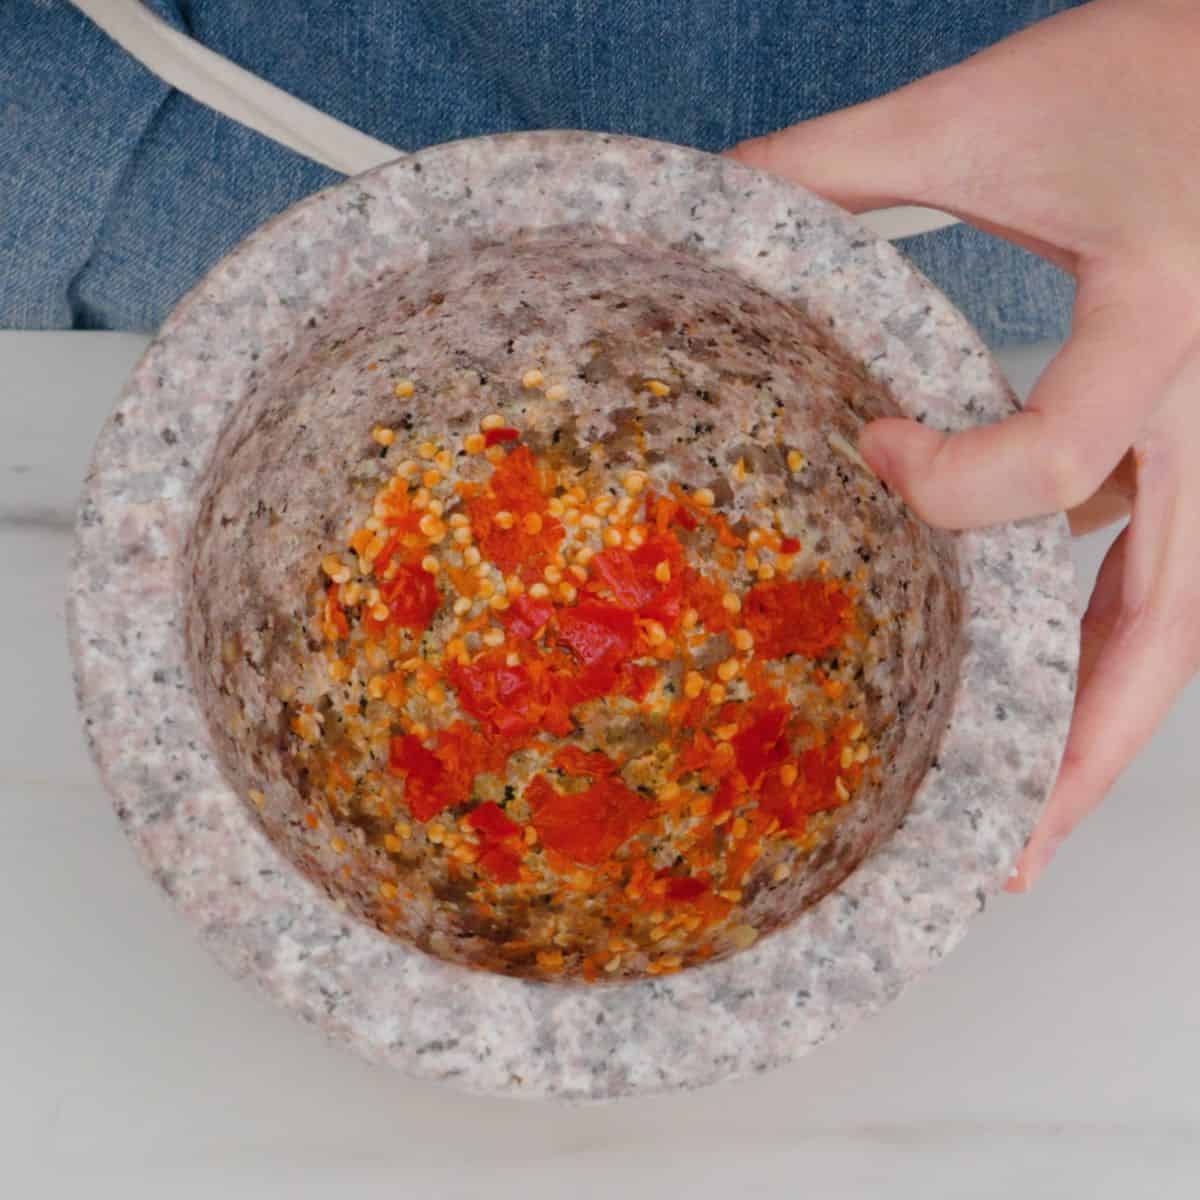
- Chili vinegar. Technically optional but I highly recommend it! You can make chili vinegar from scratch but I sometimes cheat by mixing 1 part sambal oelek with 2 parts white vinegar and it works just fine.
- Crispy pork rind. They add a lovely crunch to the noodle soup!
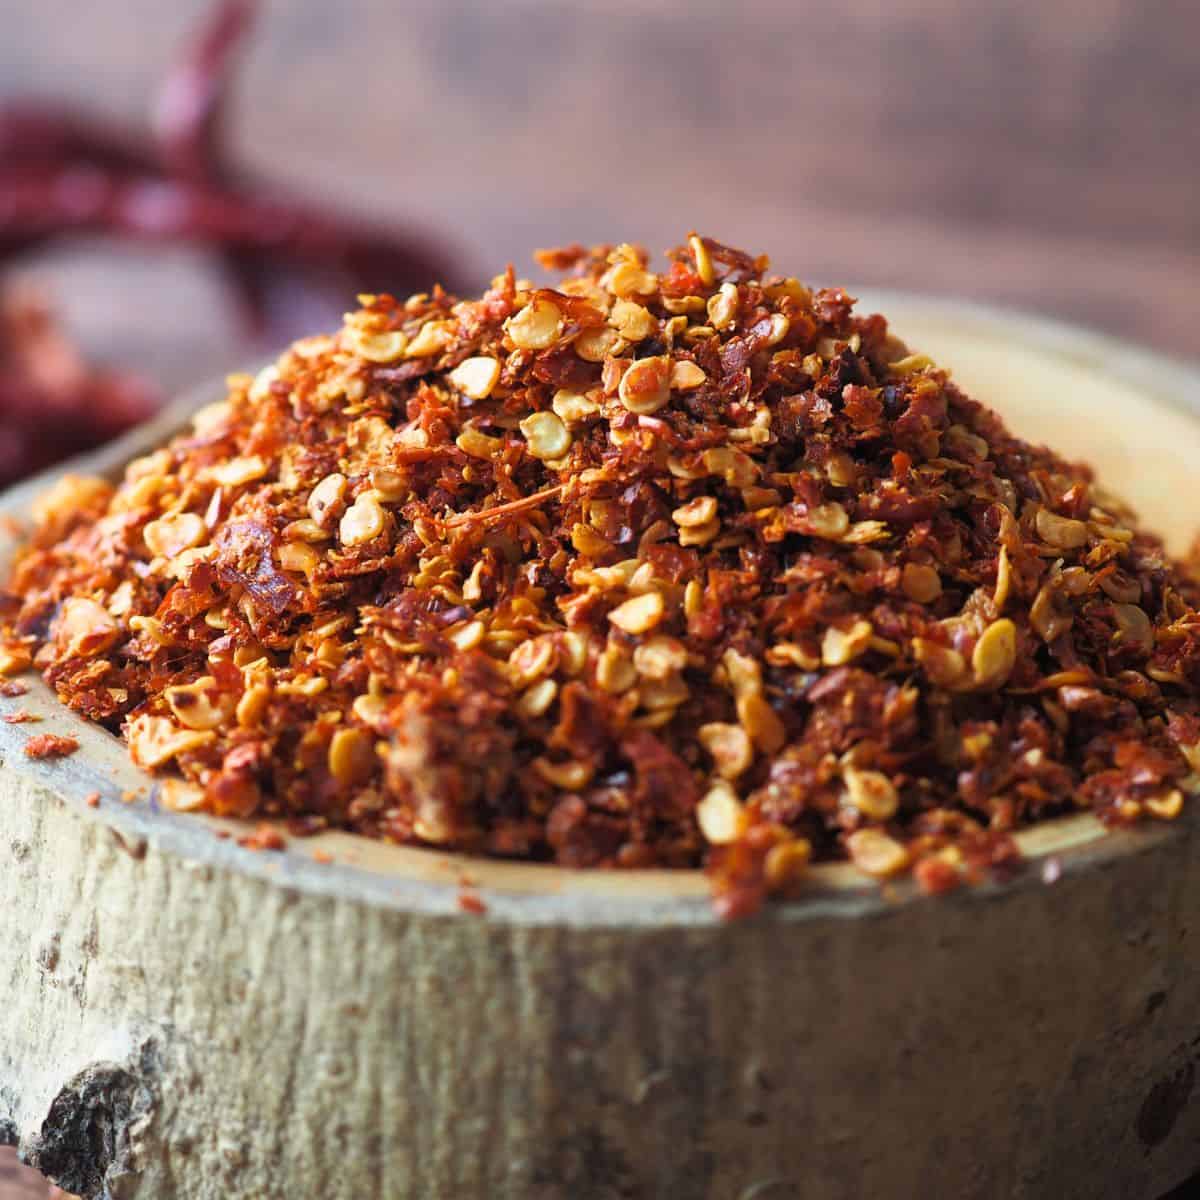
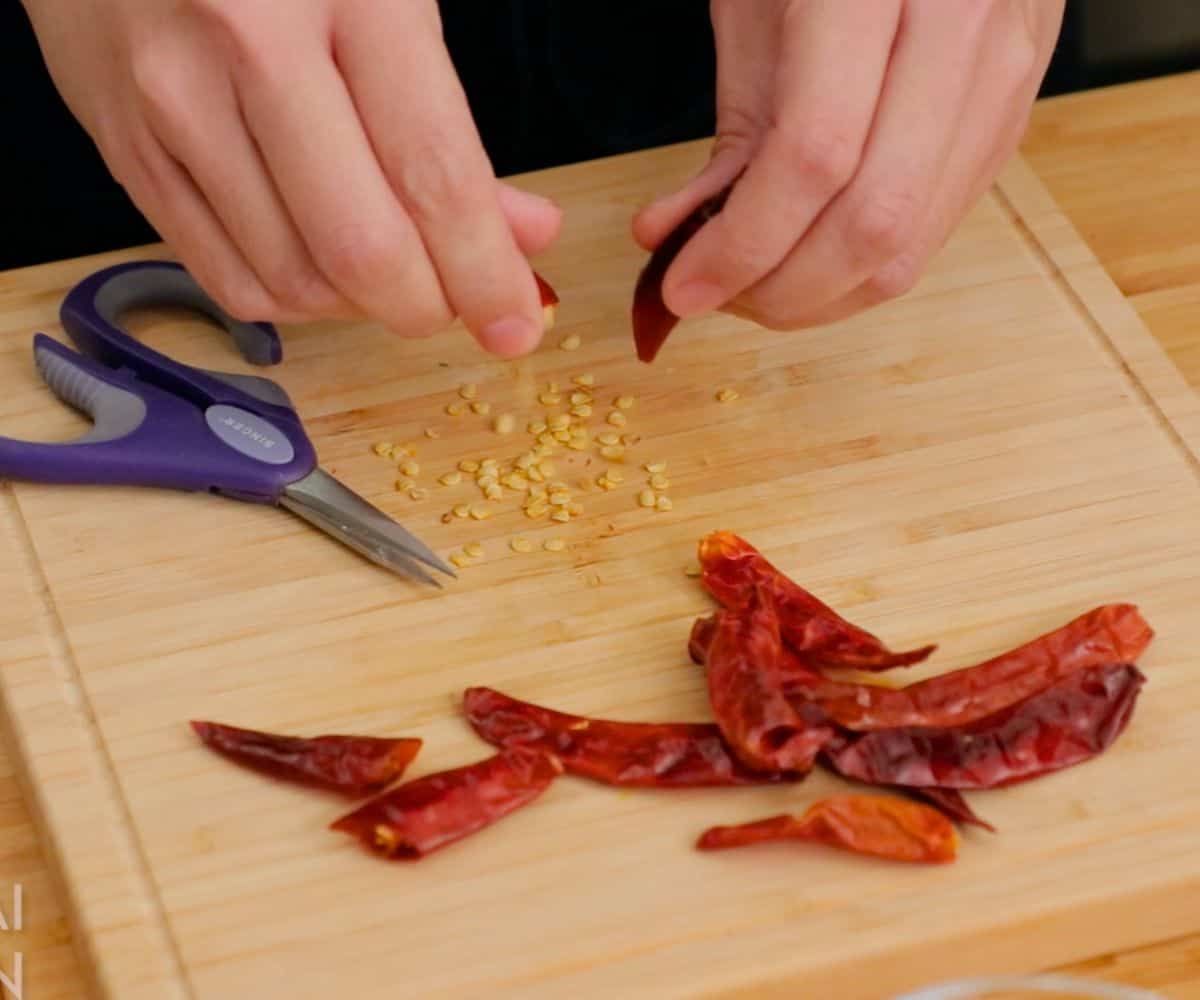
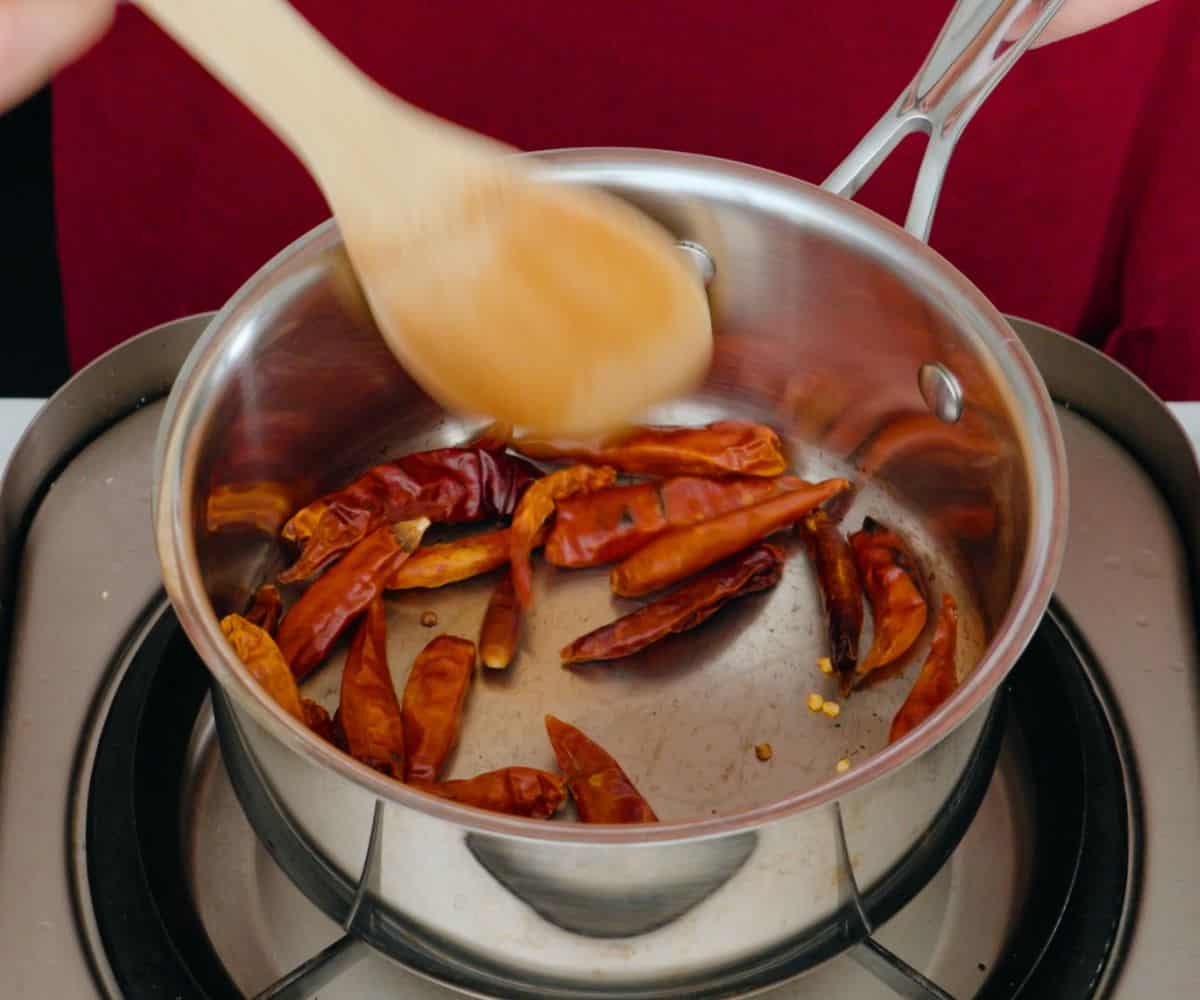
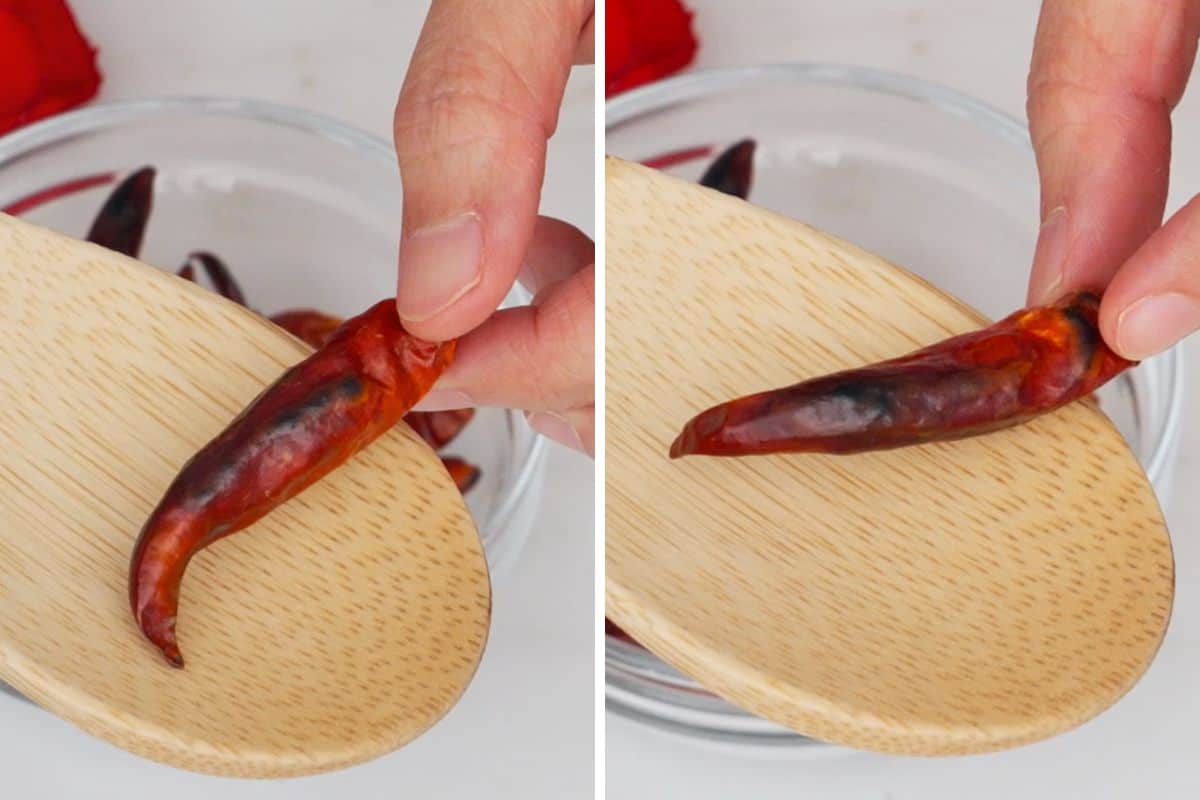
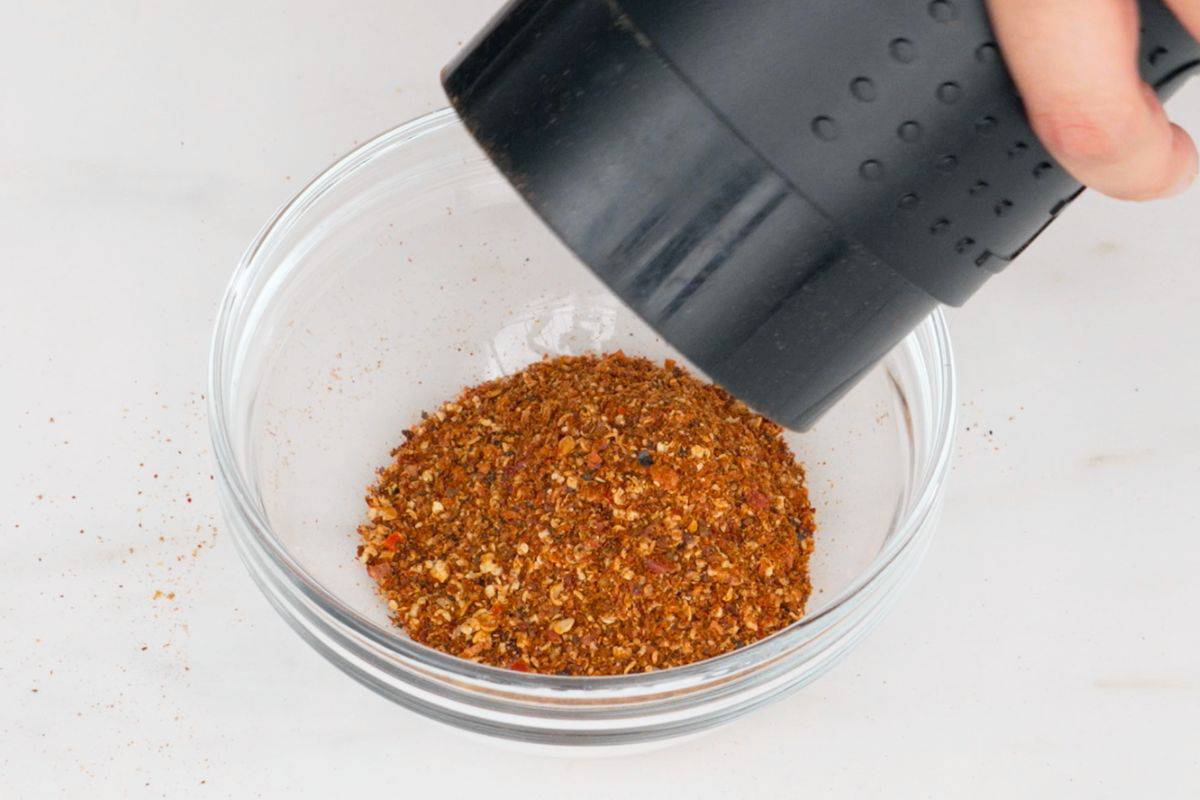
- Roasted chili flakes, but only if you want to make it spicy. Store bought is fine, or you can make your own roasted chili flakes easily!
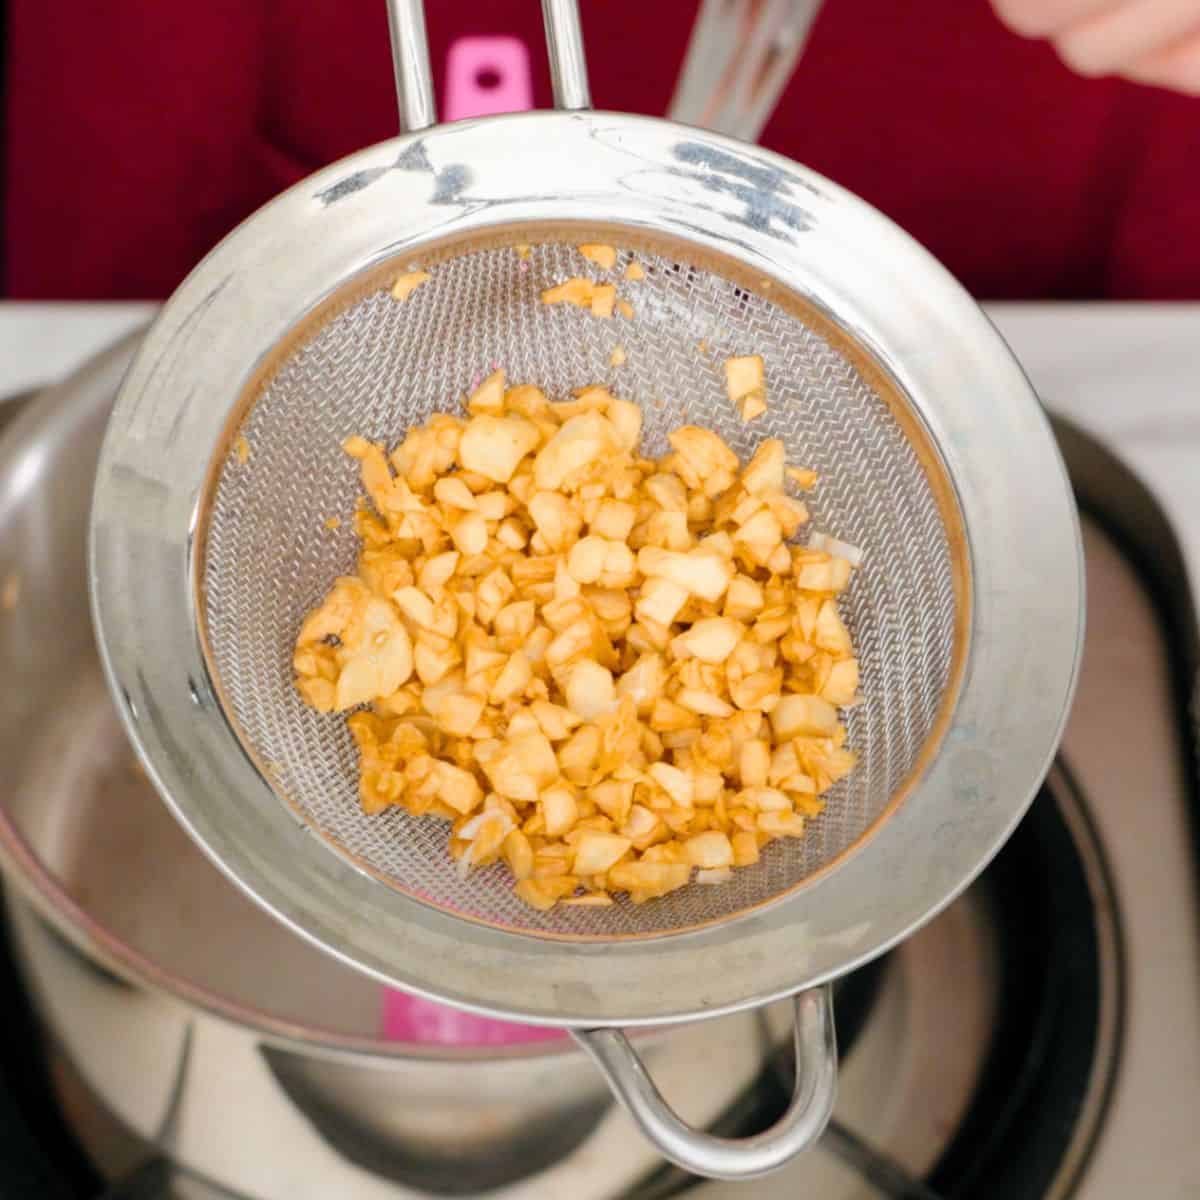
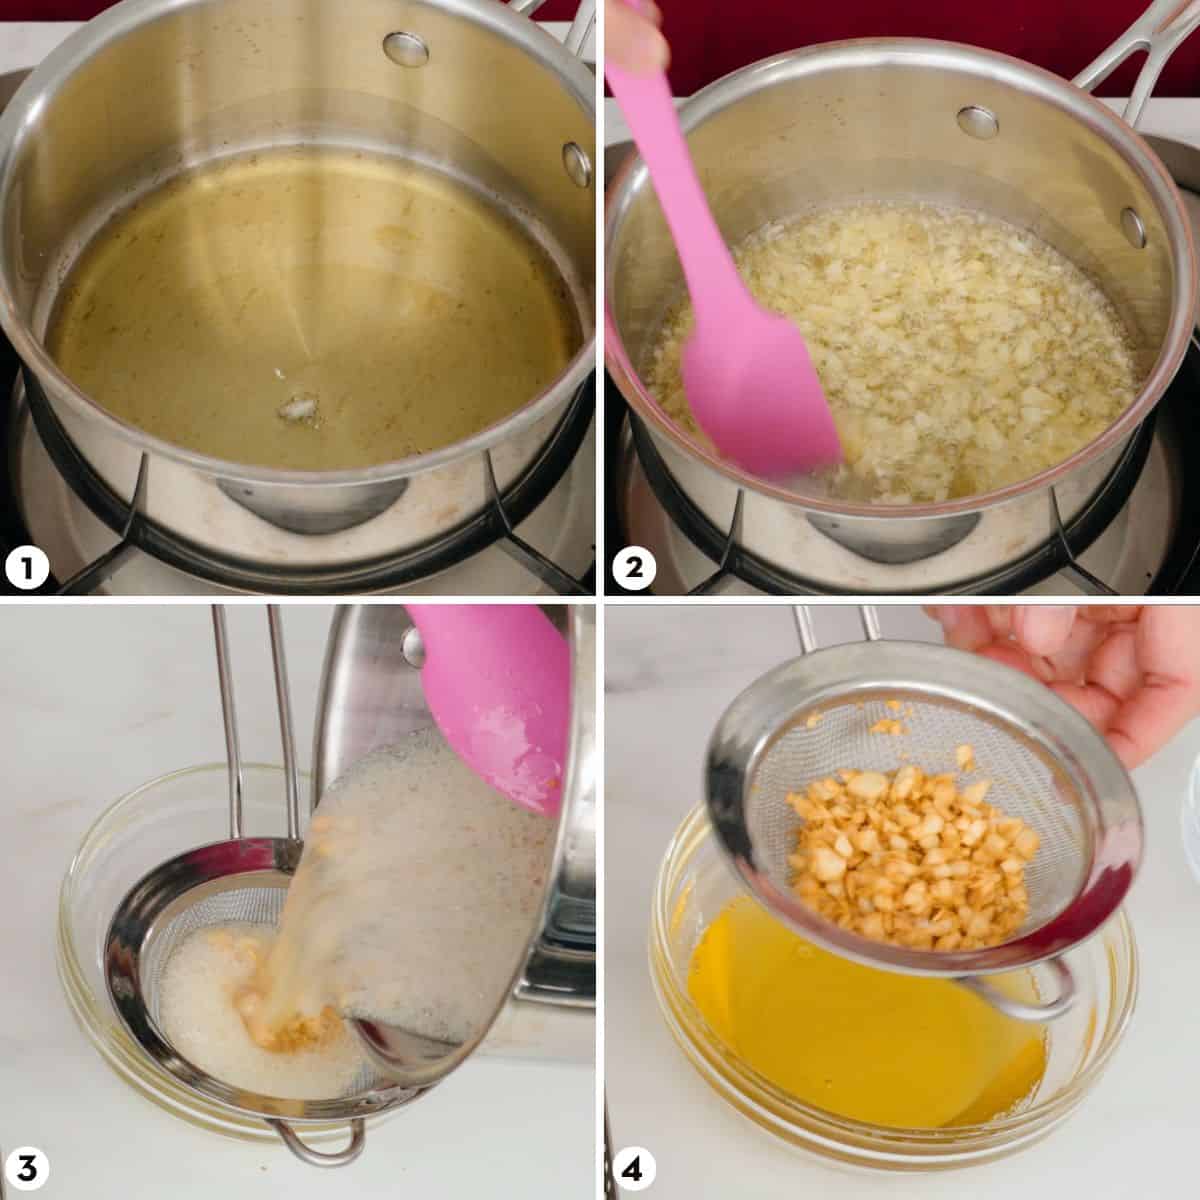
- Fried garlic & garlic oil. You can make your own fried garlic easily and it keeps well. I always have it on hand in the fridge! Here's my fried garlic recipe.
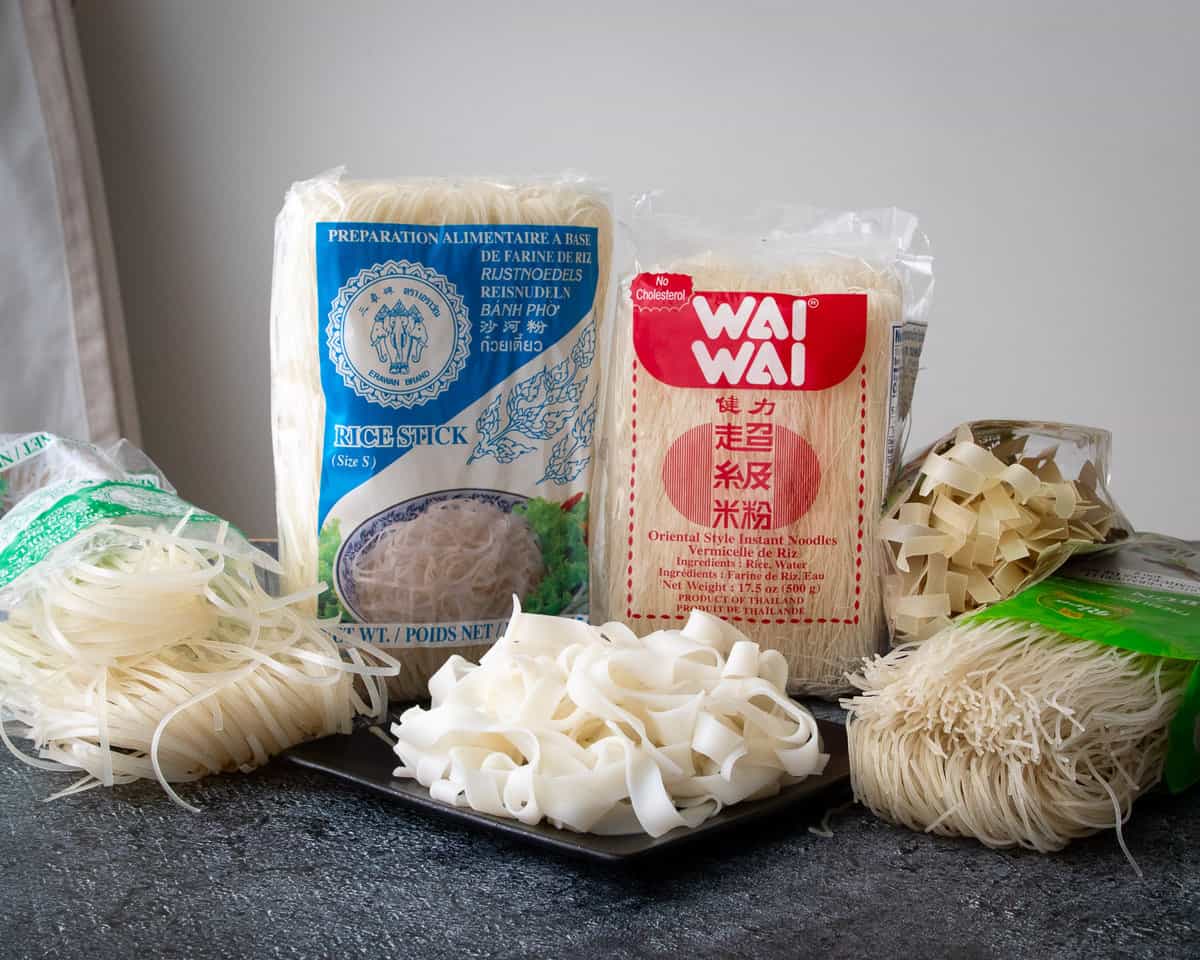
Noodle Options and Cooking Instructions
When you go to order boat noodles at any vendor, you'll be given the option of several noodles. Here they all are, and how to prep them:
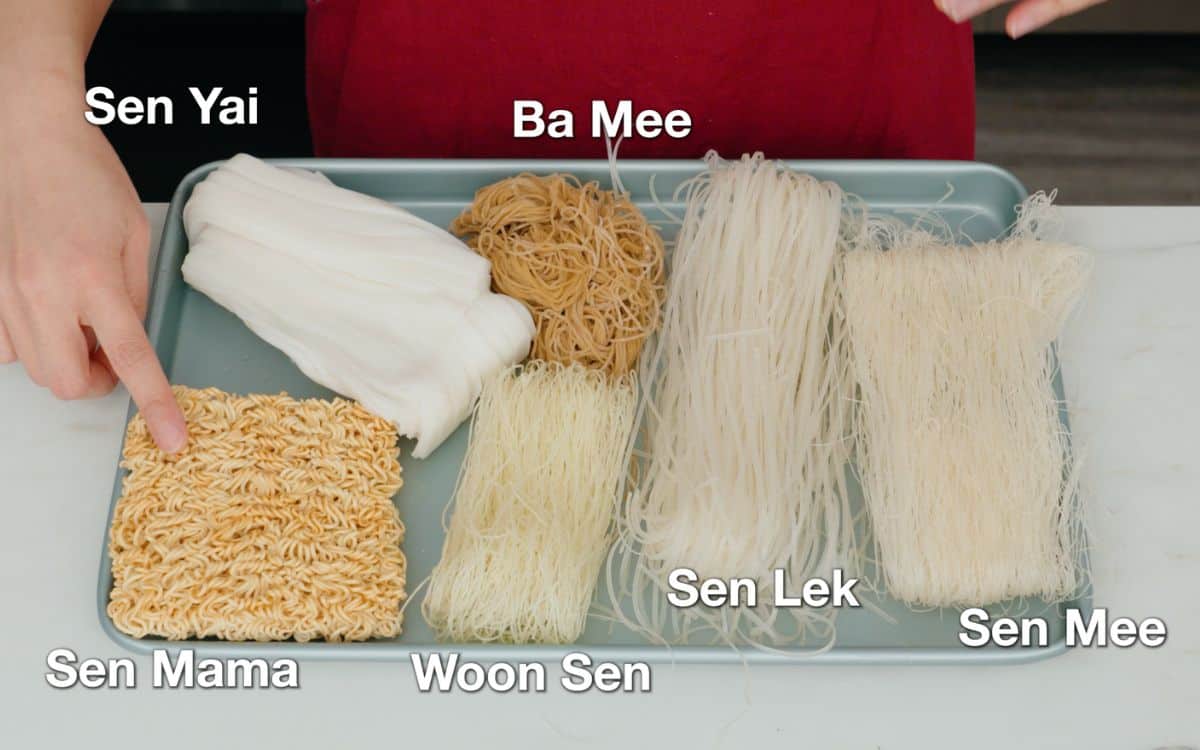
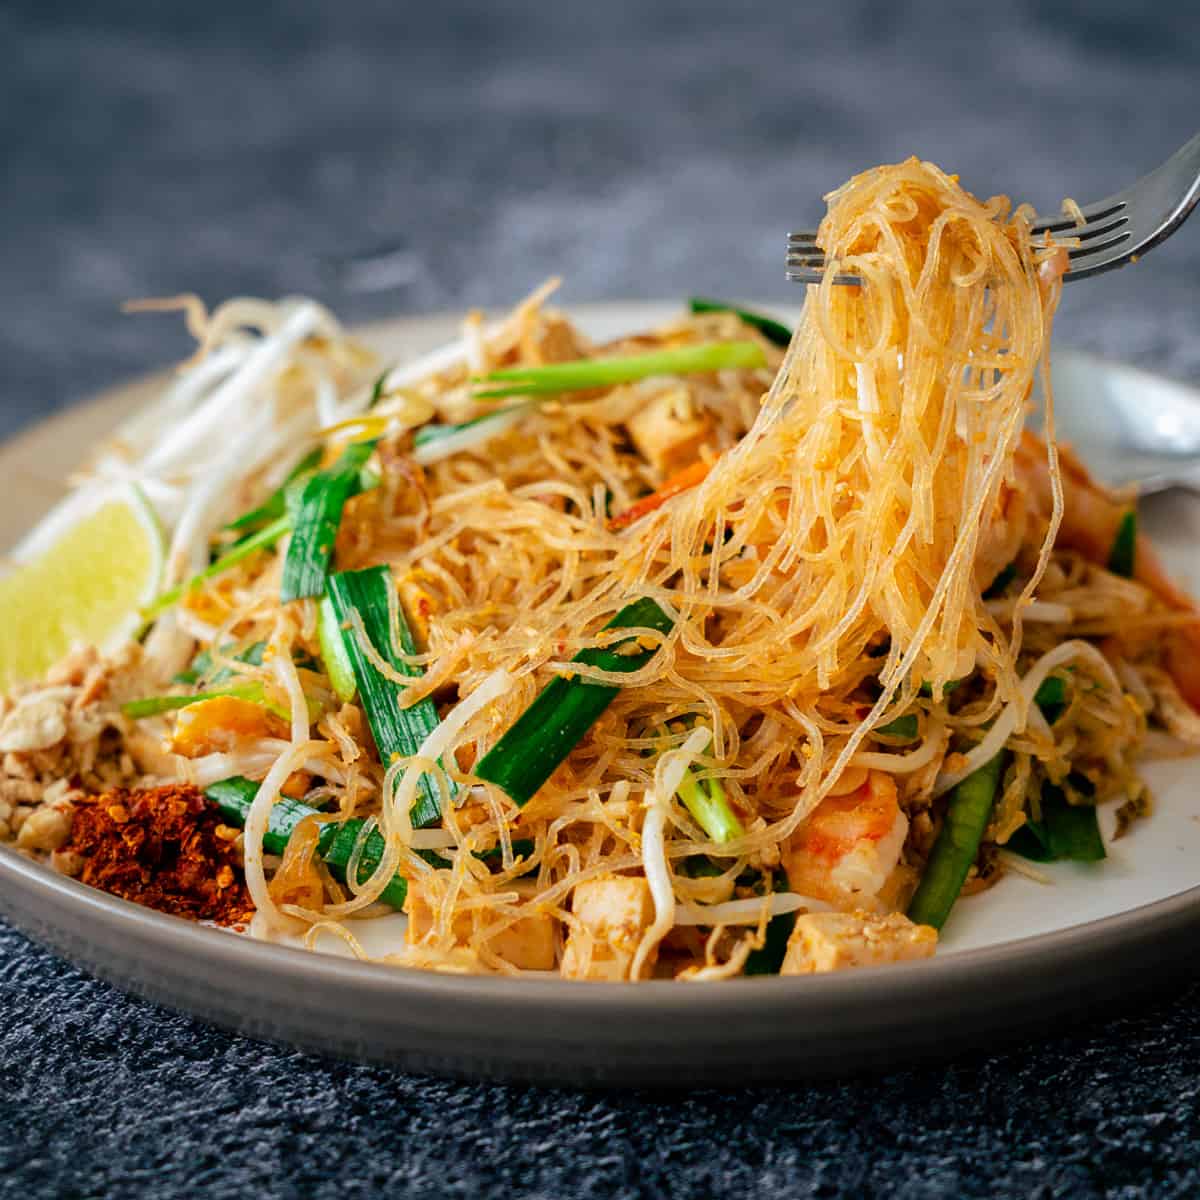
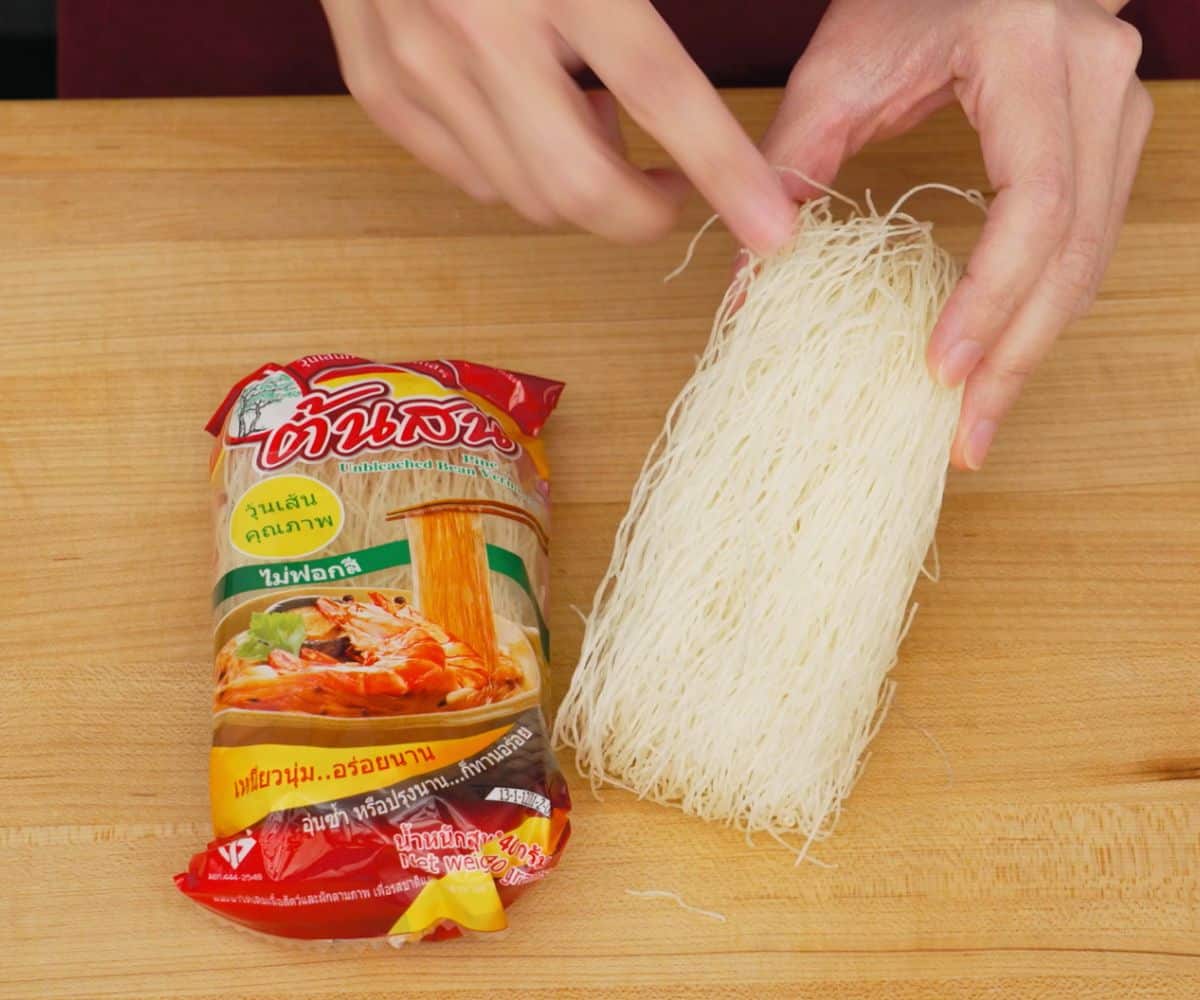
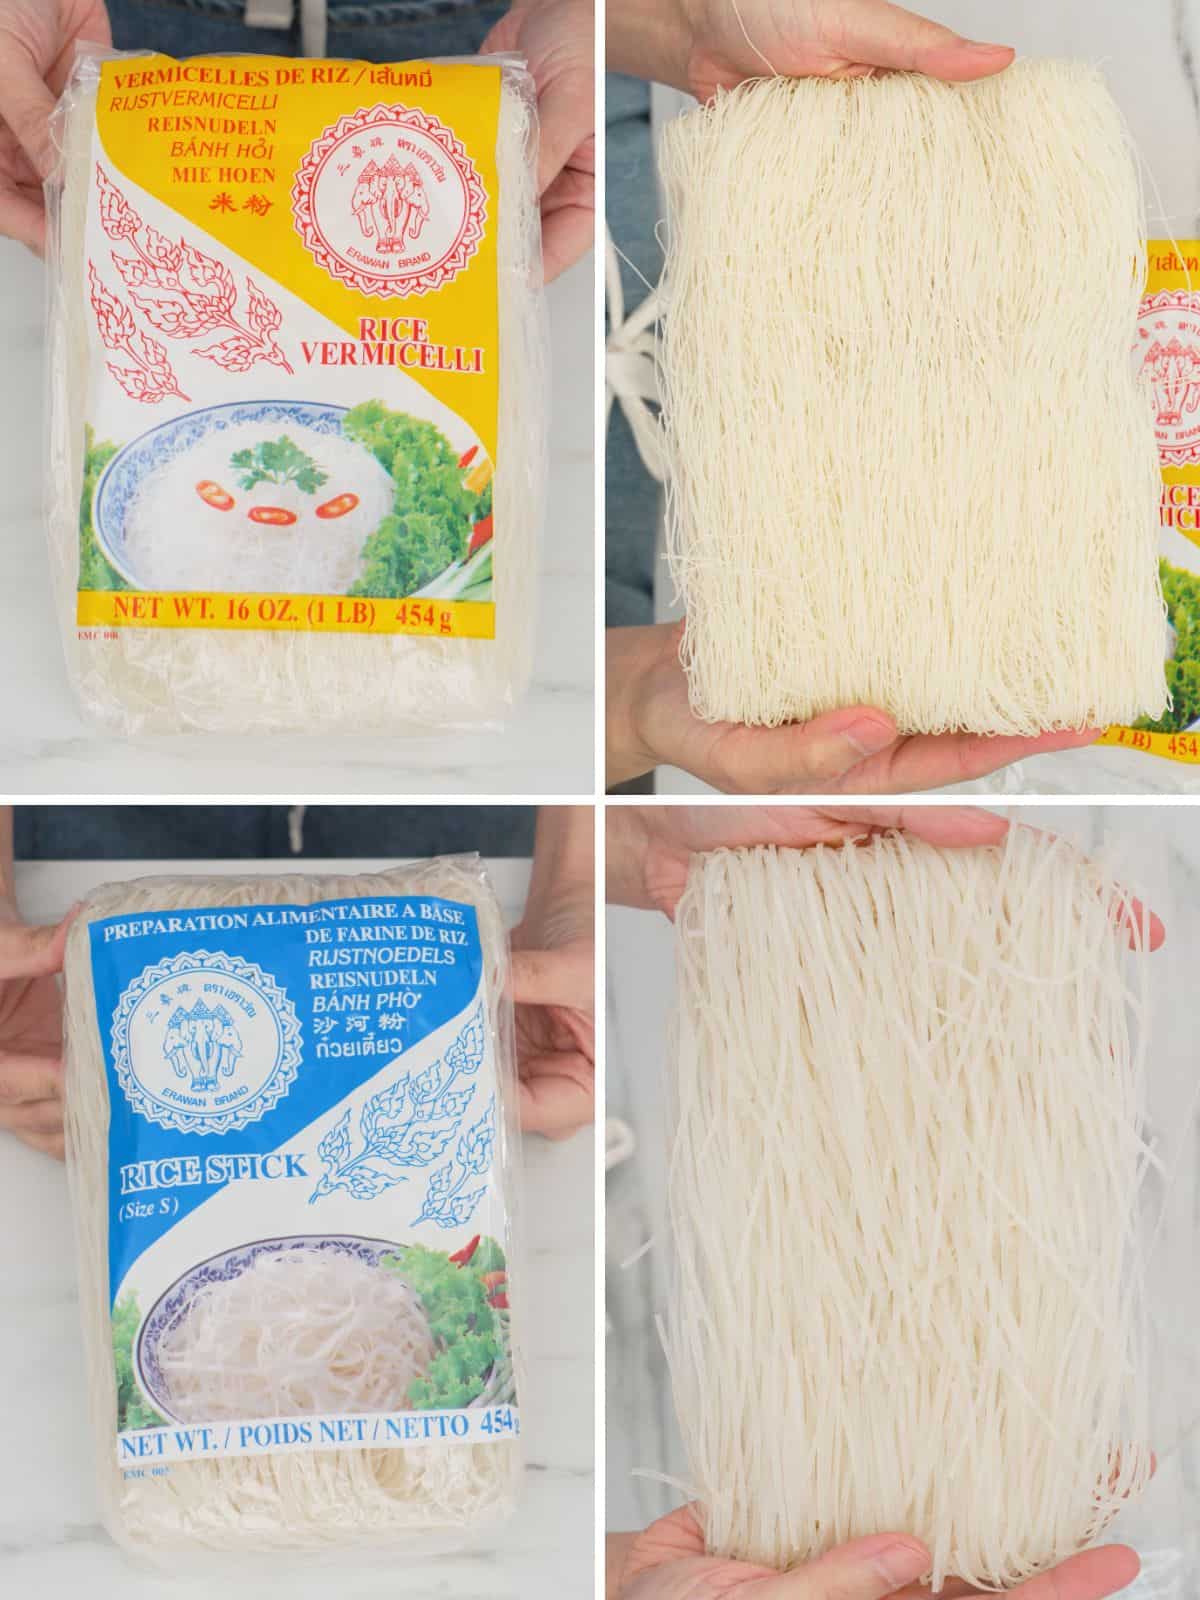
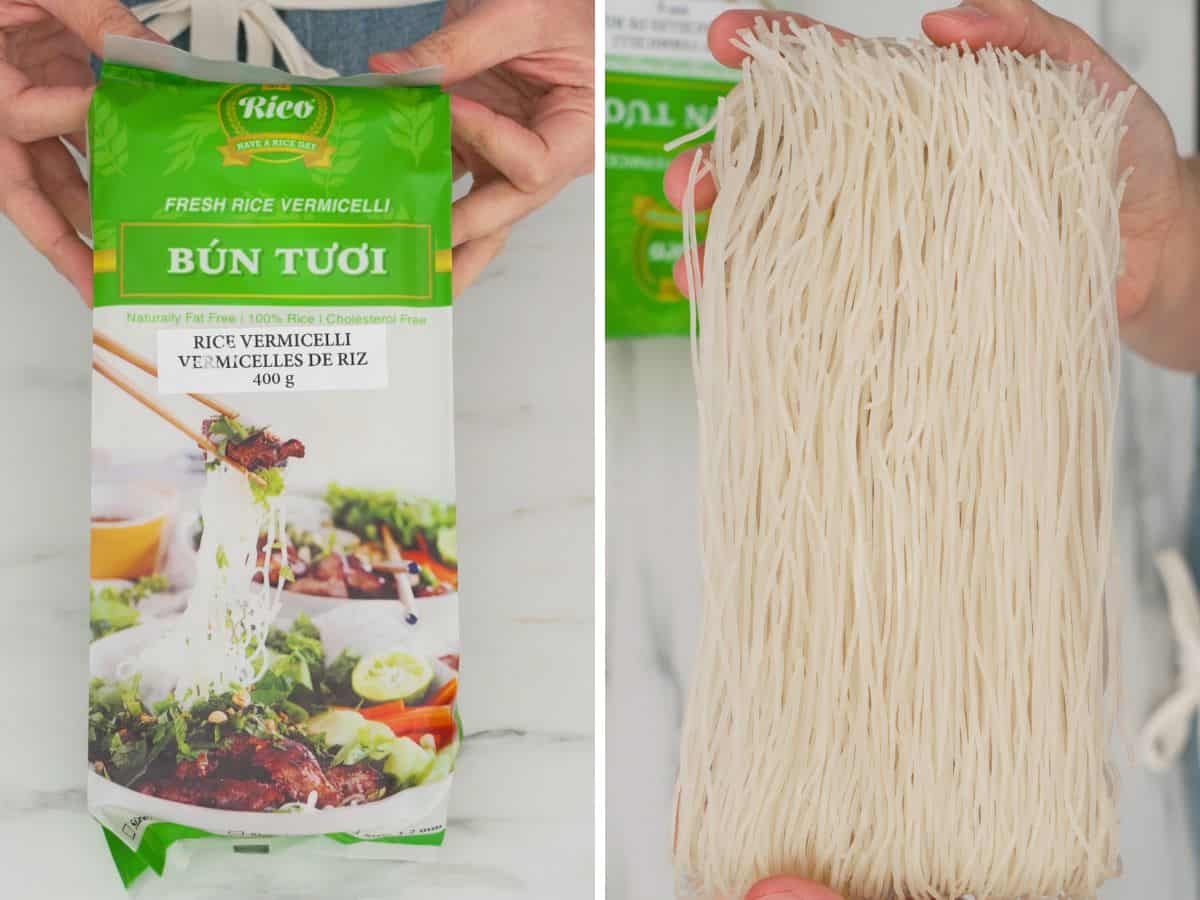
- Rice vermicelli (sen mee) - The smallest of noodles and the quickest to prep. Simply soak them in room temp water for 5-15 mins (timing varies between brands) until they are completely limp, then drain.
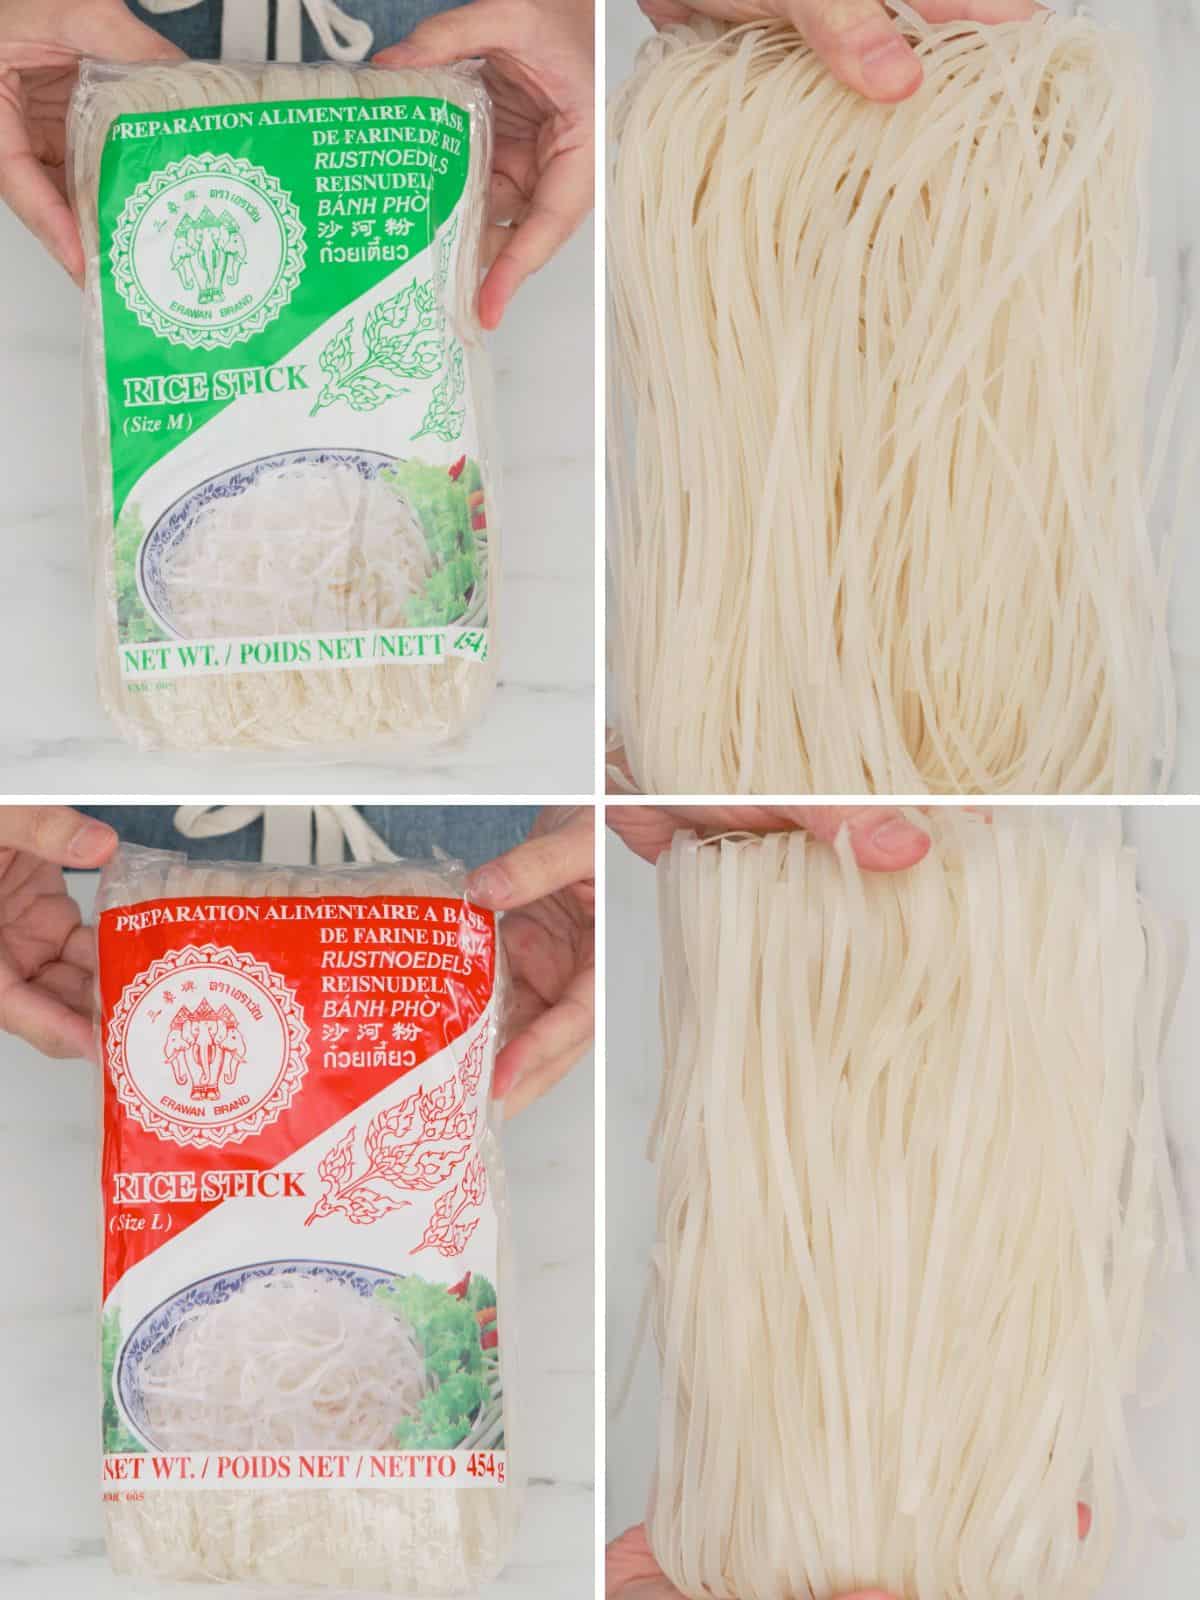
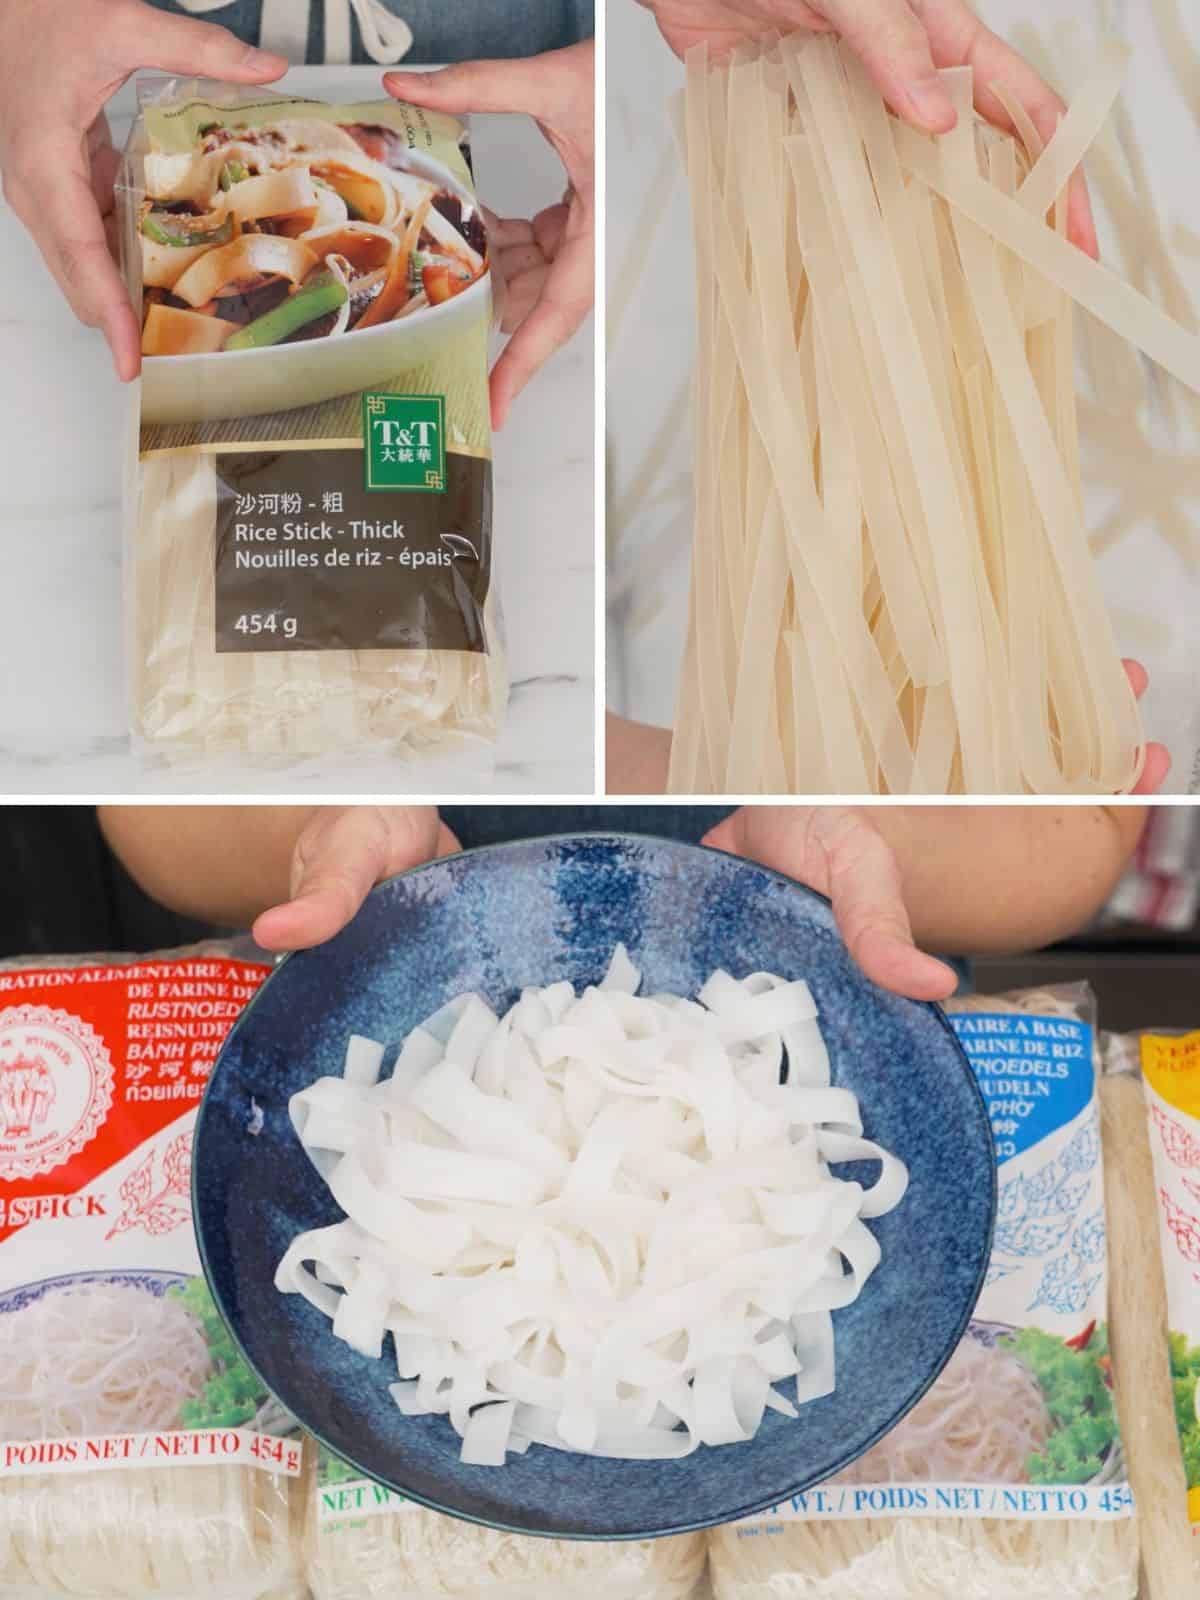
To cook, you'll need to blanch them in boiling water, one portion at a time, for 5 seconds just like I showed in the video. - Small dry rice noodles (sen lek) - The most classic option. These noodles are 1.5 mm wide when dry. Soak in room temp water for 20-30 minutes or until they turn opaque white and are completely limp - they should have lost all of the kinks - and then drain.
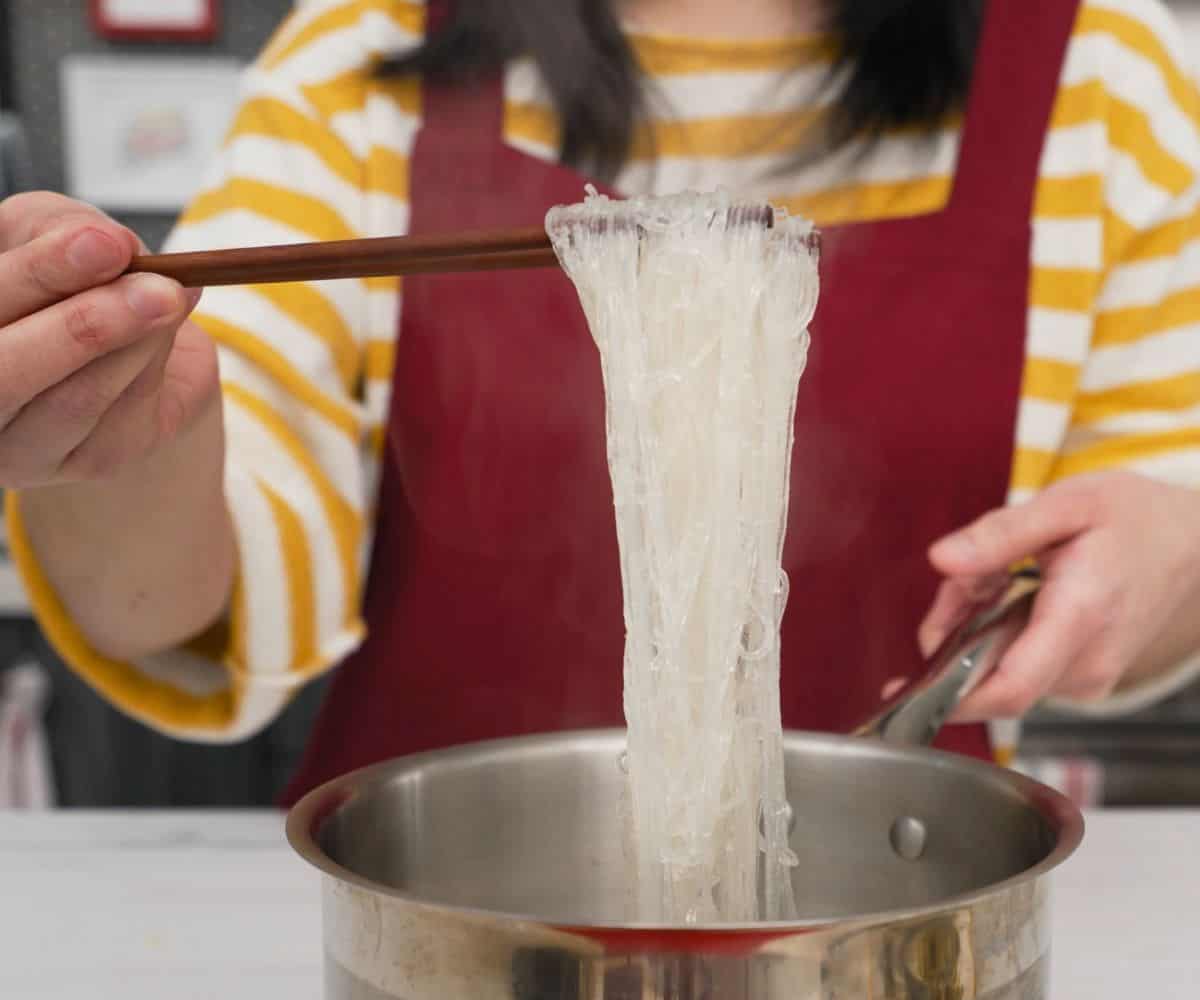
To cook, blanch them in boiling water, one portion at a time, for 5 seconds as shown in the video. - Glass noodles (woon sen) - woonsen is thin, delicate, and has a neutral flavour and is delicious in boat noodles. Soak in room temp water for 10 minutes until softened before cooking.
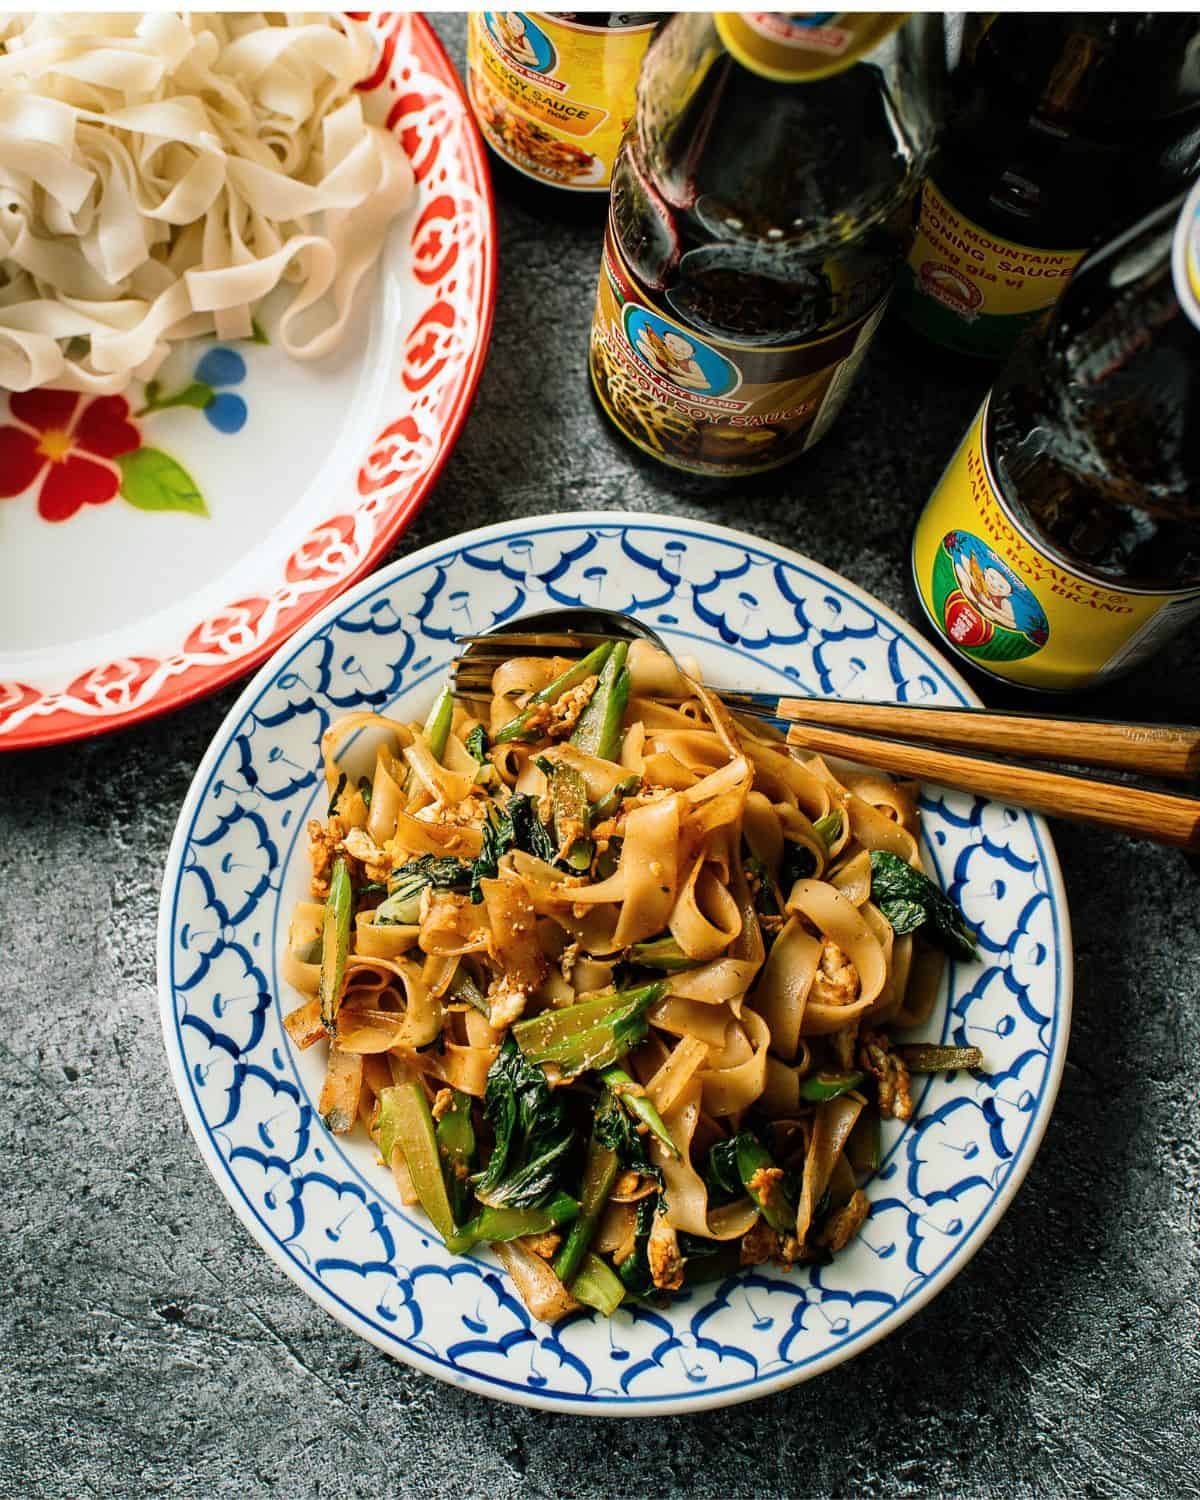
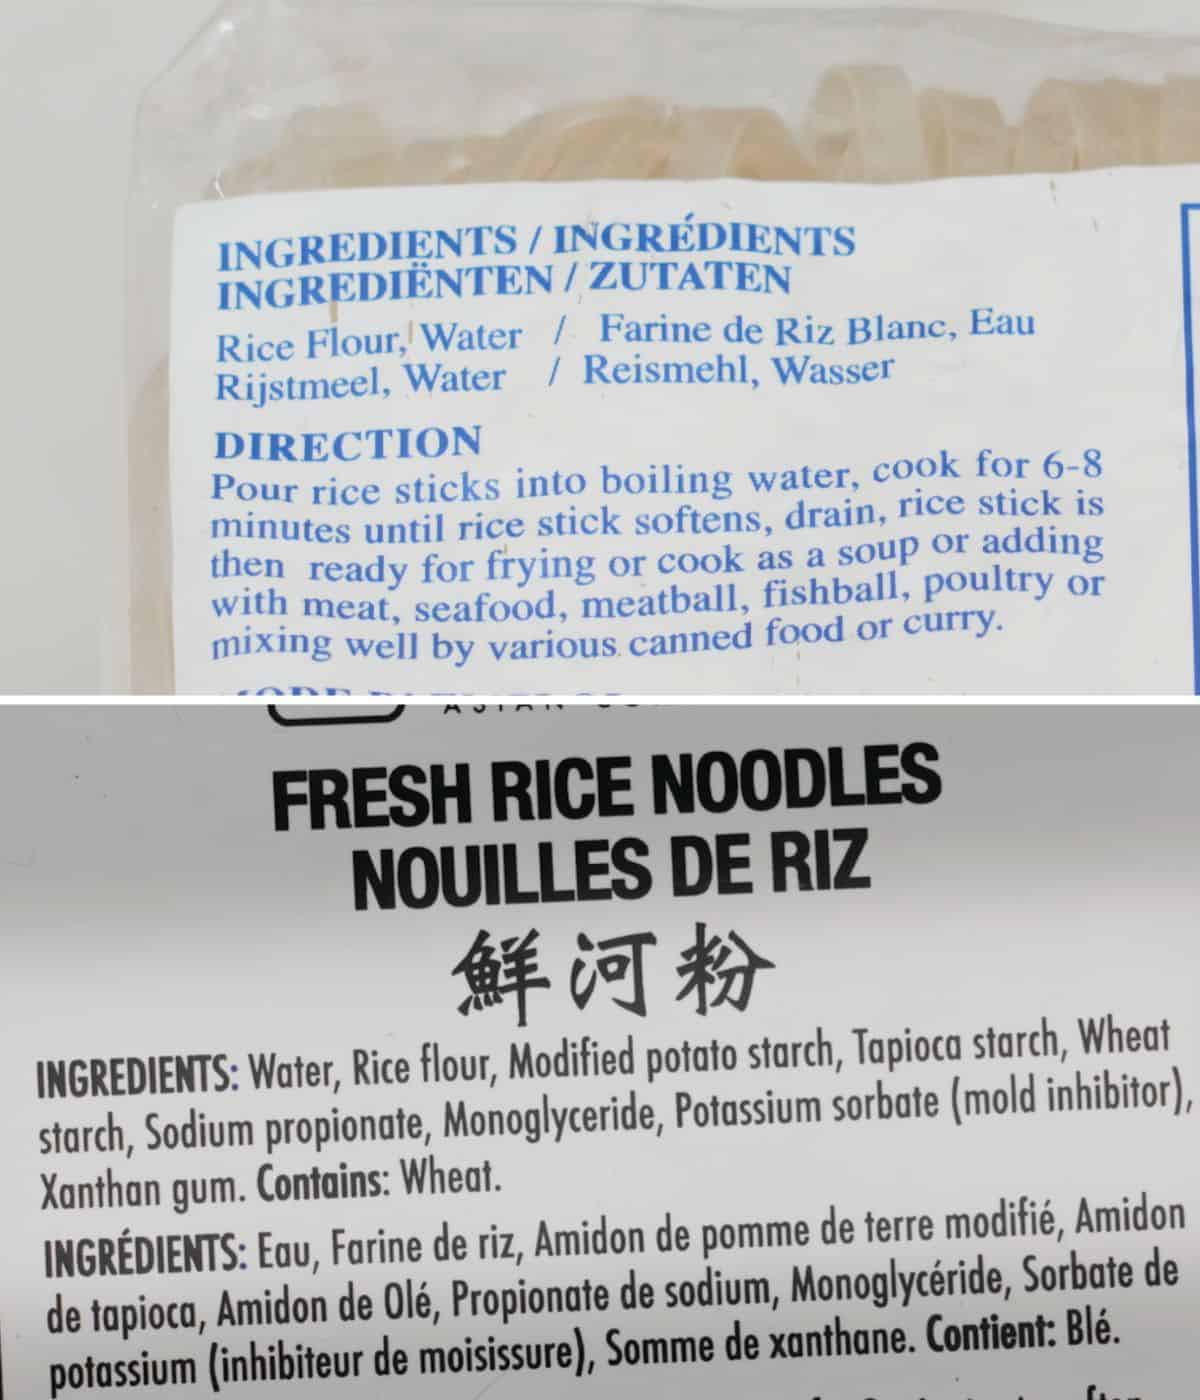
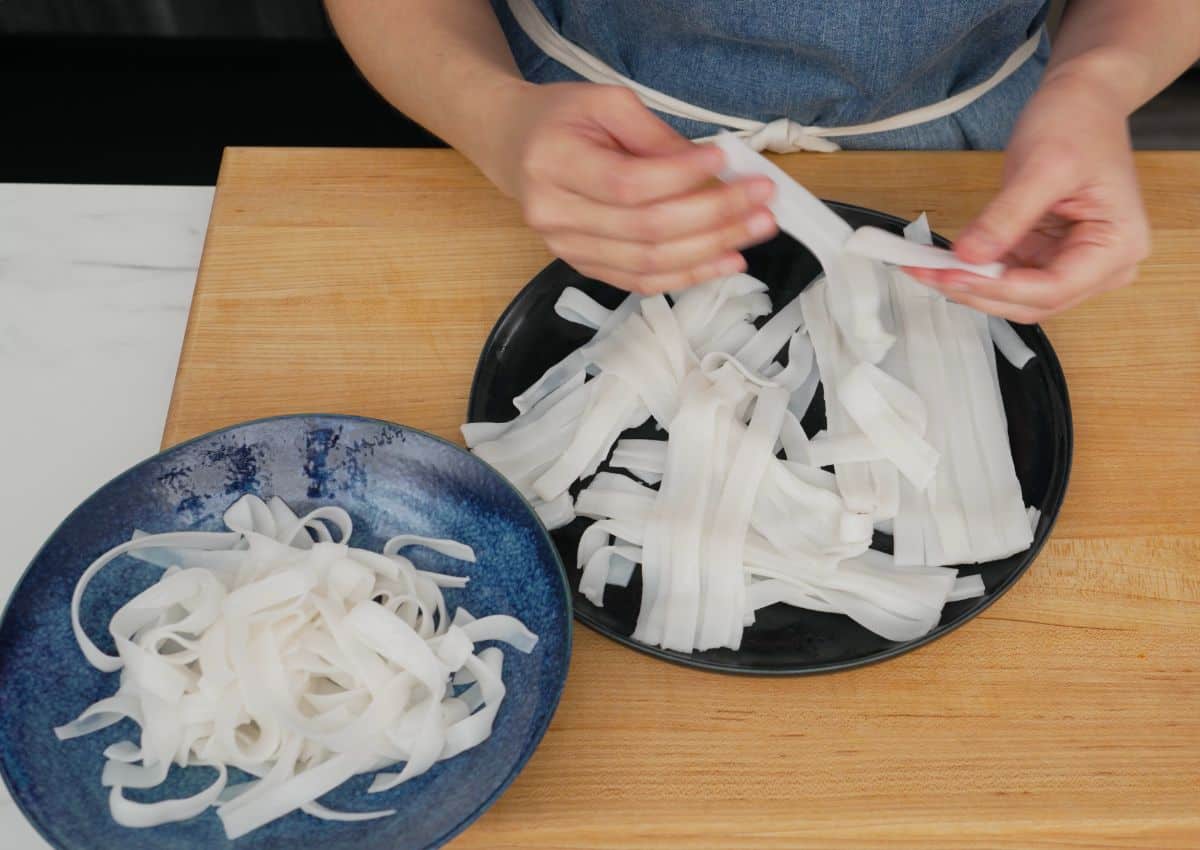
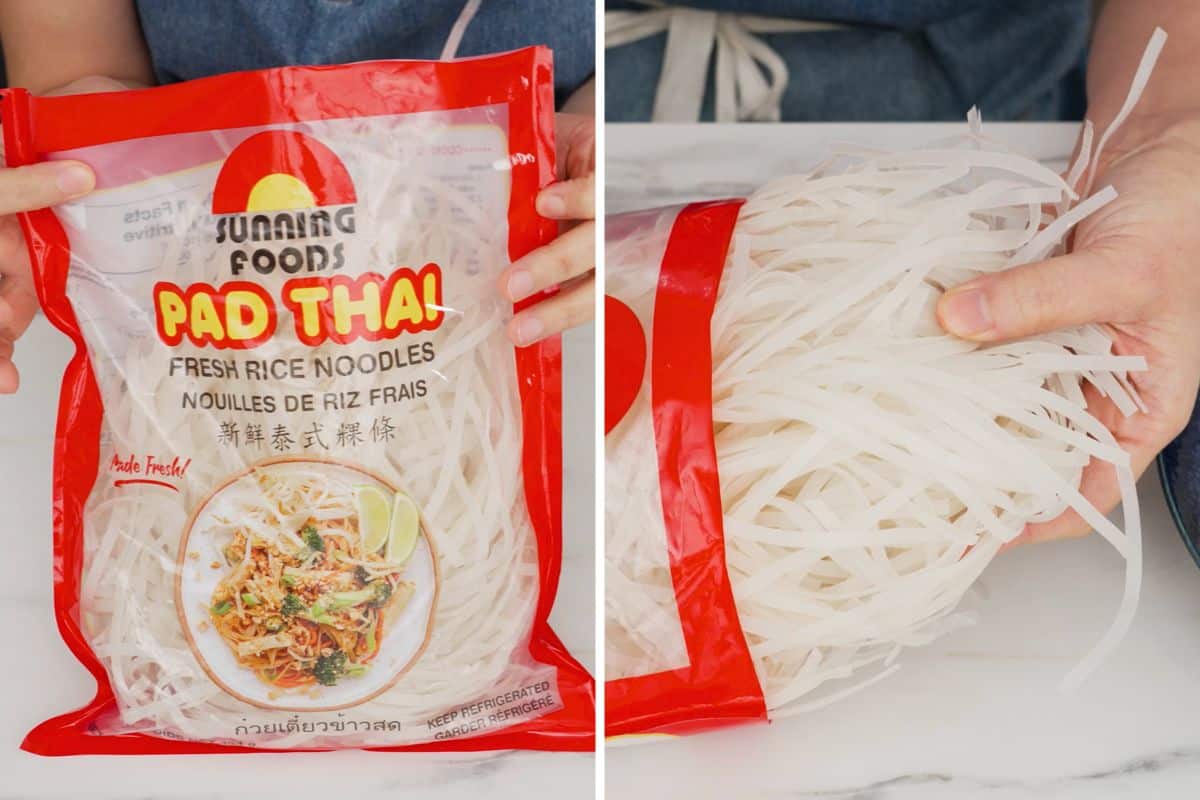
To cook, boil in hot water for 2 minutes. You can cook all of the glass noodles at once since they take a longer time to cook, then separate into portions immediately after draining. - Fresh wide rice noodles (sen yai) - This is the noodles commonly associated with pad see ew. If cold and stuck together, microwave the noodles until they are hot and soft, so they can be peeled apart without breaking. Separate all the noodles before cooking.
To cook, blanch them one portion at a time for 2 seconds in hot water just to heat them up and wash off the oil that's used to coat them. Do not let them linger in hot water for too long because they're already fully cooked and will quickly turn mushy. - Wonton noodles or egg noodles (bamee) - These vary greatly between brands, so you'll have to change the cooking time according to what you've got.
But if you have thin wonton noodles like the one shown in the pic (fresh and coated in flour), loosen the noodles and boil them in hot water for 1 minute. I find it easier to cook these 1 portion at a time, but if you're making many portions, you can cook them all at once and separate them immediately after draining. - Mama Instant Noodles (sen mama) - Mama are the Thai instant noodles and they are super tasty in boat noodles! Buy any flavour of mama since you won't need the seasoning packets, but make sure the noodles are the classic wheat fried noodles as shown in the pic.
Boil the noodles in water for about 1 minute, and you can cook all portions together and separate them after draining.
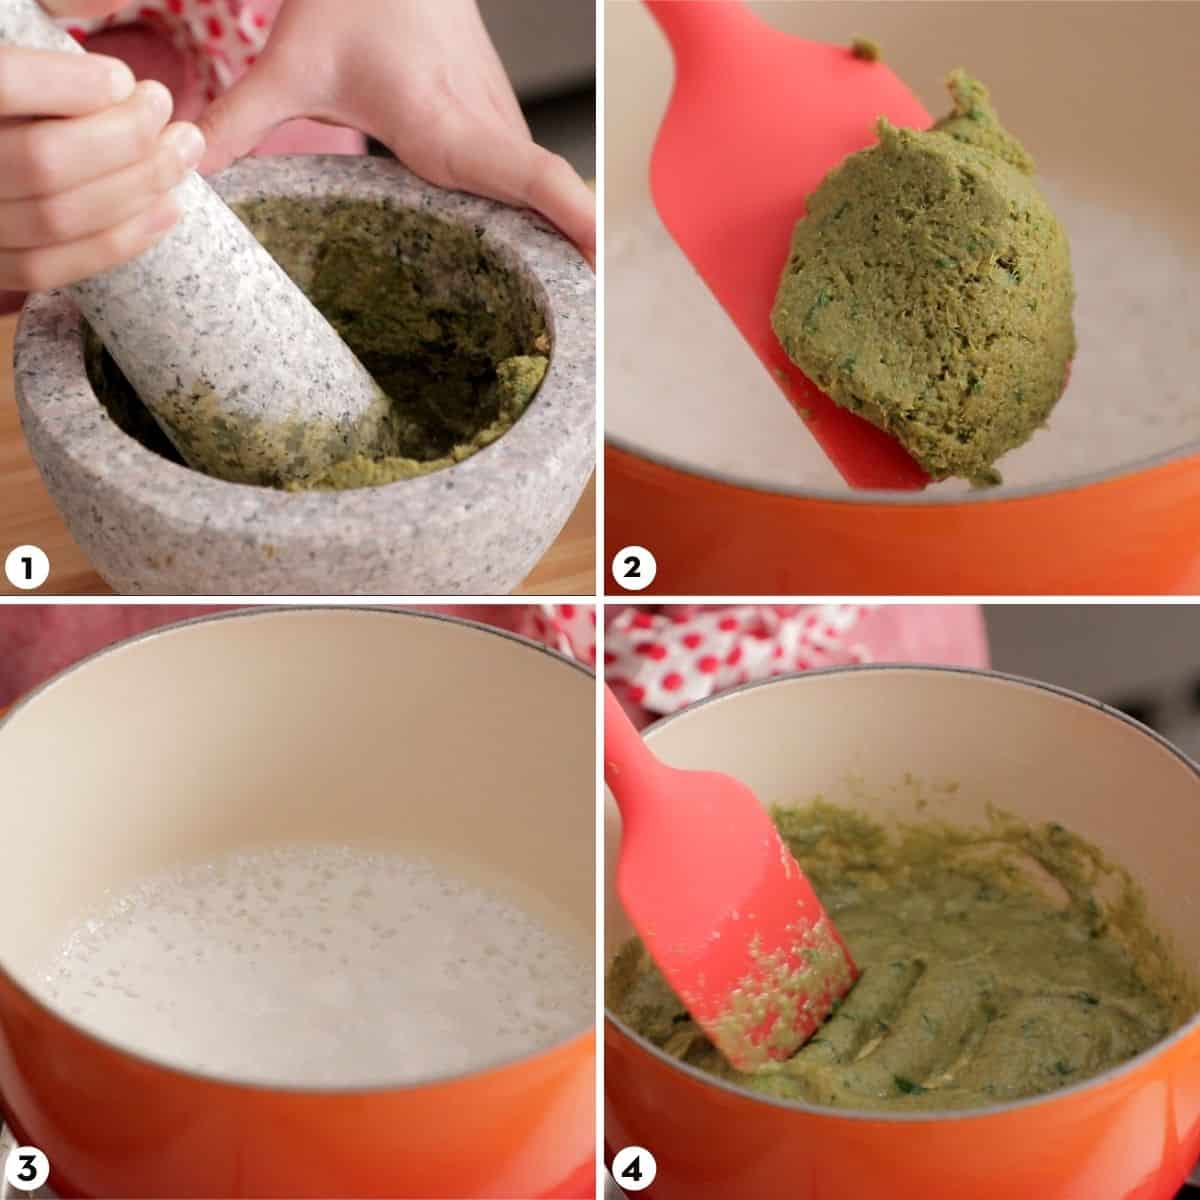
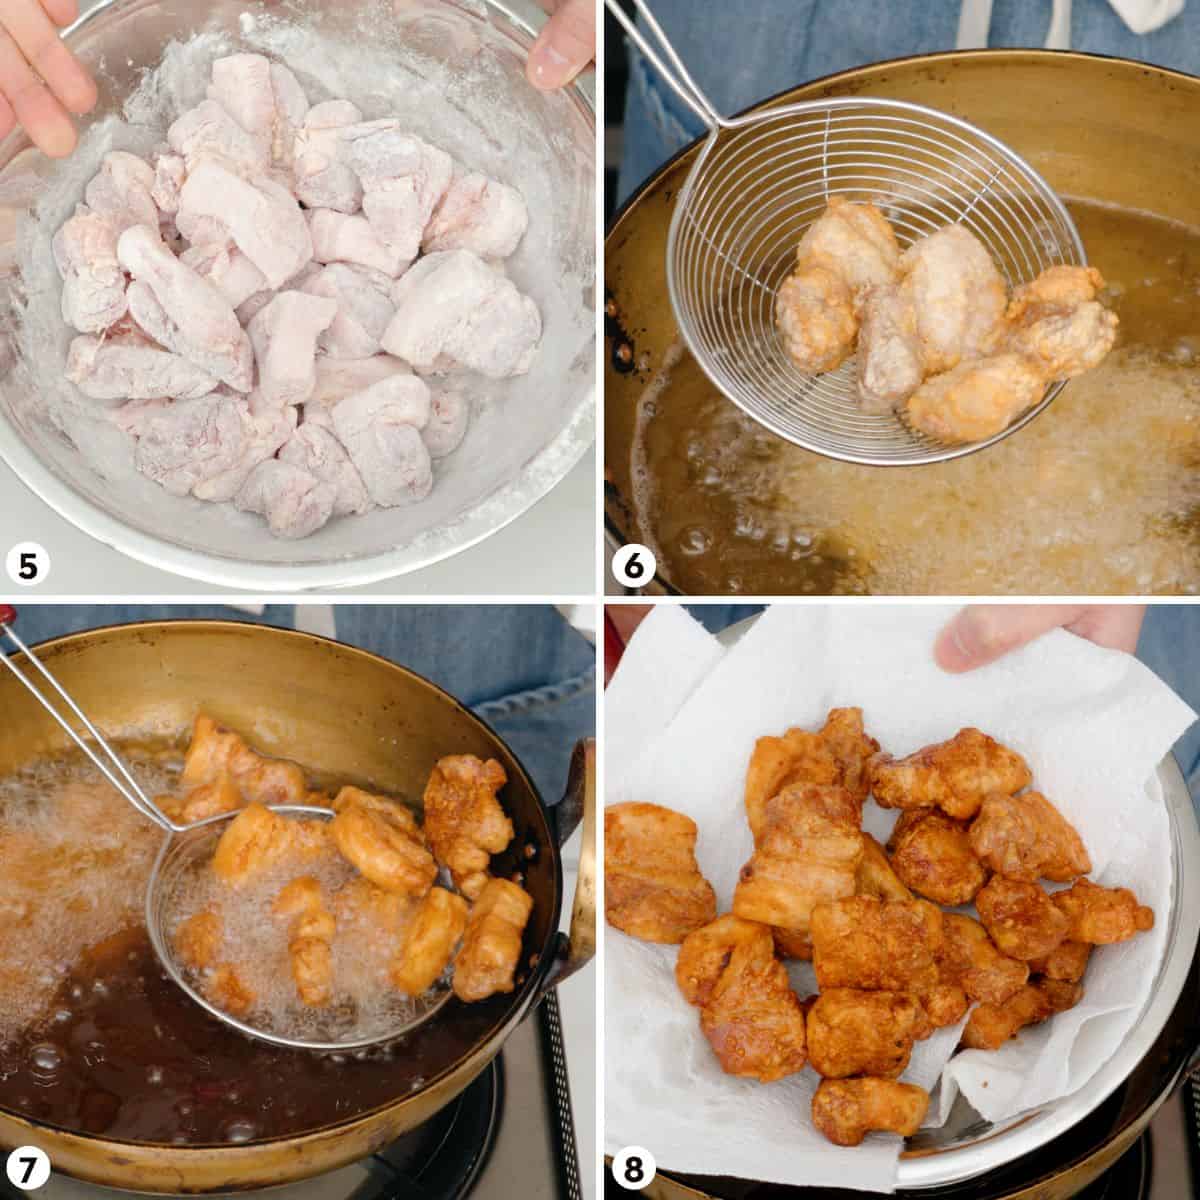
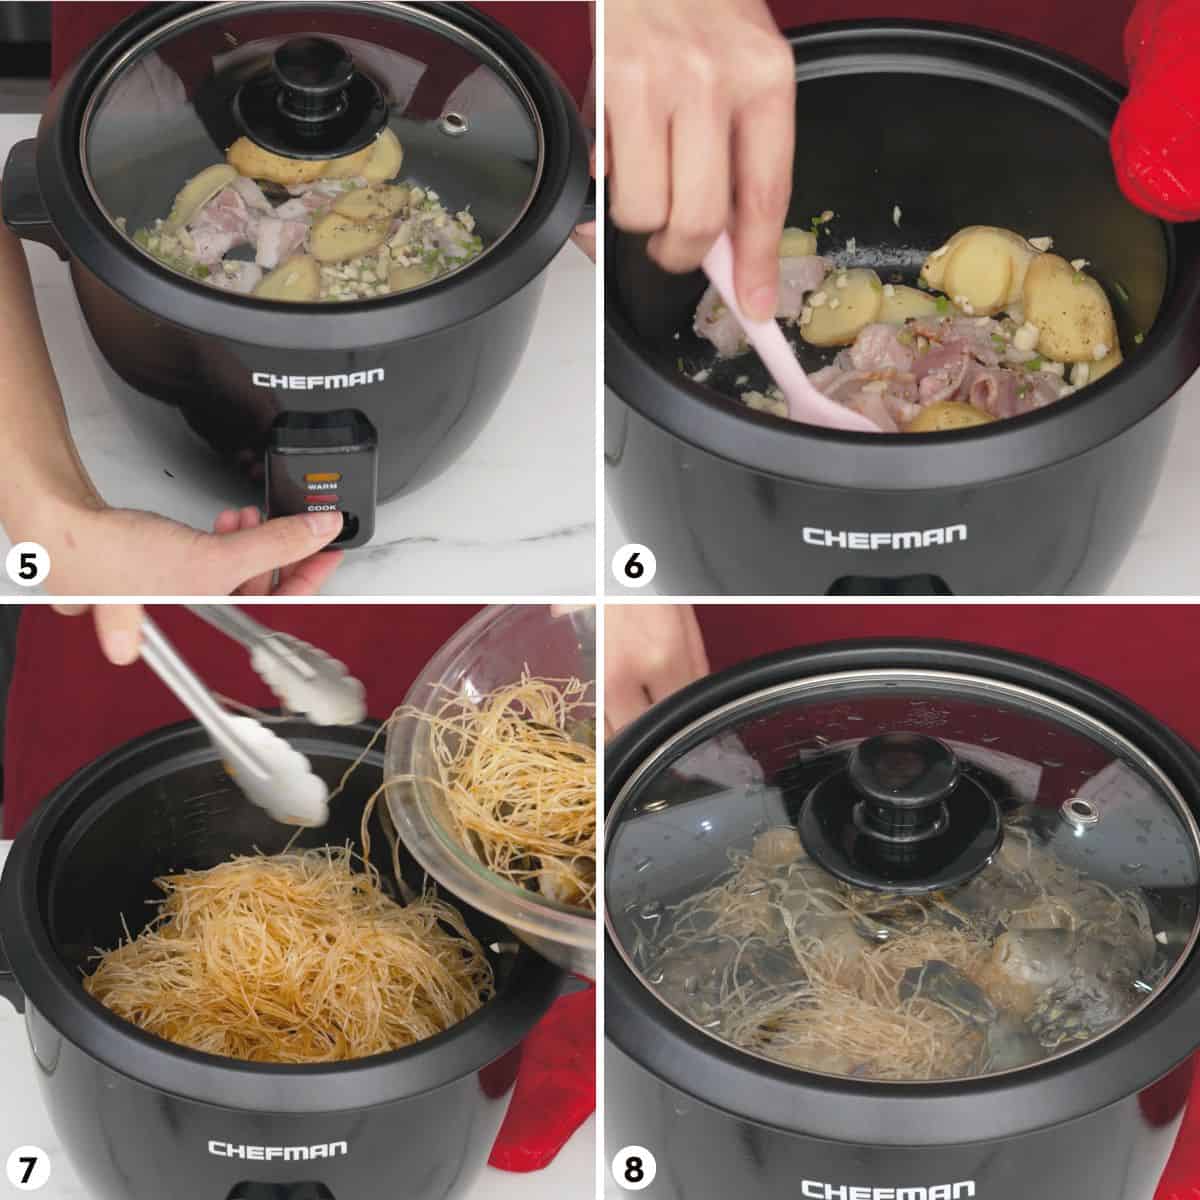
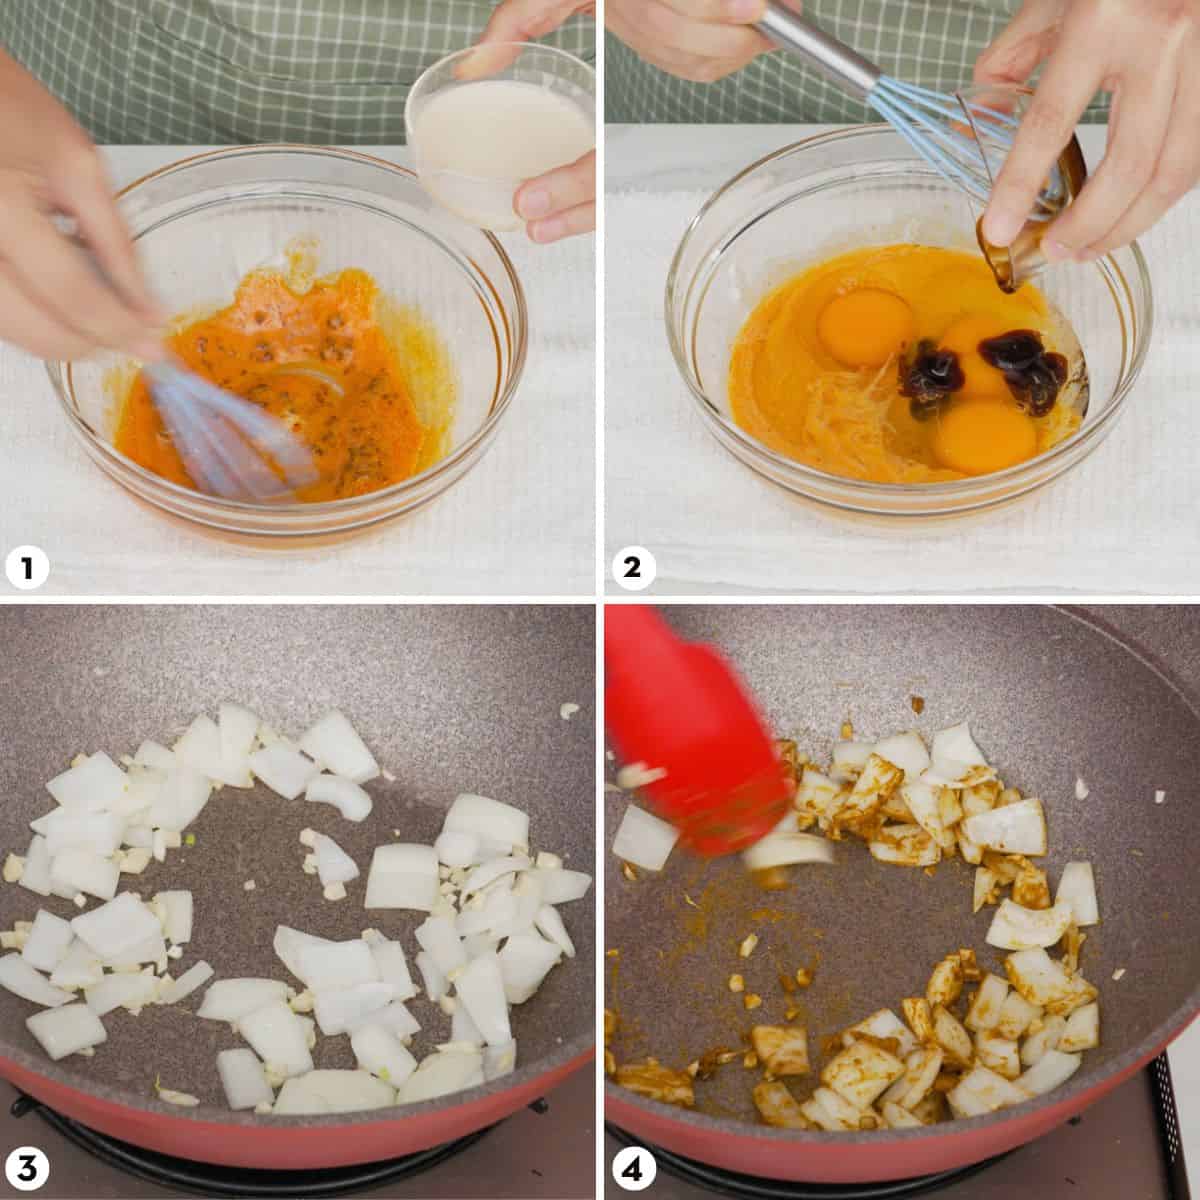
How to Make Boat Noodles
Here's the bird's eye view of the process so you get an idea of what's involved; the full instructions are in the recipe card below. It's not hard, but there are a lot of moving parts and it can be confusing for first timers, so I highly recommend watching the video tutorial, especially the assembly part, and it'll make much more sense!
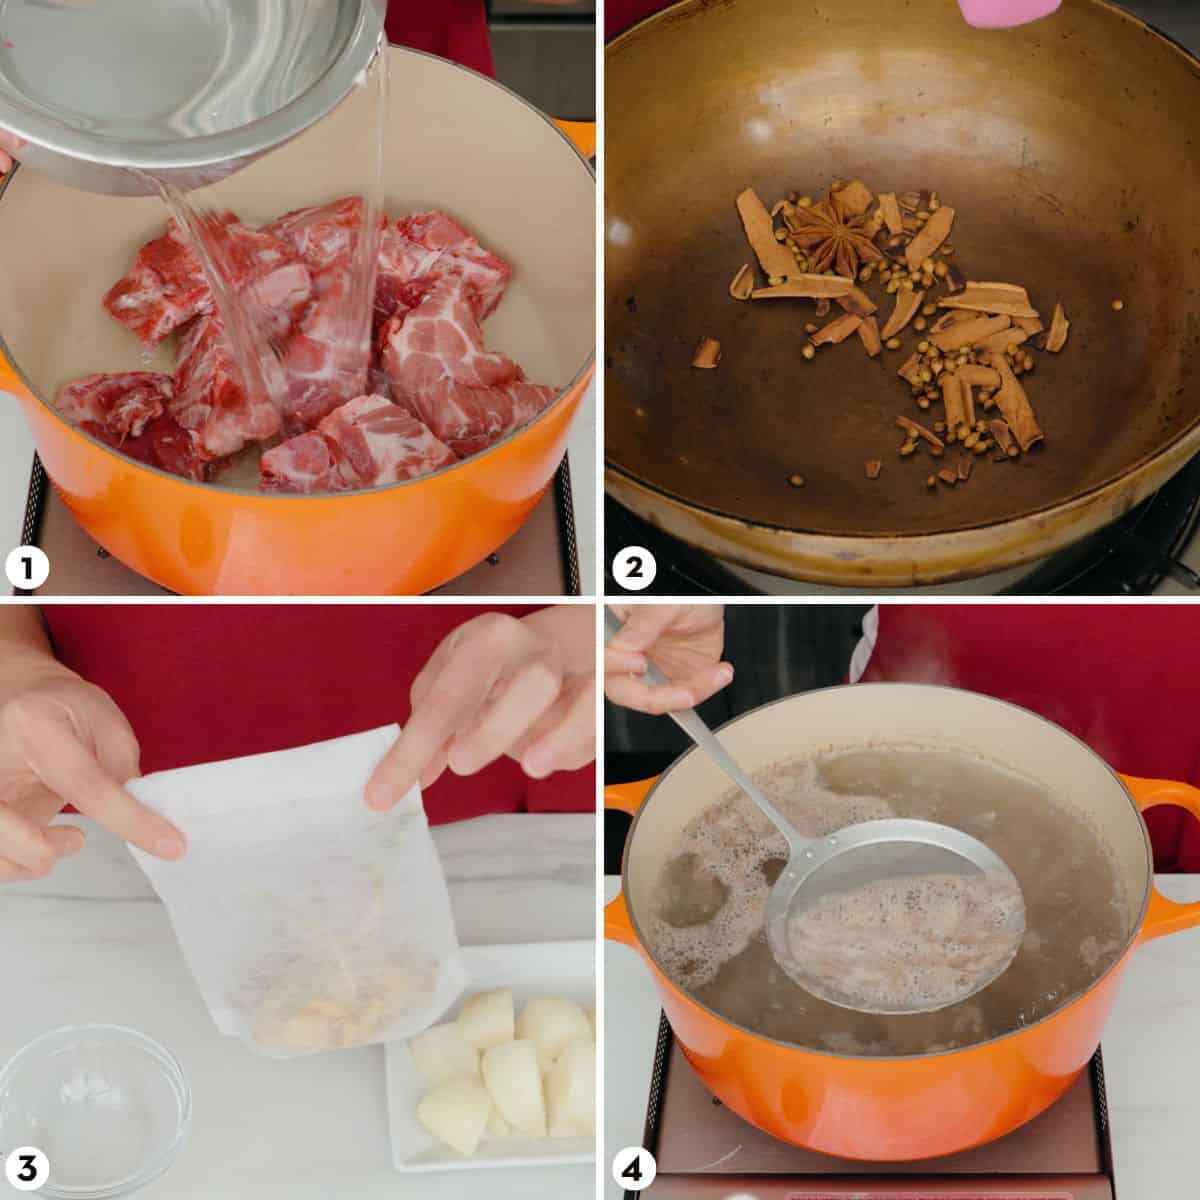
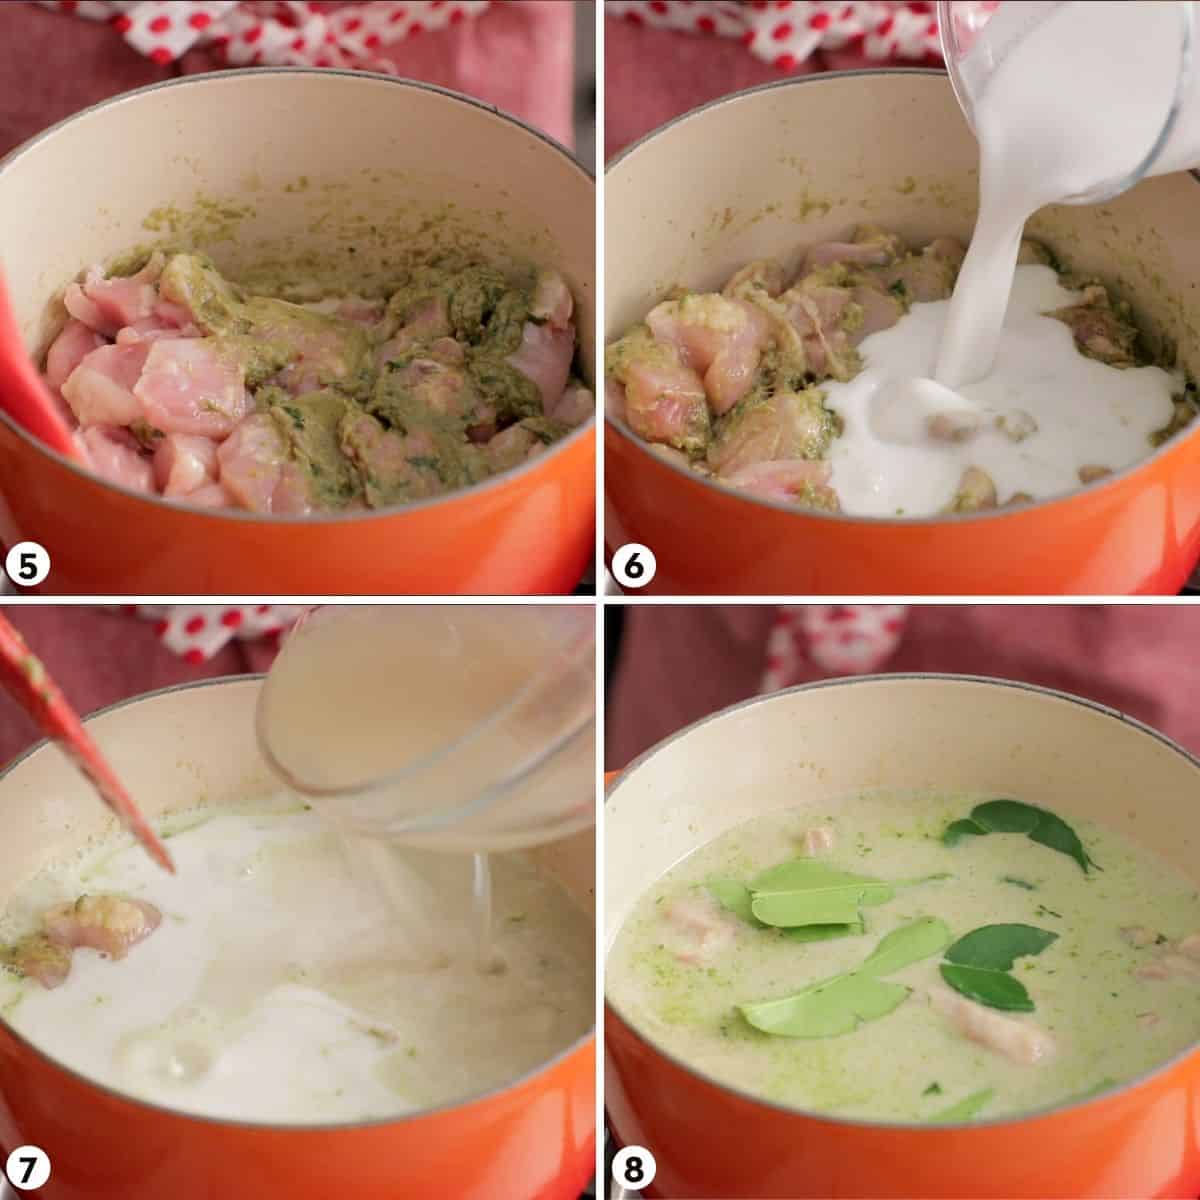
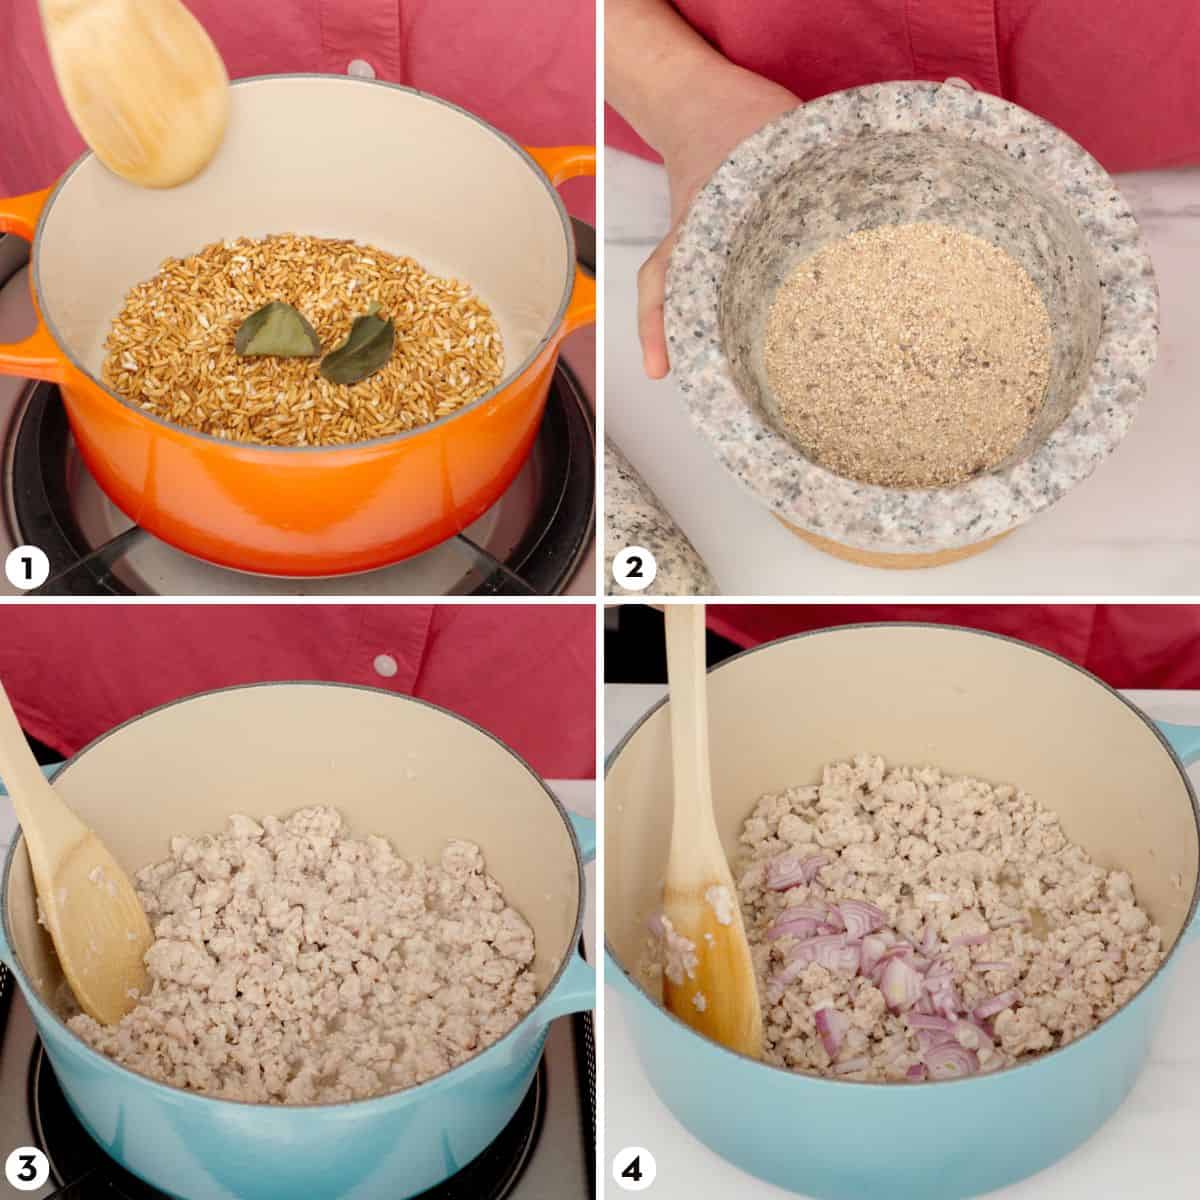
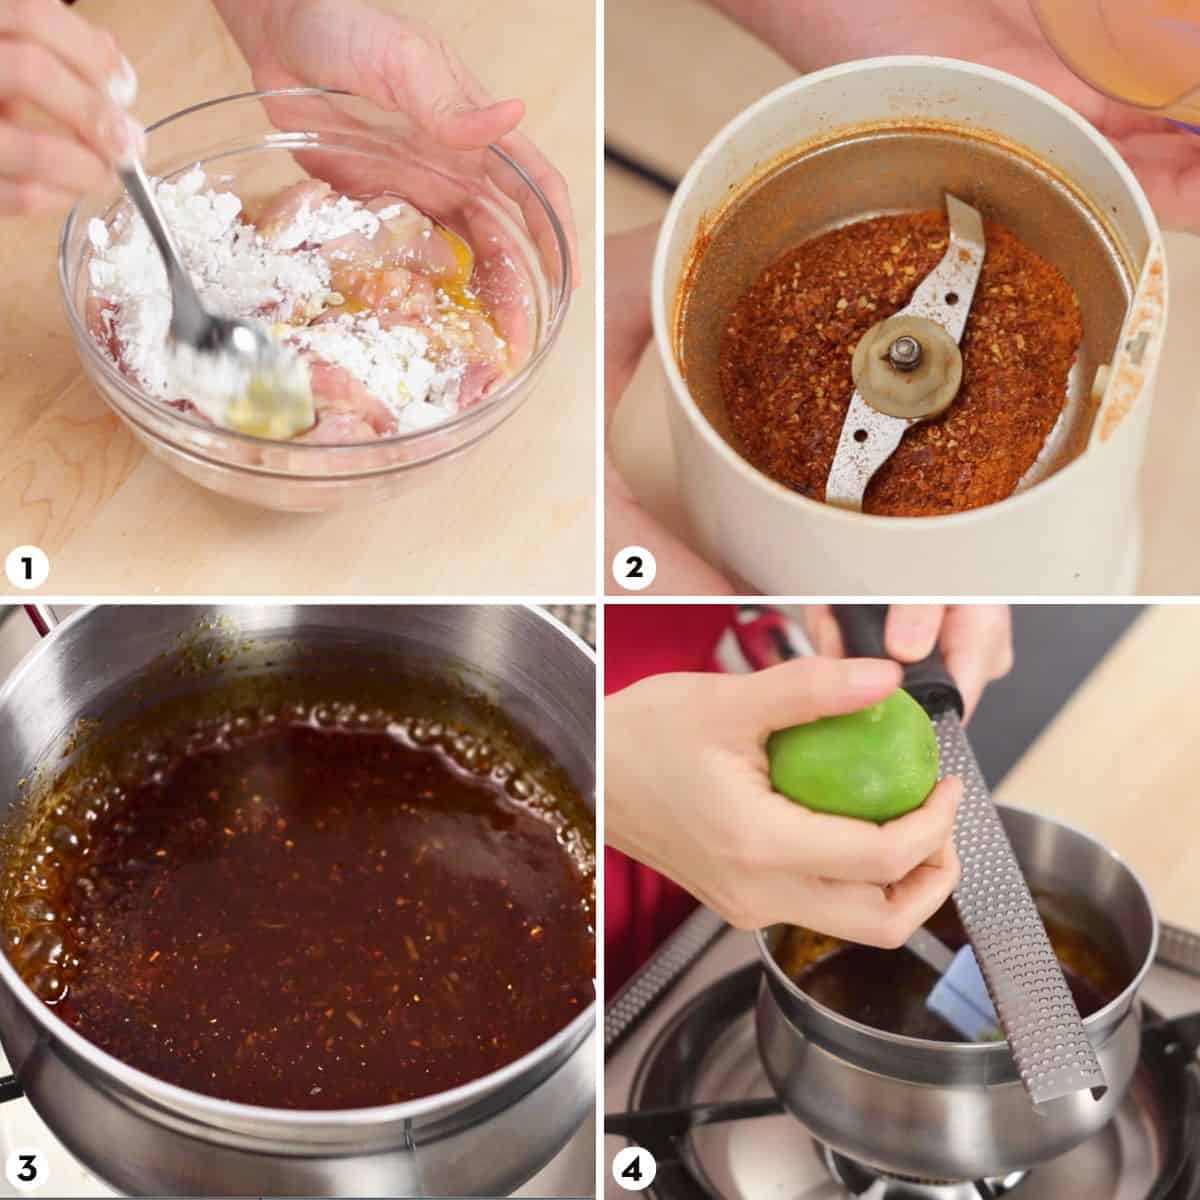
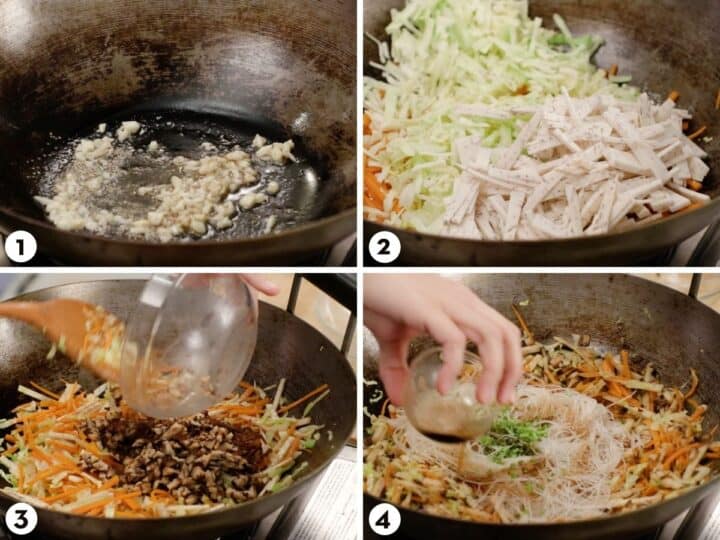
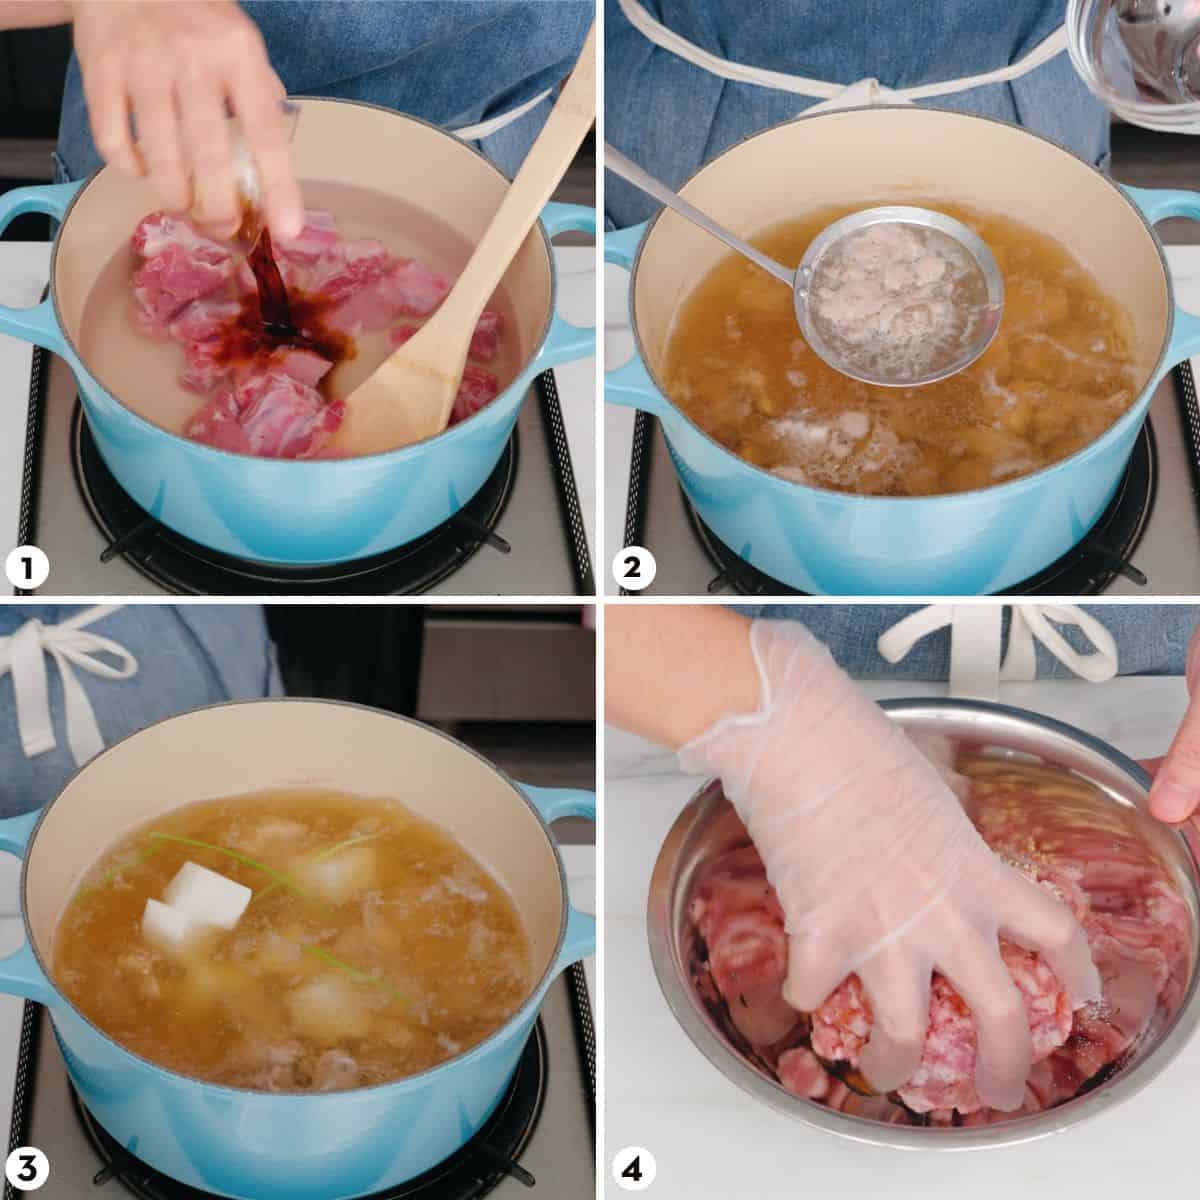
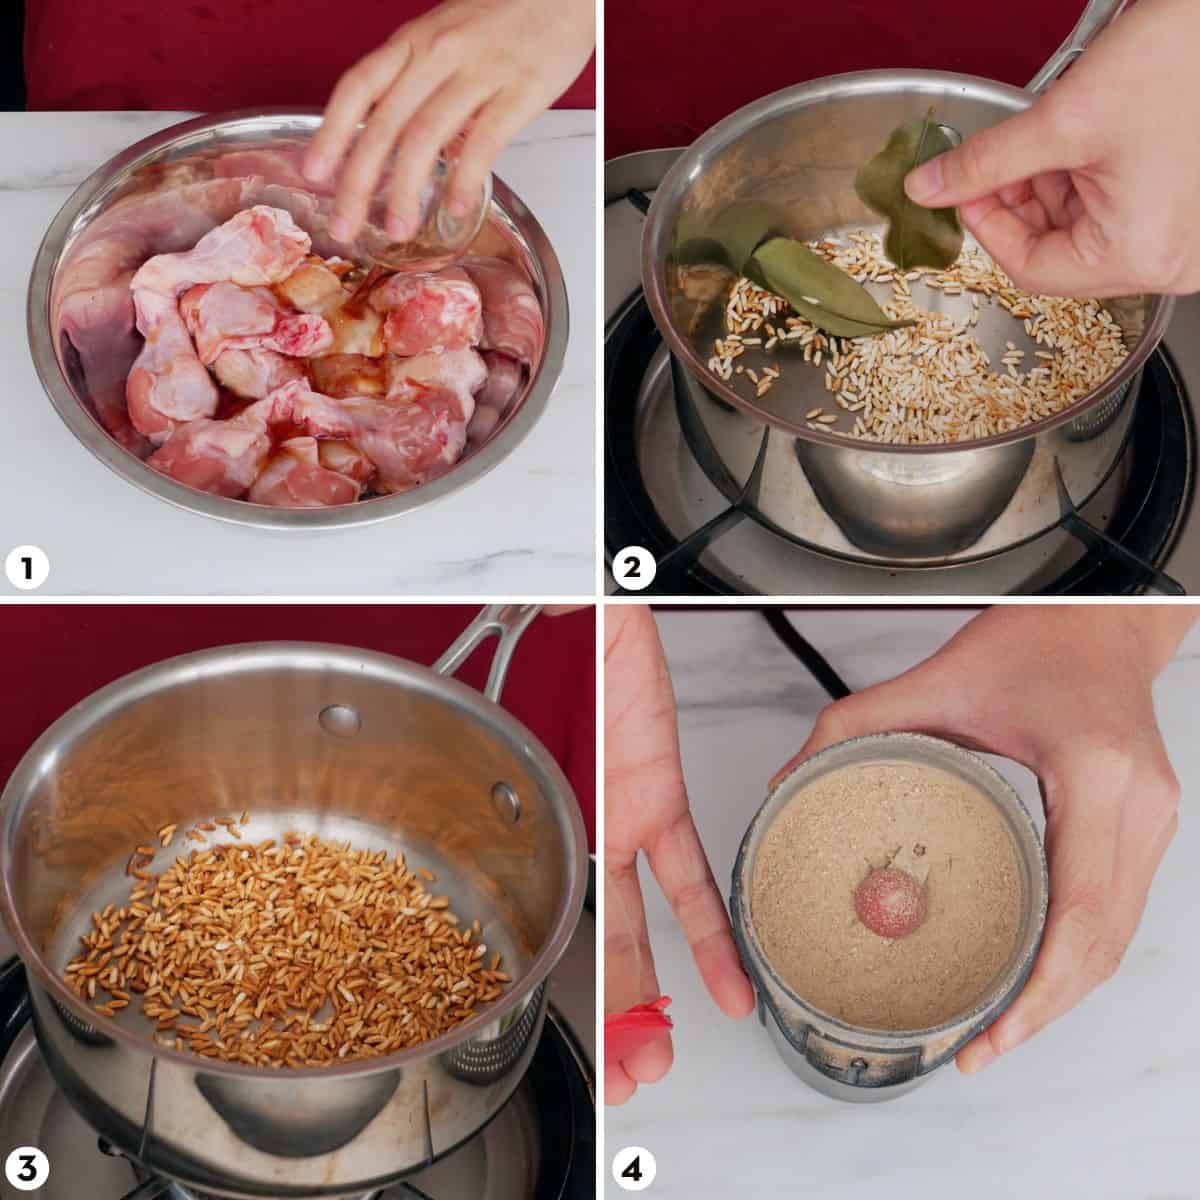
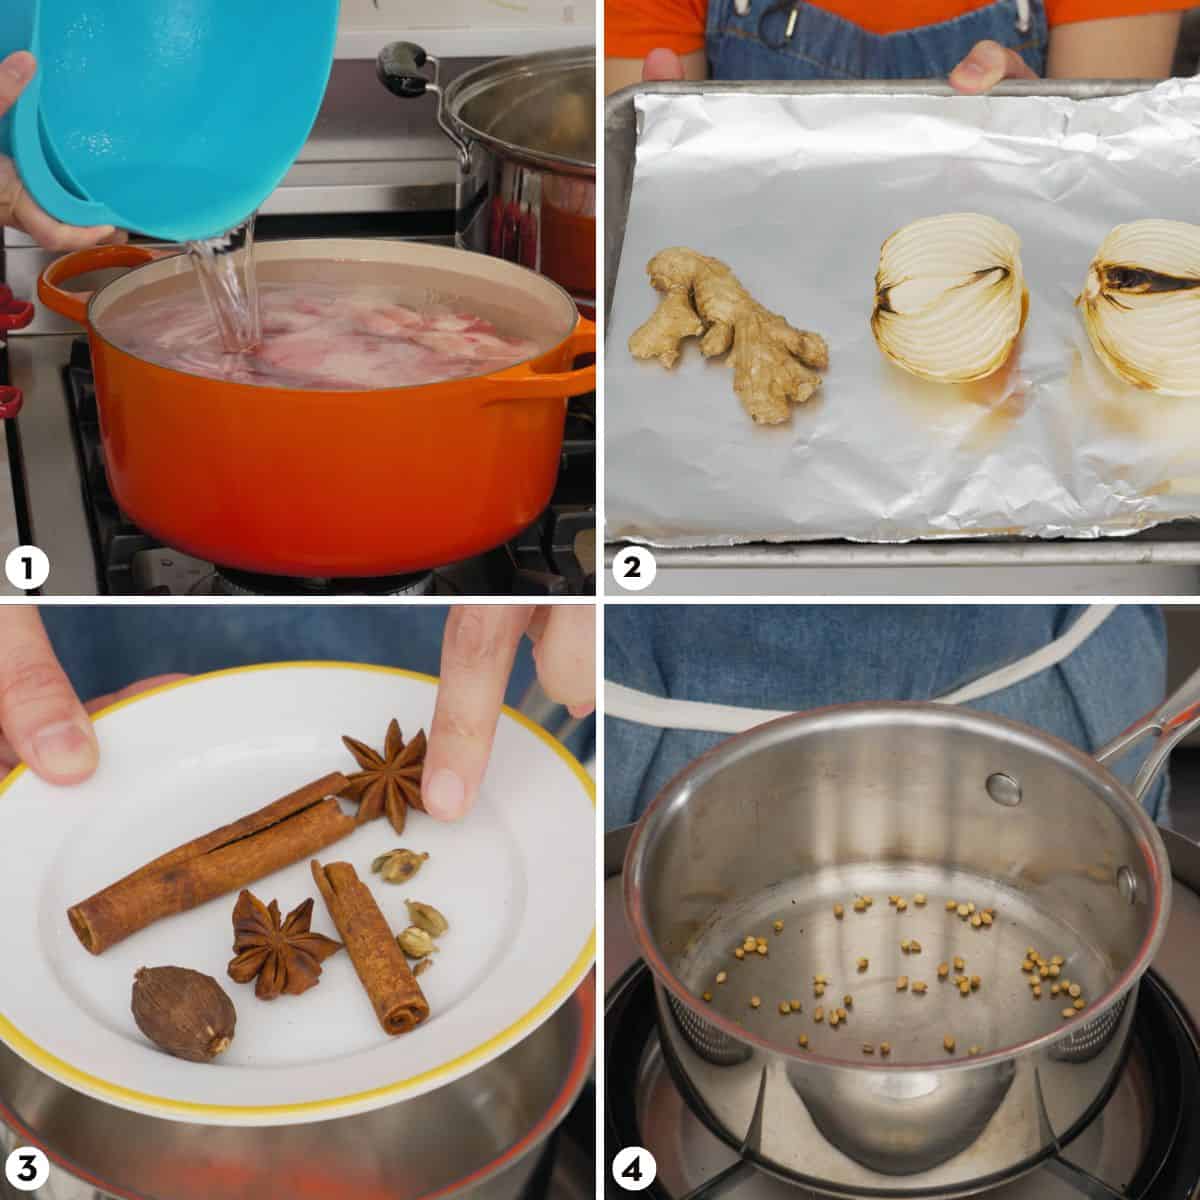
- Simmer the pork bones in water for 30 minutes.
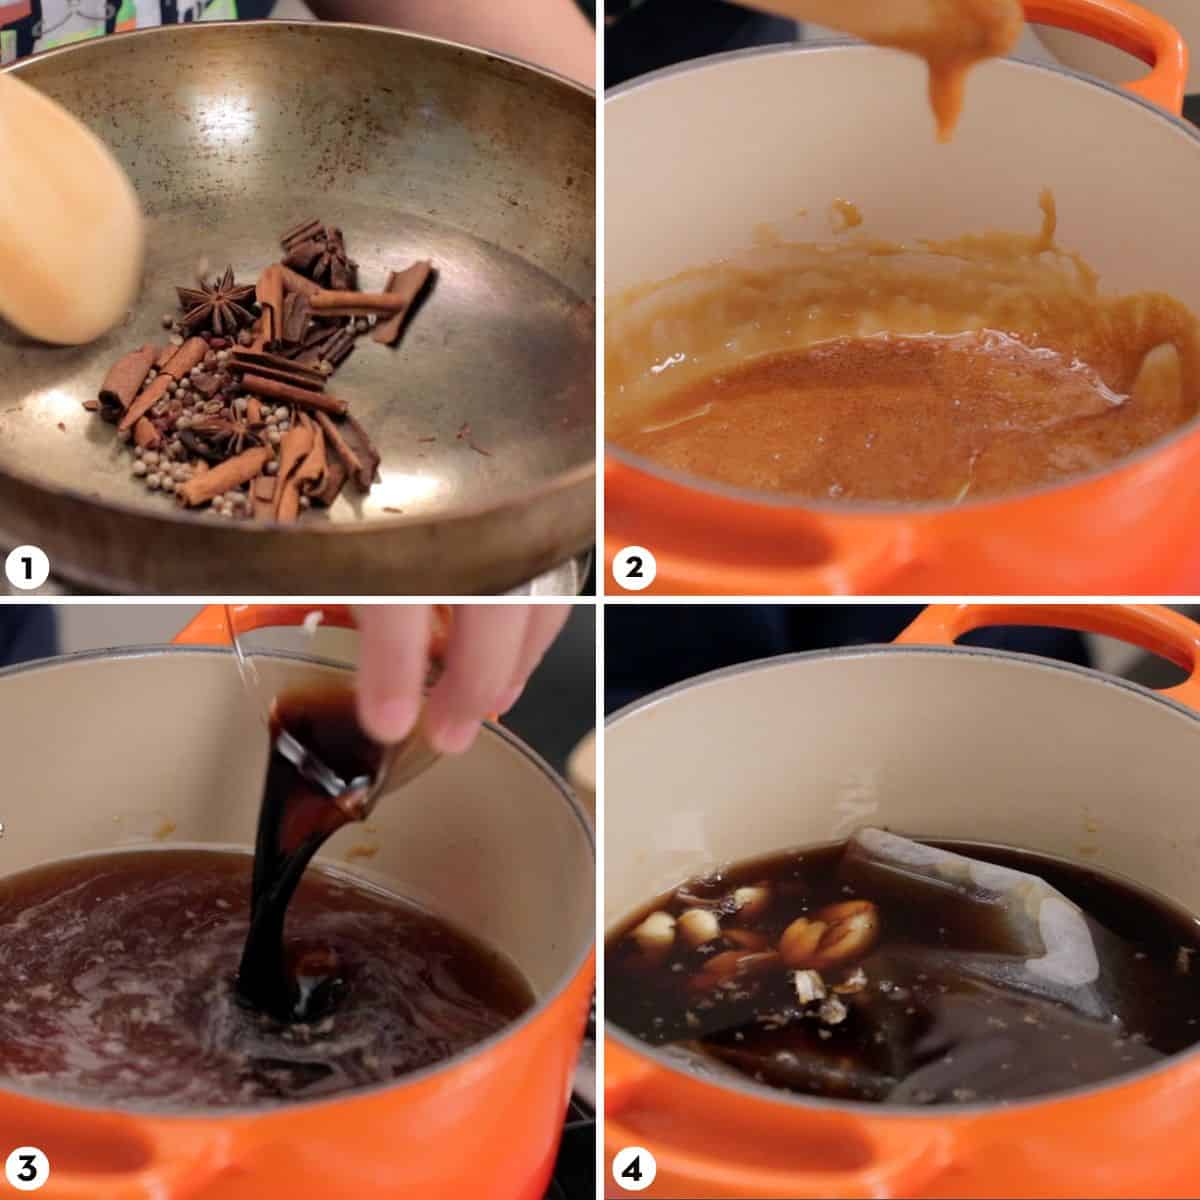
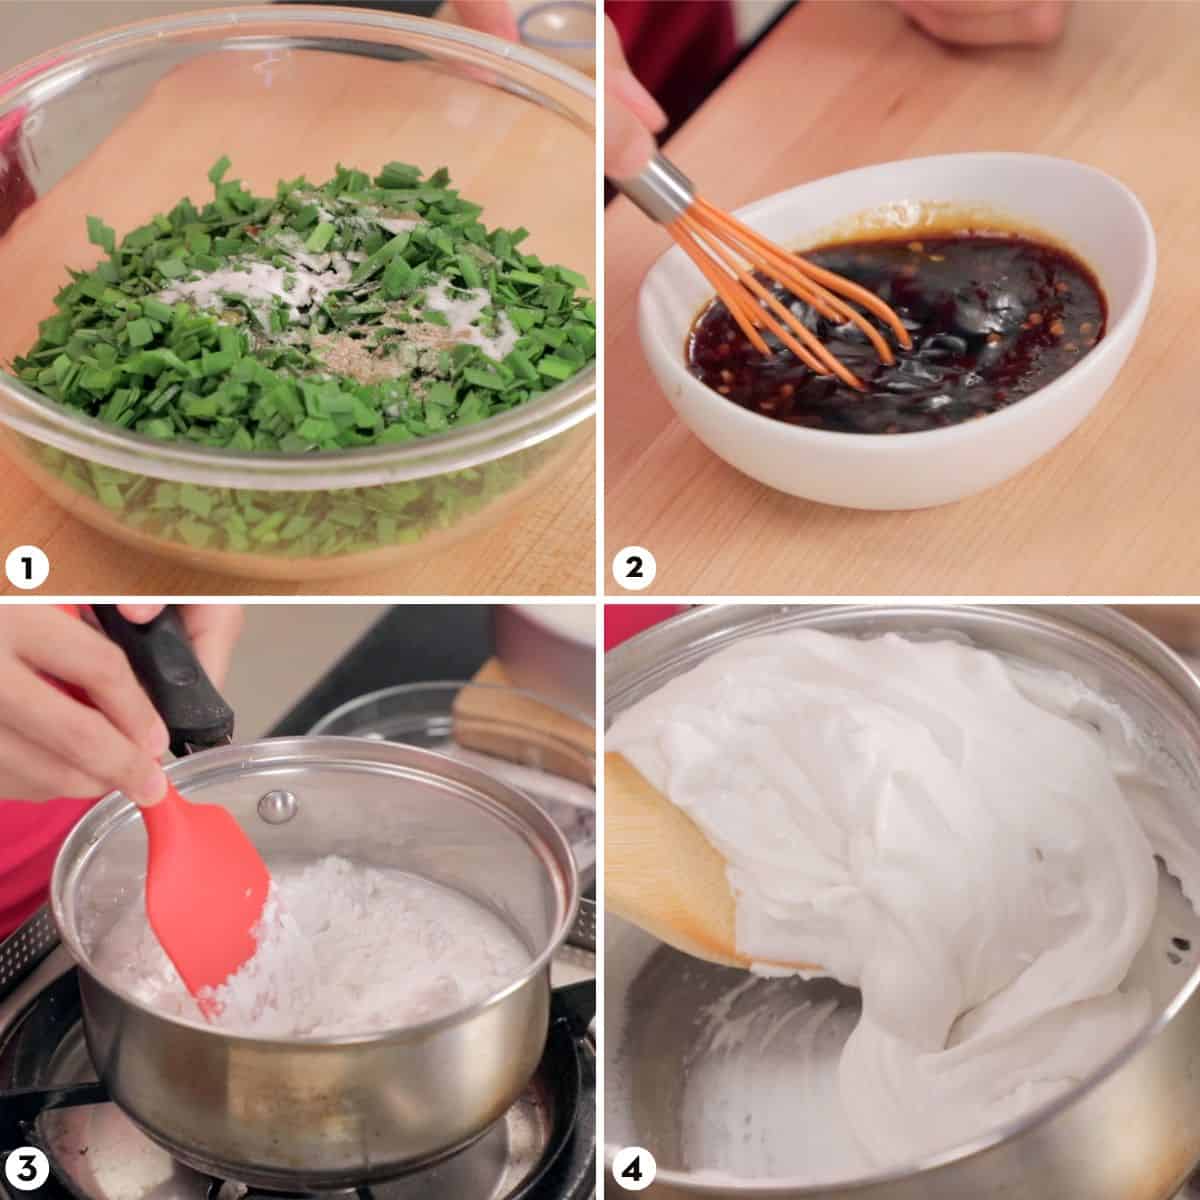
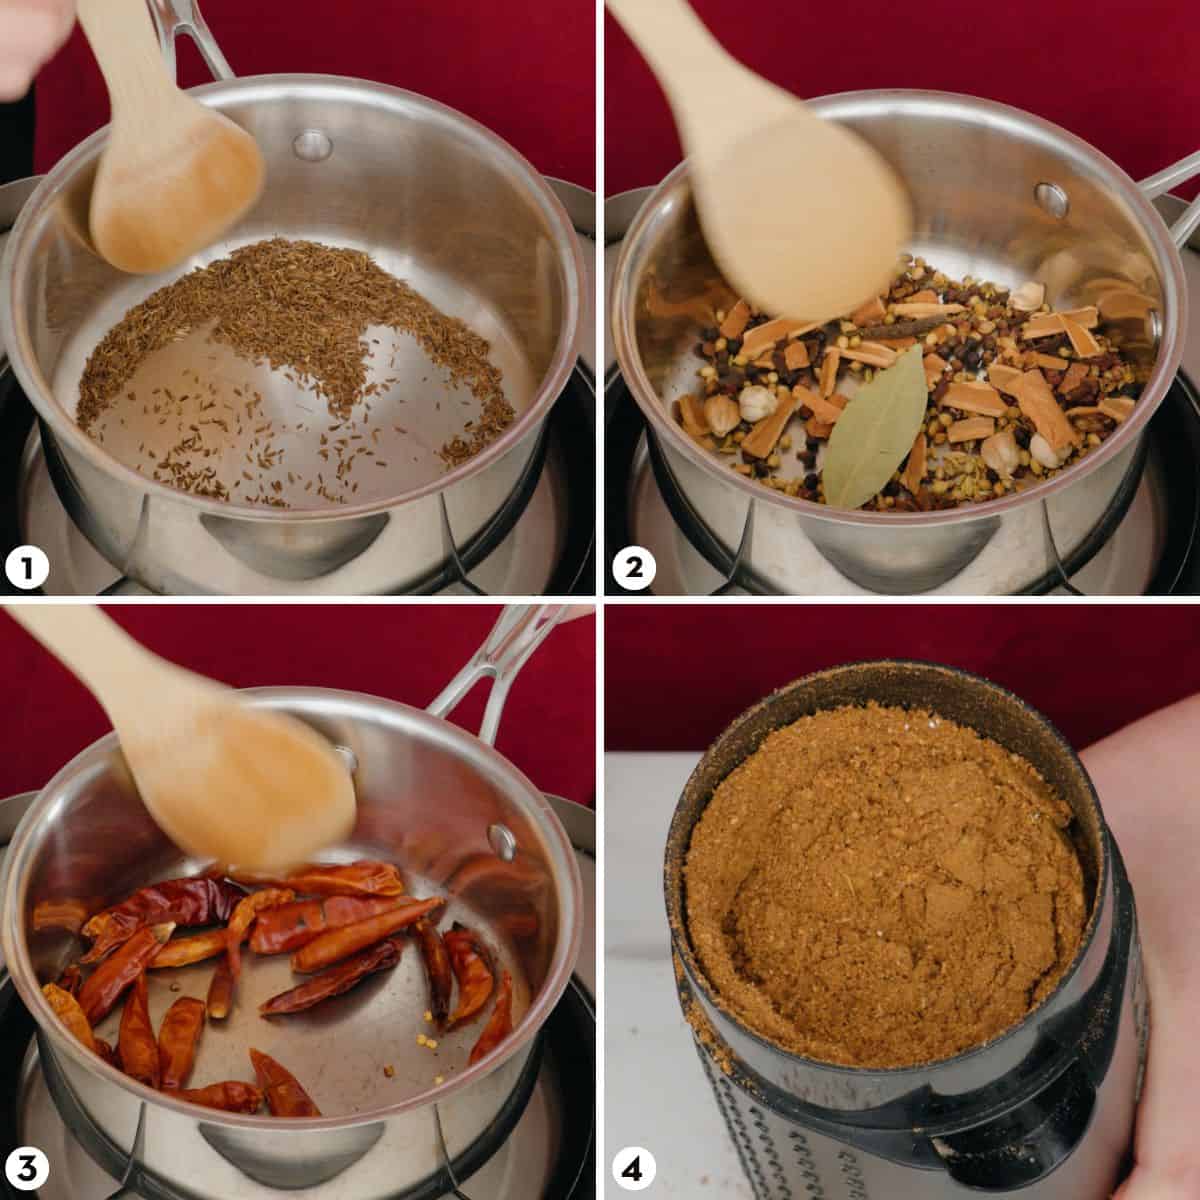
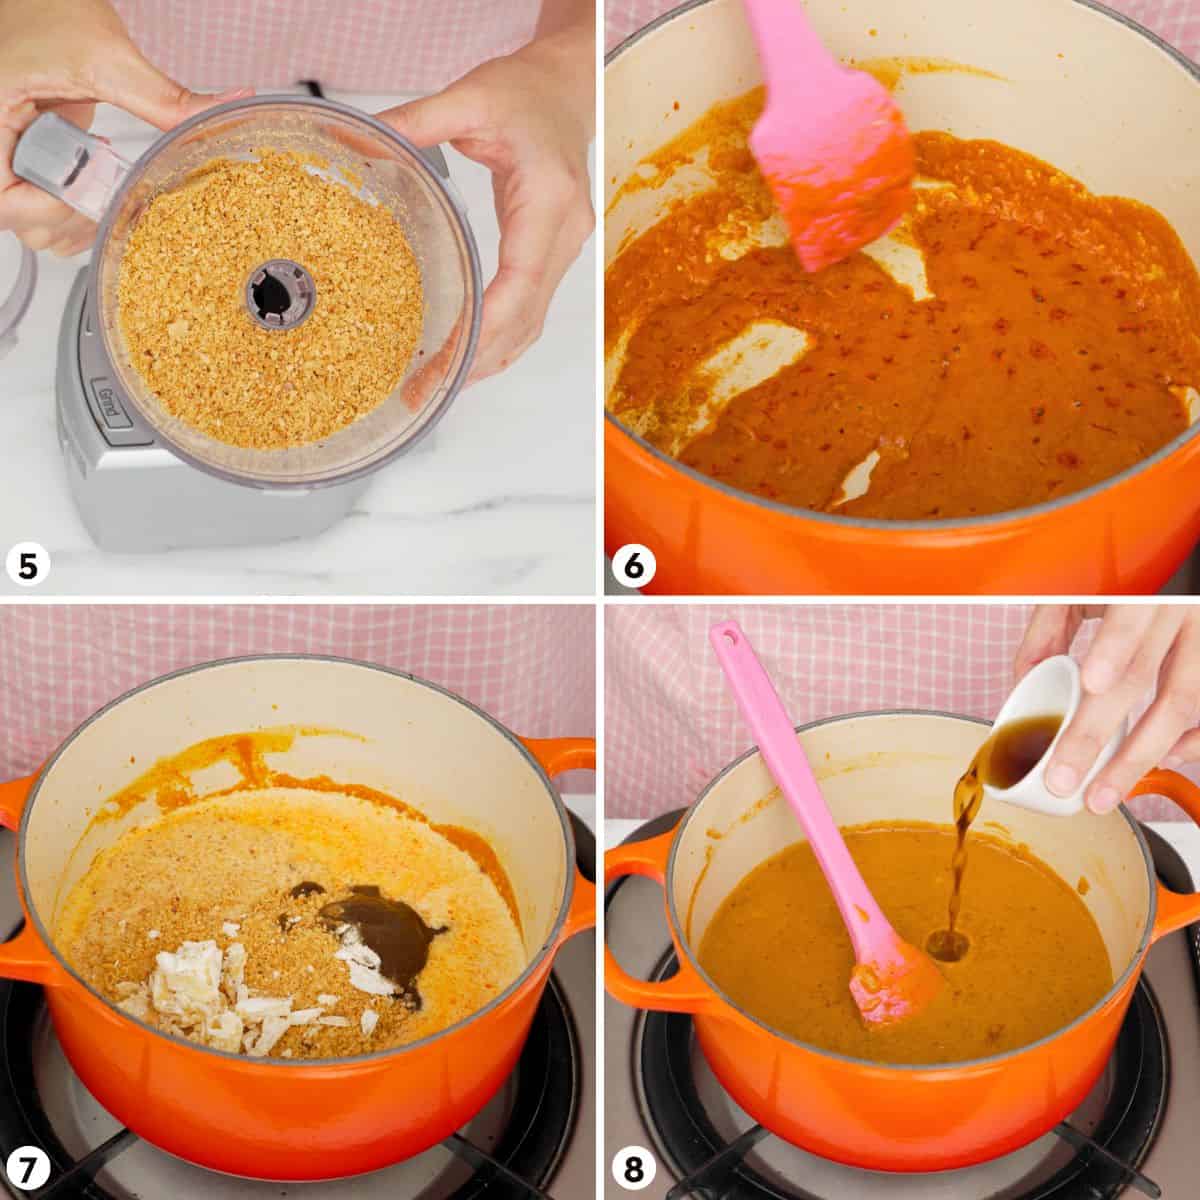
- Meanwhile, toast the dry spices until slightly charred.
- Put the spices in a soup infusion bag of cheesecloth, along with the galangal and cilantro roots/stems.
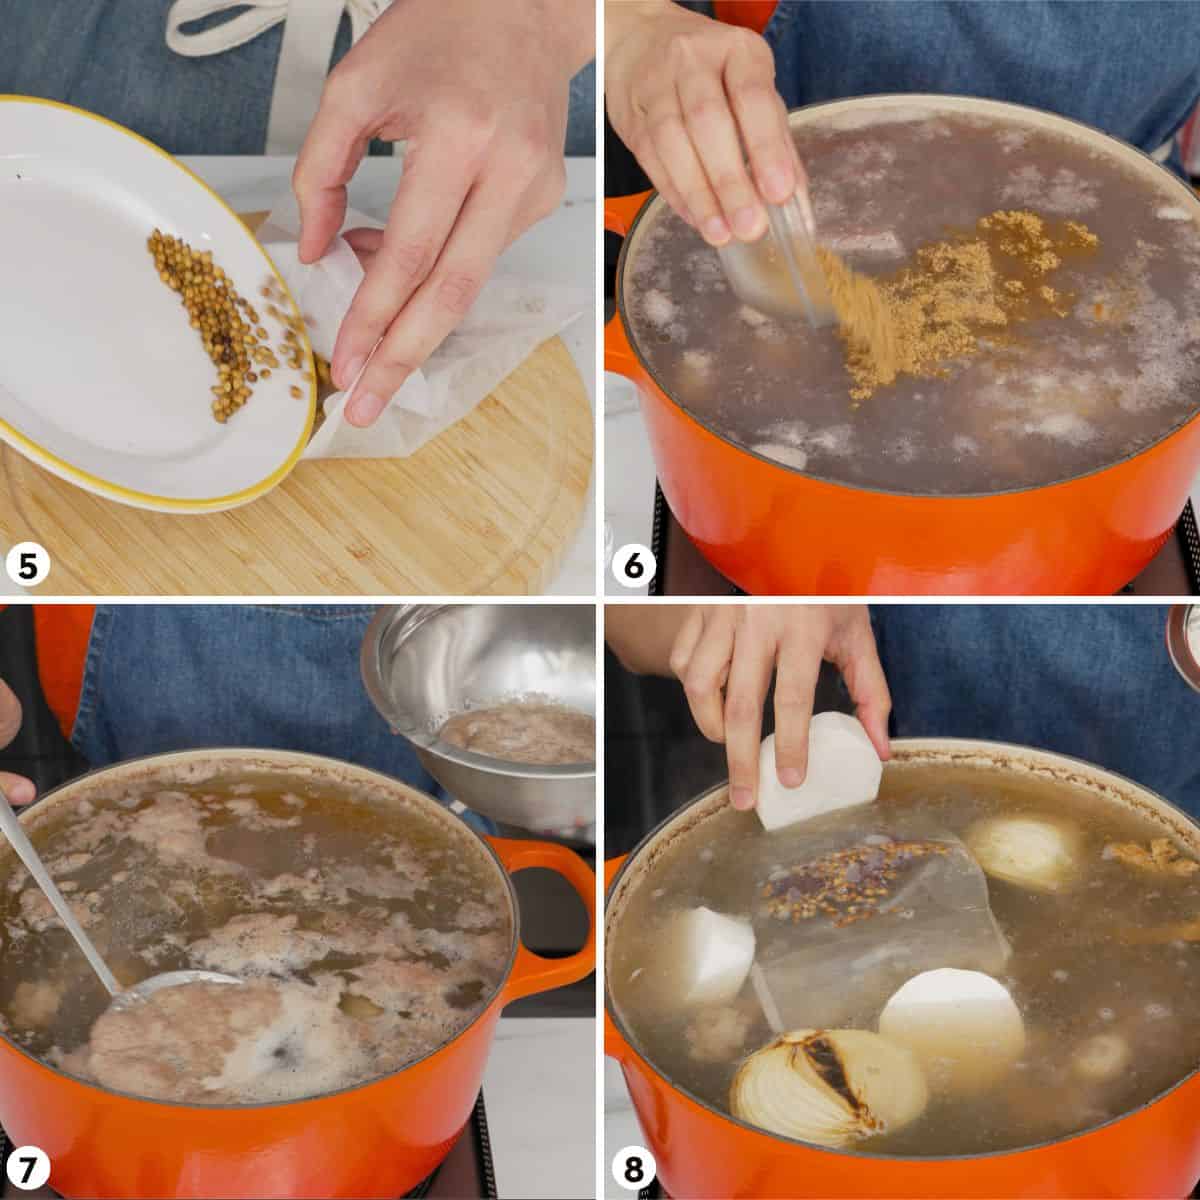
- After 30 mins, skim the scum from the broth.
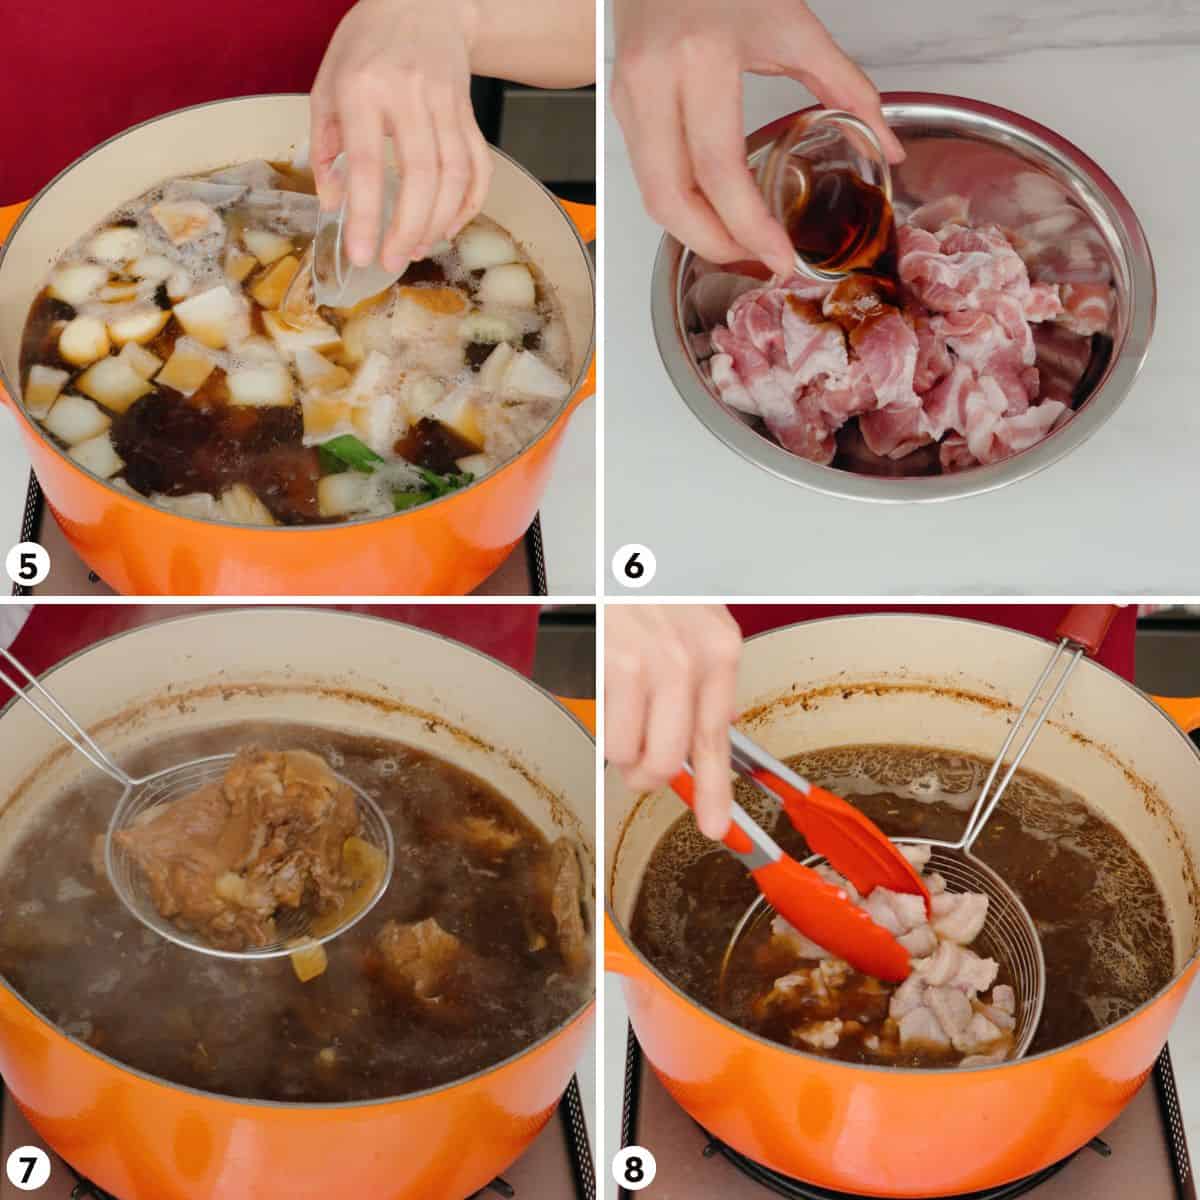
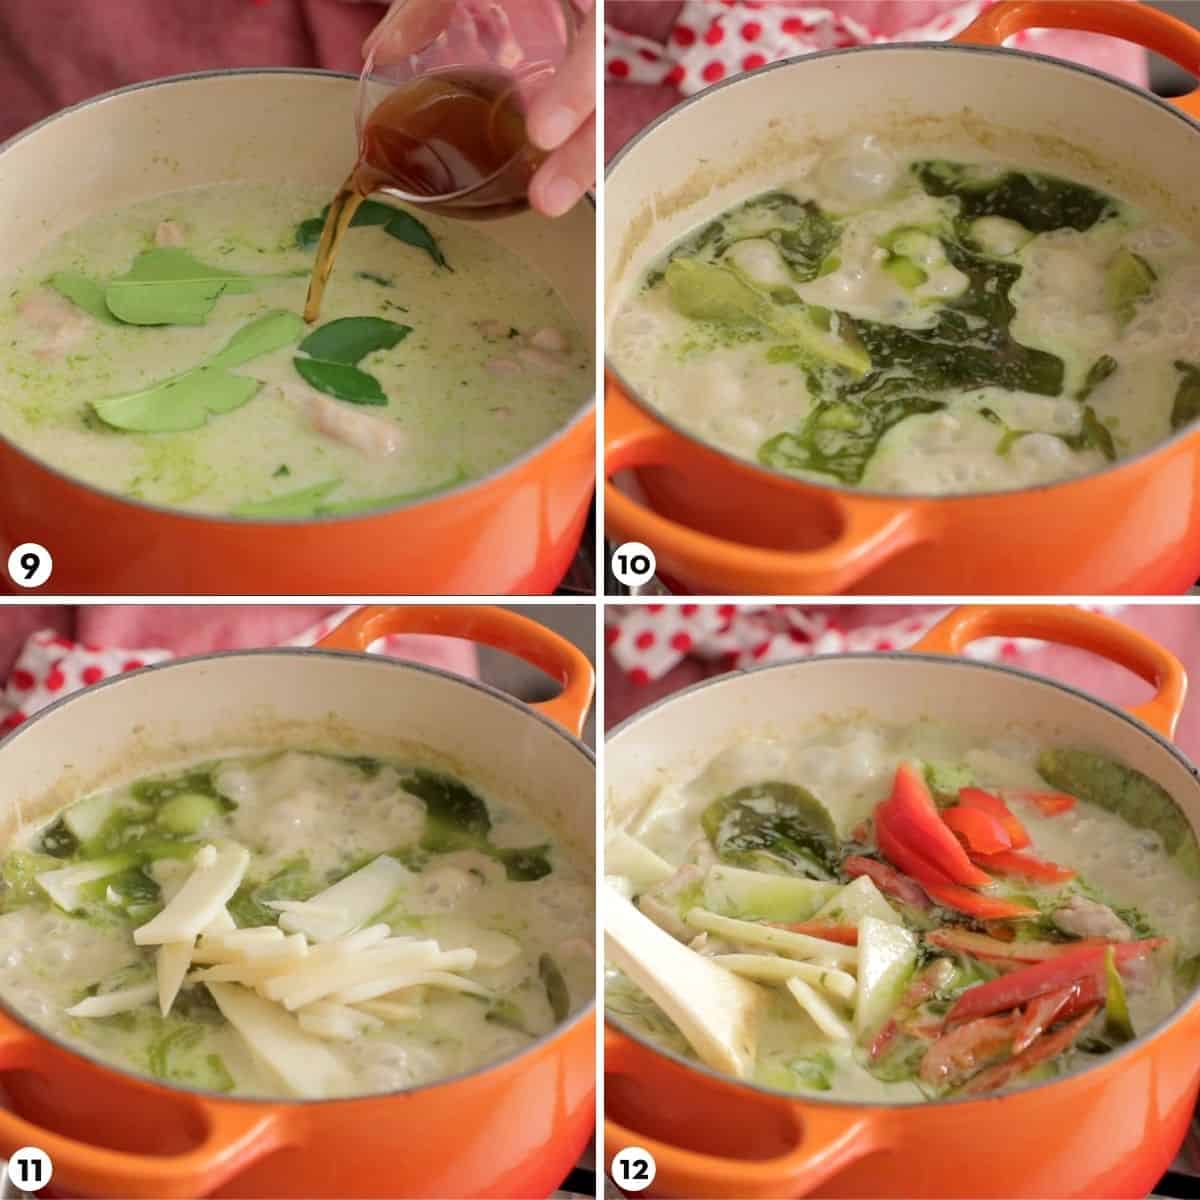
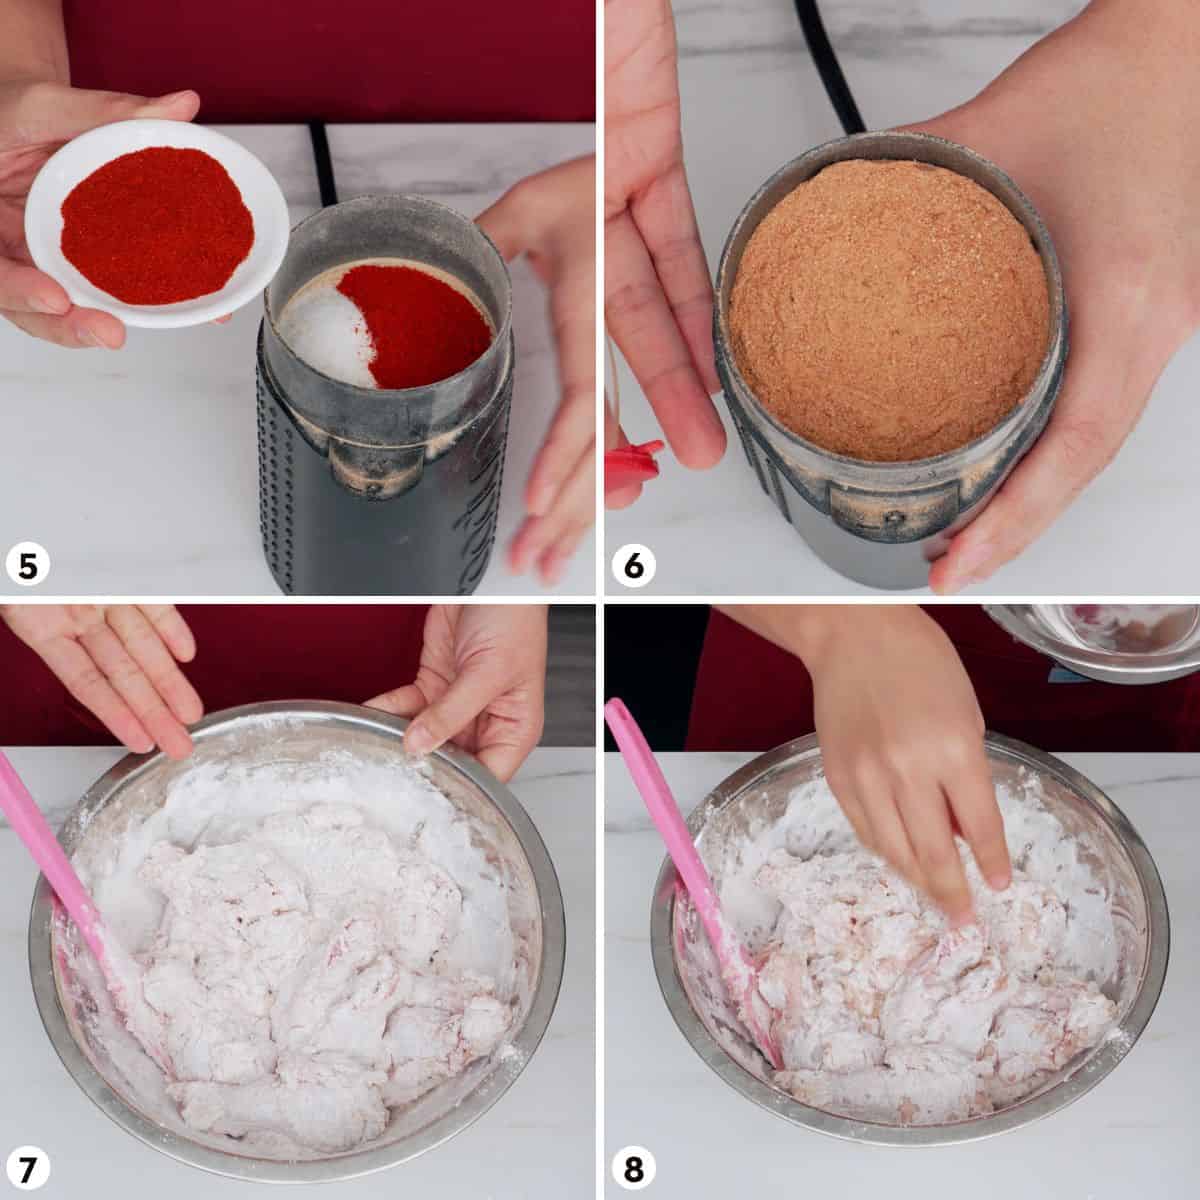
- Add the spice bag, daikon, onion, garlic, pepper, pandan leaf (tie it into a knot) and all of the seasonings except salt. Simmer gently for 1 hr 15 mins, topping it up with water as needed to keep the bones completely submerged.
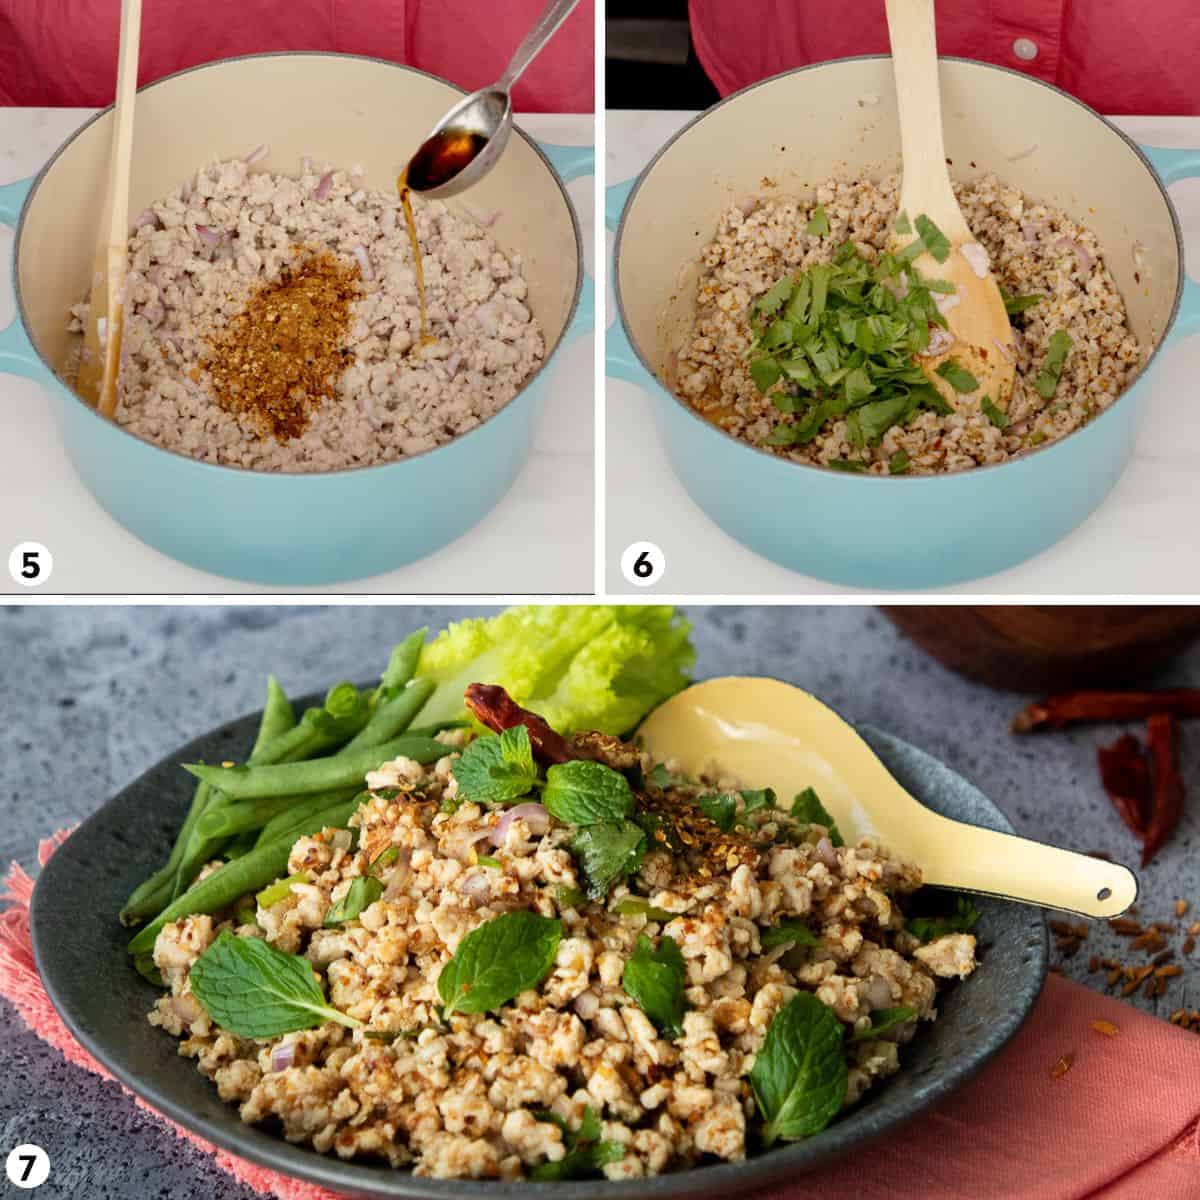
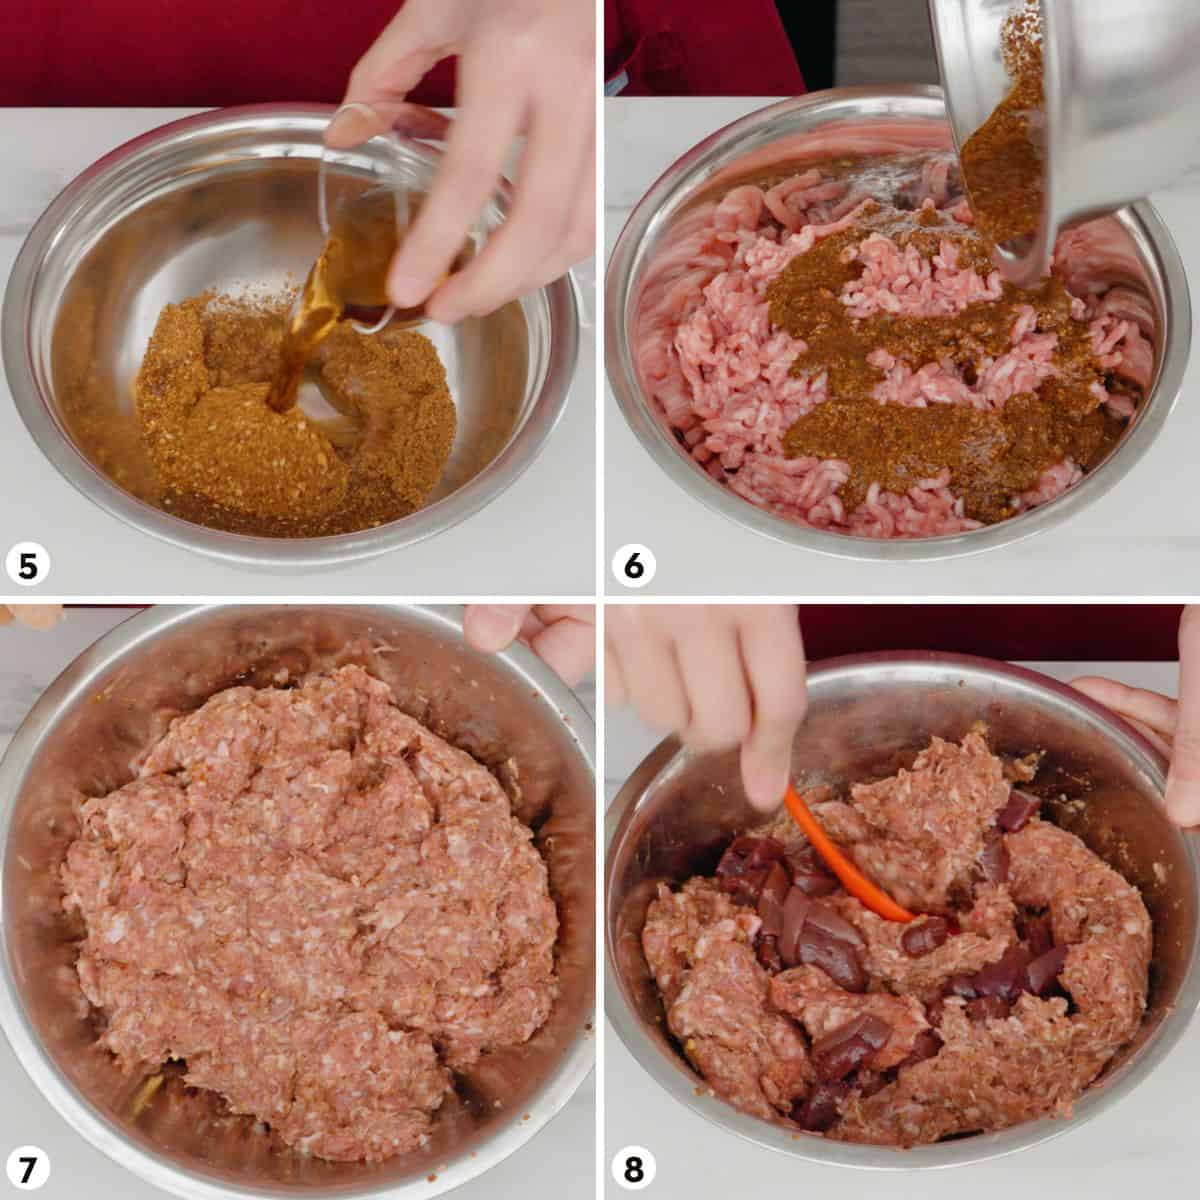
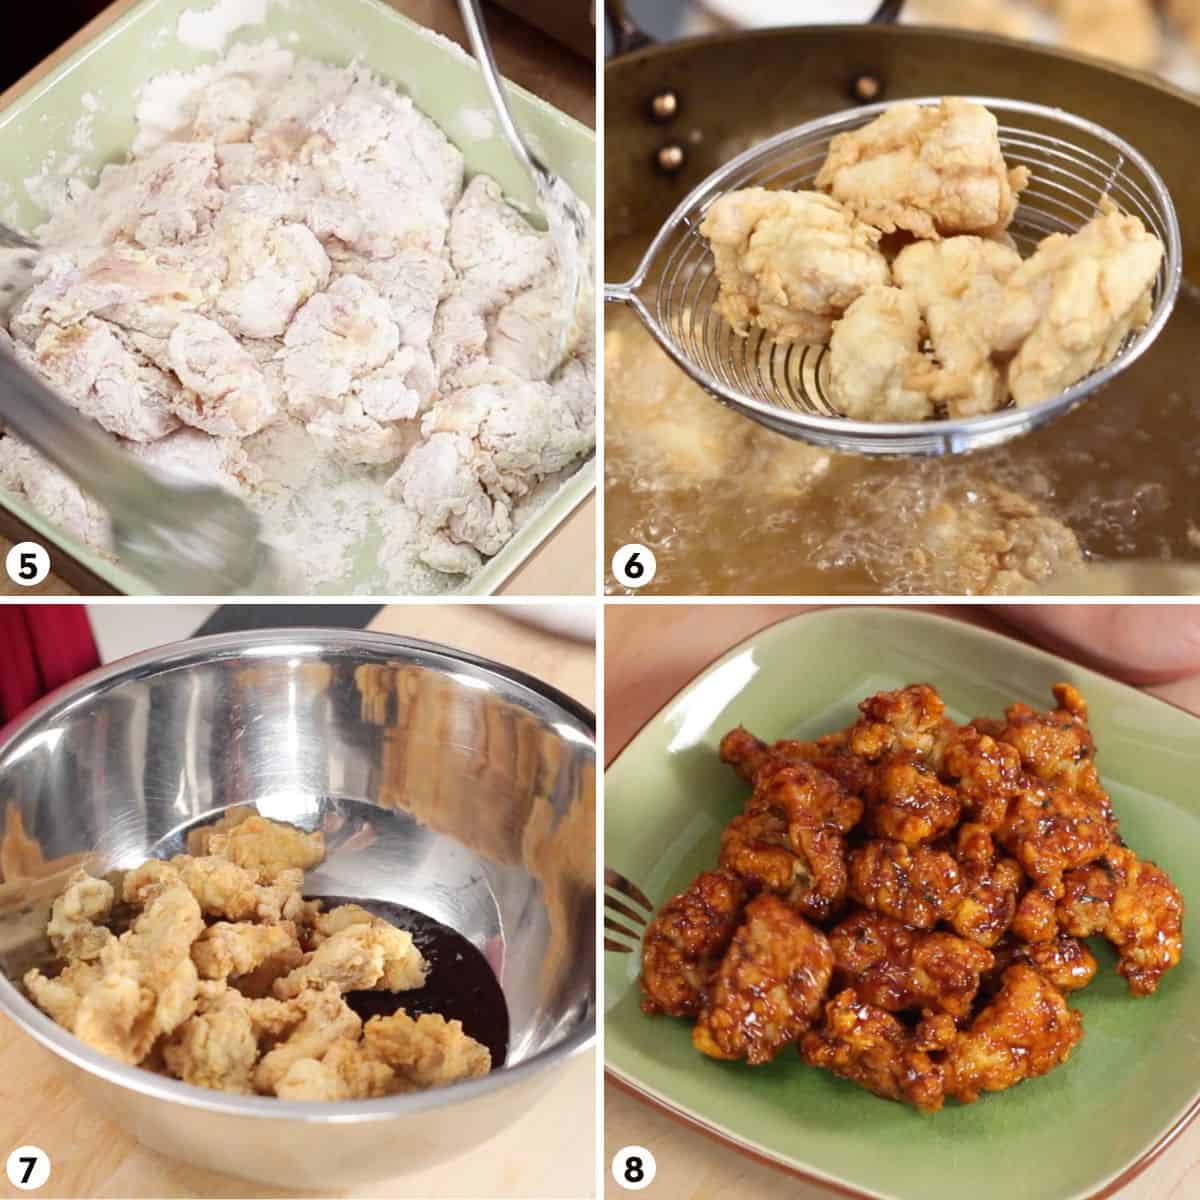
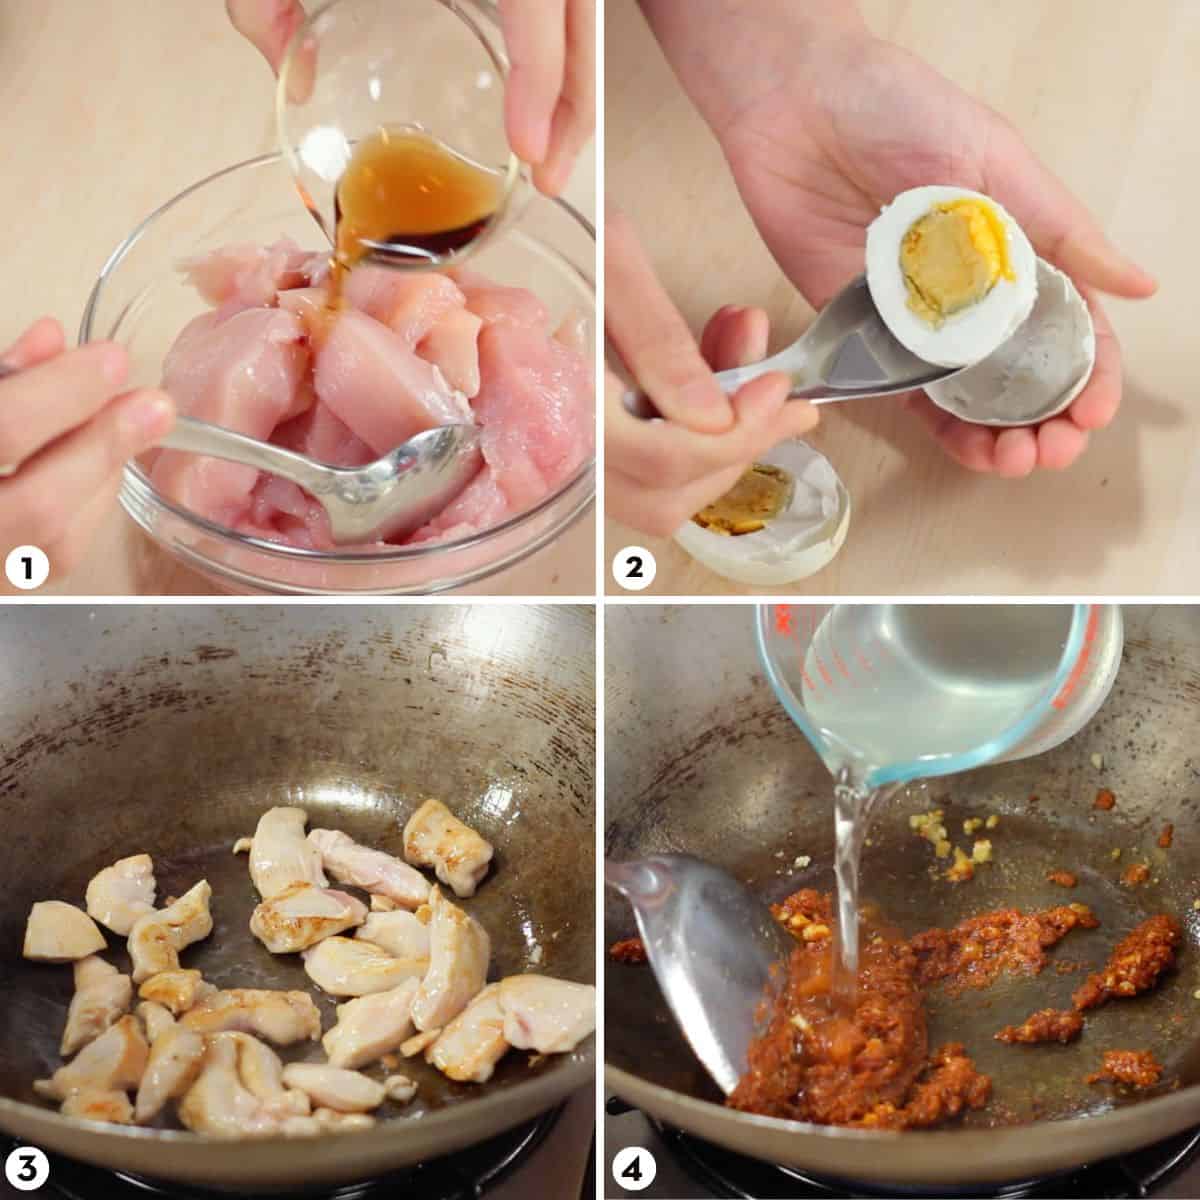
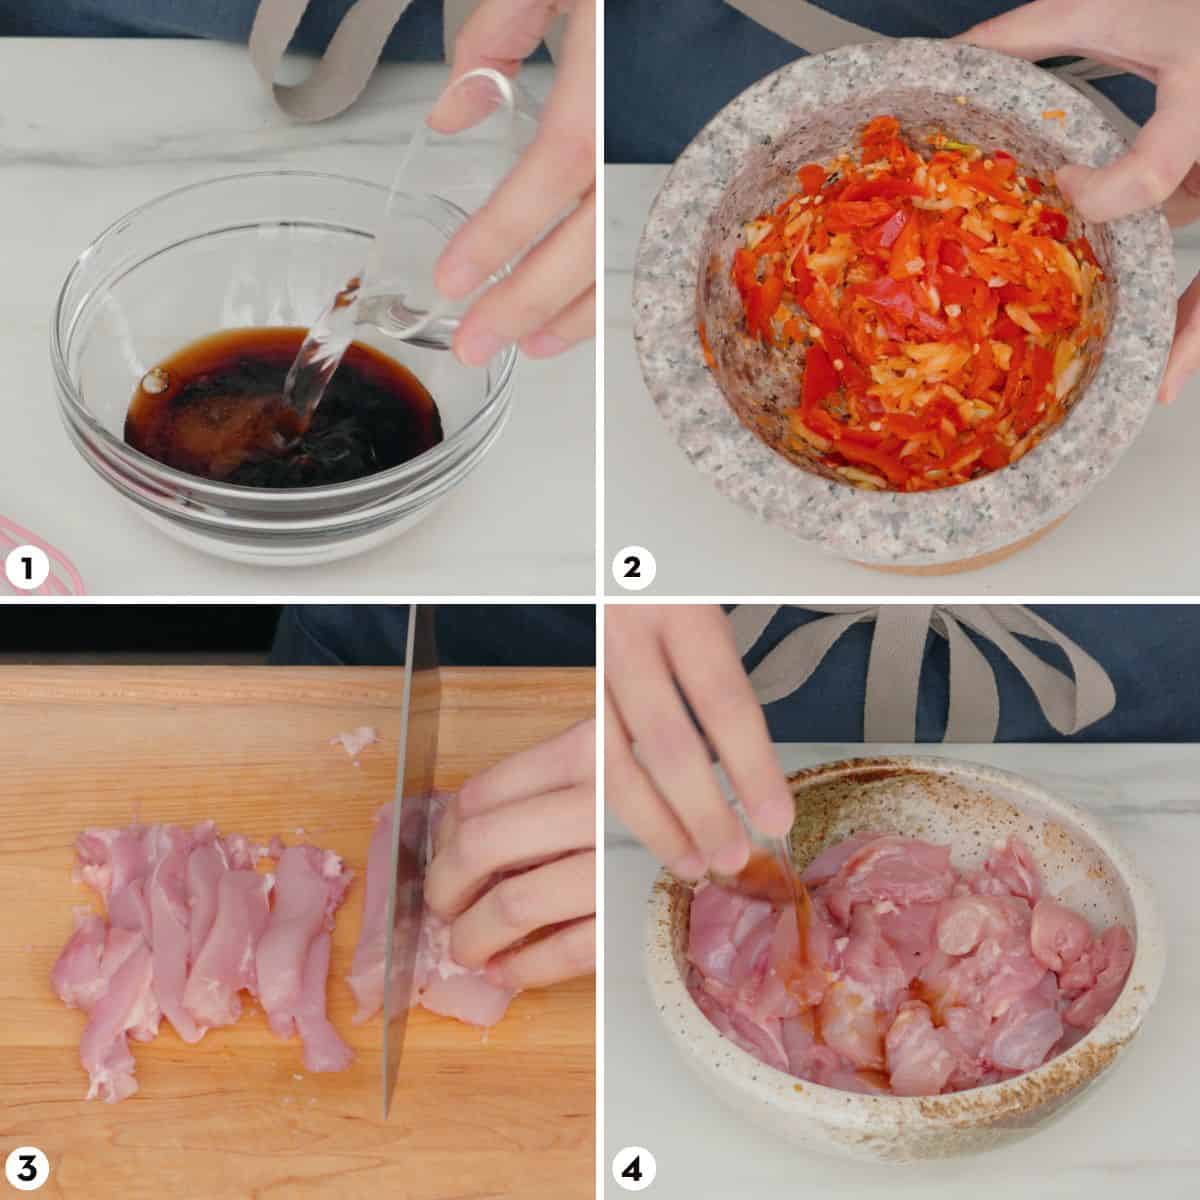
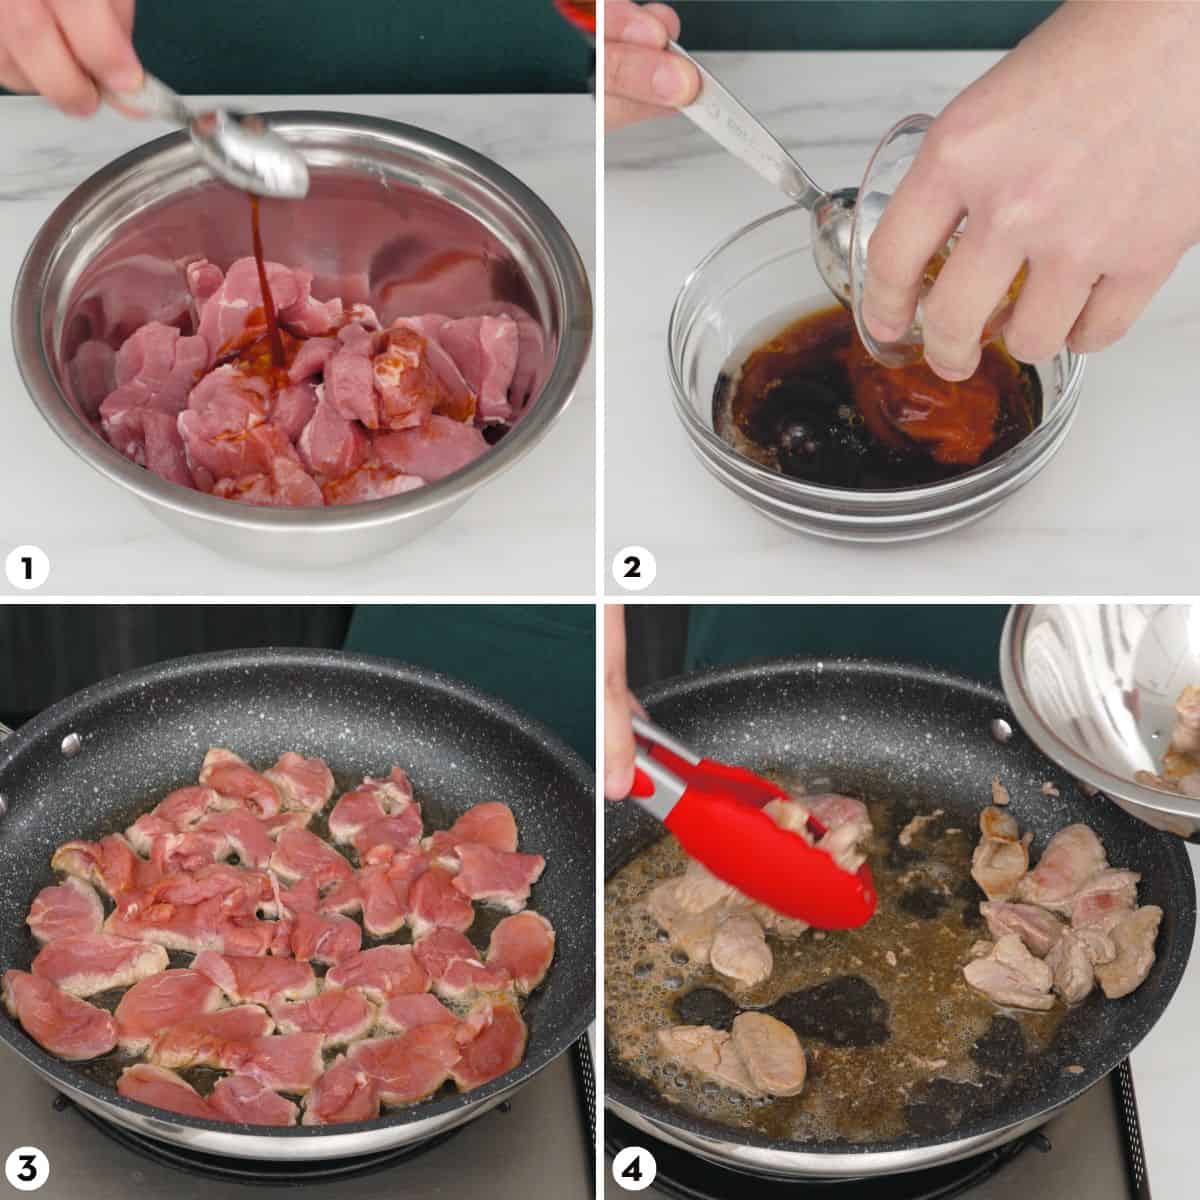
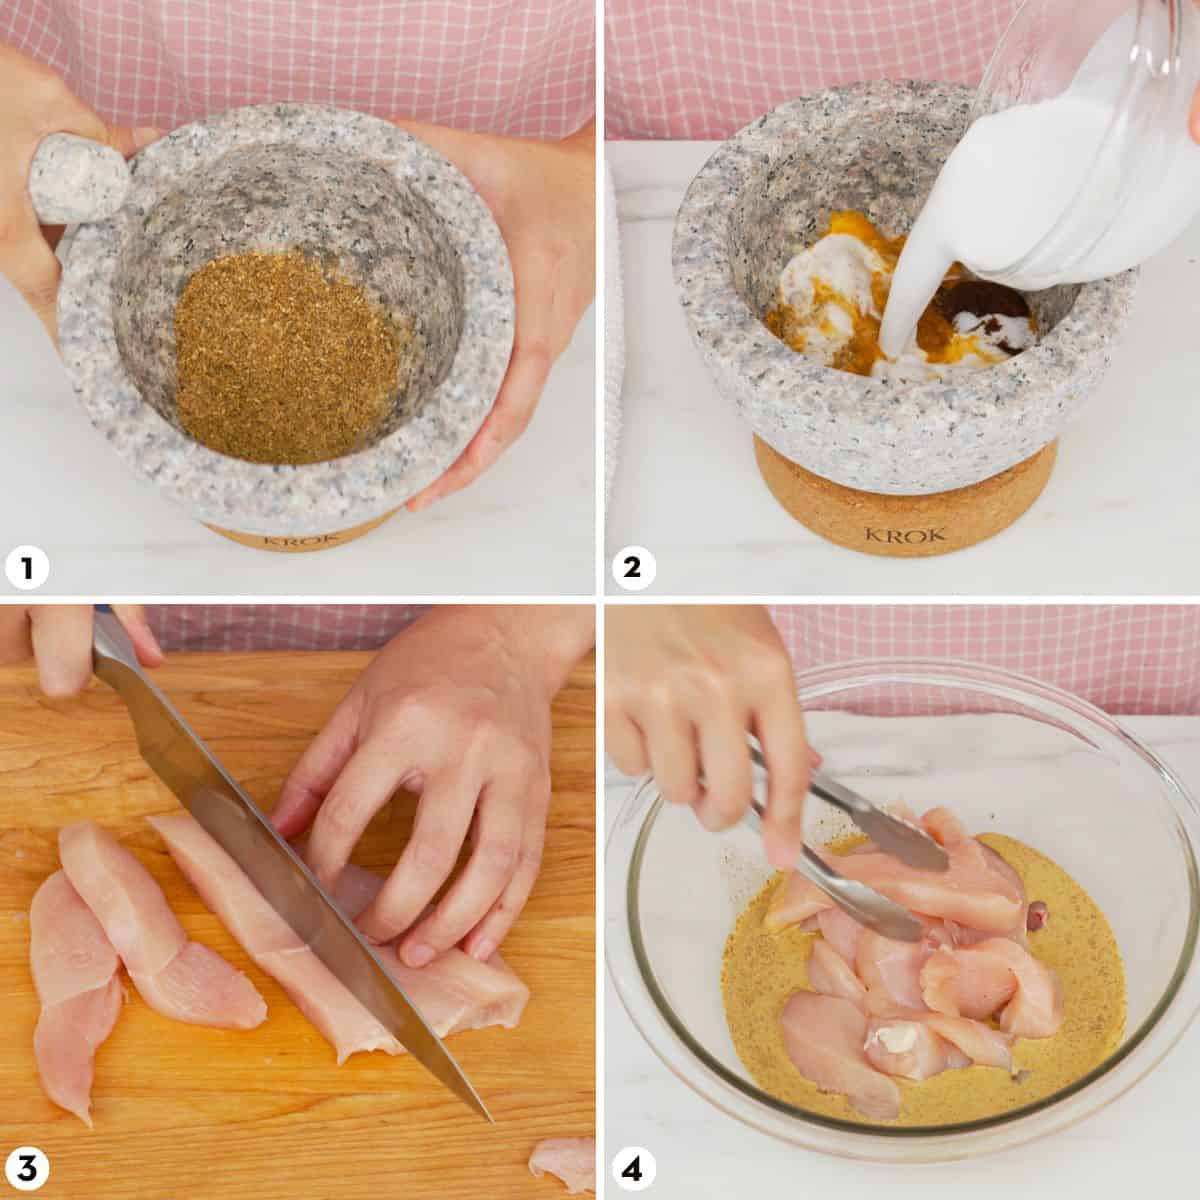
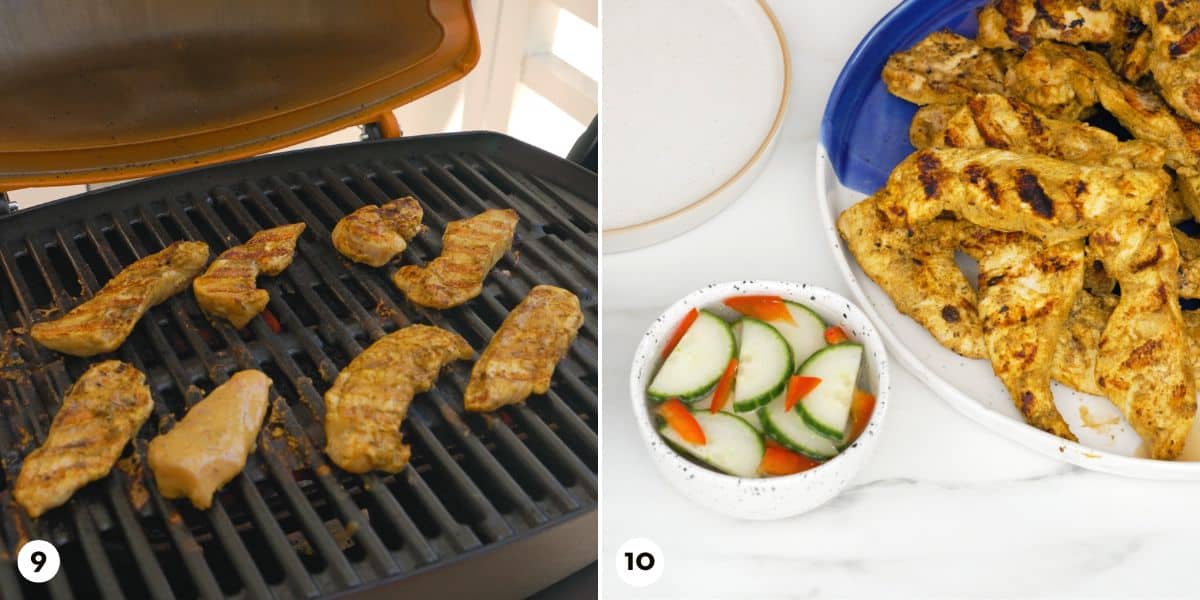
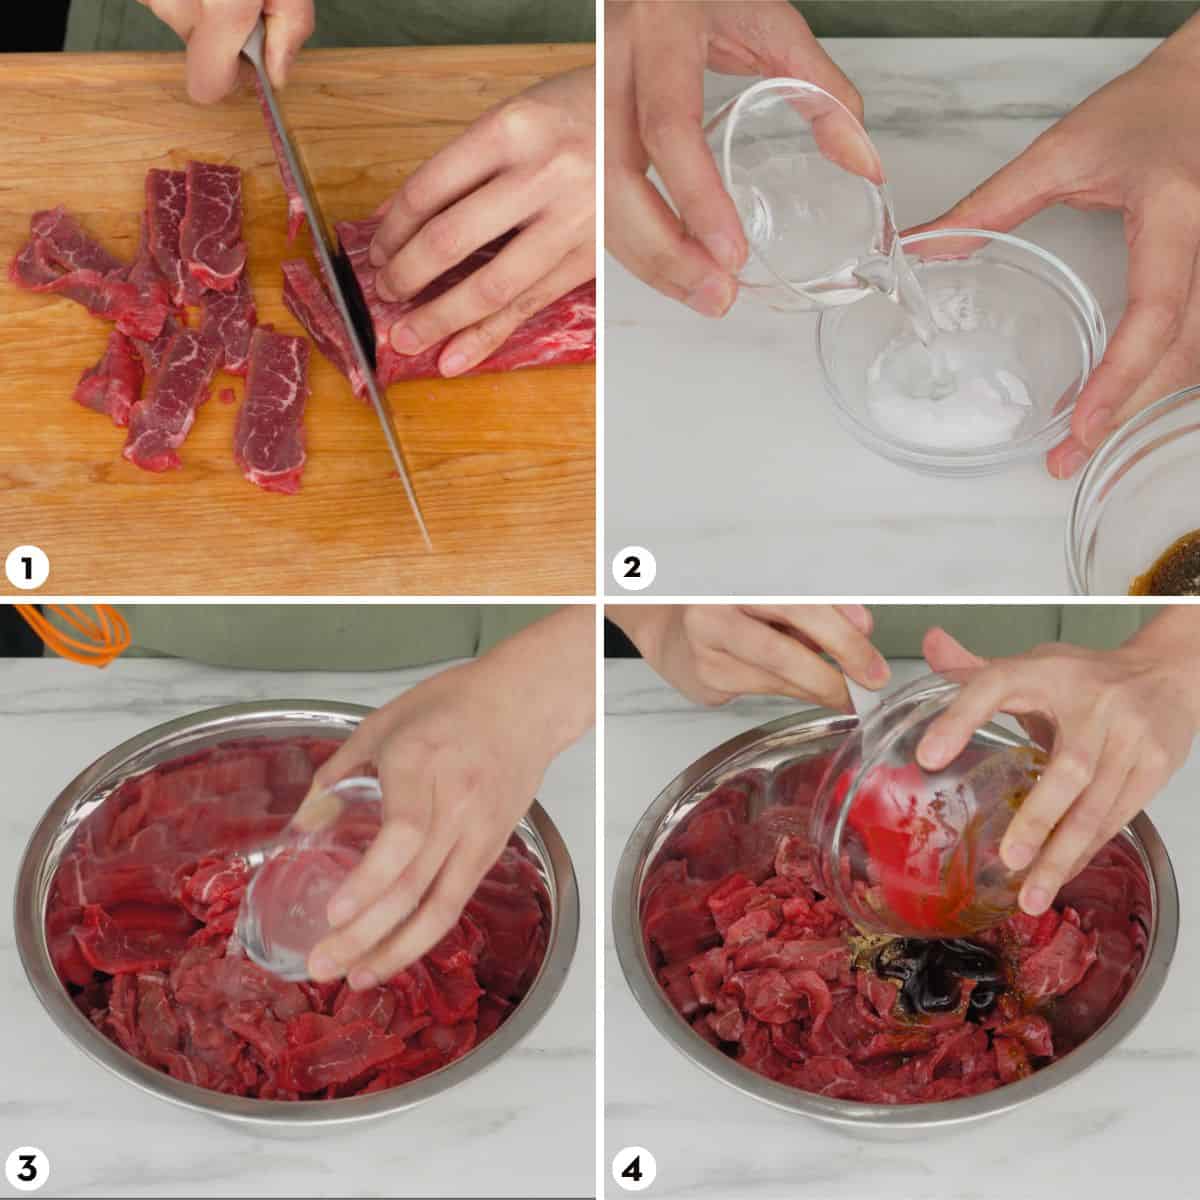
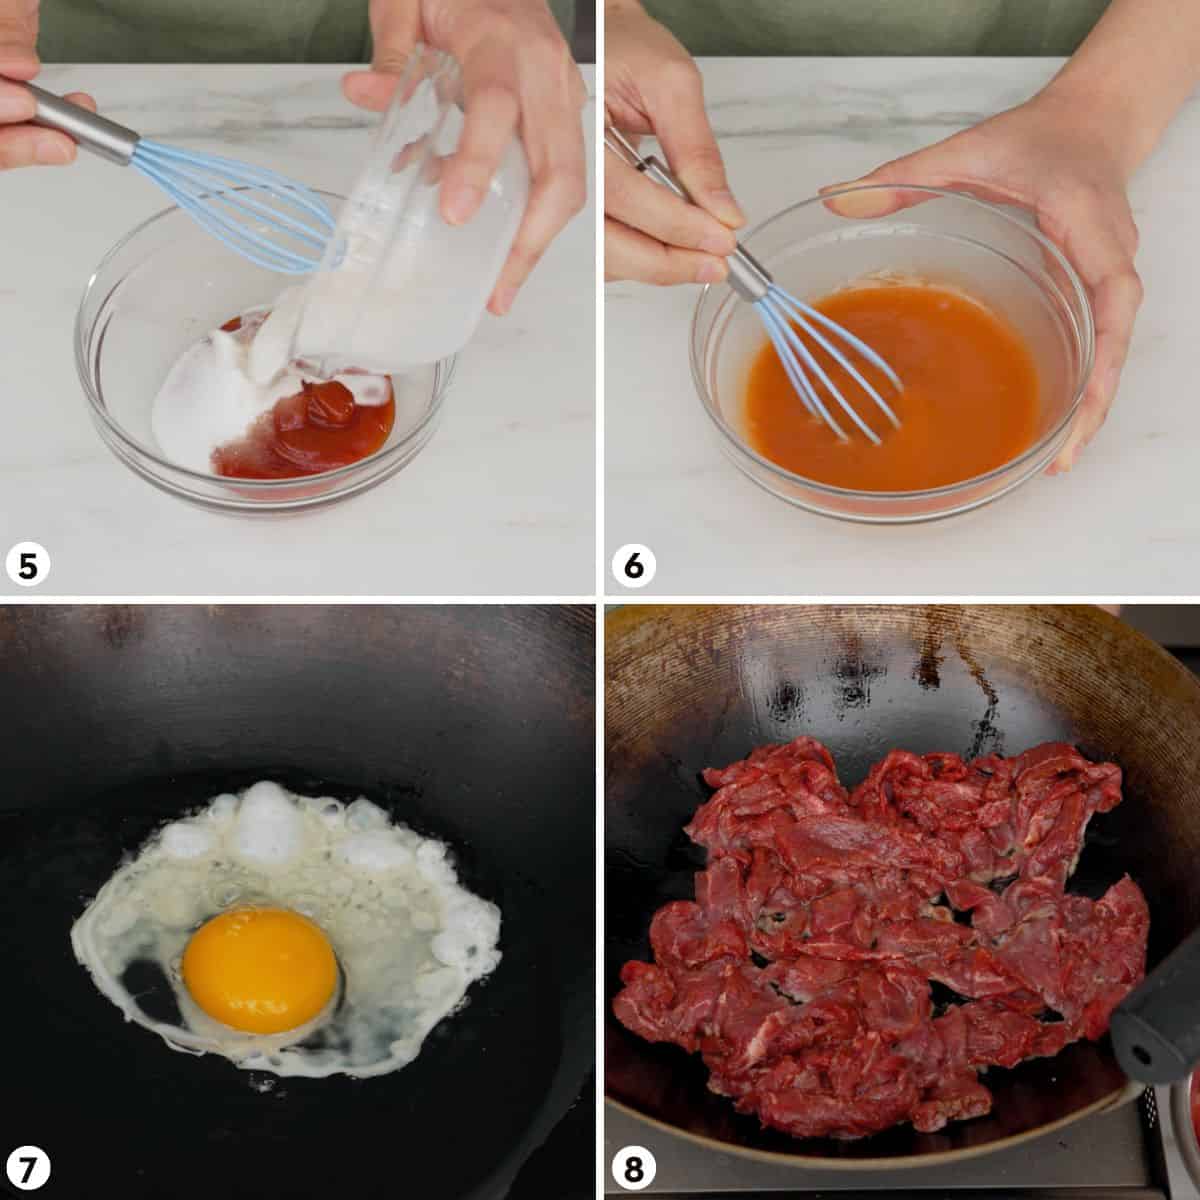
- Meanwhile combine pork shoulder slices with soy sauce and sugar and set aside.
- When the broth is done, remove the vegetables (can be eaten), spice bag (discard), and pork bones. Pick off any meat from the bones and reserve. Taste and adjust seasoning with salt as needed.
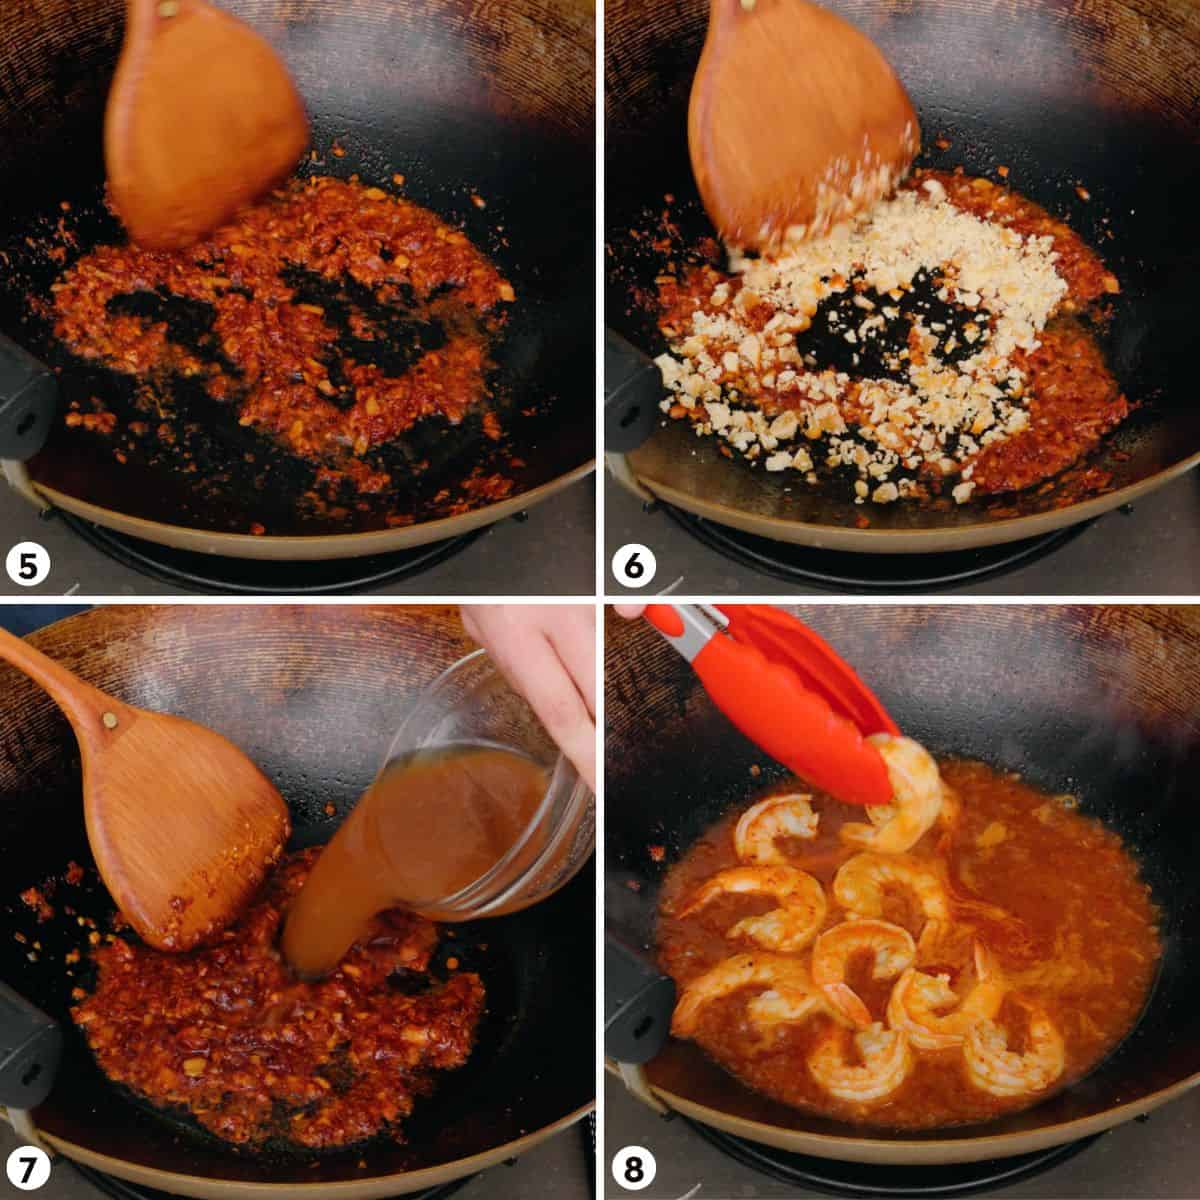
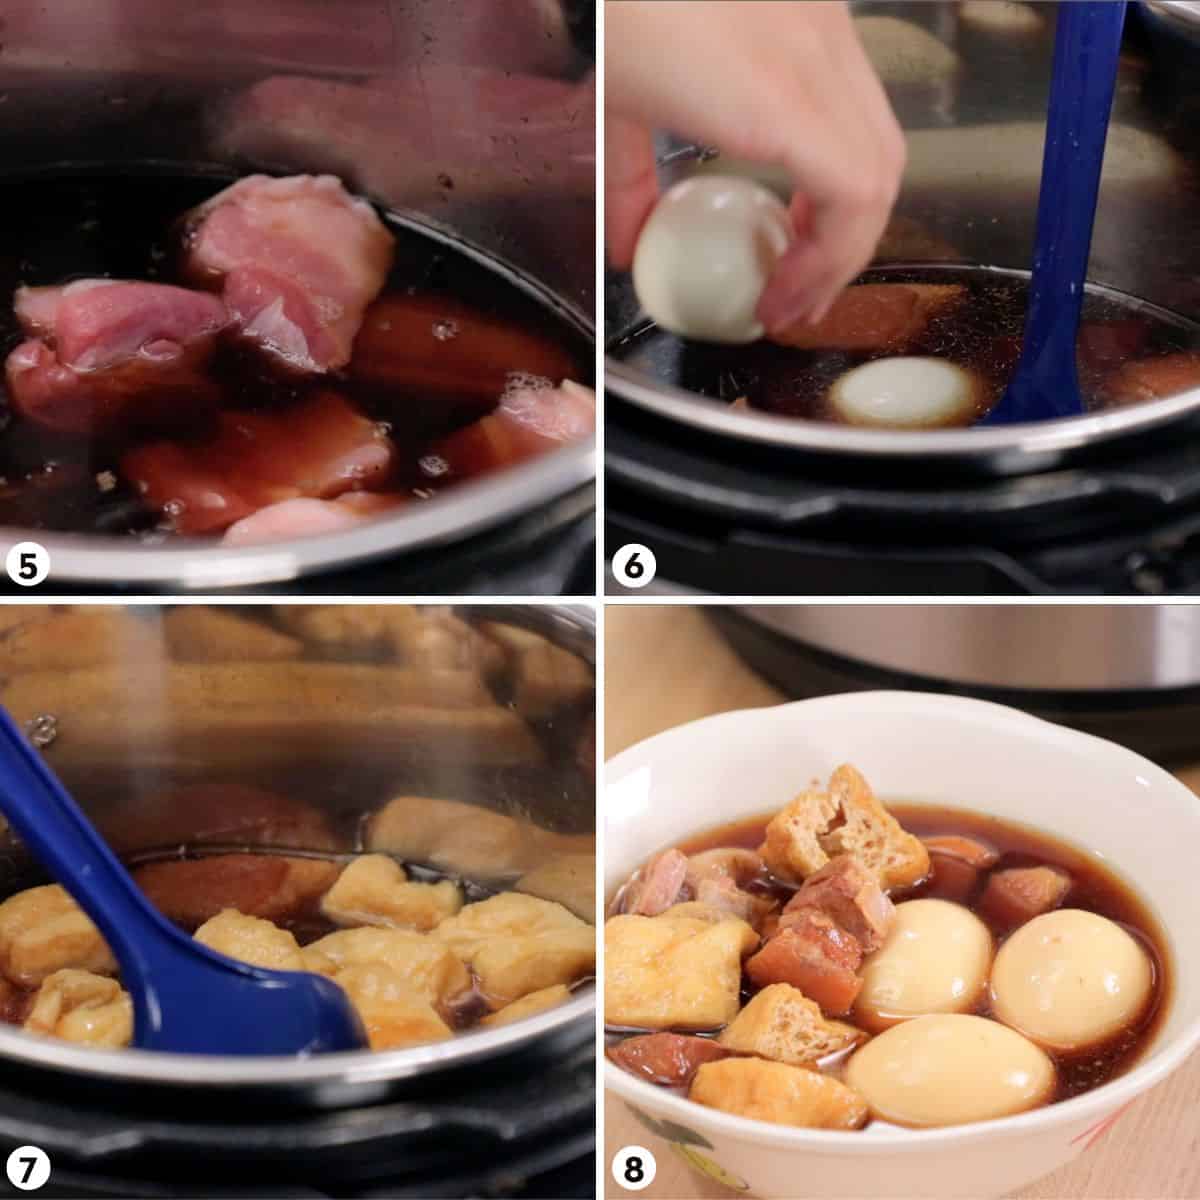
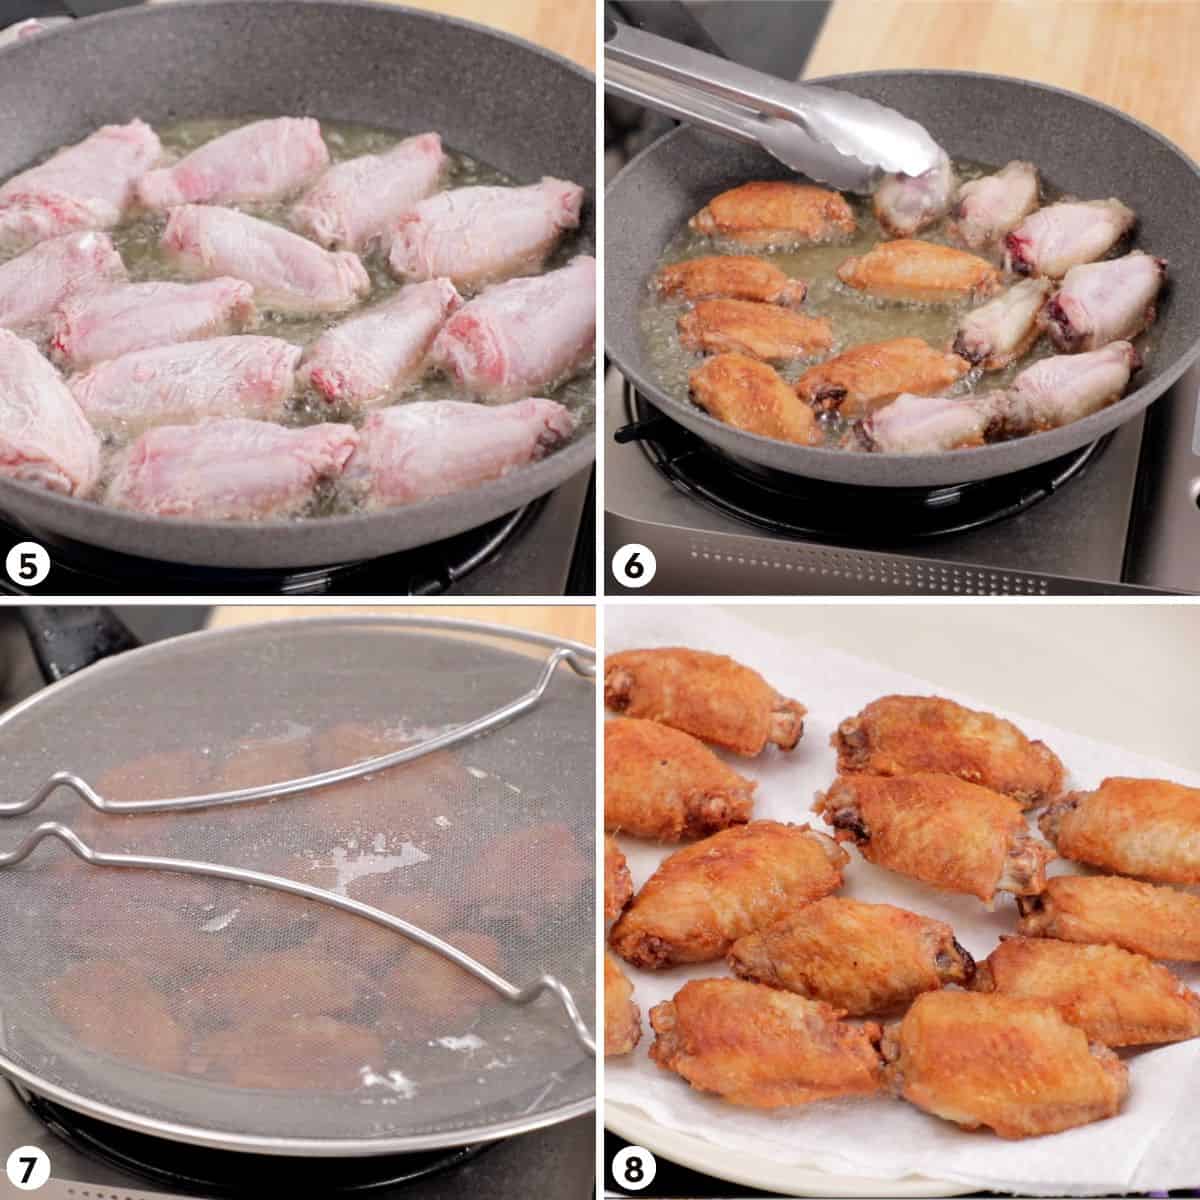
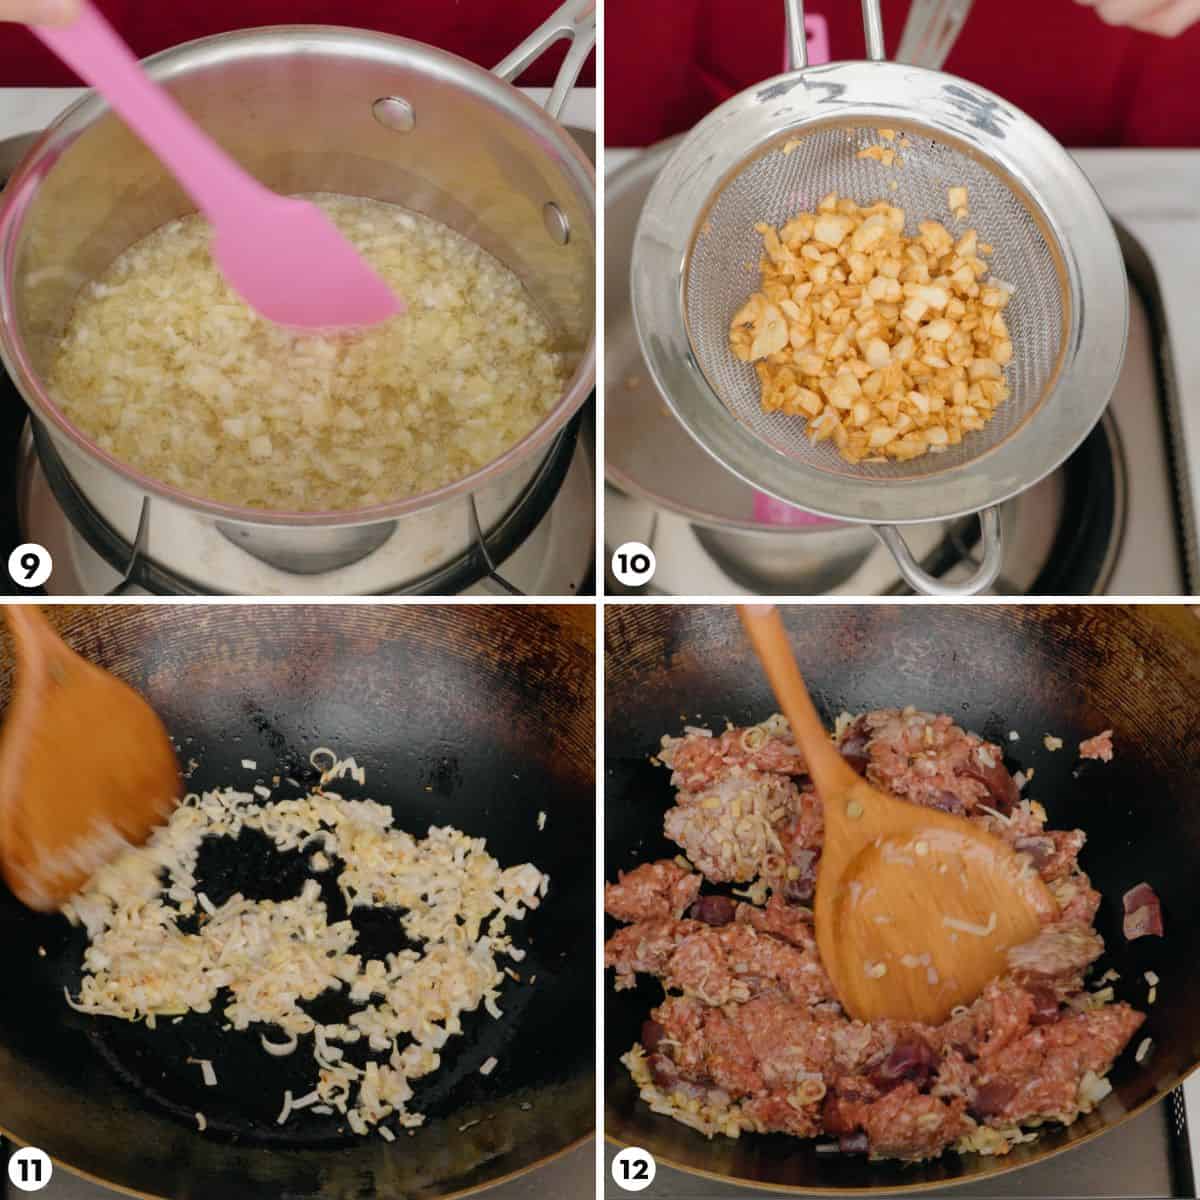
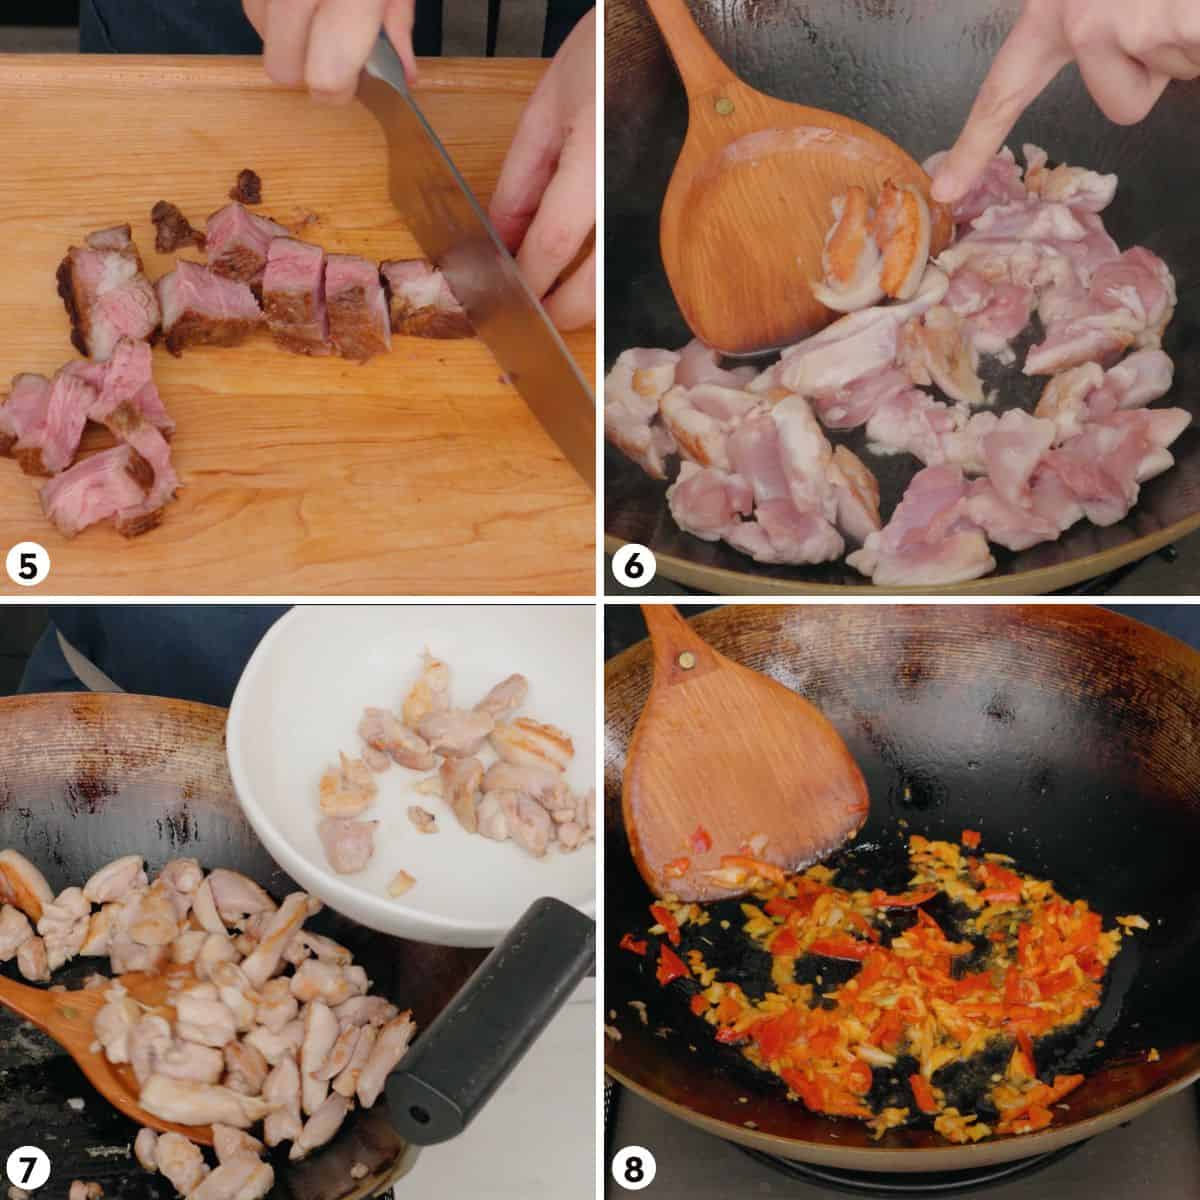
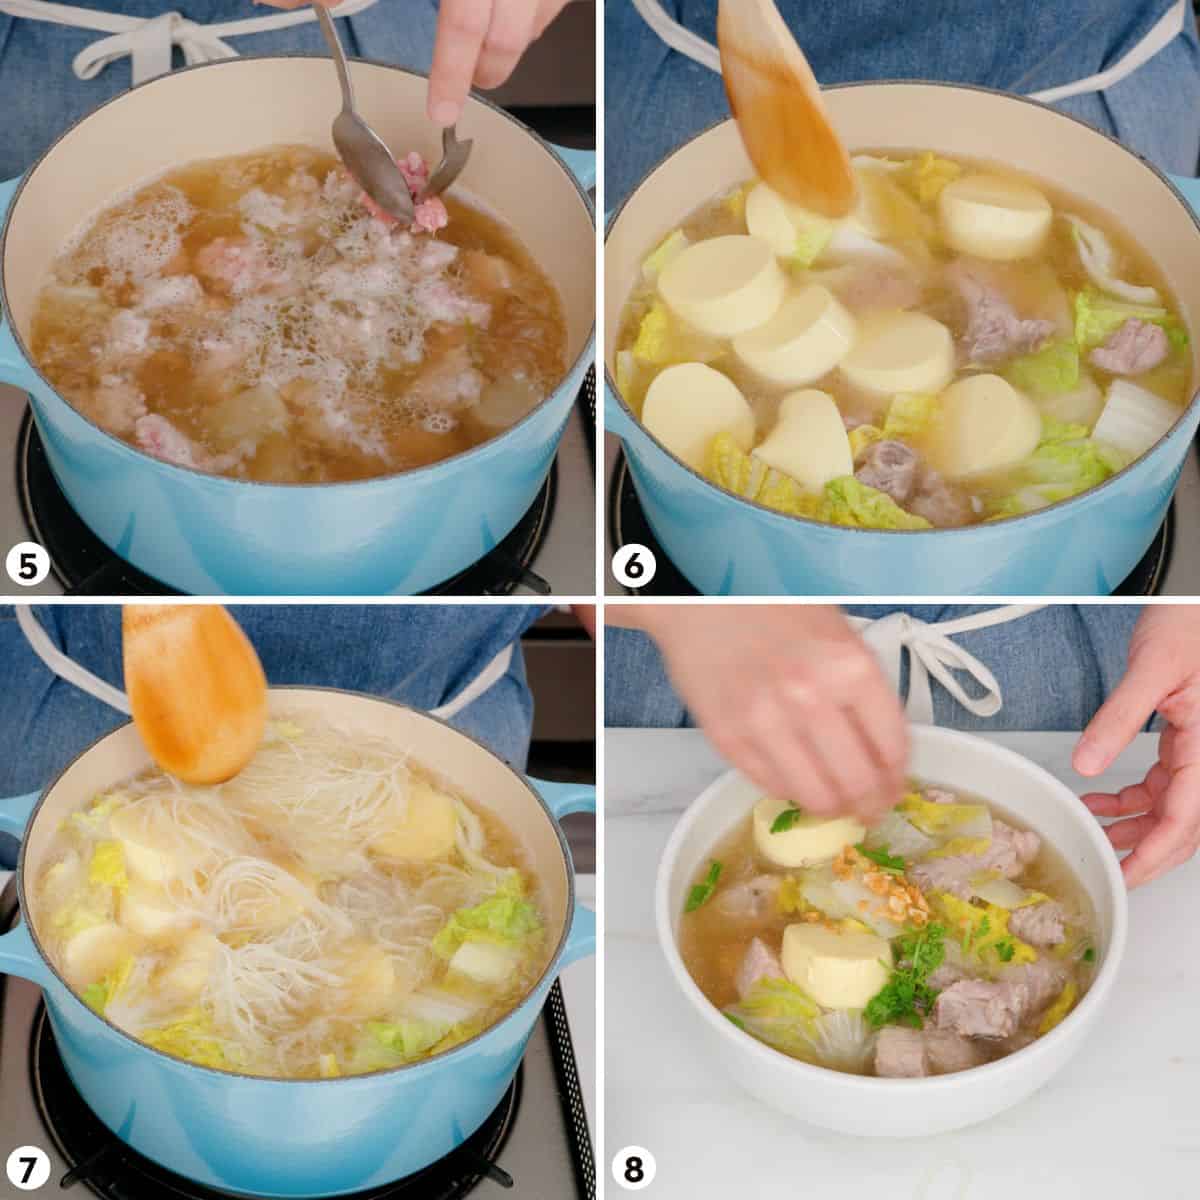
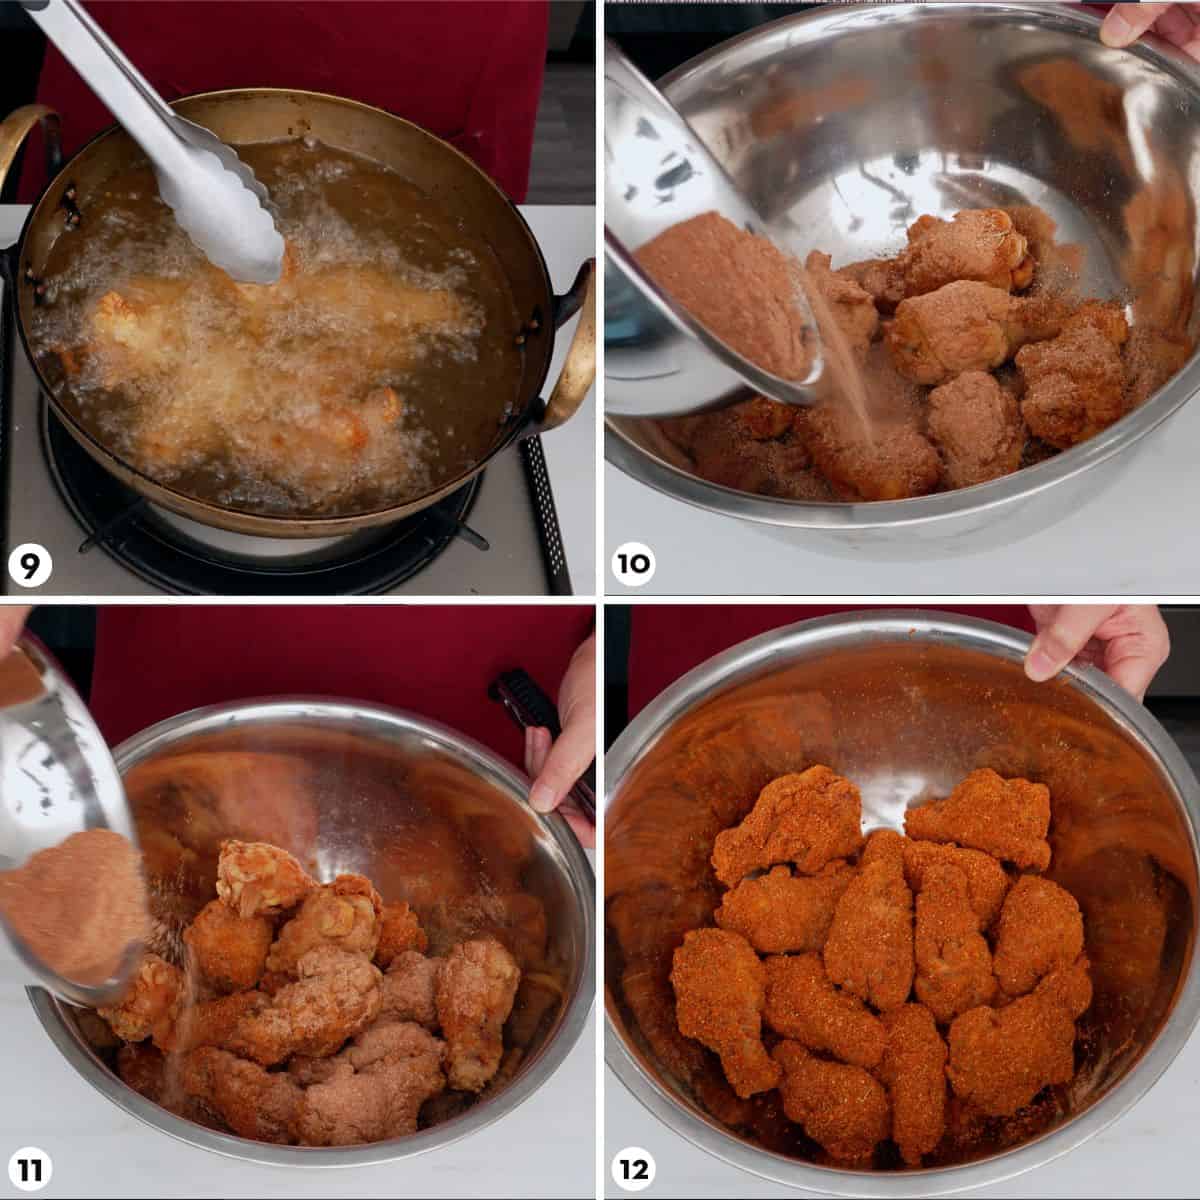
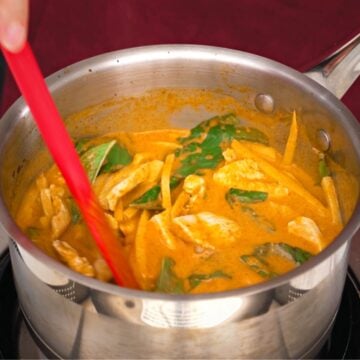
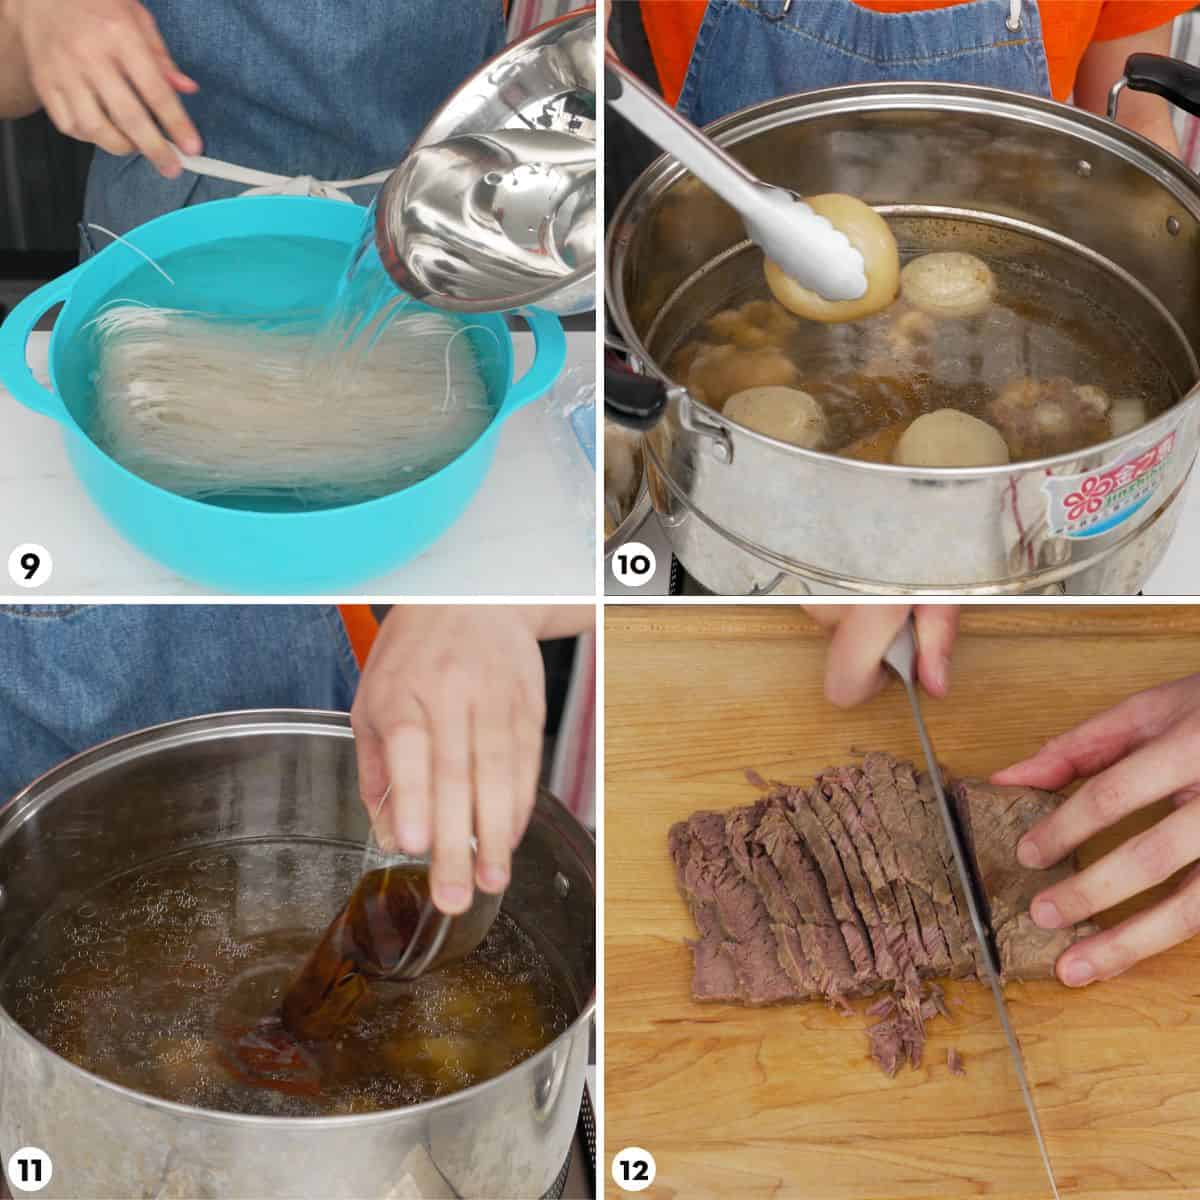
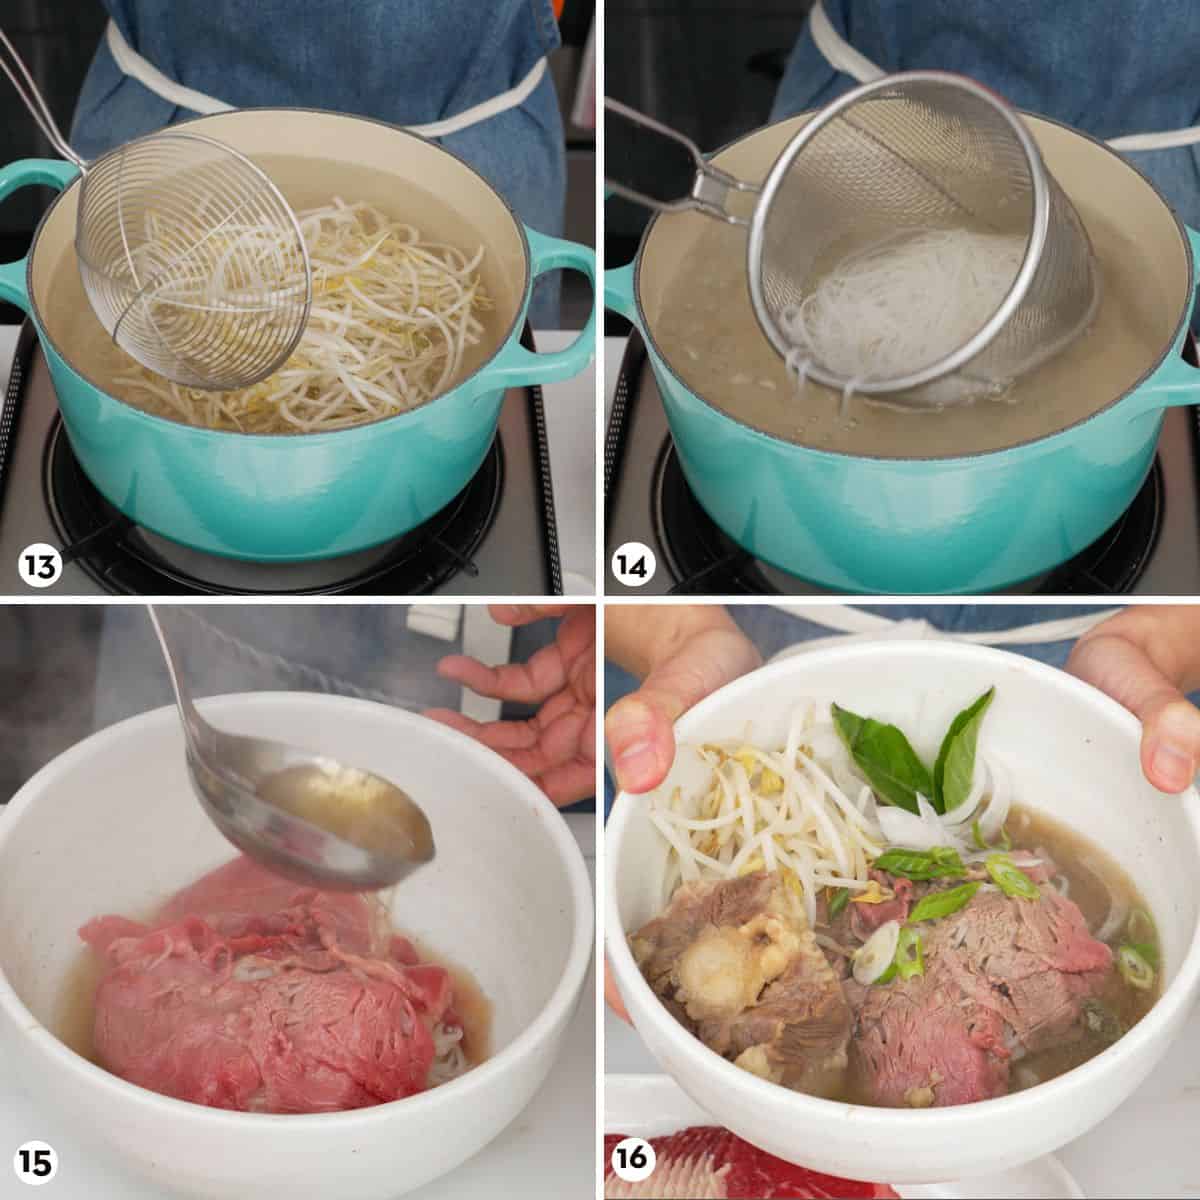
- Bring the broth to a simmer and place the pork shoulder in a sieve or wire skimmer and dunk it into the broth, stirring it around until cooked, this should take less than 1 minute. Lift it up from the broth and set aside.
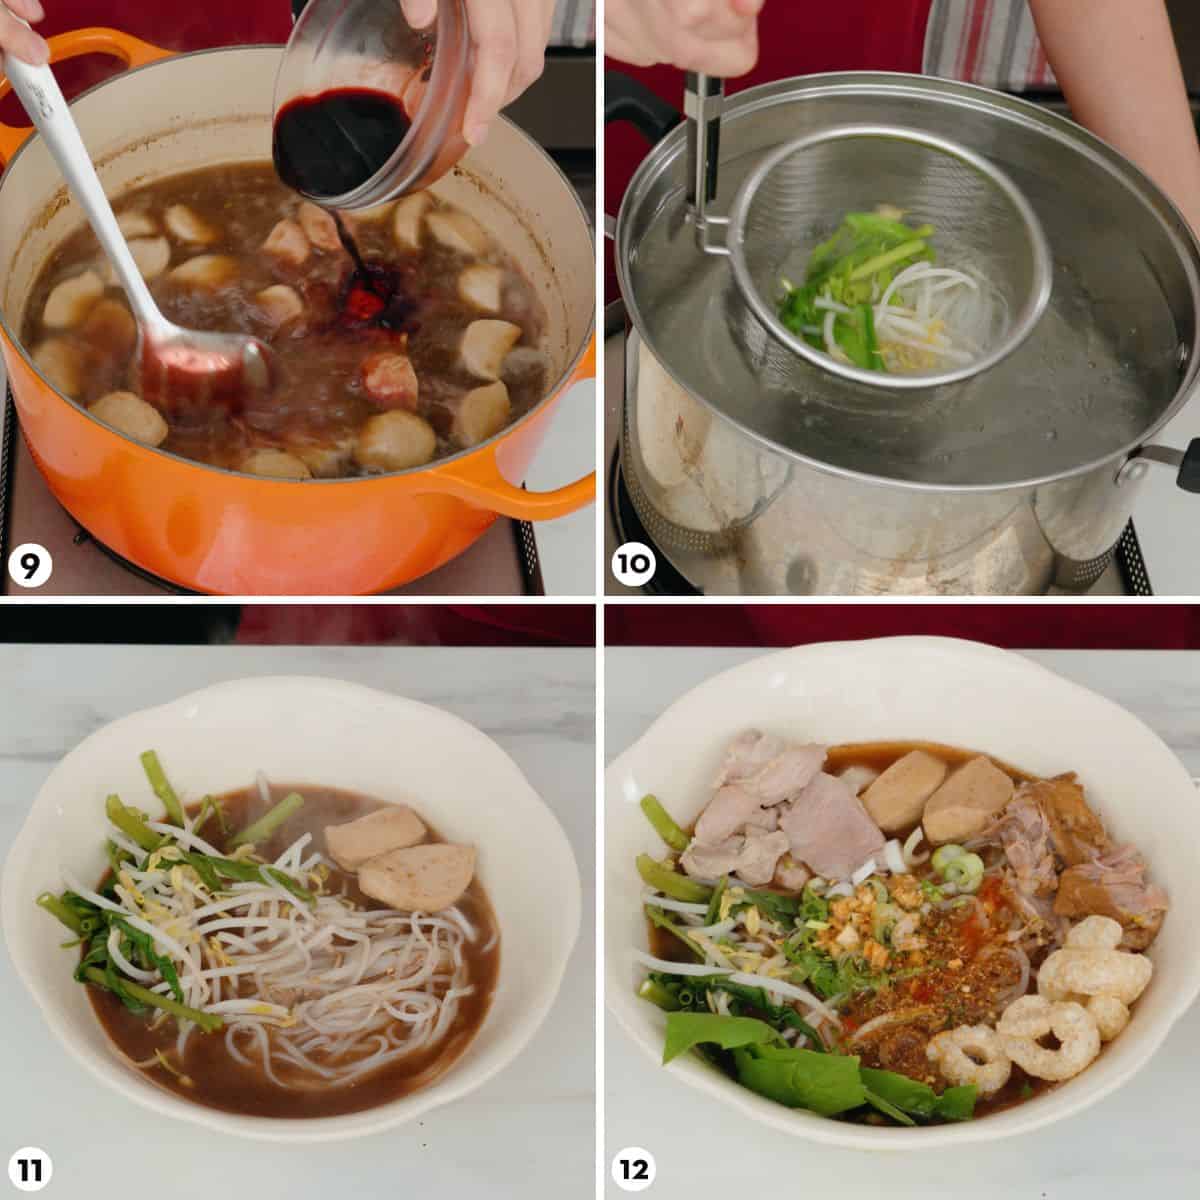
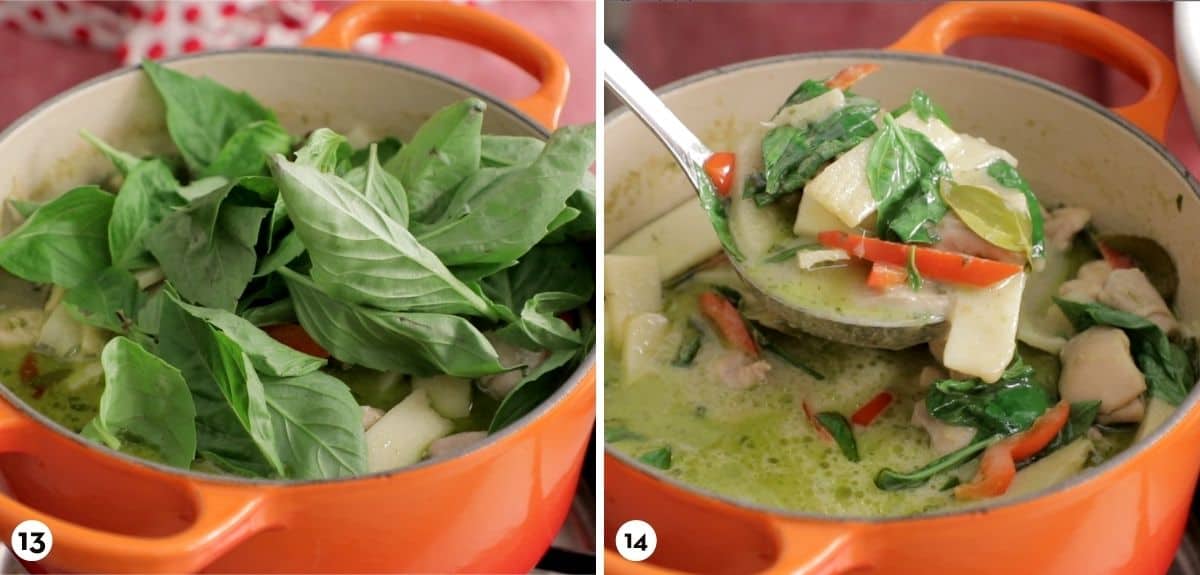
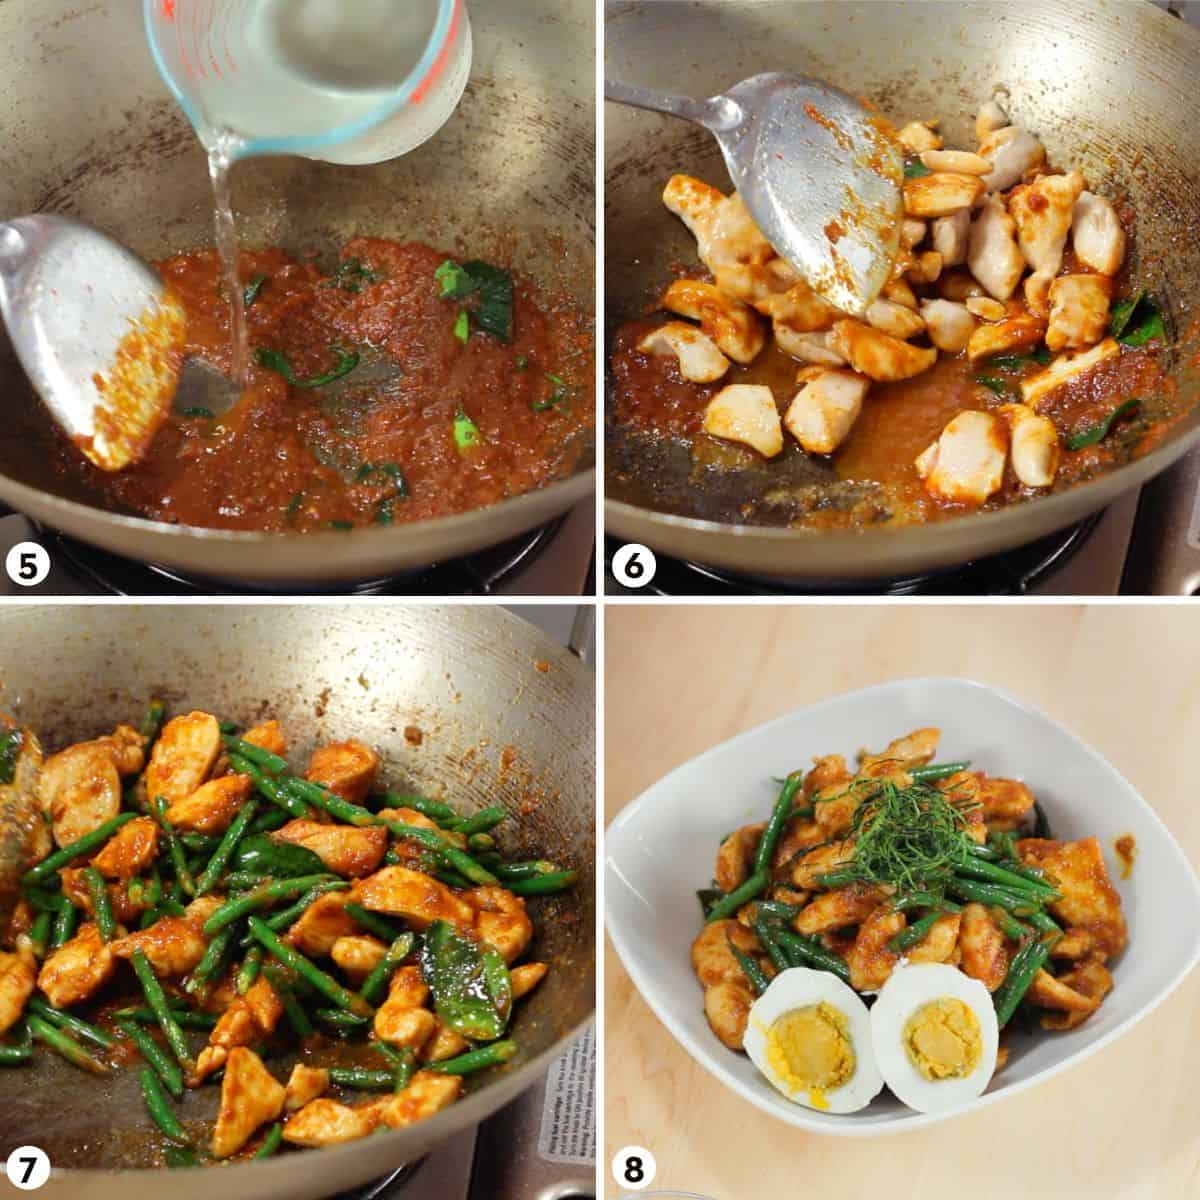
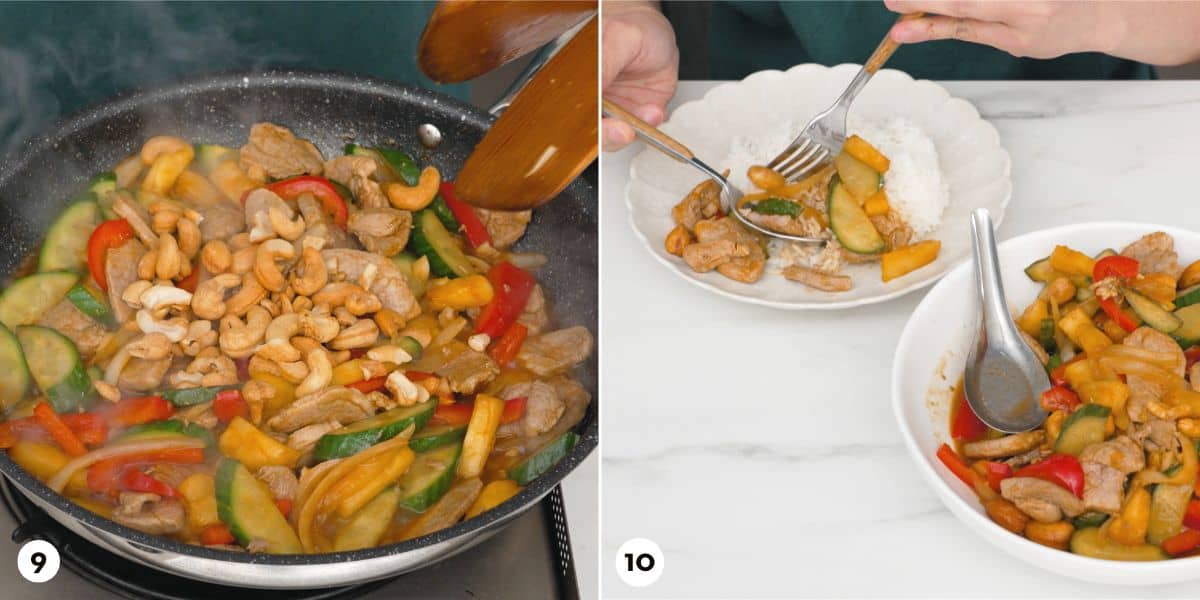
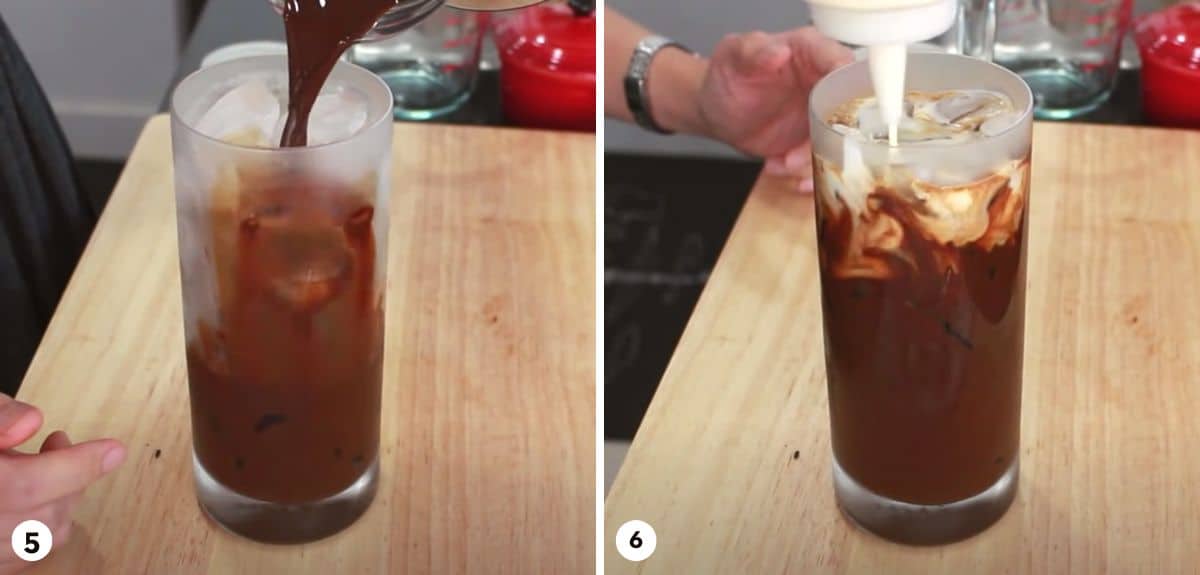
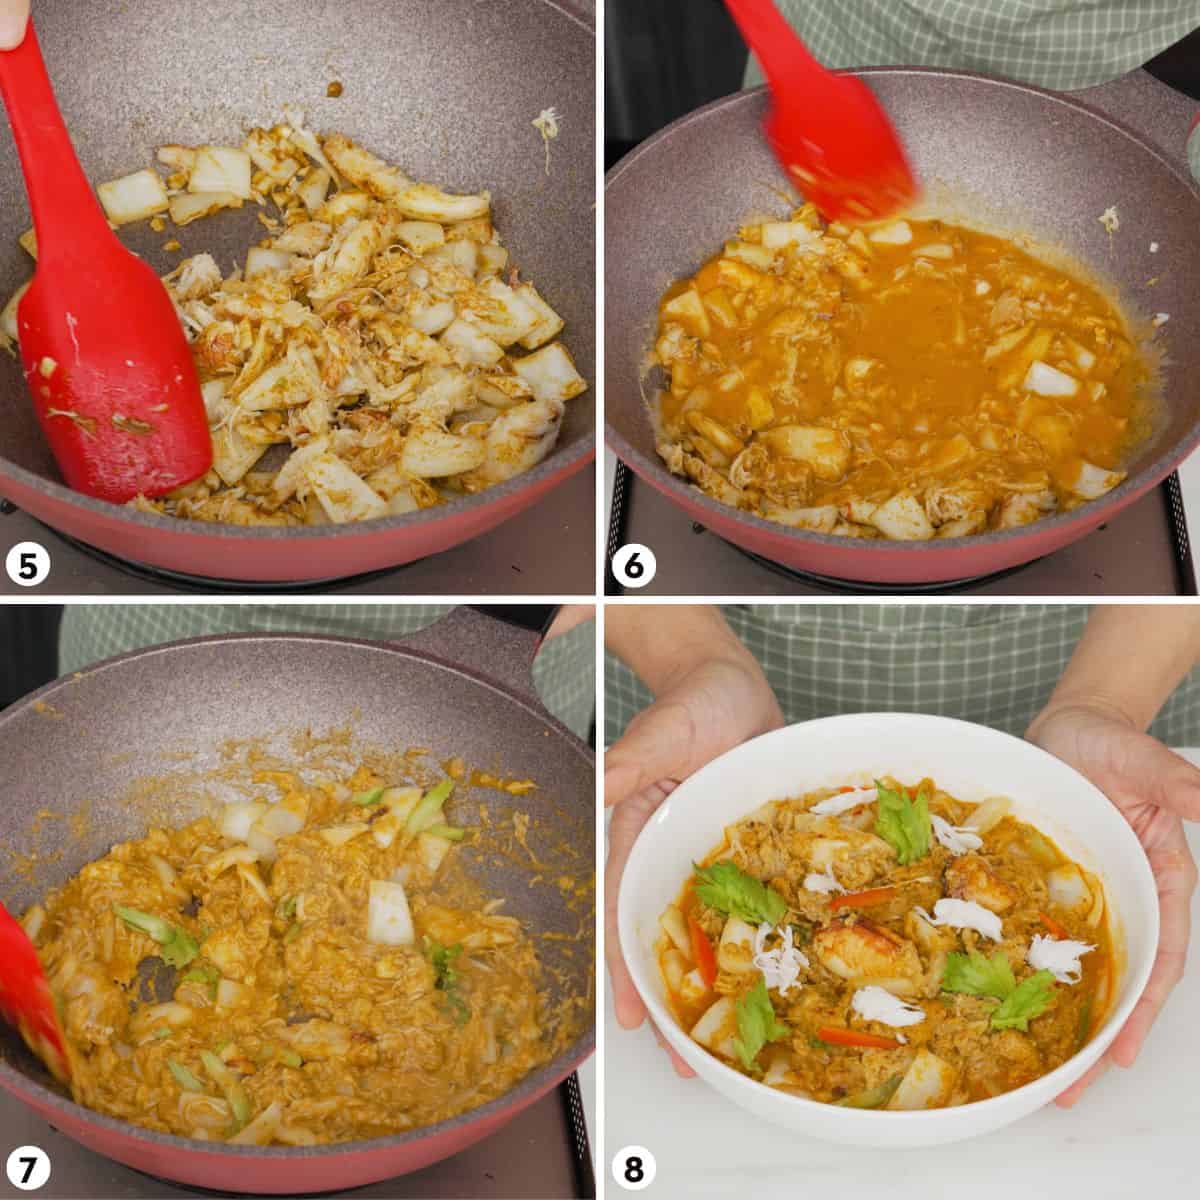
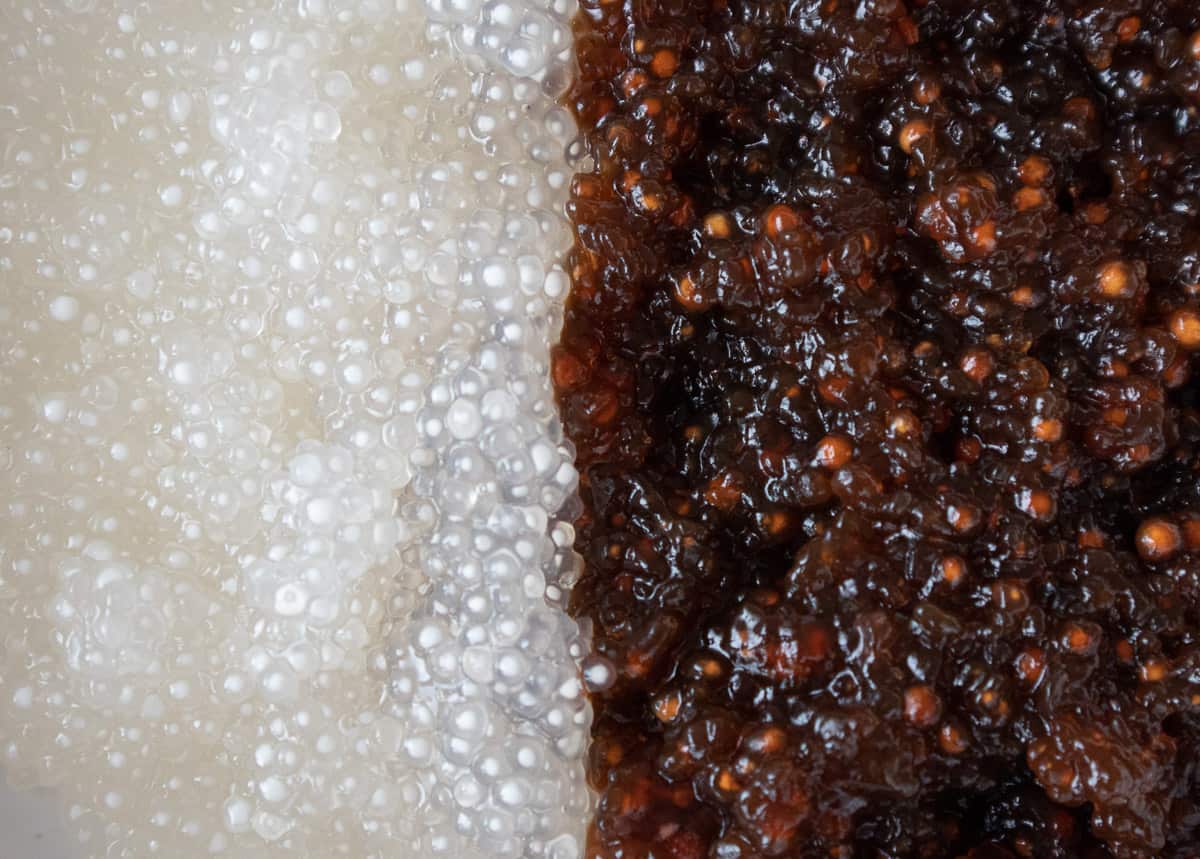
- Bring the broth back to a boil then gradually add the blood WHILE STIRRING and watch the broth thicken! Add the meatballs and keep the broth hot on low heat and covered, until ready to serve.
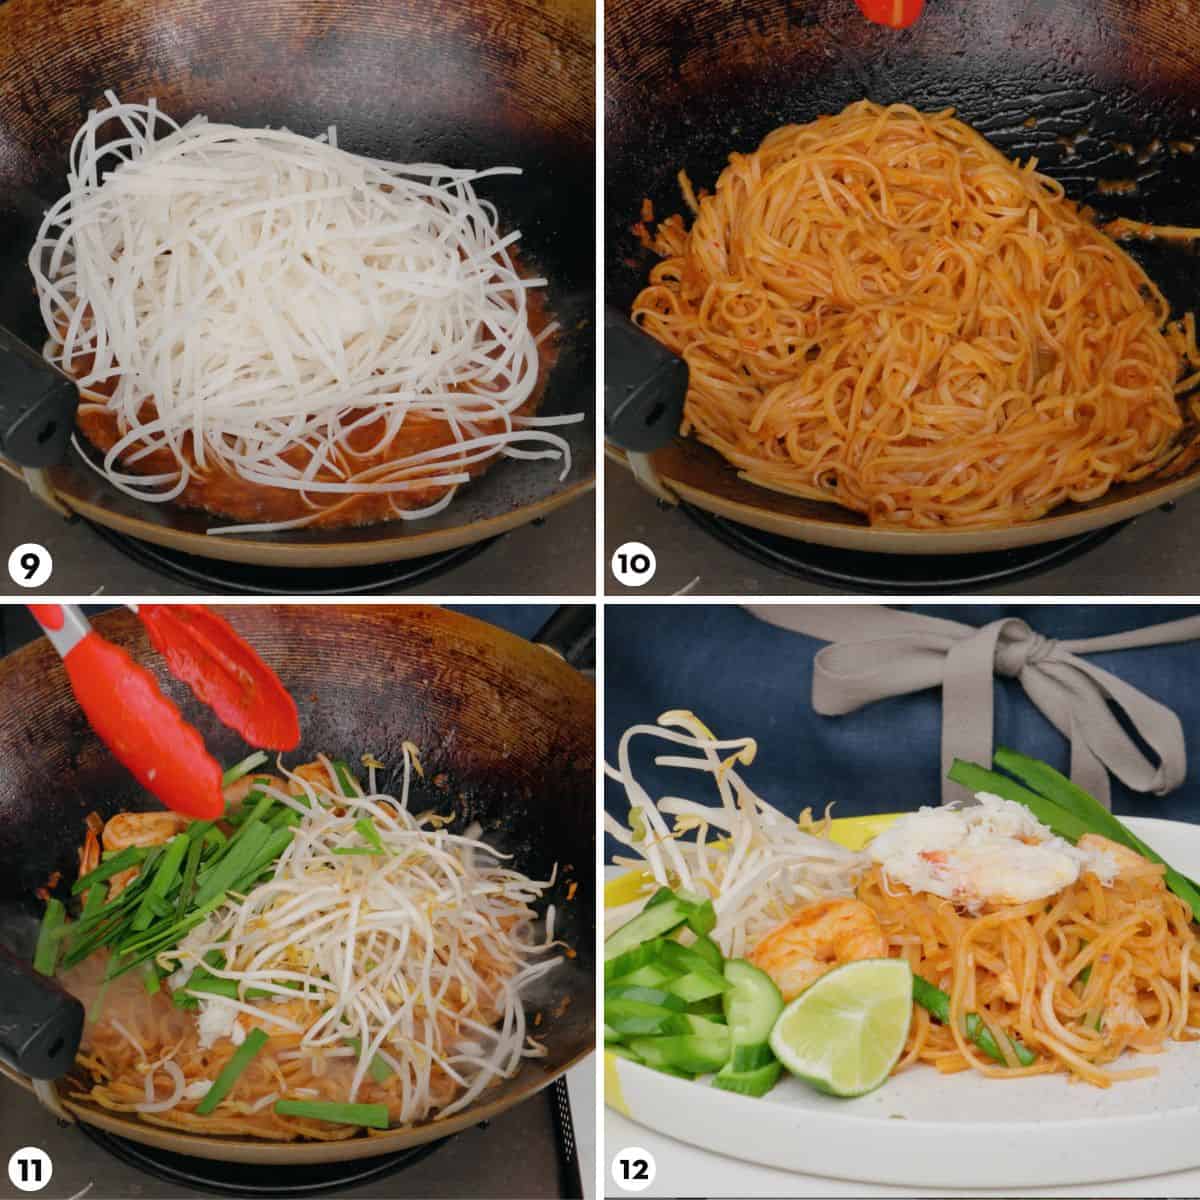
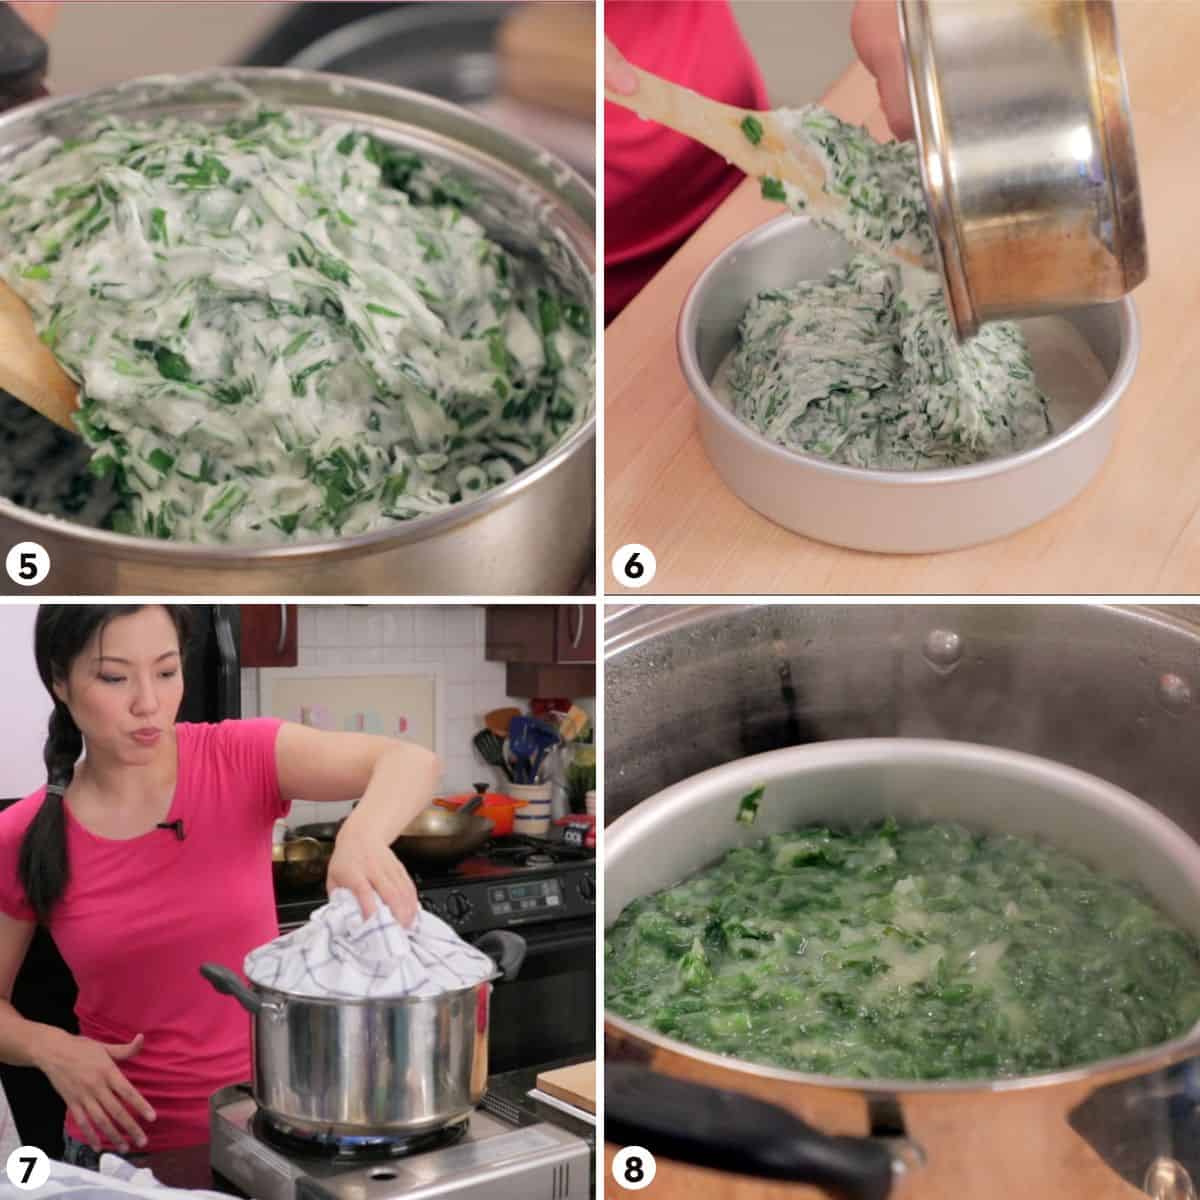
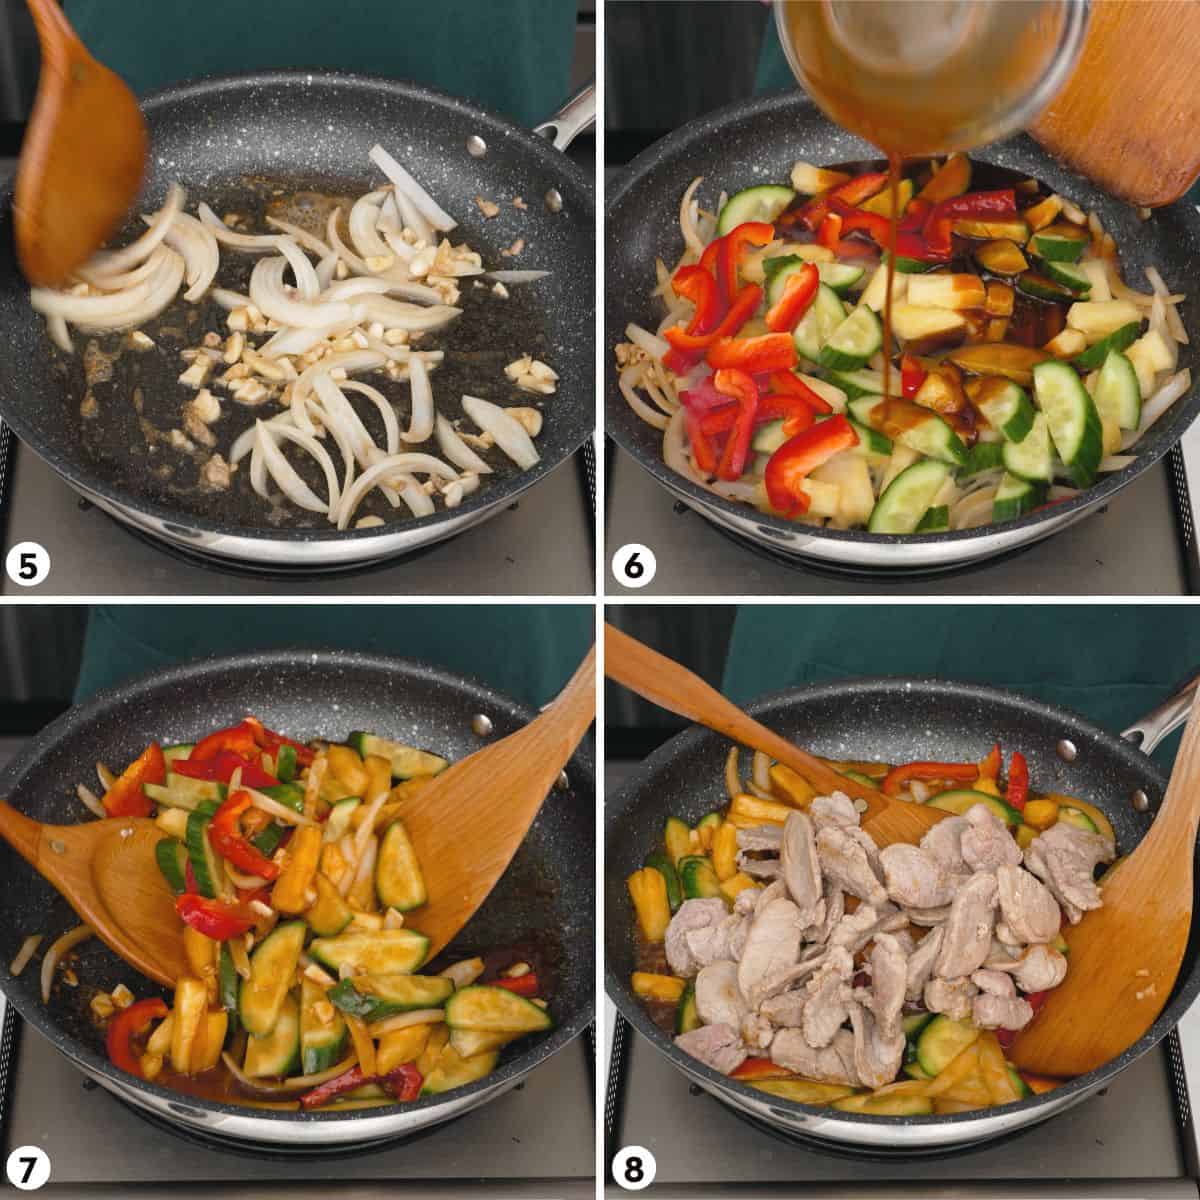
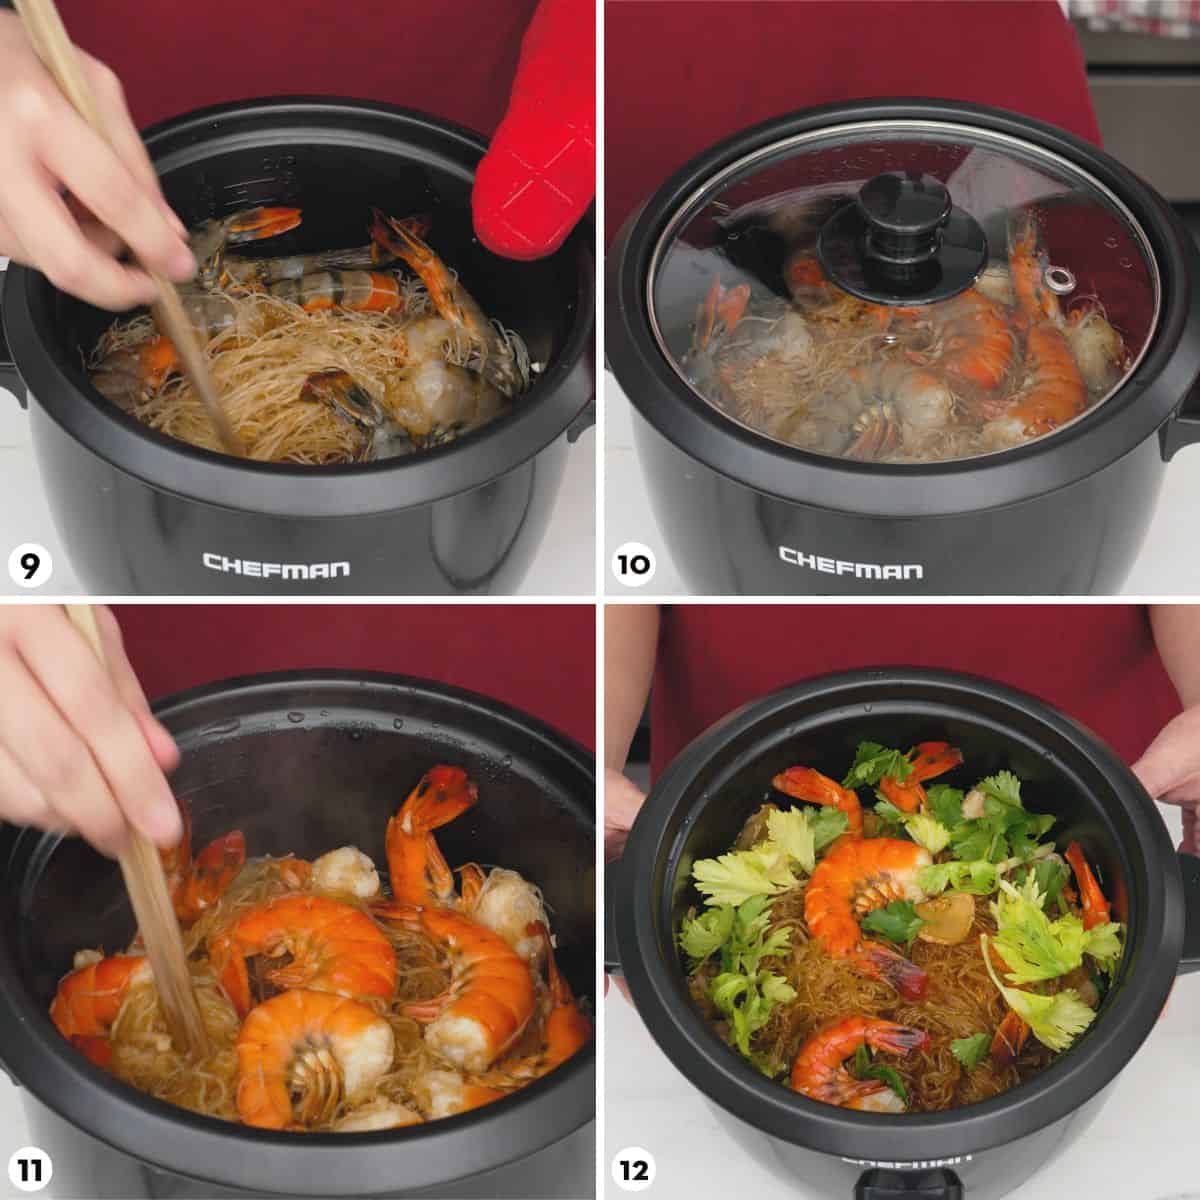
- Bring a LARGE pot of water to a FULL boil, place 1 portion of the soaked rice noodles, bean sprouts and water spinach in a noodle strainer or sieve, and blanch for 5 seconds (shake it around in the water) then place into serving bowl. (If using other kinds of noodles, see noodle options section for instructions.)
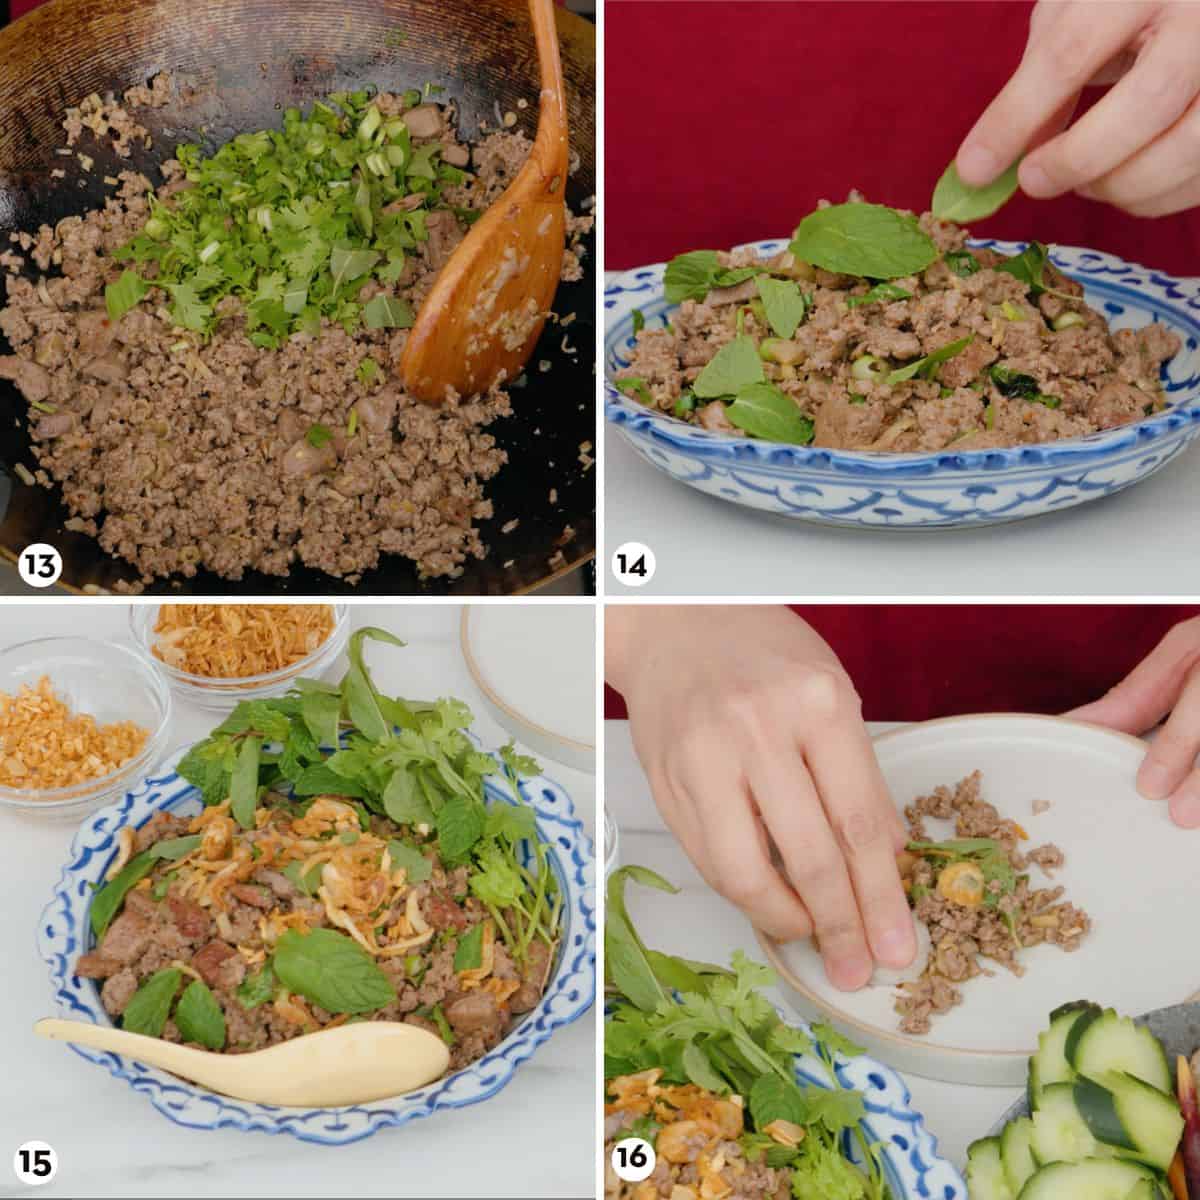
- Ladle the broth along with a few meatballs over the noodles.
- Top with marinated pork, meat from bones, and all the toppings and condiments as desired. Enjoy!
Advance Prep and Storage Tips
Boat noodles takes time to make, but if you prep all the components ahead of time, assembly is super quick and you'll have dinner on the table in 20 minutes!
Here are all the things you can do ahead of time:
- Make the broth and cook the meat in advance. This is the most important thing you need to do ahead of time. You can also cook the marinated pork once the broth is done and this will save even more time on the day. The broth will last at least 1 week in the fridge and can be frozen indefinitely. Keep the cooked meat separately in an airtight container and it'll also last up to a week.
- Soak noodles in advance. If you're using any of the noodles that require soaking, soak them in advance, drain, then keep in a covered container in the fridge and they'll last up to one week. Make sure to rest the noodles on a kitchen towel to absorb excess water before storage; any pooling water in the container will continue to get absorbed by the noodles and make them mushy.
- Make the condiments. If you're going to have chili vinegar, fried garlic, or the roasted chili flakes, get them done ahead of time and keep them in the fridge. Make sure to keep the fried garlic and garlic oil in separate containers!
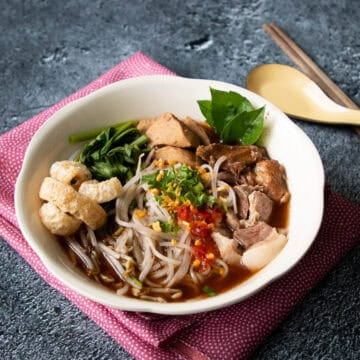
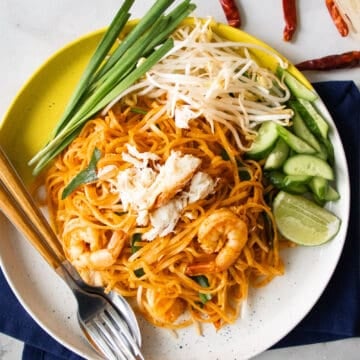
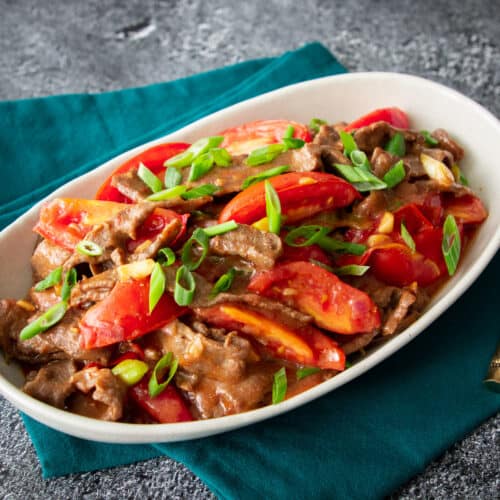
Authetic Thai Boat Noodles (guay tiew reua)
Equipment
- noodle strainer or metal sieve
Want to save this recipe?
Ingredients
Boat Noodle Broth
- 3.2 quarts water
- 2 lb pork bones, preferably neck bones (see note 1)
- 6 inches cinnamon stick
- 1 pc star anise
- 1 teaspoon coriander seeds
- 10 slices galangal
- 3 cilantro roots or 6 cilantro stems, crushed until bruised
- 3 inches daikon, peeled and cut into chunks
- ½ medium onion, cut into chunks
- 5 cloves garlic, smashed until broken
- ½ teaspoon white pepper, ground
- 1 pandan leaf (about 18 inches), optional
- 3 Tablespoons soy sauce
- 2 Tablespoons Golden Mountain Sauce
- 2 Tablespoons Tao jiew (Thai fermented soy bean paste), or sub miso or doenjang
- 2 Tablespoons white vinegar
- 1.5 Tablespoons black soy sauce, or dark soy sauce
- 1 Tablespoon fish sauce
- 25 g rock sugar , or 2 Tablespoons granulated sugar
- Salt, as needed
- ⅓ cup liquid pork or beef blood, or more if you like it thicker (see note 2)
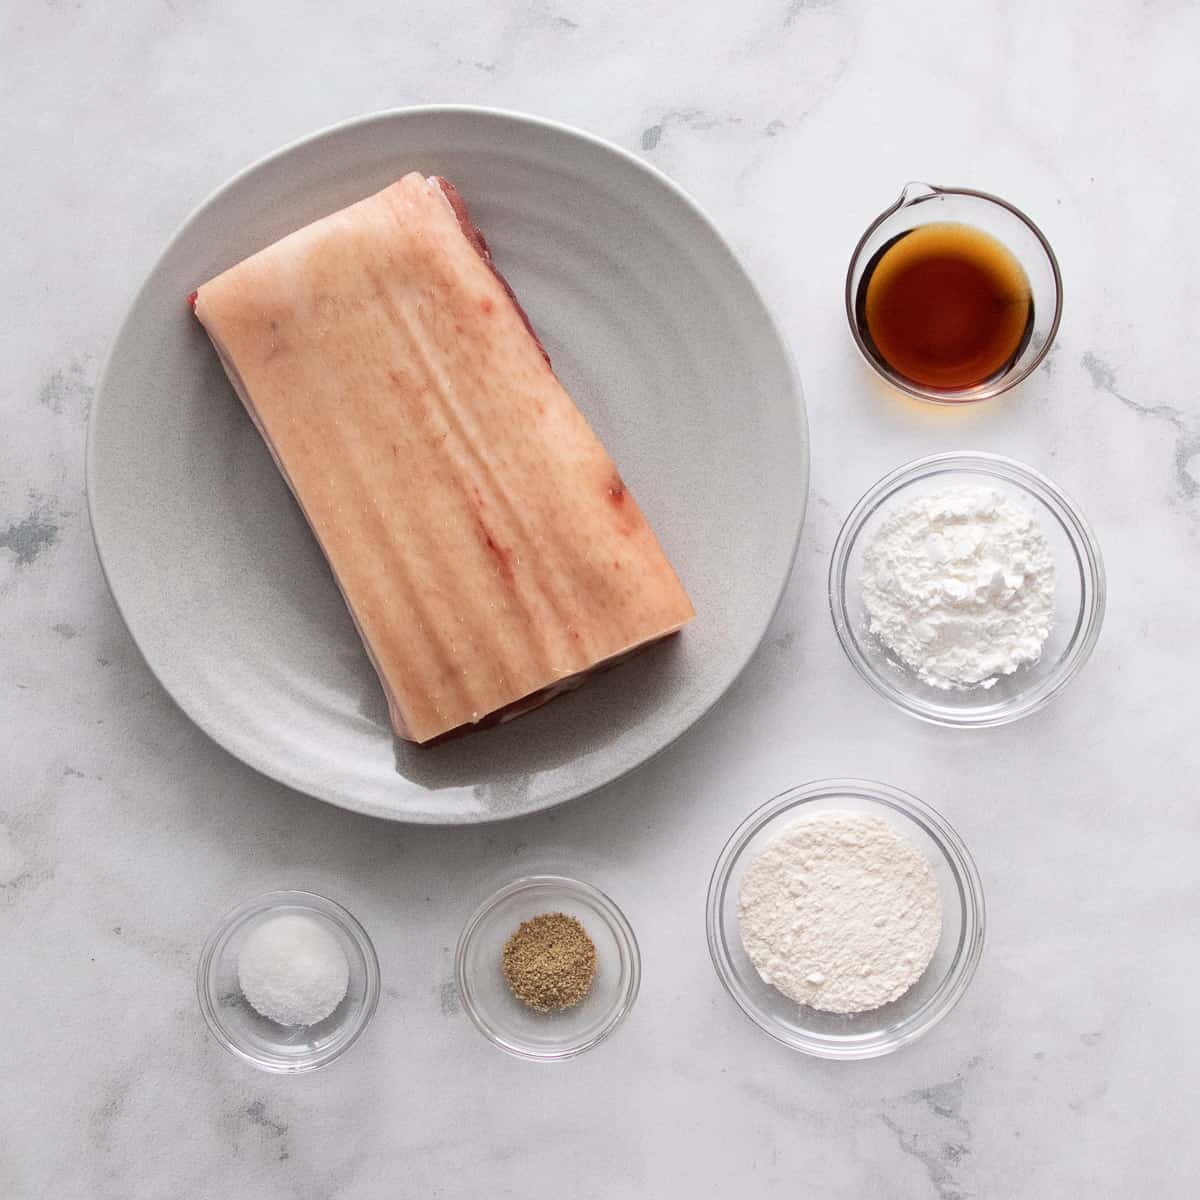
Marinated Pork
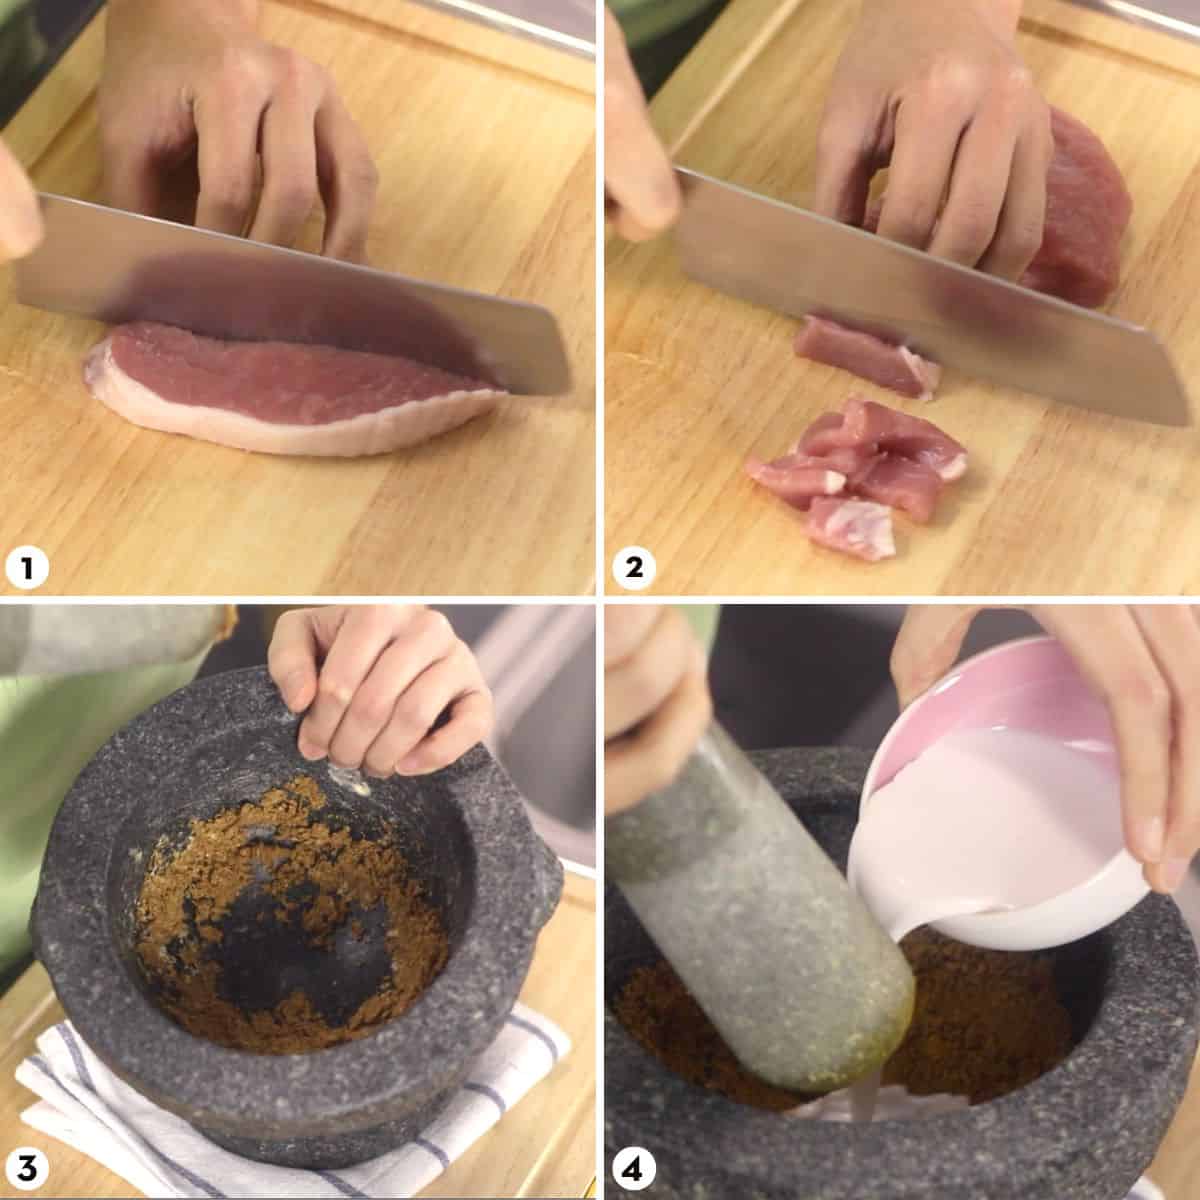
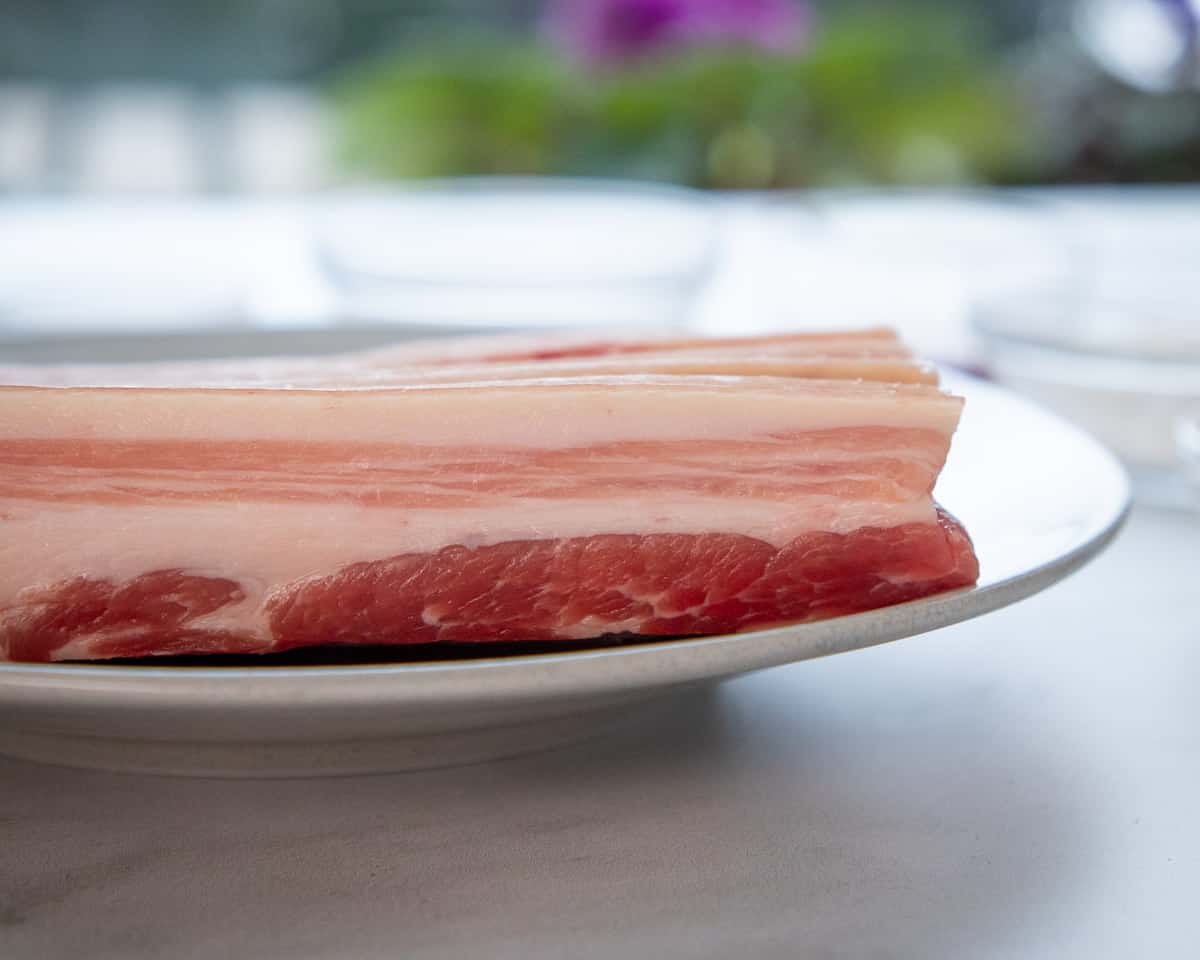
- 225 g pork shoulder, sliced into ⅛-inch thick pieces
- 1 tablespoon soy sauce
- ½ teaspoon sugar
Noodle Bowl
- 1 lb dried rice noodles, size small (1.5 mm)
- ½ lb Asian style meatballs, pork or beef (see note 3)
- 2 cups water spinach or spinach, cut in 2-inch pieces
- 2 cups bean sprouts
- 6 sprigs cilantro, chopped
- 1 stalk green onion, chopped
Optional Condiments for Serving
- Chili vinegar, highly recommended (see note 4)
- 3 sprigs Thai basil , optional
- Fried garlic & garlic oil, optional
- Crispy pork rind, optional
- Roasted chili flakes, to taste, optional
Notes
- I prefer pork neck bones because they have a lot of meat on them, which makes a great addition to the noodle bowl. If you’re using beef bones, you will not have much of this meat.
- Beef or pork blood can be found frozen at many Asian grocery stores. Do not get cooked blood which is solid and can’t be used for this recipe. If you cannot find blood, substitute coconut milk.
- Asian style meatballs can be found refrigerated or frozen at most Asian markets. If large, half or quarter them.
- Chili vinegar, though technically optional, adds a zing to boat noodles that I think MAKES the dish. My cheat is to mix 1 part sambal oelek with 2 parts white vinegar, but you can make it from scratch easily using my chili vinegar recipe (it keeps very well in the fridge).
FULL VIDEO TUTORIAL
All my recipes come with step-by-step video tutorials with extra tips not mentioned in the blog post, so make sure you watch the video to ensure success. If you enjoy them, consider subscribing to the YouTube Channel to not miss an episode. Thank you!
Subscribe to my YouTube ChannelInstructions
For the Broth:
- Add pork bones and water to a large stock pot making sure the bones are completely submerged. Simmer for 30 minutes.3.2 quarts water, 2 lb pork bones
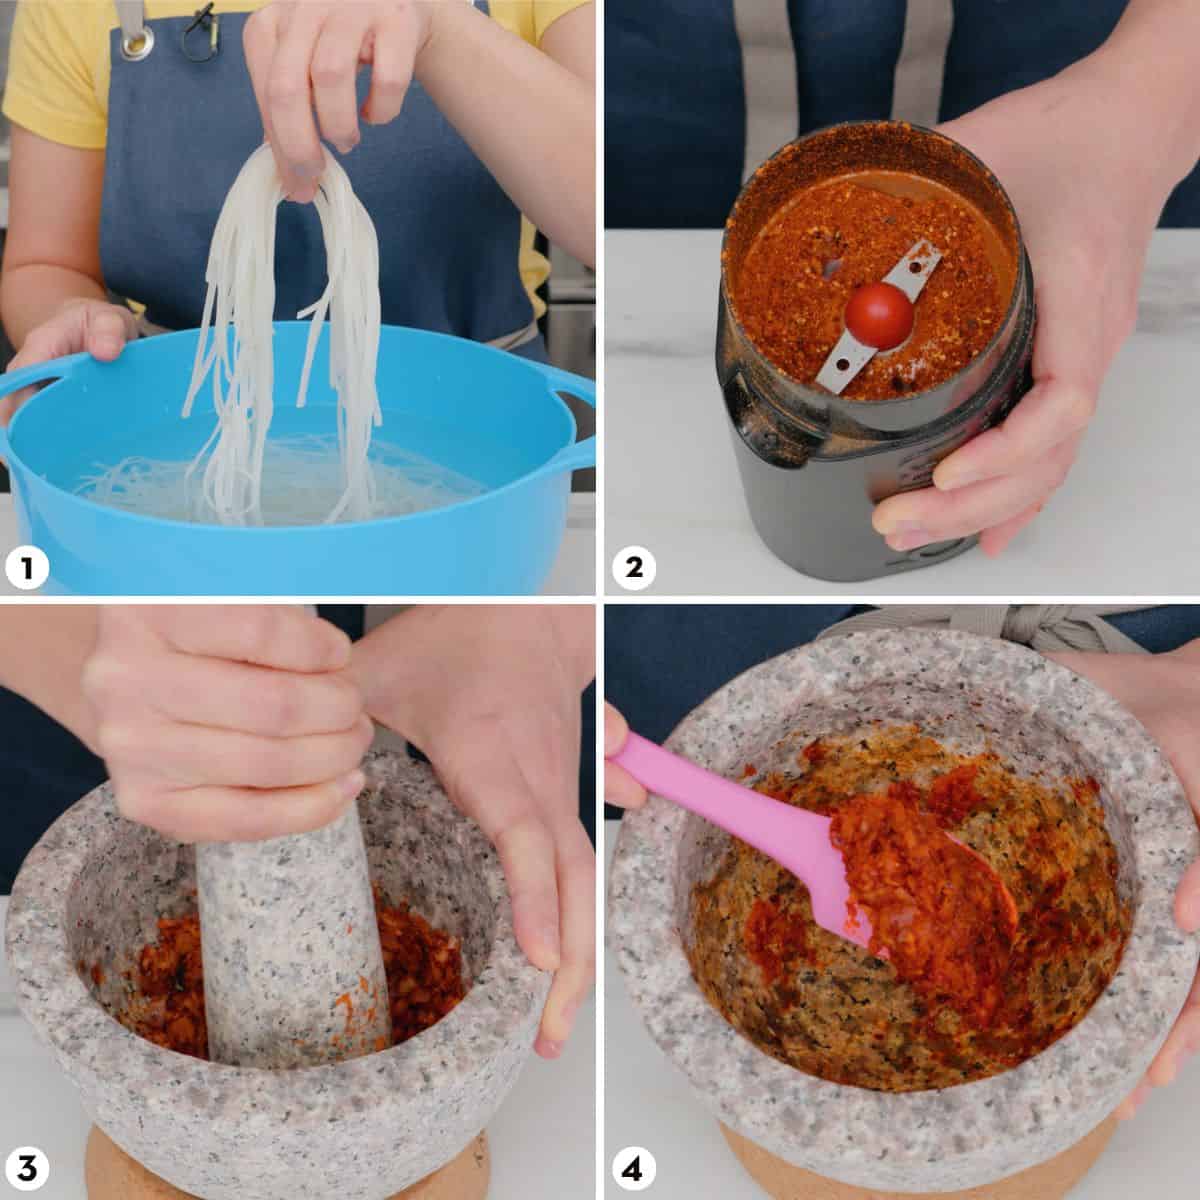
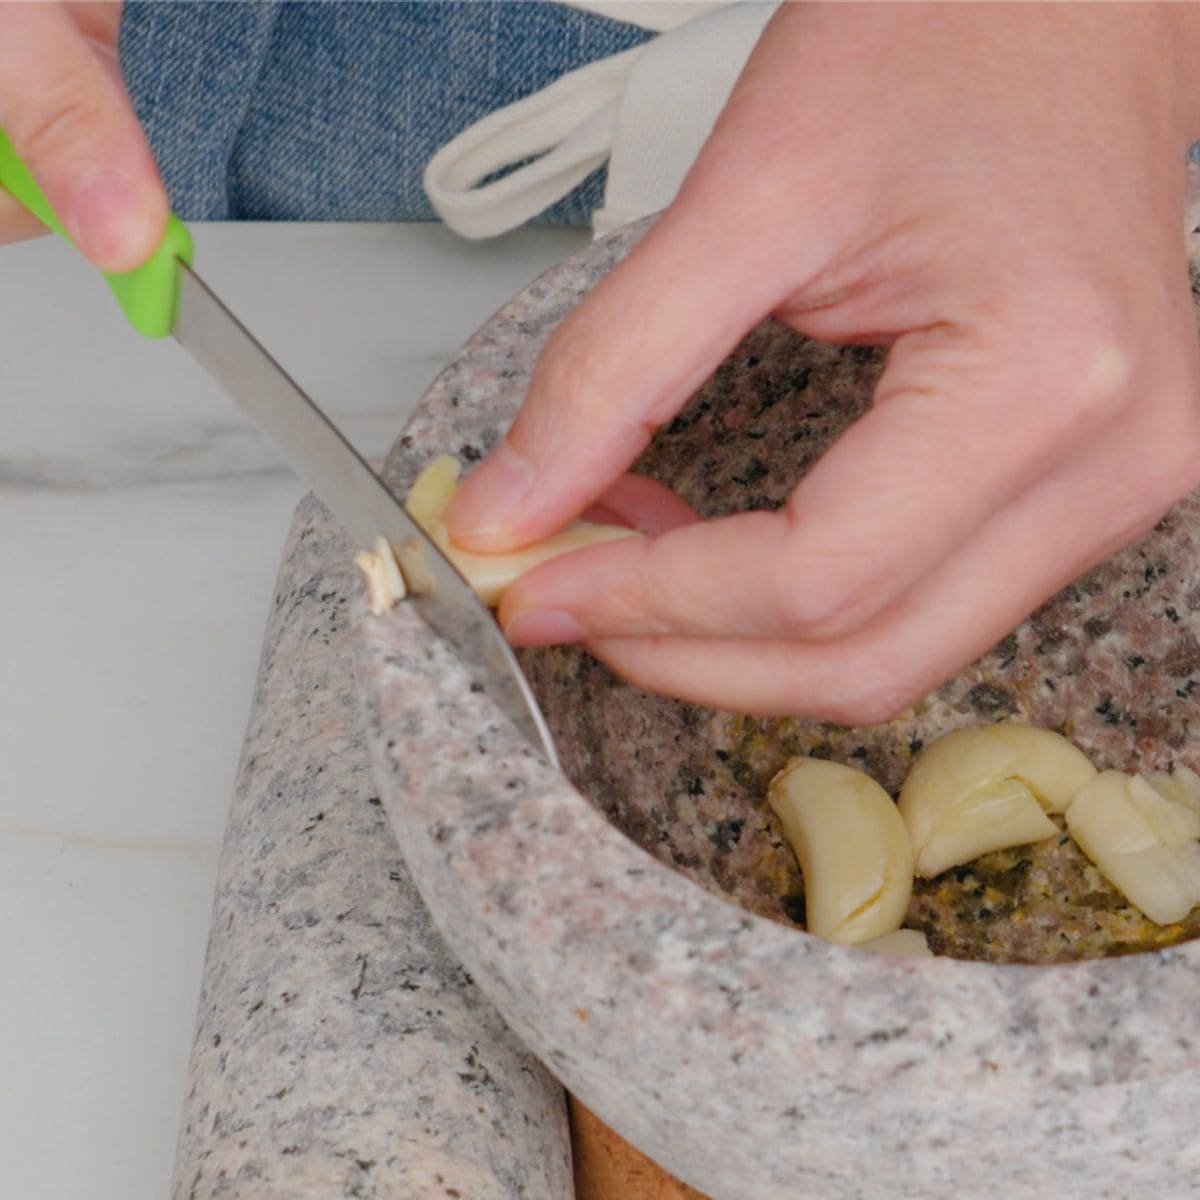
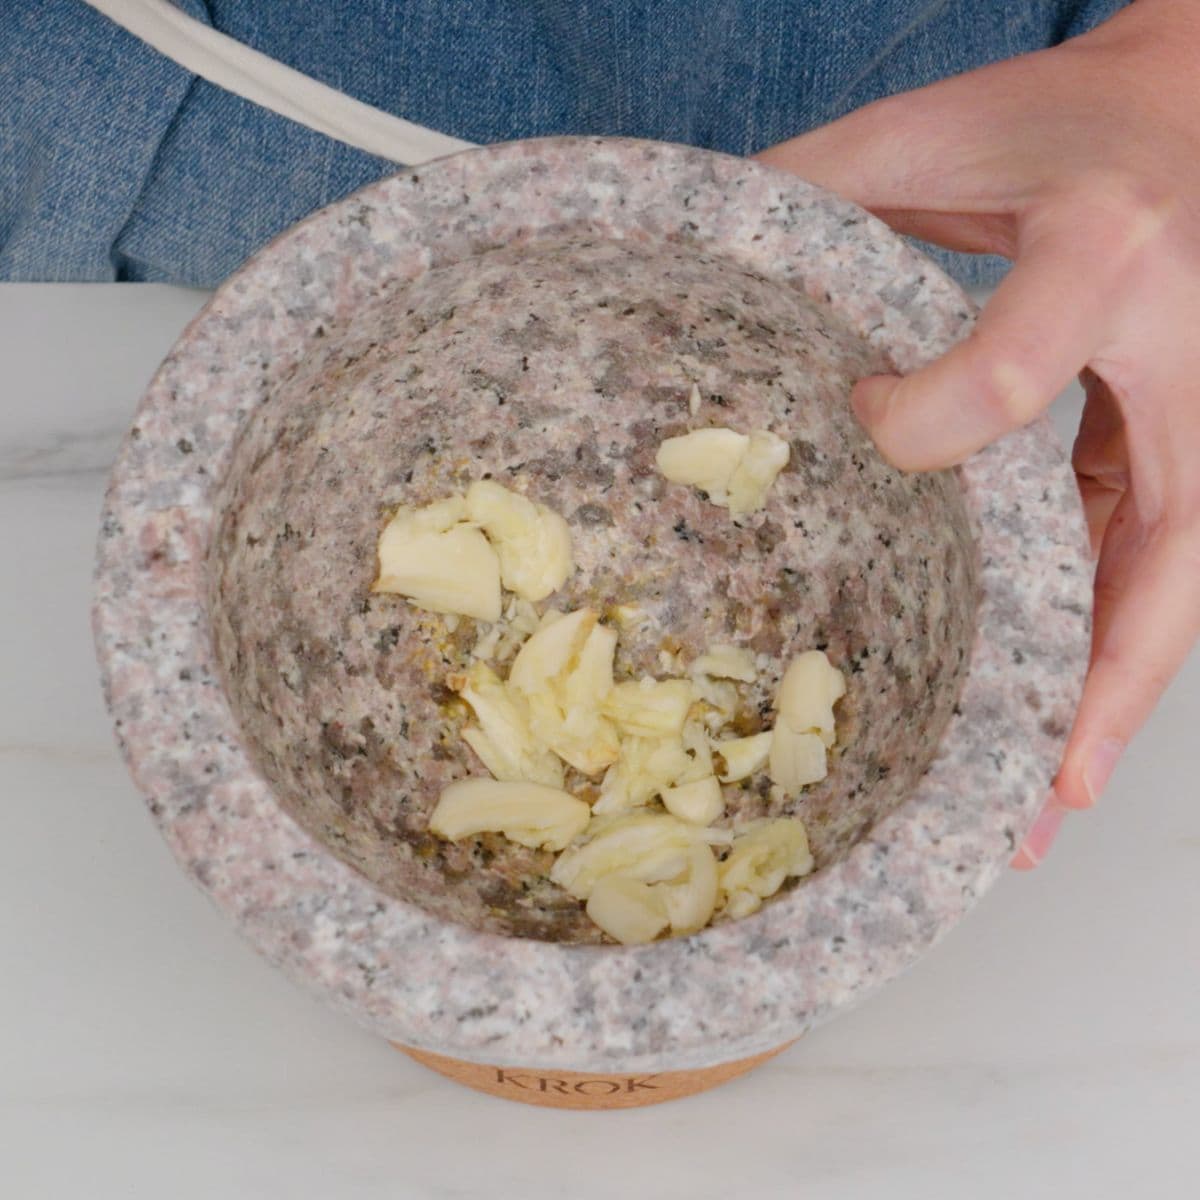
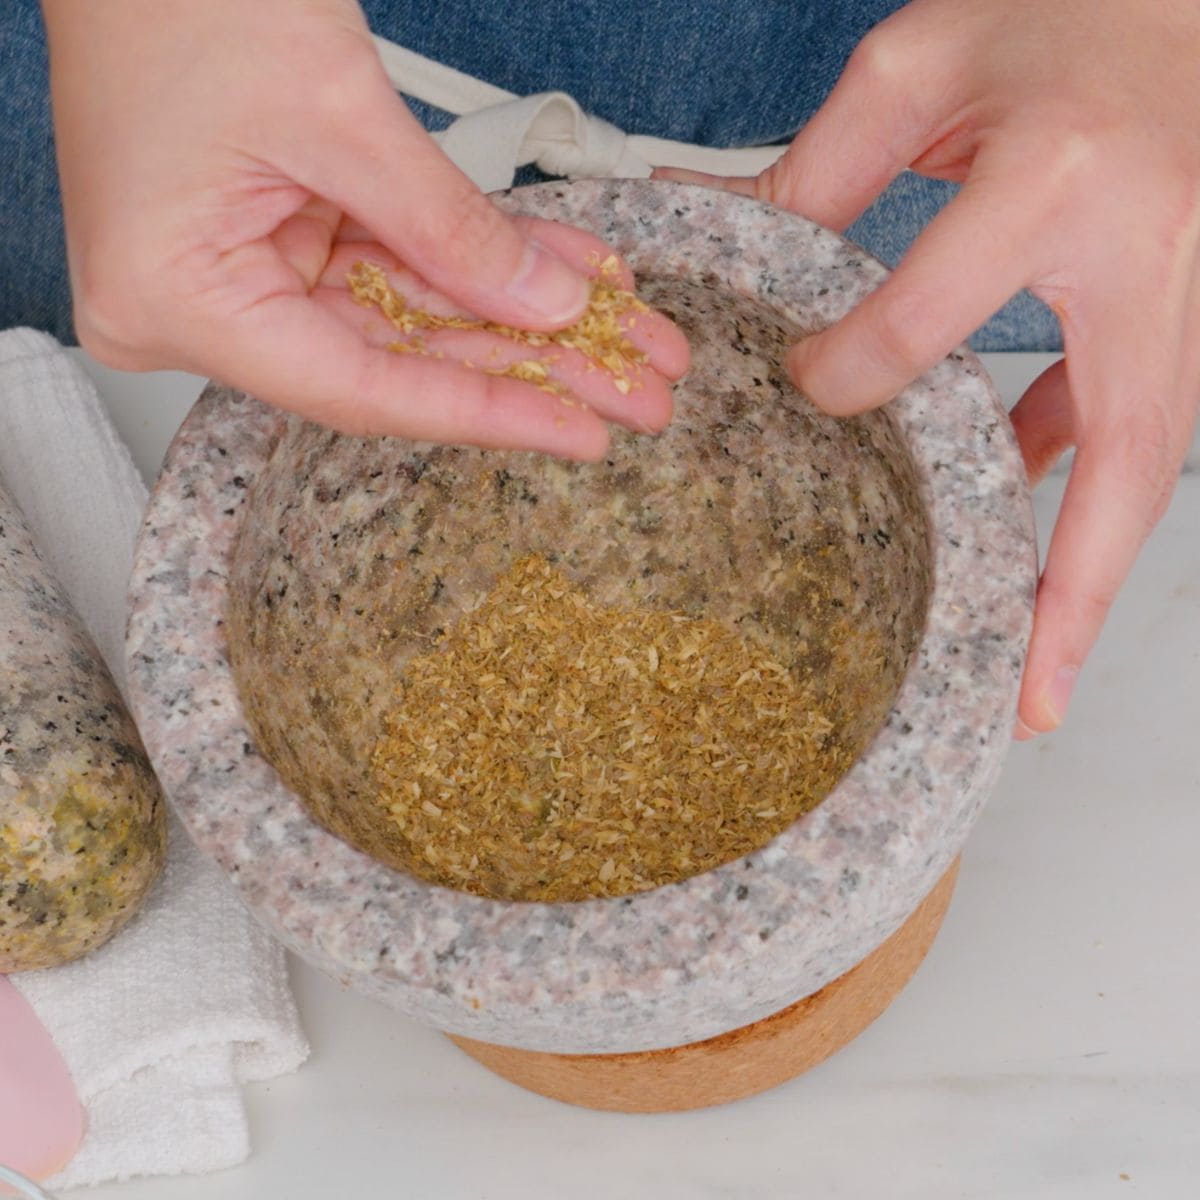
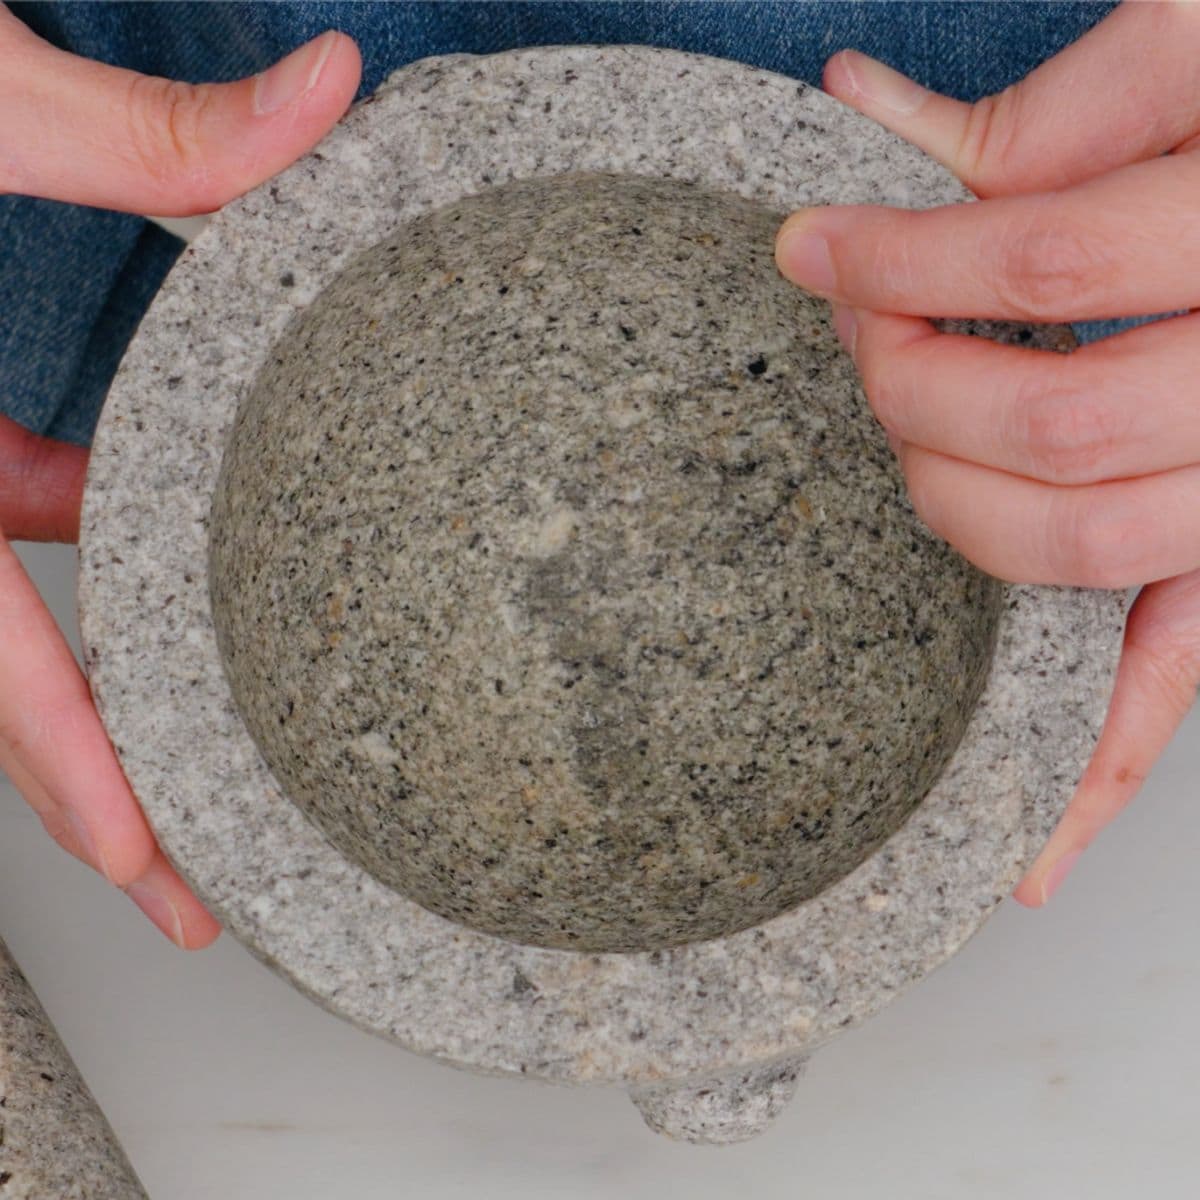
- Meanwhile, crush the cinnamon sticks until broken in a mortar and pestle (or smash them with something heavy) and add to a dry skillet or pot. Add star anise and coriander seeds and toast over medium high heat, stirring or shaking constantly until the coriander seeds are slightly charred and start to pop. Remove from heat, then add the spices into a soup infusion bag or tie in a cheese cloth along with galangal and cilantro roots or stems.6 inches cinnamon stick, 1 pc star anise, 1 teaspoon coriander seeds, 10 slices galangal, 3 cilantro roots or 6 cilantro stems
- After 30 mins of simmering, skim the scum off the top of the broth, then add the spice bag, daikon, onion, garlic and white pepper. Fold the pandan leaf in half and tie into a knot (this bruises it and releases the aroma) and add it into the broth as well.3 inches daikon, ½ medium onion, 5 cloves garlic, ½ teaspoon white pepper, 1 pandan leaf (about 18 inches)
- Add all the seasonings except the salt: soy sauce, Golden Mountain Sauce, tao jiew, vinegar, black soy sauce, fish sauce, and sugar; simmer gently for 1 hr 15 mins. If the bones become exposed, top it up with just enough water to keep everything submerged.3 Tablespoons soy sauce, 2 Tablespoons Golden Mountain Sauce, 2 Tablespoons Tao jiew (Thai fermented soy bean paste), 2 Tablespoons white vinegar, 1.5 Tablespoons black soy sauce, 1 Tablespoon fish sauce, 25 g rock sugar
- While the broth is simmering, soak the noodles in room temp water for 25-30 mins for noodles size small (1.5 mm wide). Exact timing will depend on the brand and the temperature of your water, but you want the noodles to be completely pliable and no longer holding their original shape. Drain the noodles and set aside. (If using other kinds of noodles, see blog post above for instructions)1 lb dried rice noodles
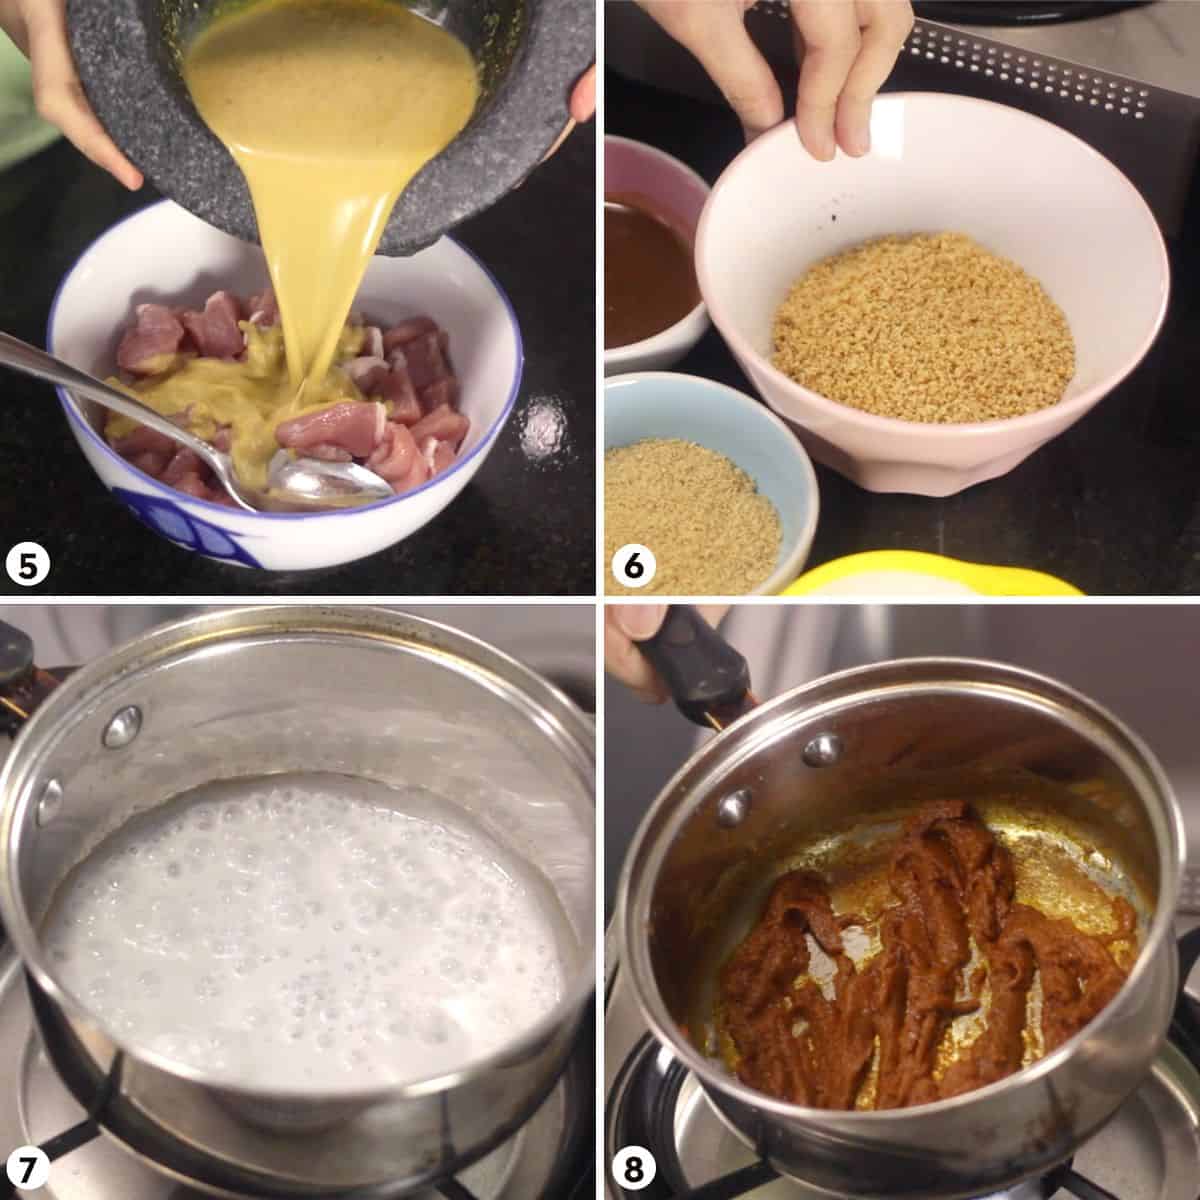
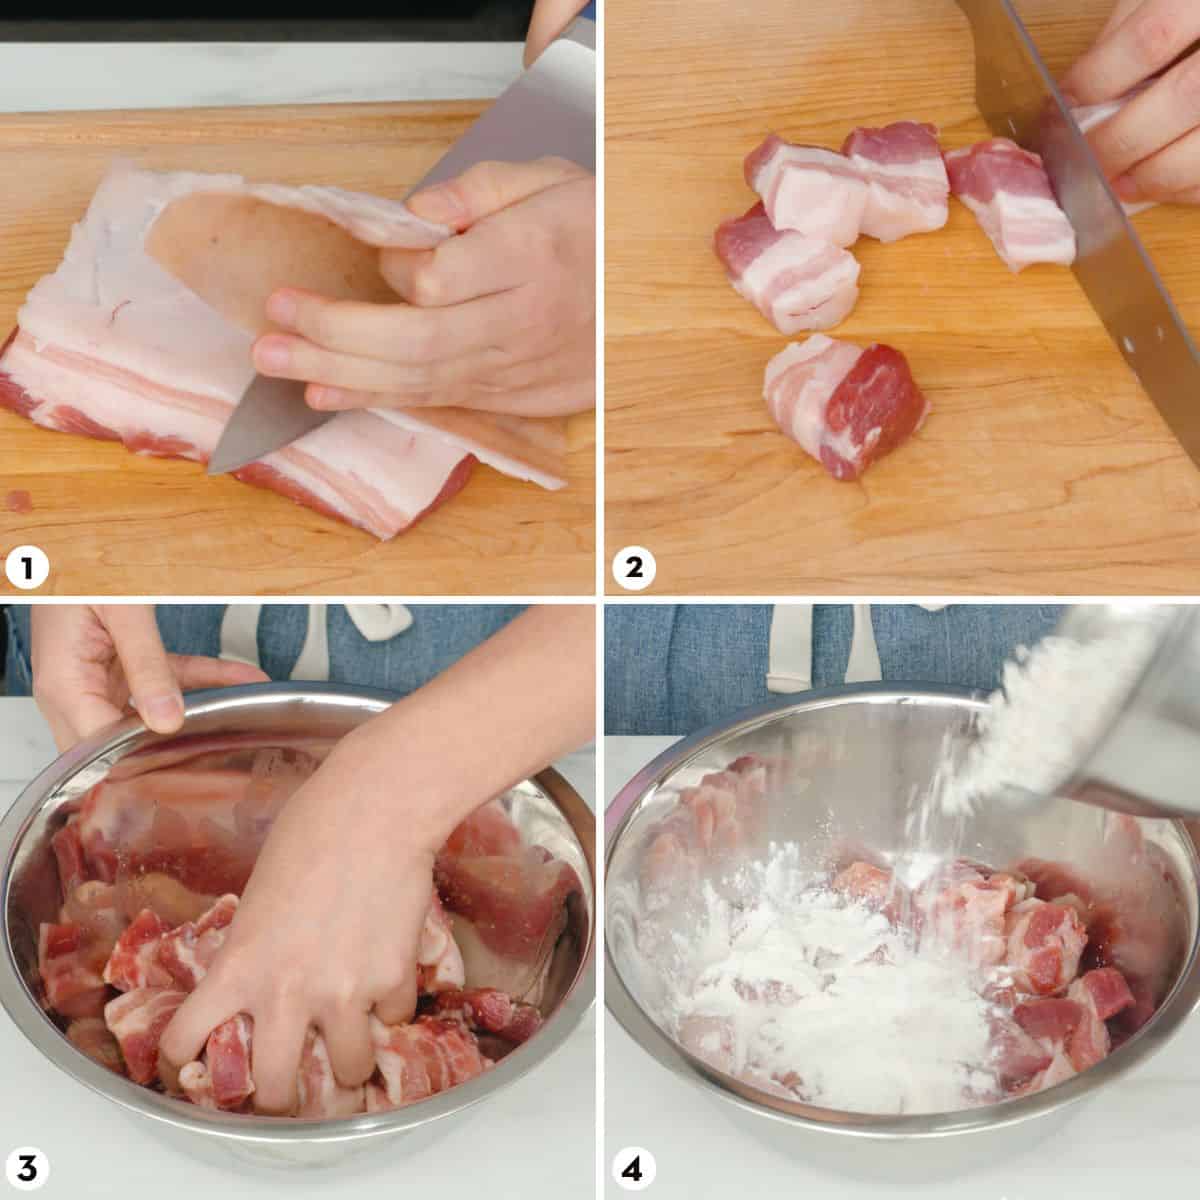
- Now is also time to make the marinated pork simply by combining the pork with the soy sauce and sugar and mix well.(If you’re making fried garlic and chili vinegar, now is also the time to make them as well.)225 g pork shoulder, 1 tablespoon soy sauce, ½ teaspoon sugar
- When the broth is done, taste and adjust seasoning with more salt or sugar if needed. You want to season the broth strongly as it will be further diluted once we add noodles and veggies to it, so aim for it to be a tiny bit too salty right now. If it is much too salty, it means you have let it reduce too far, so add more water to dilute.Salt
- Remove the spice bag and discard. Use a wire skimmer to remove the daikon, garlic and onion. If you want you can eat the daikon with the noodles or save it for another meal. The garlic and onions will mostly be dissolved by now but any pieces can be discarded, though they are also edible.Remove the pork bones from the broth, and use a fork or tongs to remove any meat off the bones and reserve this for the noodle bowl.
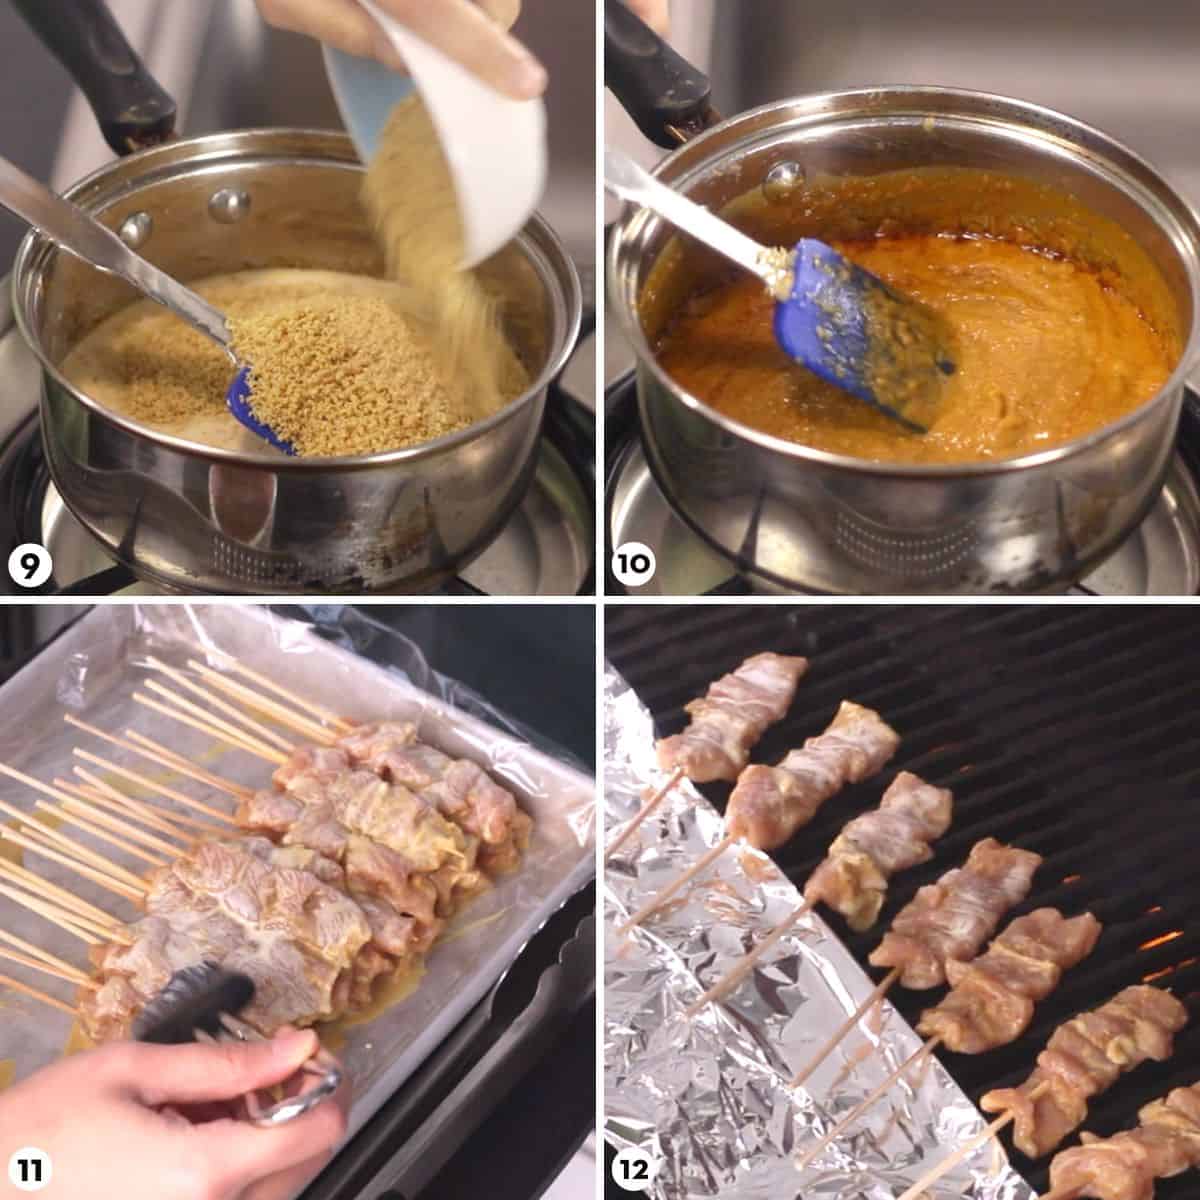
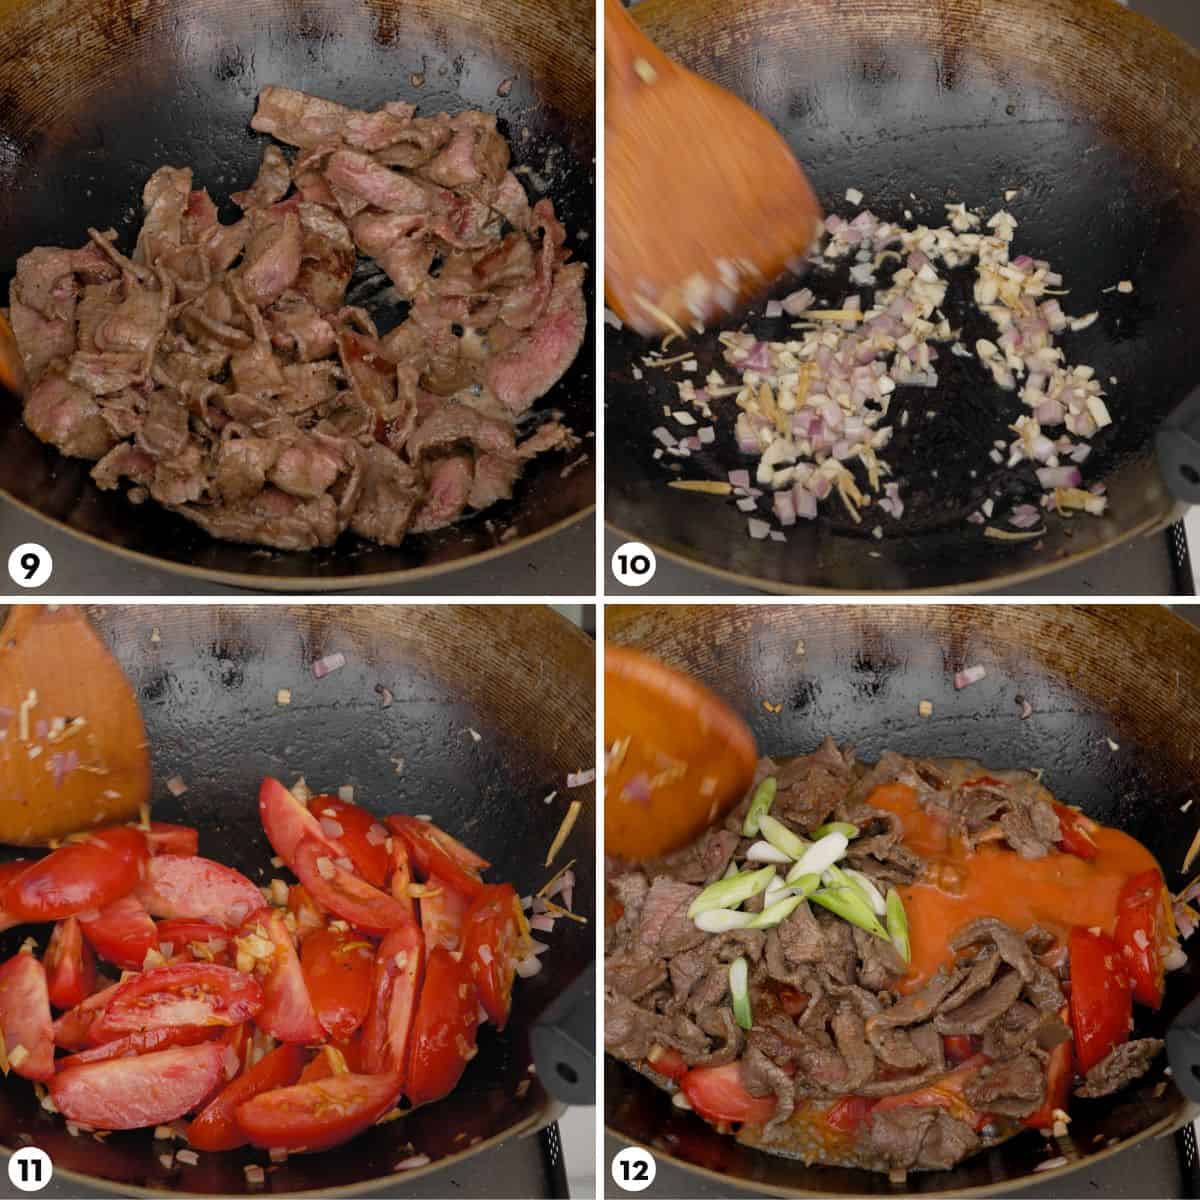
- Cook the marinated pork: Bring the broth to a simmer over high heat, then place the marinated pork in a wire skimmer (you may need to do a half batch if it doesn't fit) and dunk it into the broth, keeping the pork inside the skimmer; stir it around just until the pork is no longer pink (less than 1 minute), then drain and set aside in a bowl. (This is much more easily understood by watching the video)
- Add the blood: Bring the broth back to a simmer, and gradually add the blood WHILE STIRRING so the blood does not clump up. You'll notice the broth thicken up instantly - this is the boat noodle magic! Add the meatballs, then keep covered on the lowest heat until ready to serve. (The meatballs are already cooked, they just need to be heated.)⅓ cup liquid pork or beef blood, ½ lb Asian style meatballs
To Assemble (this part is hard to describe via text so I highly recommend watching the video to see the process)
- Bring a large stock pot of water to a full boil over high heat, filling the pot as high as you can without risking spillage; this is for blanching noodles and vegetables. You want a lot of water to ensure that temperature doesn't drop too much after you add the first batch of noodles, and also to make sure the noodles can be submerged inside the noodle strainer or sieve.
- While you wait for the water, separate the noodles into portions and place them into their own serving bowls. Also get all the condiments and toppings ready for serving.
- When the blanching water is rapidly boiling, keep the heat on high and put 1 portion of noodles into a noodle strainer or a metal sieve along with a handful of bean sprouts and a handful of spinach. Dunk the noodle strainer into the water and shake it around for 5-10 seconds (if the pot of water is on the smaller side, keep it in for 10 seconds). Shake off excess water and place the noodles and veg into a serving bowl. Check the noodle texture, it should still be chewy but should not feel undercooked. If they still taste undercooked, put it back in for another 5 seconds and increase timing for the next batch. Repeat with the remaining portions. (Note: I recommend blanching 1 portion at a time as it is much harder to separate noodles into portions after they're cooked.)2 cups water spinach or spinach, 2 cups bean sprouts
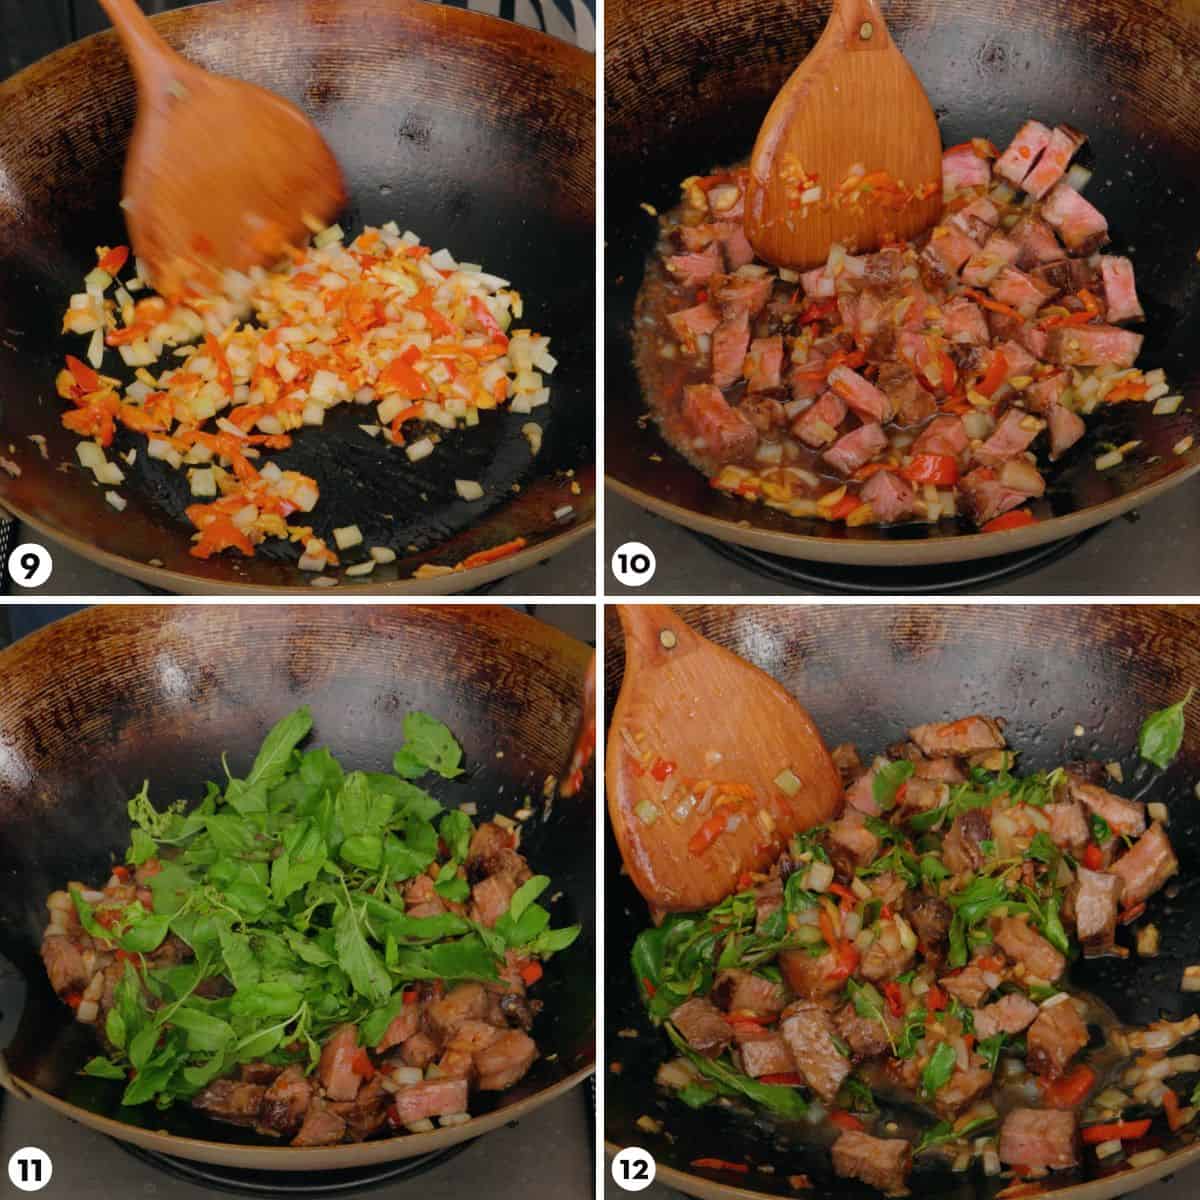
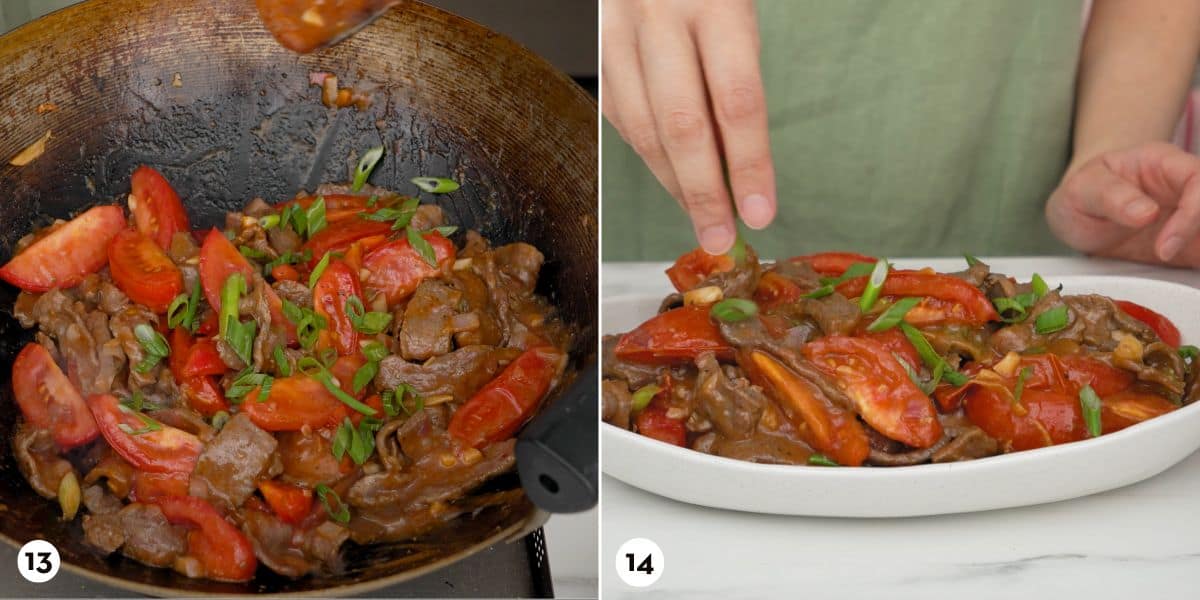
- Stir the broth (as the blood will settle) and ladle the broth over the noodles along with a few meatballs. Top the noodles with the marinated pork, the meat from the bones, fried garlic, garlic oil, chopped cilantro and/or green onions, and Thai basil (if using).Serve immediately with roasted chili flakes, chili vinegar, and crispy pork rind. Enjoy!6 sprigs cilantro, 1 stalk green onion, Chili vinegar, 3 sprigs Thai basil, Fried garlic & garlic oil, Crispy pork rind, Roasted chili flakes